Epoxy flooring has moved well beyond its origins in industrial facilities and garages. The same material that makes factory floors resistant to chemical spills and heavy machinery now creates some of the most visually striking residential floors available — marble-effect living rooms, metallic basement transformations, terrazzo-inspired kitchens, and geometric statement floors that would be prohibitively expensive to achieve in natural stone. Epoxy bonds chemically with concrete, creating a surface that’s harder than the substrate beneath it, resistant to most household chemicals, easy to clean, and capable of maintaining its appearance for 10 to 20 years with appropriate maintenance. These 20 ideas cover every design style, every room application, and every budget level — with specific guidance on what makes each system work.
1. Metallic Epoxy Floor
Best for: Garages, basements, commercial spaces, and any room where a dramatic, high-gloss statement floor is the goal
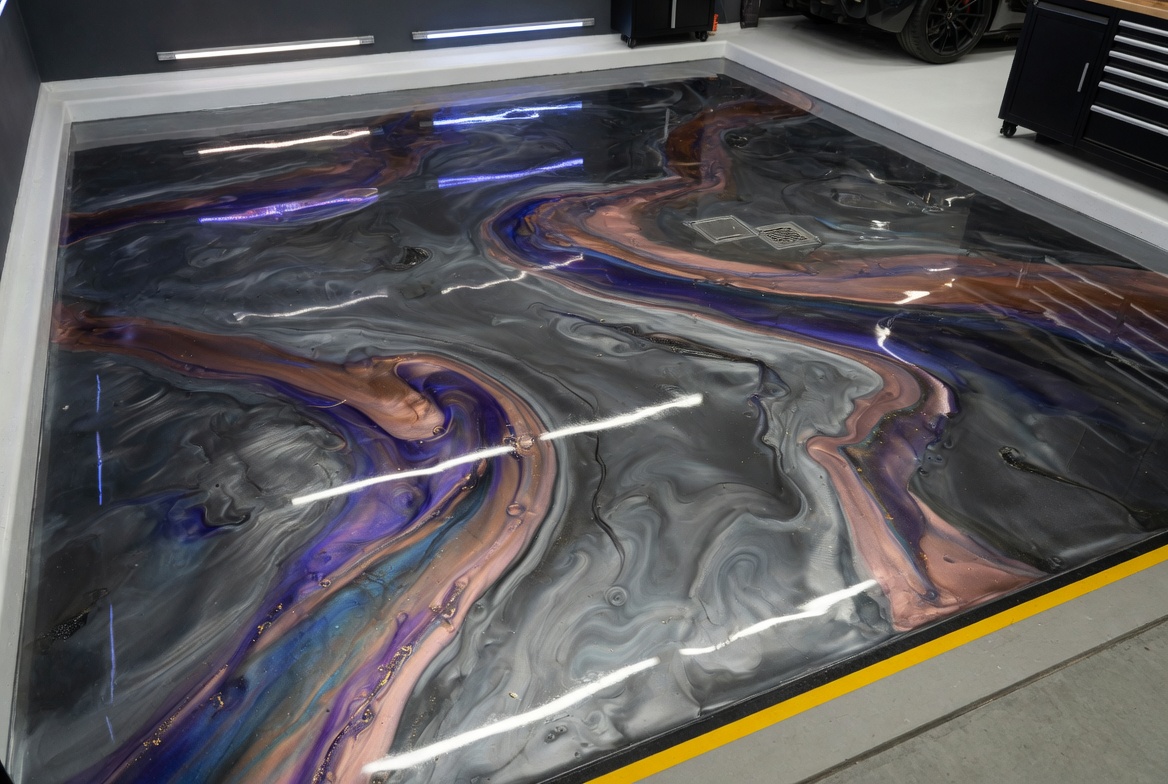
Metallic epoxy is the most visually dramatic epoxy system available. Metallic pigments — fine aluminum or mica particles suspended in a clear epoxy base — create a floor that resembles molten metal, swirling lava, or a shimmering ocean surface. No two metallic epoxy floors are identical: the installer’s technique, the pigment combination, and the application conditions create a completely unique result each time.
The most popular metallic color combinations: silver and black (the most requested, creates a dramatic dark mirror effect); copper and bronze (warm, rich tones that suit residential spaces); blue and silver (mimics ocean or glacier imagery); gold and cream (luxurious, suits upscale residential and commercial spaces).
Smart tip: Request a sample panel from any metallic epoxy installer before committing to a full installation. The appearance of metallic epoxy changes dramatically depending on the viewing angle, the lighting conditions, and the specific pigments and techniques used. A sample panel applied in the actual space under the actual lighting conditions is the most reliable preview of the finished result.
Mistake to avoid: Applying metallic epoxy over a concrete floor without thorough mechanical surface preparation. Metallic epoxy requires a chemically clean, mechanically profiled surface for adhesion — acid etching alone is insufficient for most applications. Diamond grinding or shot blasting opens the concrete surface adequately. Metallic epoxy applied over improperly prepared concrete delaminates within months.
2. Marble-Effect Epoxy
Best for: Living rooms, entryways, bathrooms, and commercial spaces — any application where the appearance of marble is desired at a fraction of the cost
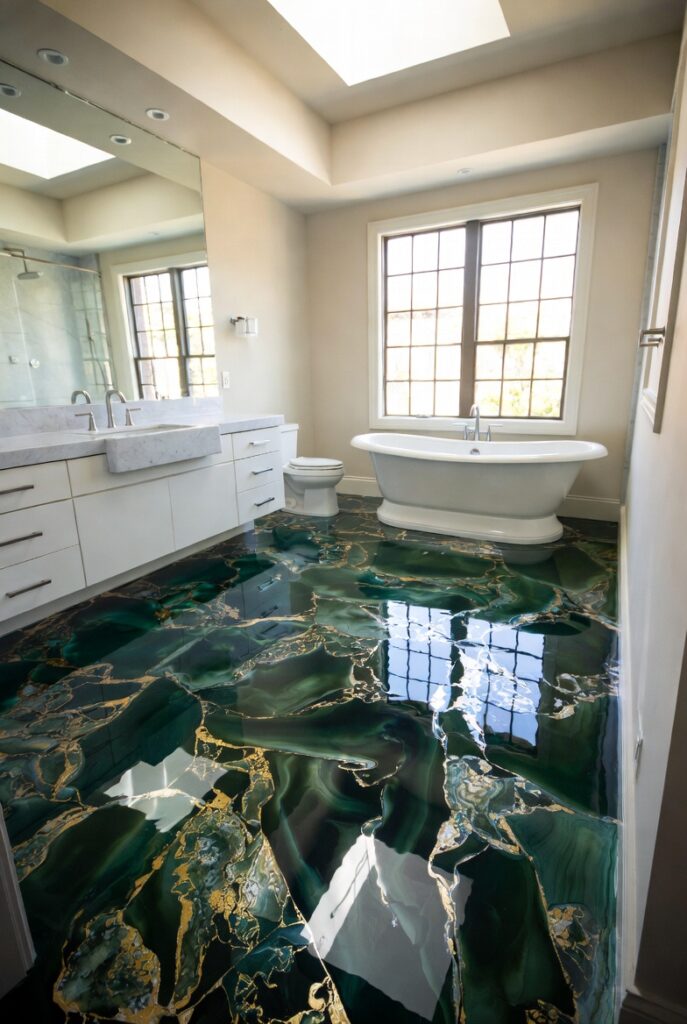
Marble-effect epoxy reproduces the veining, depth, and translucency of natural marble at significantly lower cost and with significant practical advantages: epoxy is non-porous (marble requires regular sealing), resistant to staining from wine, coffee, and acidic foods (marble stains readily without sealing), and requires no honing or polishing to maintain its surface quality.
The marble effect is created by applying pigmented epoxy in vein-like patterns over a base color, then manipulating the wet epoxy to create the flowing, organic quality of natural marble veining. White base with grey veining (Carrara-inspired) is the most popular; black base with gold veining (Nero Marquina-inspired) creates a more dramatic result.
Smart tip: The most convincing marble-effect epoxy uses three to five different pigment shades within the veining rather than a single vein color. Natural marble veining is not uniform — it varies in width, intensity, and color along each vein. A skilled installer replicates this variation to create a genuinely convincing natural stone effect.
Mistake to avoid: Choosing a marble-effect epoxy based on photographs without considering the scale of the veining pattern relative to the room size. Very large veining patterns that look dramatic in a showroom can look overwhelming in a small bathroom or entryway. Very fine veining patterns can appear uniform and dull in a large open-plan space. Discuss scale with the installer before choosing a specific pattern.
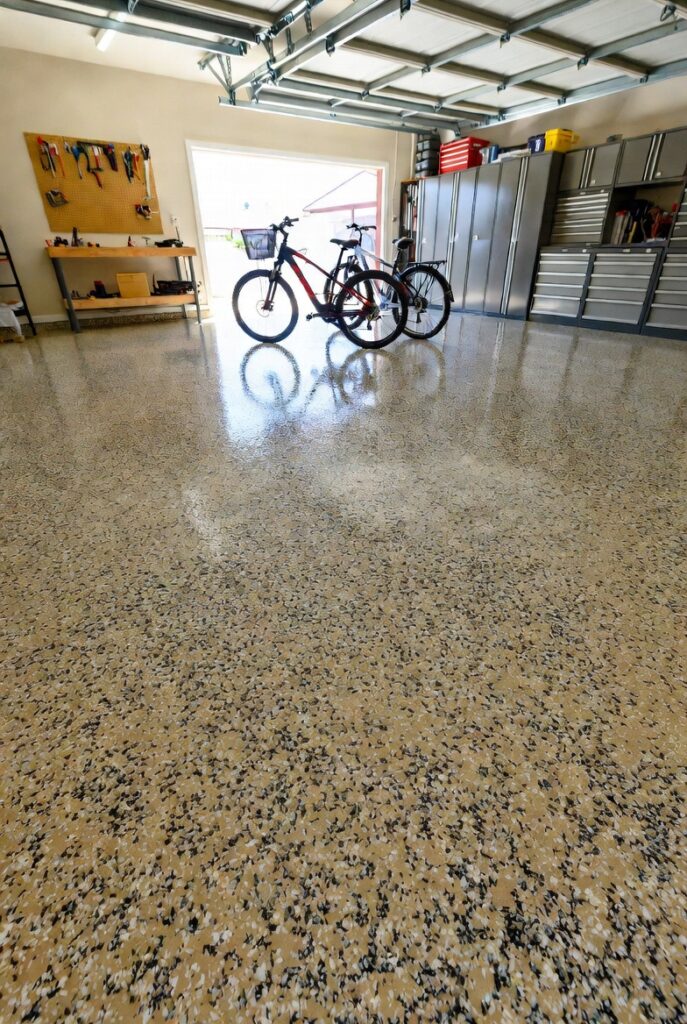
3. Flake or Chip Epoxy System
Best for: Garages, laundry rooms, basements, and any high-traffic area where durability and slip resistance are priorities alongside appearance
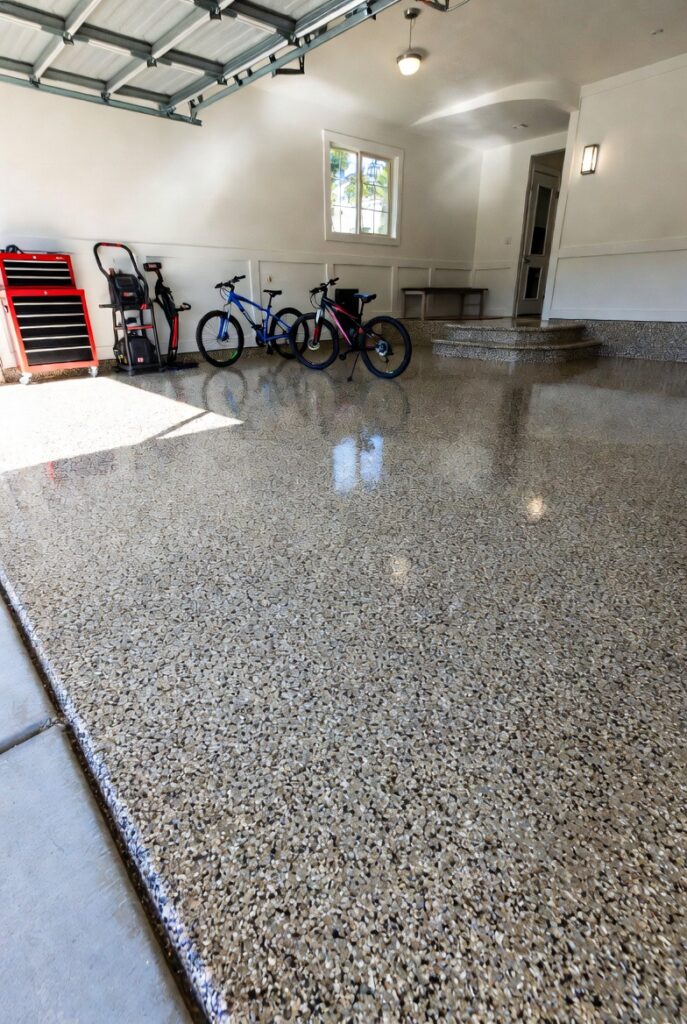
Flake (or chip) epoxy is the most widely installed residential epoxy system because it combines excellent durability, practical slip resistance, and an attractive speckled appearance with the most forgiving installation process of any epoxy system. Colored vinyl flakes are broadcast into a wet epoxy base coat, creating a textured surface that hides imperfections, provides grip, and resists showing tire marks and scuffs.
The color combination options are extensive — flake systems are available in hundreds of color blend options, allowing the floor to coordinate with the room’s existing palette or create a feature statement.
Smart tip: A full-broadcast flake system (where flakes cover 100% of the floor surface rather than a partial broadcast) creates a more uniform, professional appearance and provides better slip resistance than a partial broadcast. The full coverage also makes the floor easier to clean — partial broadcast systems leave exposed base coat between flakes that can show wear differently from the flake areas over time.
Mistake to avoid: Using a thin flake system in a garage with heavy vehicle traffic without a polyaspartic or polyurethane topcoat. Epoxy alone — without a topcoat sealer — is susceptible to hot tire pickup (the heat of car tires pulls the epoxy coating off the concrete in warm weather). A polyaspartic or polyurethane topcoat over the flake system prevents this and significantly extends the floor’s lifespan.
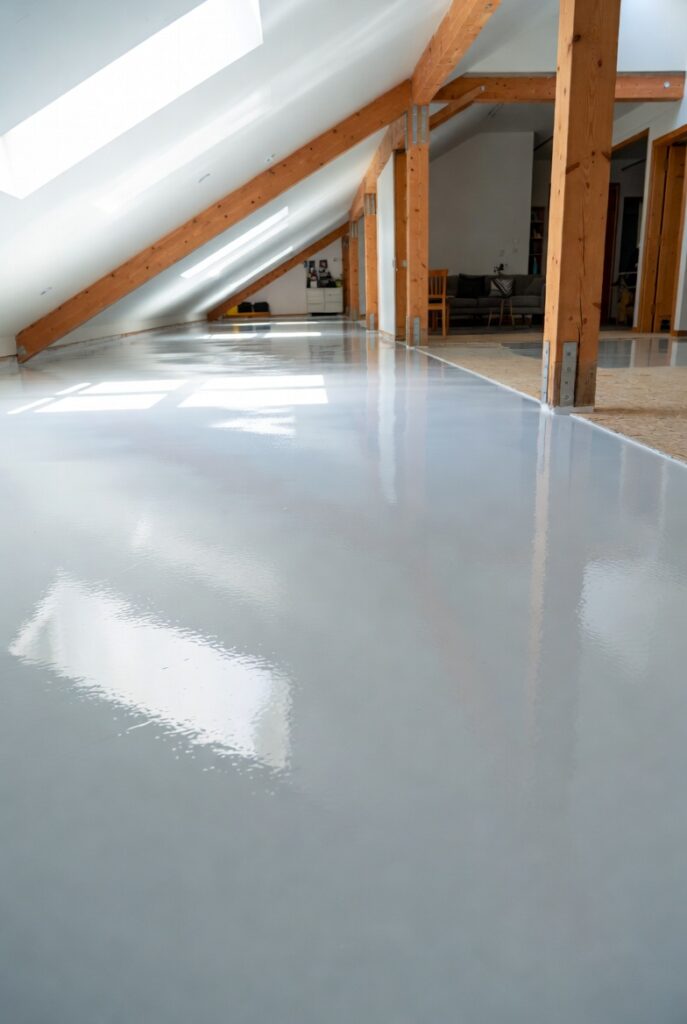
4. Solid Color Epoxy Floor
Best for: Commercial spaces, industrial applications, and contemporary residential spaces where a clean, uninterrupted color is the aesthetic goal
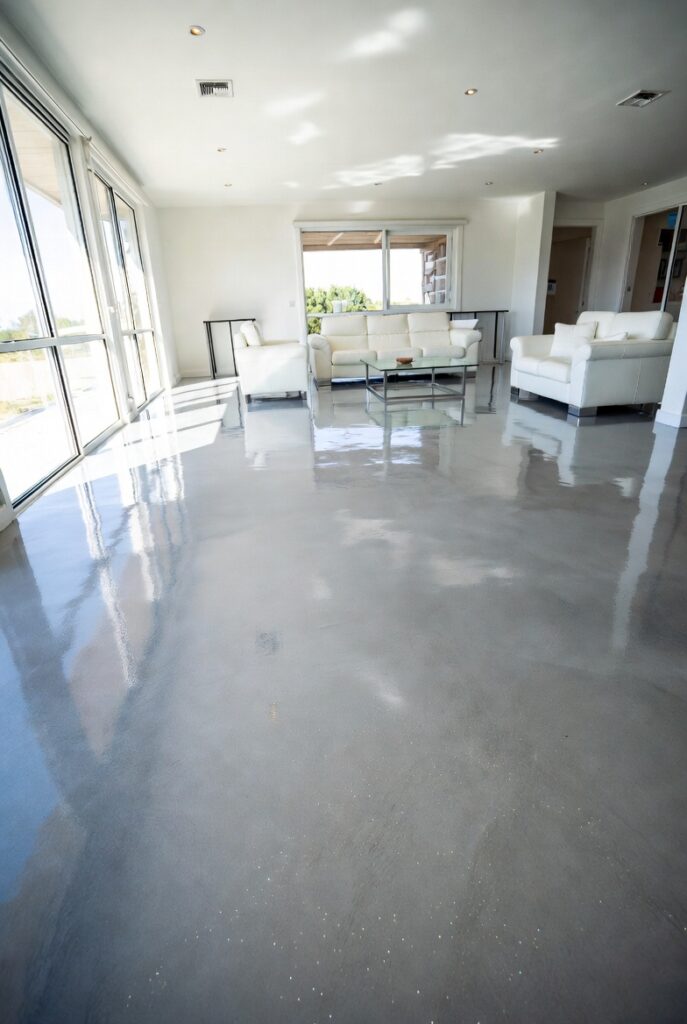
A solid color epoxy floor — a single pigmented color applied as a high-gloss coating — is the simplest and most cost-effective epoxy system. The high-gloss finish reflects light, brightening the space, and the solid color creates a clean visual baseline that makes the room’s furniture and equipment the focal point rather than the floor.
Popular solid color choices by application: light grey (the most specified color for garages and basements — neutral, hides minor scuffs, suits most car colors); white (maximum light reflection, creates a clinical or gallery-like atmosphere — suits workshops and art spaces); dark charcoal or black (dramatic, sophisticated — suits contemporary residential spaces and upscale commercial applications).
Smart tip: For a solid color garage floor, choose a slightly lighter grey than initially seems appropriate. A floor that looks perfectly grey in a small paint sample often reads as significantly darker in a large enclosed garage with limited natural light. Going one or two shades lighter than the initial preference produces a finished result that feels appropriately toned rather than oppressively dark.
Mistake to avoid: Applying a solid color epoxy in a single thin coat and expecting adequate coverage. Concrete is porous and absorbs the first coat unevenly — areas of heavier absorption appear lighter than surrounding areas, creating a mottled, inconsistent appearance. Apply a primer coat first, followed by at least two topcoats, for a truly uniform solid color result.
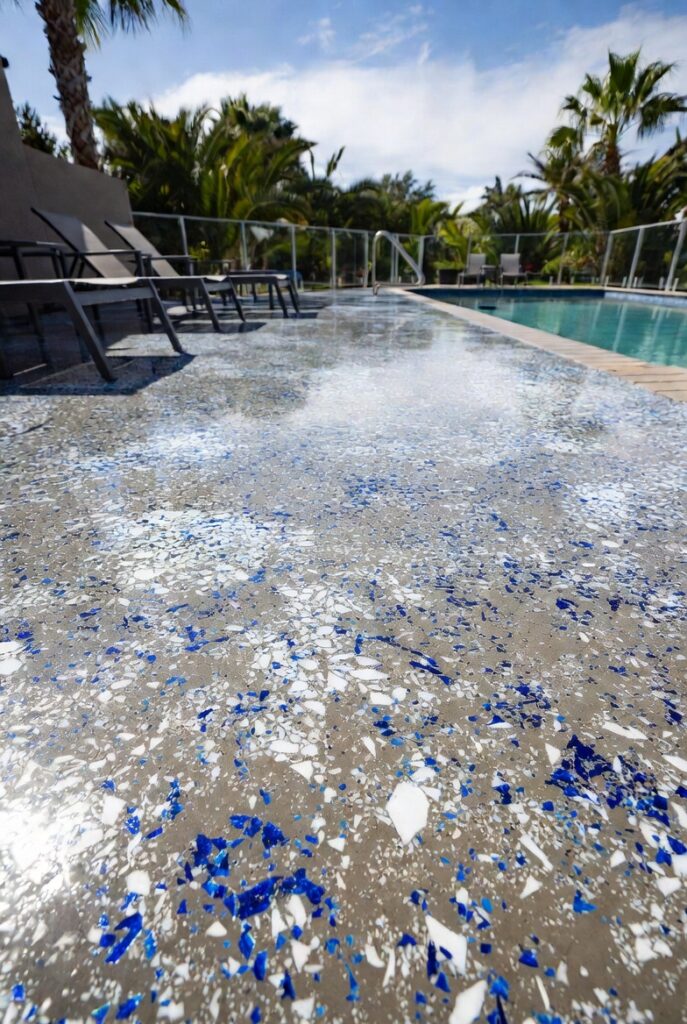
5. Terrazzo-Inspired Epoxy
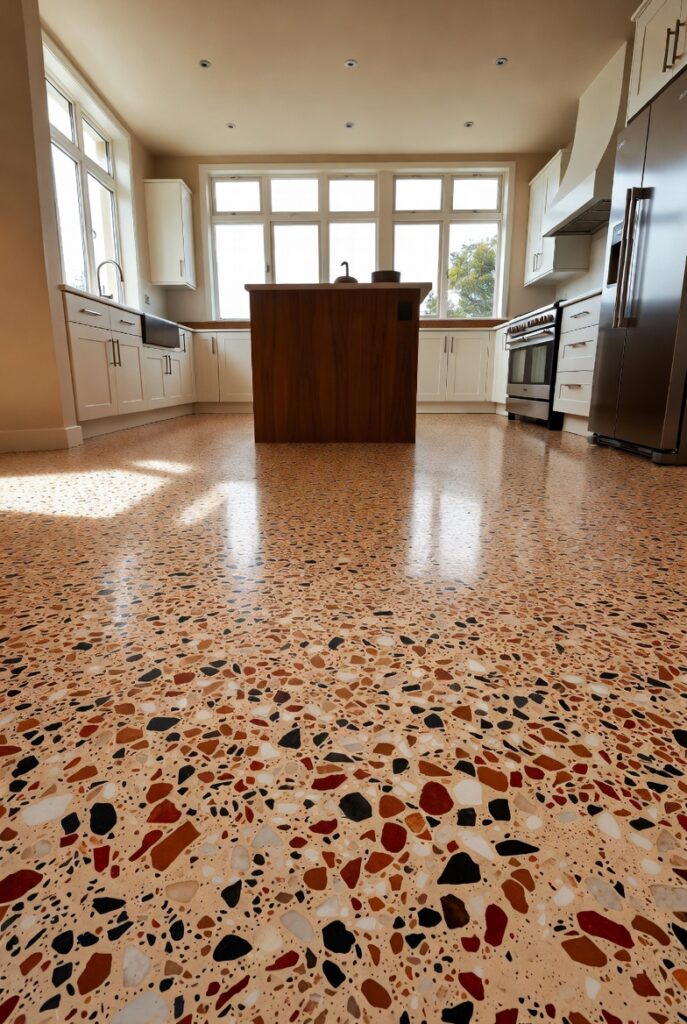
Best for: Entryways, kitchens, bathrooms, and commercial spaces — any application where the distinctive terrazzo aesthetic is desired in a seamless, durable format
Terrazzo-inspired epoxy — chips of marble, granite, quartz, glass, or recycled materials suspended in a clear or pigmented epoxy base — recreates the distinctive speckled beauty of traditional terrazzo without the traditional installation complexity. Traditional terrazzo requires specialized craftsmen, lengthy curing periods, and grinding and polishing stages that epoxy terrazzo eliminates.
The sustainable terrazzo trend incorporates recycled materials — crushed glass from bottles, broken ceramic tile, mother of pearl — creating floors with both environmental credentials and genuine visual interest from the embedded fragments.
Smart tip: The aggregate size in an epoxy terrazzo system determines the floor’s visual scale. Fine aggregate (under 5mm) creates a refined, quiet surface with gentle color variation. Larger aggregate (10 to 20mm) creates a bolder pattern with individual pieces visible from a standing distance. Choose the aggregate size based on the room’s scale and viewing distance.
Mistake to avoid: Specifying traditional terrazzo aggregate proportions for an epoxy terrazzo system. Traditional terrazzo has different structural requirements from epoxy terrazzo — the aggregate-to-binder ratios that work in traditional systems can affect the mechanical strength and adhesion of epoxy systems. Use aggregate ratios specified by the epoxy product manufacturer rather than traditional terrazzo proportions.
6. 3D Epoxy Floor Art
Best for: Feature rooms, commercial spaces, hospitality environments — any application where the floor is intended to be an artistic statement
3D epoxy flooring uses high-resolution printed vinyl imagery — an underwater scene, a forest floor, a geometric illusion, an abstract composition — applied beneath the clear epoxy topcoat to create the impression of depth, dimensionality, or trompe l’oeil imagery when viewed from above. The clear epoxy encapsulates the image, protecting it from wear while providing the glossy, refractive quality that enhances the 3D visual effect.
The most requested 3D epoxy images: ocean and water scenes (cobalt blue water with visible sandy bottom creates a convincing water surface illusion); forest floors (moss, stones, and fallen leaves — creates a naturalistic effect in contrast with built interiors); geometric depth illusions (grid patterns, optical illusions that appear to extend below the floor surface).
Smart tip: 3D epoxy floors are most effective in rooms where the floor is viewed from a standing or walking position rather than from ground level. The trompe l’oeil effect — designed to be seen from above — loses its illusion quality when viewed at floor level. This makes 3D epoxy most appropriate for large open floor areas, entryways, and commercial spaces where the full floor surface is visible.
Mistake to avoid: Using low-resolution imagery in a 3D epoxy application. The vinyl image beneath the clear epoxy must be printed at very high resolution to maintain quality at the scale of a full room floor — typically 300 DPI at full print scale. Lower resolution images show pixelation that’s visible and distracting at normal viewing distances.
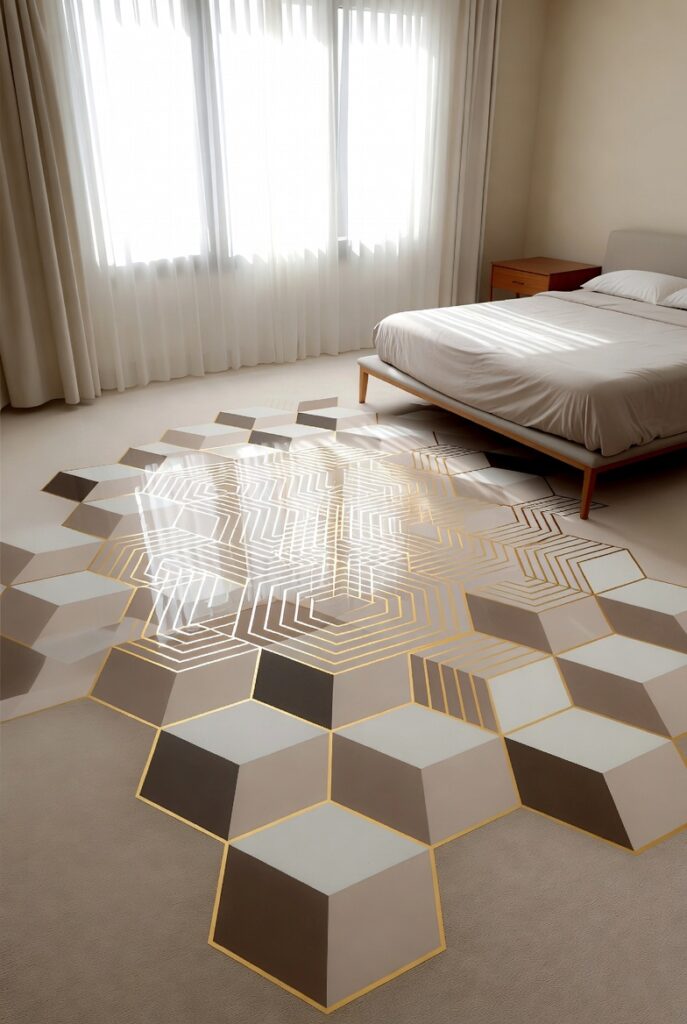
7. Geometric Pattern Epoxy
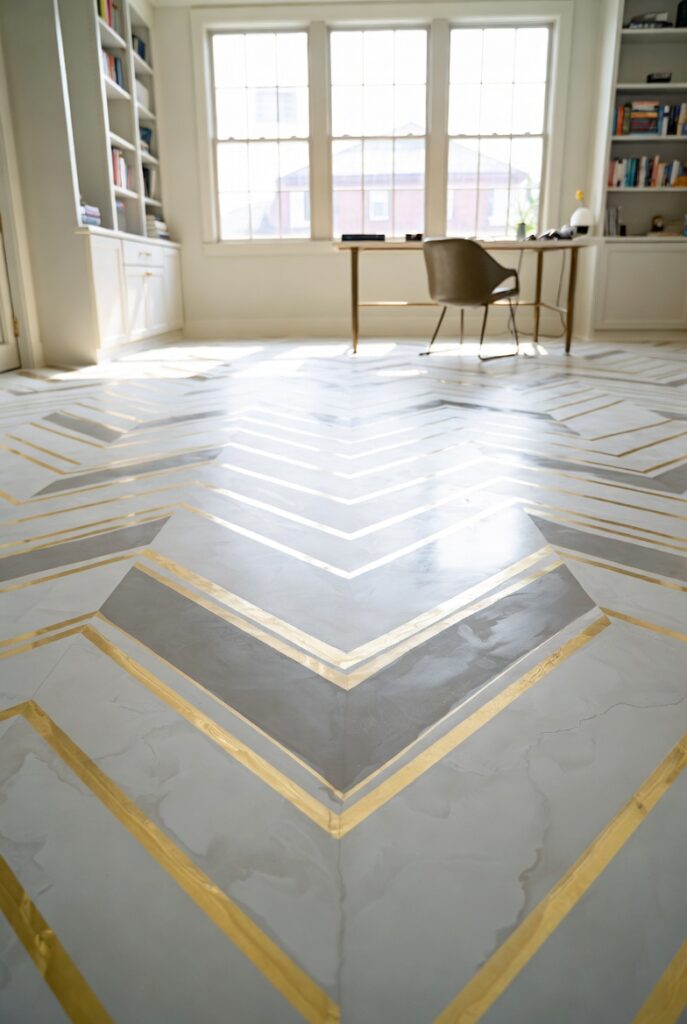
Best for: Contemporary and modern interiors, commercial spaces, any floor where a bold graphic statement is appropriate
Geometric epoxy floors use masking tape or vinyl stencils to create precise geometric patterns — hexagons, chevrons, diamonds, stripes, or custom geometric compositions — in multiple colors within a single epoxy system. The masking creates perfectly sharp edges between colors that would be impossible to achieve by hand.
The geometric pattern approach allows any floor to become a designed element with strong visual impact while remaining as durable and practical as any other epoxy system.
Smart tip: Choose two or three colors maximum for a geometric epoxy floor. More colors create visual complexity that competes with the room’s furniture and decor. Two strongly contrasting colors — black and white, navy and cream, charcoal and pale grey — create the most powerful geometric statement with the cleanest visual result.
Mistake to avoid: Applying a geometric pattern over an unlevel or uneven concrete floor without self-leveling preparation. The geometric pattern’s precise lines and flat color fields make any surface imperfection — undulation, cracking, unevenness — more visible rather than less. Self-leveling underlayment applied before the geometric epoxy system conceals these imperfections and provides the flat canvas the pattern requires.
8. Garage Epoxy Floor Coating
Best for: Every garage — epoxy is the most appropriate flooring system for garage applications across all performance categories
A garage epoxy floor protects concrete from oil stains, chemical spills, tire marks, and the mechanical wear of vehicle traffic. An uncoated concrete garage floor is porous — it absorbs oil, battery acid, and chemical spills permanently within minutes of contact. An epoxy-coated floor resists these penetrations, allowing spills to be wiped before they stain.
The practical specification for a garage epoxy system: primer coat (seals the concrete and creates a chemically receptive surface); epoxy base coat with vinyl flake broadcast (provides color, texture, and slip resistance); and a polyaspartic or polyurethane topcoat (provides UV resistance, chemical resistance, and prevents hot tire pickup). This three-layer system is the professional standard for garage epoxy applications.
Smart tip: Apply garage epoxy in spring or autumn when temperatures are moderate — between 50°F and 80°F (10°C and 27°C). Epoxy applied in extreme heat or cold cures improperly — too hot causes air bubbles and fish-eye defects; too cold slows or prevents curing and produces a floor that remains tacky and weak. Temperature is the most critical environmental factor in epoxy application quality.
Mistake to avoid: Applying garage epoxy over concrete with active moisture transmission. Concrete that transmits moisture vapor from below (common in slabs on ground without an adequate vapor barrier) causes epoxy to blister and delaminate within months. Perform a calcium chloride moisture test before application — if moisture transmission exceeds the epoxy manufacturer’s specification, address the moisture source before applying any coating.
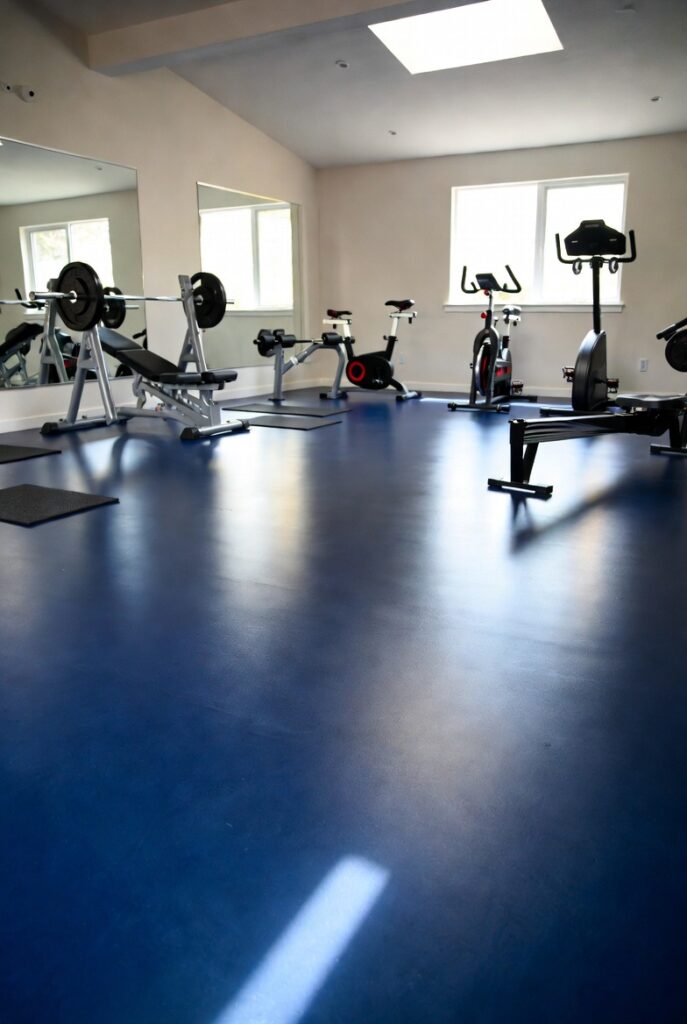
9. Basement Epoxy Floor
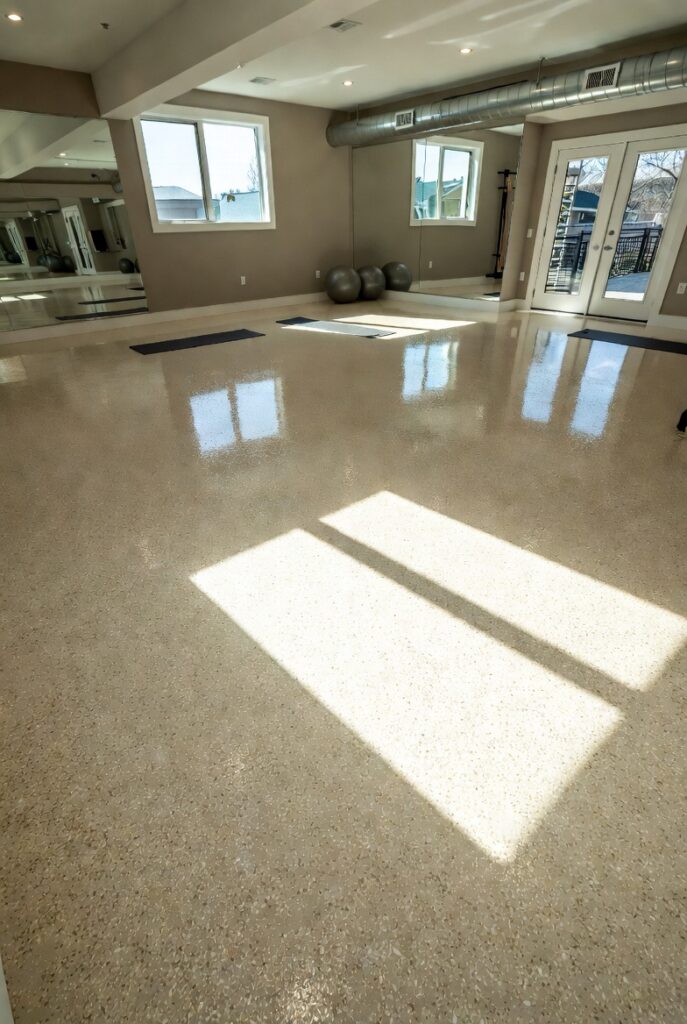
Best for: Basements used as living space, home gyms, workshops, or any below-grade space where a clean, durable floor is needed
A basement epoxy floor transforms the typically utilitarian concrete floor of a basement into a finished surface appropriate for habitable space. The seamless, non-porous surface resists moisture intrusion from minor seepage, is easy to clean, and reflects the available light — making a naturally dark below-grade space feel significantly brighter.
The specific consideration for basement epoxy: moisture. Basement concrete often has higher moisture transmission than above-grade slabs — both from condensation and from groundwater pressure through the slab. An epoxy system applied over high-moisture concrete traps the moisture beneath the coating, causing blistering and delamination. The moisture must be managed before the epoxy system is applied.
Smart tip: Apply a moisture-tolerant epoxy primer specifically formulated for below-grade applications before the main epoxy system in any basement installation. These products — typically water-based or moisture-tolerant epoxy formulations — create a barrier that allows the main decorative system to perform even over concrete with moderate moisture transmission.
Mistake to avoid: Using an above-grade epoxy system in a basement without moisture testing. The epoxy products specified for garages and above-grade floors are often not appropriate for below-grade applications with elevated moisture. Test moisture transmission (calcium chloride or relative humidity probe) and select a system specifically rated for the measured moisture level.
10. Kitchen Epoxy Floor
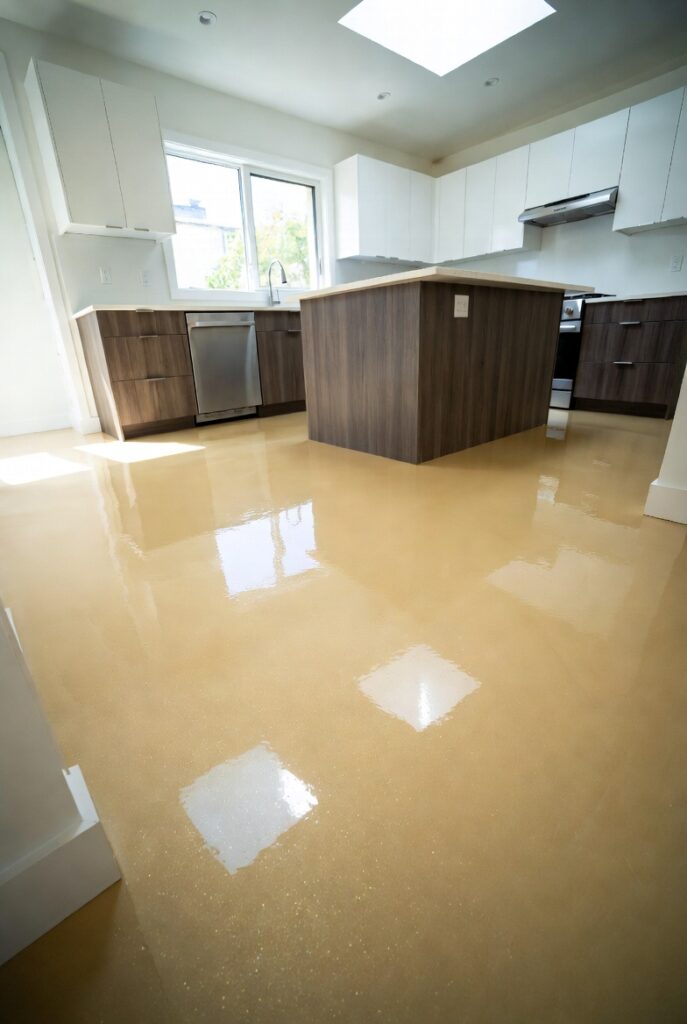
Best for: Residential and commercial kitchens — epoxy provides the hygiene, chemical resistance, and ease of cleaning that kitchen environments require
A kitchen epoxy floor is hygienic, seamless, and easy to clean — qualities that suit food preparation environments. The absence of grout lines (a perpetual hygiene challenge in tiled kitchen floors) and the chemical resistance to cooking oils, acidic foods, and cleaning products make epoxy a genuinely appropriate kitchen flooring material.
Kitchen epoxy aesthetics tend toward the practical and neutral — light grey, cream, or a subtle terrazzo effect that doesn’t compete with the kitchen’s cabinetry and countertops. The high-gloss finish reflects kitchen lighting and contributes to the bright, clean atmosphere that kitchen design typically targets.
Smart tip: Specify a slight anti-slip additive (fine aluminum oxide broadcast or an anti-slip aggregate incorporated in the topcoat) for kitchen epoxy applications. Kitchen floors inevitably become wet from cooking and cleaning — a high-gloss epoxy surface without slip resistance can be dangerously slippery when wet. The anti-slip additive is nearly invisible but significantly improves traction under wet conditions.
Mistake to avoid: Applying kitchen epoxy without ensuring the floor is free of grease contamination. Concrete floors in existing kitchens are often contaminated with cooking oils and fats that have penetrated the surface over years. Standard mechanical surface preparation may not adequately remove all grease contamination — a degreasing treatment and thorough cleaning are required before any coating can adhere properly.
11. Bathroom Epoxy Floor
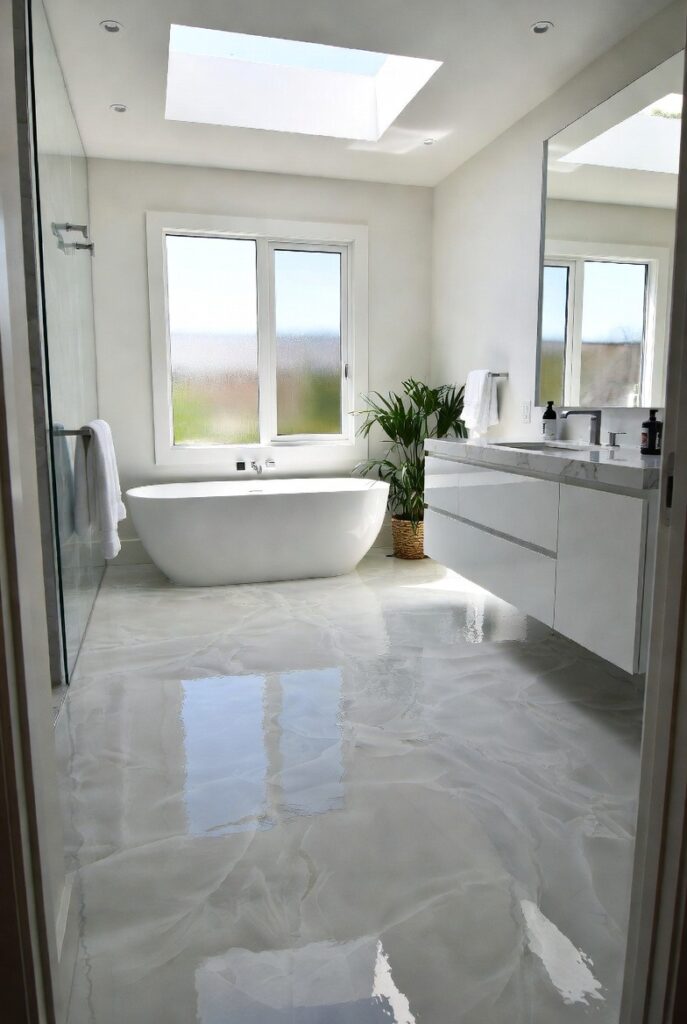
Best for: Bathrooms requiring a seamless, waterproof, grout-free floor — particularly shower rooms and wet rooms
Bathroom epoxy creates a seamless waterproof surface that addresses the primary weakness of standard bathroom tiling: grout. Grout between bathroom tiles is porous, harbors mold and bacteria, discolors over time, and requires regular intensive cleaning. An epoxy bathroom floor has none of these problems — it’s seamless, non-porous, easy to clean, and doesn’t support mold growth.
The most effective bathroom epoxy systems for wet areas: a waterproof, flexible epoxy formulation applied over a properly waterproofed substrate; a mineral finish epoxy that creates a matte, stone-like appearance (more appropriate for bathrooms than high-gloss systems that show every water mark); or a metallic epoxy with a semi-gloss topcoat for a spa-like luxury appearance.
Smart tip: Use a matte or satin topcoat on bathroom epoxy floors rather than a high-gloss finish. High-gloss epoxy in a bathroom shows every water spot, every footprint, and every soap smear — requiring constant wiping to maintain its appearance. A matte or satin topcoat provides the same durability and waterproofing with significantly lower maintenance visibility.
Mistake to avoid: Applying bathroom epoxy over an inadequately waterproofed substrate in a shower area. Epoxy is waterproof on its surface but is not a substitute for proper substrate waterproofing — water that gets beneath the epoxy through cracks or substrate joints will cause delamination and allow moisture to reach the structure. Apply proper waterproofing membrane to the substrate before the epoxy system.
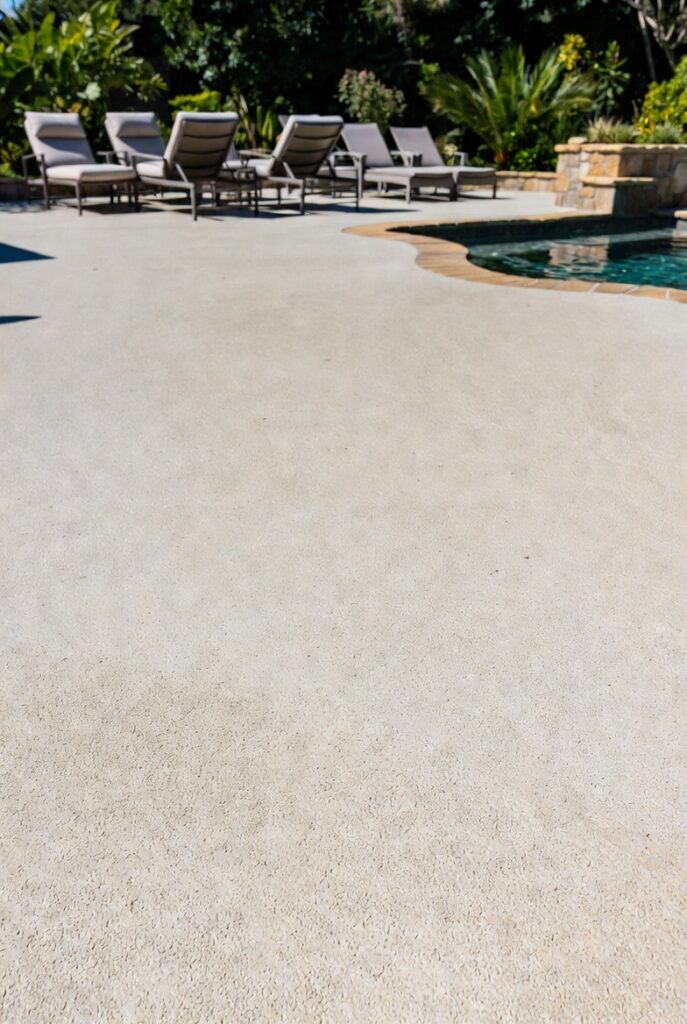
12. Outdoor and Patio Epoxy
Best for: Patios, pool decks, outdoor kitchens, and driveways — any outdoor concrete surface needing a durable, decorative coating
Outdoor epoxy requires UV-stable formulations specifically designed for exterior applications. Standard interior epoxy yellows and degrades rapidly under UV exposure — it’s the wrong product for exterior use. UV-stable polyaspartic or polyurea coatings (often called “outdoor epoxy” colloquially) maintain their color and mechanical properties in sun exposure and weather cycles.
Outdoor epoxy coatings for pool decks require anti-slip formulation — the combination of water and a smooth surface creates significant slip hazard. Most outdoor coating systems for pool areas incorporate aluminum oxide or other aggregates for traction.
Smart tip: Choose a polyaspartic coating rather than traditional epoxy for outdoor applications. Polyaspartic has superior UV stability, greater flexibility (resisting the cracking that temperature expansion and contraction cause in rigid epoxy), faster cure time (walkable in hours rather than days), and better resistance to the freeze-thaw cycles that damage conventional epoxy in cold climates.
Mistake to avoid: Applying any coating system to outdoor concrete without first addressing drainage. Coatings trap water on the surface rather than allowing it to absorb into the concrete — if the concrete surface doesn’t slope adequately to drain, water pools on the coated surface. Ensure a minimum 1:80 slope away from structures before coating any exterior concrete.
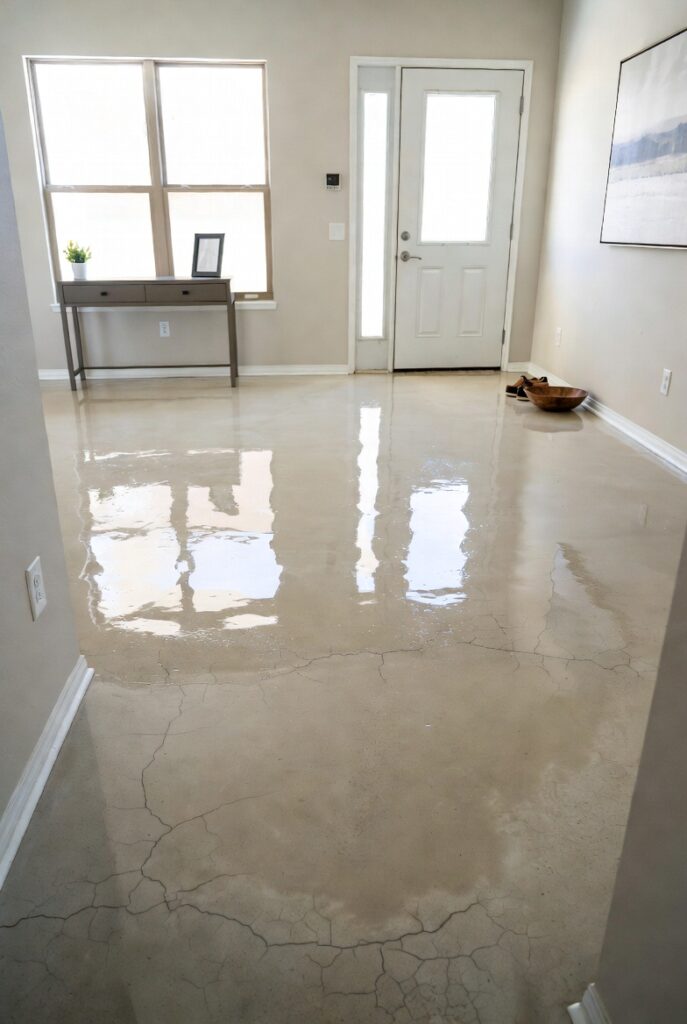
13. Industrial Concrete-Look Epoxy
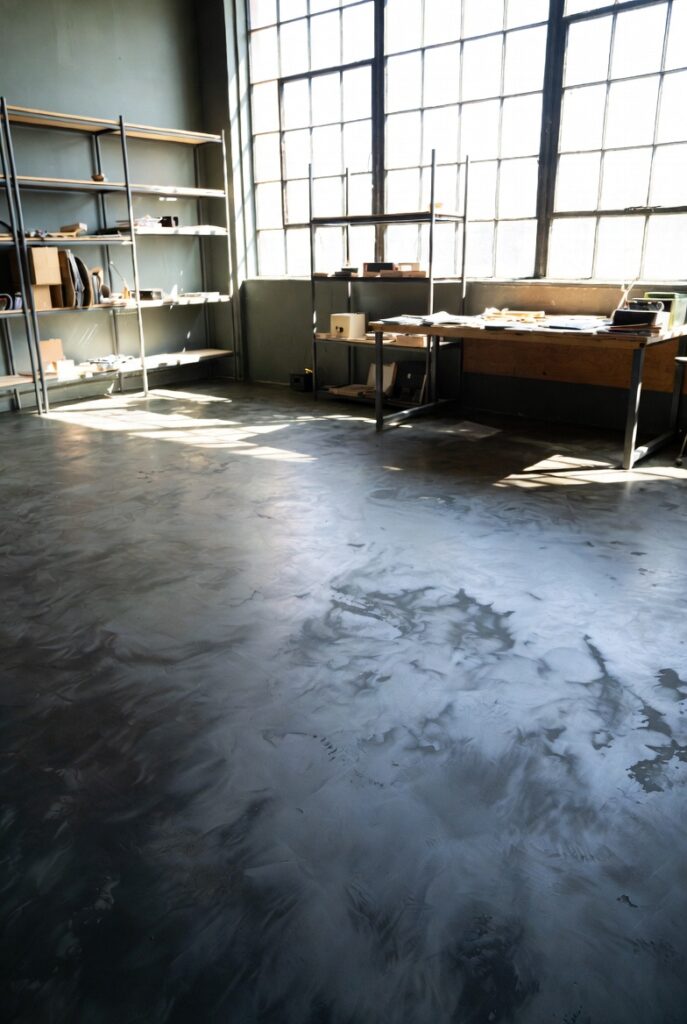
Best for: Loft apartments, modern homes, commercial spaces, and any interior where an urban, industrial aesthetic is the design language
An industrial concrete-look epoxy — a grey-toned, matte or semi-gloss coating that replicates the appearance of polished concrete — provides the visual aesthetic of industrial flooring without the cost and complexity of actual concrete polishing. The coating can be applied over existing concrete, tile, or other substrates, creating a consistent industrial appearance regardless of what’s beneath it.
The industrial look suits contemporary interiors with exposed brick, steel elements, and minimal decoration — the floor’s understated, textured appearance provides a neutral base that doesn’t compete with bold interior elements.
Smart tip: Introduce subtle tonal variation in an industrial concrete-look epoxy application by using a base coat and a partially transparent finishing coat in a slightly different tone. The slight variation in depth — lighter areas and slightly darker areas — replicates the natural tonal variation of real concrete and prevents the flat, painted-floor appearance that a single solid grey coating can produce.
Mistake to avoid: Applying a concrete-look epoxy over a substrate with a strong existing pattern (a tiled floor with dark grout lines, for example) without a self-leveling underlayment first. The existing pattern telegraphs through thin coating systems, creating a floor that looks like a poorly concealed previous surface rather than a genuine concrete appearance.
14. Earth Tone and Natural Epoxy
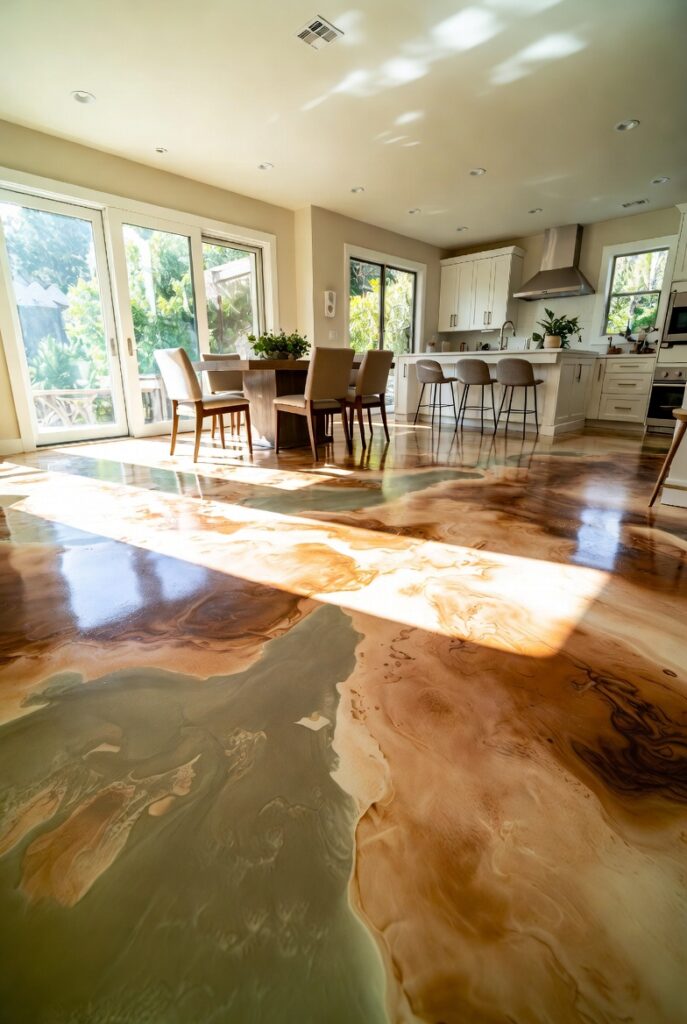
Best for: Homes with biophilic design aesthetics, spaces where a connection to natural materials and colors is the design priority
Earth-toned epoxy — warm browns, terracotta, sage green, warm ochre, and weathered stone grey — creates flooring that references natural materials while providing the practical advantages of epoxy. The warm color palette connects the interior to the natural world and suits homes with natural material furniture, indoor plants, and organic textures.
The 2025 trend toward nature-inspired interiors has made earth-toned epoxy one of the fastest-growing residential epoxy applications — the combination of organic color with the modern convenience of epoxy suits the biophilic design aesthetic that has become central to contemporary residential design.
Smart tip: Pair earth-toned epoxy floors with matte or satin topcoats rather than high-gloss finishes. The reflective quality of a high-gloss finish creates a modern, commercial aesthetic that works against the warm, natural quality of earth-tone colors. A matte or satin topcoat allows the warm color to be the dominant characteristic rather than the reflective surface quality.
Mistake to avoid: Using earth tones that are too warm or too saturated for the room’s size and natural light. A deep terracotta epoxy that looks inviting in a large, well-lit room can make a smaller, north-facing room feel oppressively warm and dark. Test color samples in the actual space under the actual lighting conditions before committing.
15. Glow-in-the-Dark Epoxy
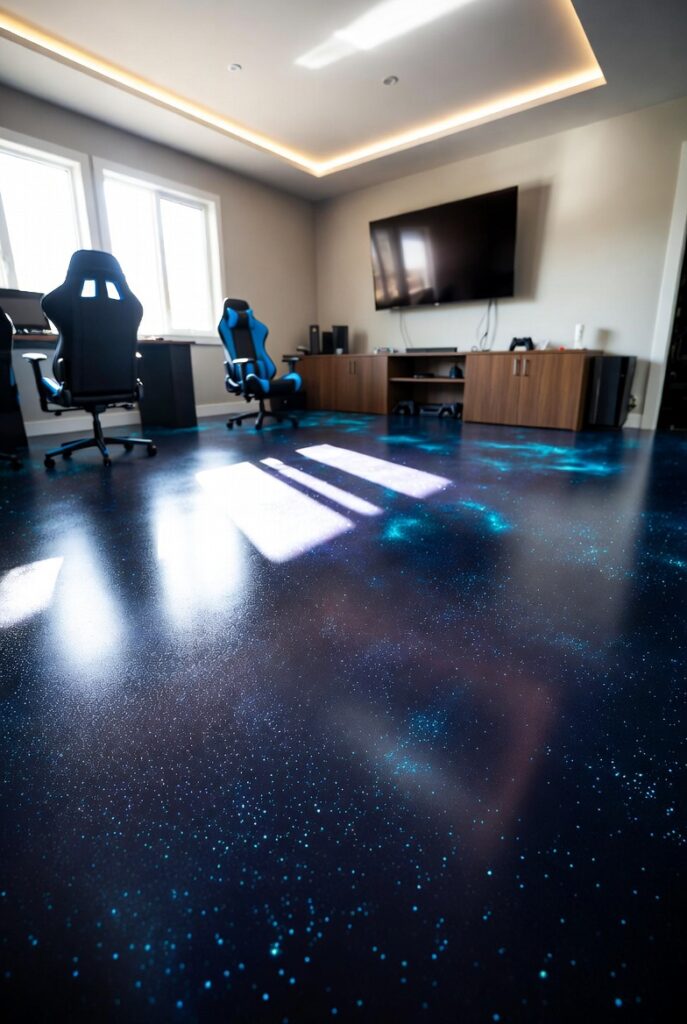
Best for: Children’s rooms, entertainment spaces, nightclubs, stairways, and any application where illuminated wayfinding or playful atmosphere is desired
Glow-in-the-dark epoxy incorporates photoluminescent pigments — materials that absorb ambient light during the day and emit a soft glow in darkness. Applied as a complete floor system or as design elements embedded within a standard epoxy floor, glow-in-the-dark pigments create a floor that transforms completely between day and night conditions.
Practical applications: stairway edging that glows to indicate step edges in power outages; pool deck perimeter lines that glow in darkness; children’s bedroom floors with constellation patterns that emerge at night; entertainment spaces where the floor becomes part of the ambience.
Smart tip: Photoluminescent pigments require adequate light absorption to glow effectively. Position glow-in-the-dark epoxy elements in areas that receive reasonable daytime illumination — a glow floor in a perpetually dark room has limited photoluminescent capacity and produces a weaker glow effect. LED lighting during the day, deliberately directed at the floor, charges photoluminescent pigments rapidly and intensely.
Mistake to avoid: Expecting photoluminescent epoxy to glow as brightly or as long as the promotional photographs suggest. Photoluminescent materials peak in brightness immediately after the light source is removed and fade gradually over several hours. The vivid glowing floor of the promotional image represents the peak brightness — the actual in-use experience is typically subtler and shorter-duration than marketing materials suggest.
16. Custom Logo or Design Inlay
Best for: Commercial spaces, home gyms, workshops — any application where a specific design element or branding needs to be permanently integrated into the floor
A custom design inlay — a logo, emblem, pattern, or image precisely placed within the epoxy floor system — creates a branded or personalized floor feature that is as durable as the floor itself. The design is applied at the base coat stage and encapsulated beneath the clear topcoat, protecting it from wear indefinitely.
For home applications: a family crest in the entryway, a compass rose in a nautical-themed room, a sports team logo in a home gym, a personalized monogram in a foyer. For commercial applications: corporate logos, directional wayfinding designs, zone demarcation patterns.
Smart tip: Commission a custom design inlay from an epoxy installer with specific experience in this technique — the alignment, edge quality, and color accuracy of a custom inlay require skills beyond standard epoxy application. Request examples of previous custom inlay work from any installer quoting on this application.
Mistake to avoid: Applying a custom inlay design without protecting it under a sufficient thickness of clear topcoat. A design applied with minimal clear coat above it is vulnerable to wear at the design edges — the pigment and design layer can be abraded at high-traffic points. Apply at minimum 2 to 3 millimeters of clear epoxy over any custom inlay design.
17. Anti-Slip Epoxy for Safety
Best for: Kitchens, bathrooms, pool decks, workshops, and any wet or potentially slippery floor application
Anti-slip epoxy incorporates aggregate materials — aluminum oxide (the most effective), silicon carbide, or fine quartz — into the epoxy topcoat to create a textured surface with significantly higher friction than a smooth epoxy floor. The aggregate is nearly invisible in the finished surface but measurably increases the friction coefficient to a level appropriate for wet foot traffic.
The level of anti-slip aggregate can be calibrated to the application: light broadcast (fine texture, suitable for residential applications) through medium broadcast (commercial kitchen specification) to heavy broadcast (industrial and outdoor applications requiring maximum traction).
Smart tip: Include anti-slip specification in any epoxy system for areas used while wet or in socks. The most common safety complaint about epoxy floors comes from people who didn’t specify anti-slip and later discover that their beautiful floor is slippery when wet. Anti-slip specification costs minimally more than a standard smooth topcoat and provides significantly better safety.
Mistake to avoid: Using the same anti-slip aggregate level throughout a home epoxy installation regardless of room use. A heavy anti-slip aggregate appropriate for a wet room is unnecessarily rough underfoot in a dry living room. Specify anti-slip levels appropriate to each room’s wet-use risk — lighter in dry residential areas, heavier in wet rooms and outdoor applications.
18. Self-Leveling Epoxy Over Old Floors
Best for: Old or uneven concrete floors, floors with minor cracking, any substrate that needs leveling before a decorative epoxy system is applied
Self-leveling epoxy is a low-viscosity formulation that flows under gravity to find its own level, filling low spots and creating a flat, smooth substrate for the decorative system above. It’s not primarily a decorative product — it’s a preparation and leveling tool that makes subsequent decorative coatings perform better over imperfect substrates.
Self-leveling epoxy suits applications where the existing concrete floor has significant but repairable imperfections — areas of deterioration, surface spalling, or unlevel sections that would cause problems for the decorative system above.
Smart tip: Self-leveling epoxy requires perimeter dams to prevent the material from flowing beyond the intended area. Without dams, low-viscosity self-leveling epoxy flows toward the lowest point in the room — potentially through doorways and under walls. Install temporary dams at all perimeter transitions before pouring self-leveling epoxy.
Mistake to avoid: Using self-leveling epoxy to fill deep holes or cracks without first packing them with repair mortar. Self-leveling products are designed for leveling, not for structural repair of significant voids. Cracks and holes deeper than 3 to 5mm should be filled with epoxy crack filler or repair mortar and allowed to cure before self-leveling epoxy is applied over the surface.
19. Epoxy on Plywood Subfloor
Best for: Residential floors over timber framing where a smooth, durable finish is desired without the weight of concrete overlays
Epoxy can be applied over properly prepared plywood subfloor as well as concrete — expanding its application to above-grade timber-framed construction. The plywood substrate must be mechanically secured (all squeaks eliminated, all fasteners countersunk), primed with a flexible epoxy primer formulated for timber substrates, and the joints between plywood sheets must be filled and feathered before the decorative system is applied.
The key difference from concrete application: plywood flexes under load, and flexible epoxy formulations must be used over timber substrates to prevent cracking. Standard rigid epoxy systems formulated for concrete are inappropriate over flexible plywood substrates.
Smart tip: Apply epoxy over plywood subfloor only in rooms where floor deflection is minimal — typically ground-floor or basement areas where the subfloor is well-supported. Upper floors with significant flex under foot traffic create ongoing stress on the epoxy coating that eventually causes cracking regardless of the flexibility of the formulation used.
Mistake to avoid: Applying epoxy over plywood with unsealed joints between sheets. Even when filled and feathered, plywood sheet joints can move slightly with seasonal humidity changes. These movements telegraph through the epoxy coating as visible lines or cracks. Using fiberglass mat tape embedded in the primer coat over all plywood joints before the decorative system reinforces the joint and reduces cracking risk.
20. How to Choose the Right Epoxy System
Best for: Anyone planning an epoxy floor installation — system selection determines the floor’s appearance, performance, and longevity
The epoxy flooring market includes dozens of product systems varying in chemistry, performance characteristics, and application requirements. Choosing the right system requires understanding the specific demands of the application — the traffic level, moisture conditions, aesthetic requirements, and maintenance commitment of the owner.
System selection by application: garage (flake system with polyaspartic topcoat — maximum durability, chemical resistance, UV stability); basement (moisture-tolerant primer required, flexible system for below-grade conditions); kitchen (anti-slip topcoat, food-safe formulation, easy-clean surface); bathroom (waterproof, flexible, matte or satin finish); outdoor (polyaspartic or polyurea, UV-stable, anti-slip, freeze-thaw resistant); decorative residential (metallic or marble effect, standard interior epoxy, high-gloss or satin topcoat).
Smart tip: For any significant epoxy installation, obtain three quotes from professional installers and ask each one to specify the exact products they’ll use — manufacturer, product name, and application specification. Compare not just price but the quality of the specification. The cheapest quote using inferior products produces a floor that fails prematurely; the most expensive quote should be justified by a superior product specification and installation track record.
Mistake to avoid: Treating all epoxy products as equivalent. The performance range between entry-level and professional-grade epoxy systems is significant — in chemical resistance, UV stability, mechanical hardness, and adhesion to the substrate. A professional-grade system costs more but lasts two to three times longer than an entry-level system under equivalent conditions.
Before You Start
- Test for moisture. Moisture transmission through the slab is the most common cause of epoxy failure. Perform a calcium chloride test or plastic sheet test before any installation and address moisture issues before applying any coating.
- Prepare the surface properly. Surface preparation is the most important determinant of epoxy performance — more important than the product quality. Mechanical preparation (diamond grinding or shot blasting) is the professional standard. Acid etching alone is inadequate for most applications.
- Plan the temperature and humidity window. Epoxy application requires specific temperature and humidity conditions. Plan installation for moderate temperature days and ensure the space is ventilated but not in wind that introduces dust.
- Consider professional installation. DIY epoxy kits are available but produce significantly inferior results compared to professionally applied systems — in both appearance and longevity. For a floor expected to last 10 to 20 years, professional installation is the better investment.
Conclusion
Epoxy flooring’s combination of design flexibility, durability, and practical maintenance characteristics make it one of the most versatile flooring options available. The design range — from a simple solid grey garage coating to a complex metallic residential floor — means there’s an appropriate epoxy system for virtually every application and aesthetic. The performance principles are consistent regardless of design: adequate surface preparation, appropriate system specification for the application, and correct installation conditions determine the floor’s longevity far more than the design choice itself.