The space under a staircase is one of the most consistently wasted areas in a home. It’s triangular, awkward, and often either left completely empty or used as a dumping ground for things that don’t have a better home. Yet it represents between 30 and 80 square feet of usable floor area — depending on the staircase configuration — that could be doing real work. The challenge is the geometry: the space gets taller at one end and slopes to almost nothing at the other, which means standard off-the-shelf storage rarely fits well. Custom solutions that work with the shape rather than against it are what unlock the space’s full potential. These 20 ideas cover every possible use of under-stair space — from a simple pull-out drawer system to a full powder room — at every budget level.
1. Build Custom Pull-Out Drawers
Best for: Any under-stair space — pull-out drawers are the most space-efficient storage solution available for this area
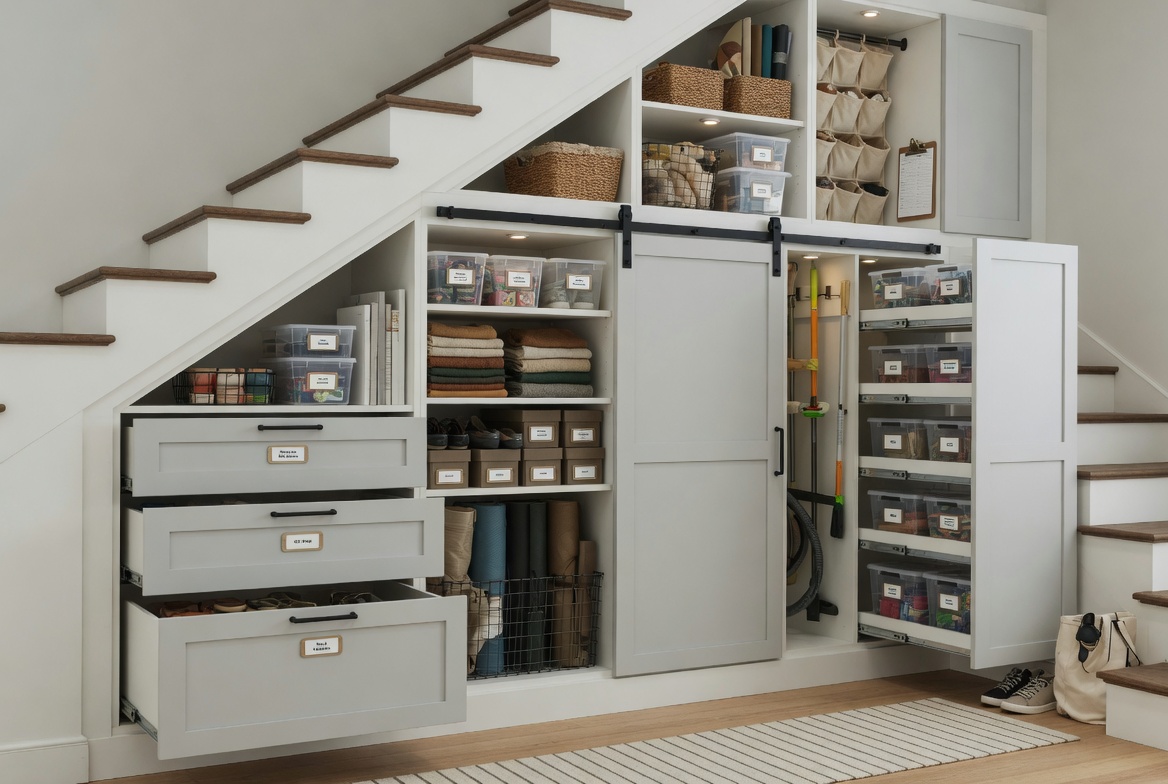
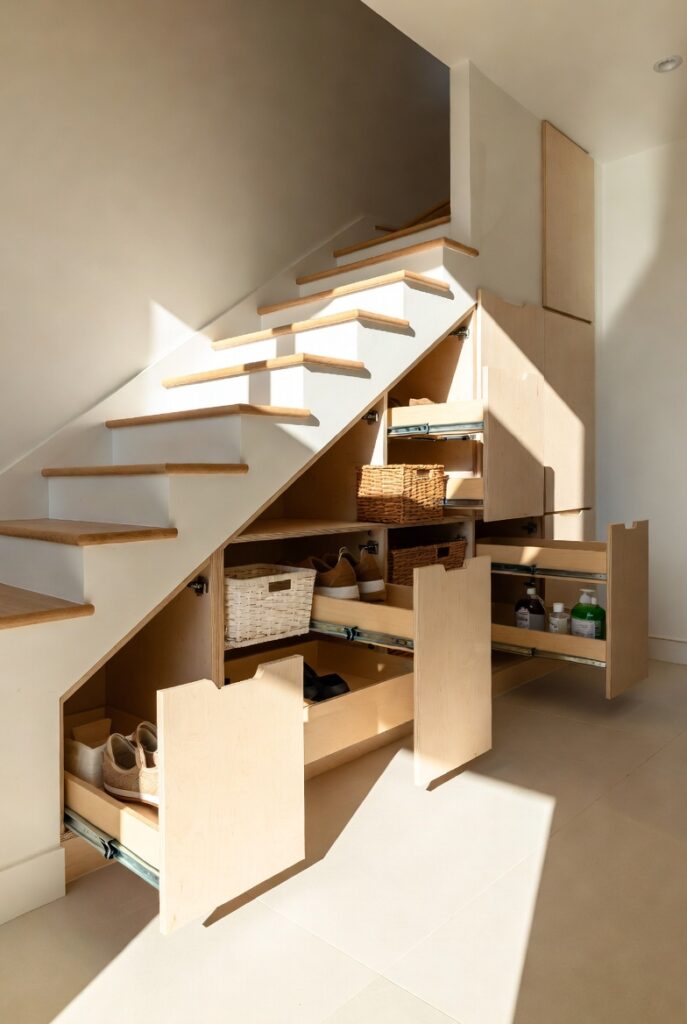
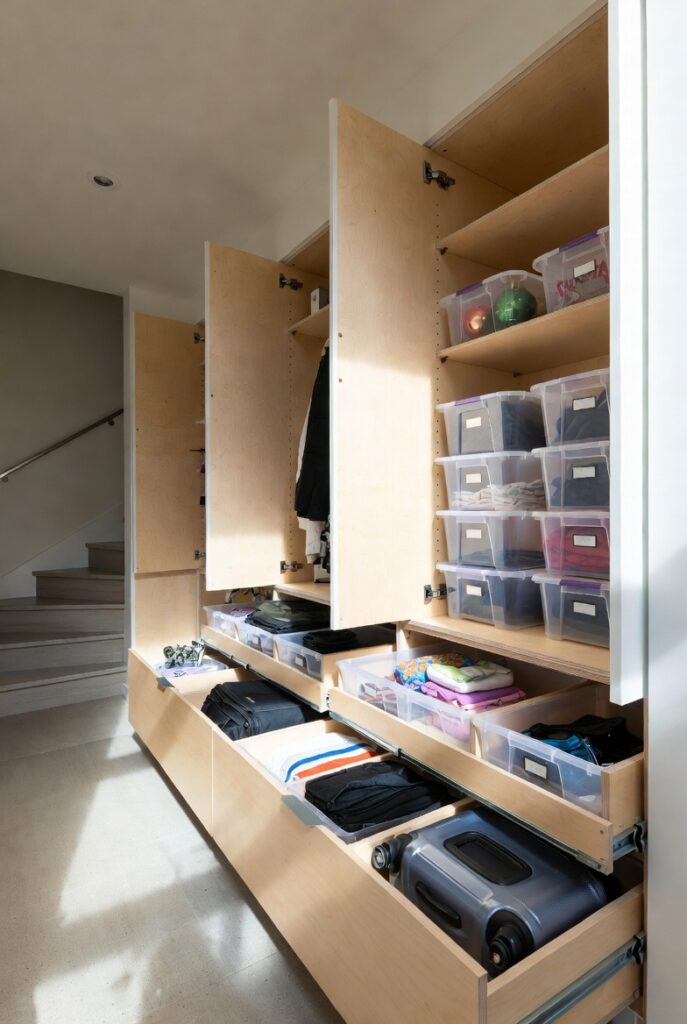
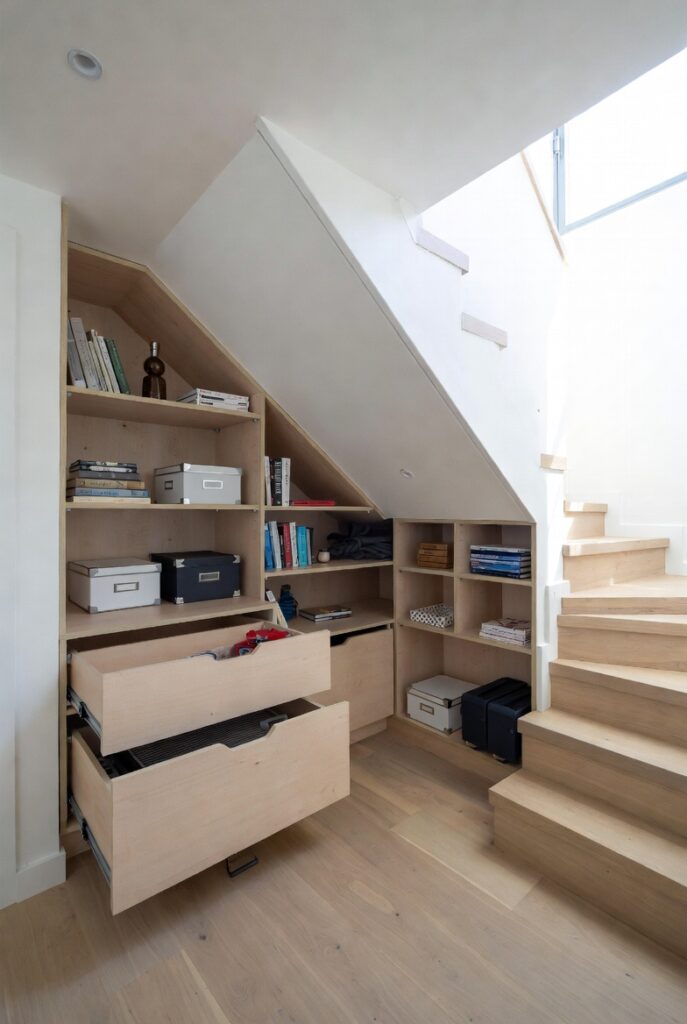
Custom pull-out drawers built to fit the exact dimensions of the under-stair space — each drawer a different depth to accommodate the sloping ceiling — use virtually every cubic inch of available space while keeping everything accessible. Unlike a simple closet where items at the back become difficult to reach, pull-out drawers bring the full depth of the storage to the front with a single movement.
Each drawer is sized to the specific height available at its position: the tallest drawer nearest the staircase opening (where the ceiling is highest) stores tall items; progressively shallower drawers toward the narrow end store flat items. The result is a storage system that wastes almost nothing.
Smart tip: Use full-extension drawer slides rather than standard slides. Full-extension slides allow the entire drawer to come out beyond the cabinet face, making the back of even a deep drawer fully accessible. Standard slides that extend only 75% of the drawer’s depth leave the back quarter perpetually difficult to reach.
Mistake to avoid: Building all drawers to the same depth. The most common under-stair drawer mistake is creating a uniform grid that doesn’t account for the varying ceiling height. A drawer positioned where the ceiling is only 12 inches high but built at the standard 18-inch depth will hit the stair underside when opened. Measure the available height at each drawer position before finalizing dimensions.
2. Create a Slide-Out Pantry
Best for: Under-stair spaces adjacent to or near the kitchen — the most practical use of under-stair space for a household that struggles with kitchen storage
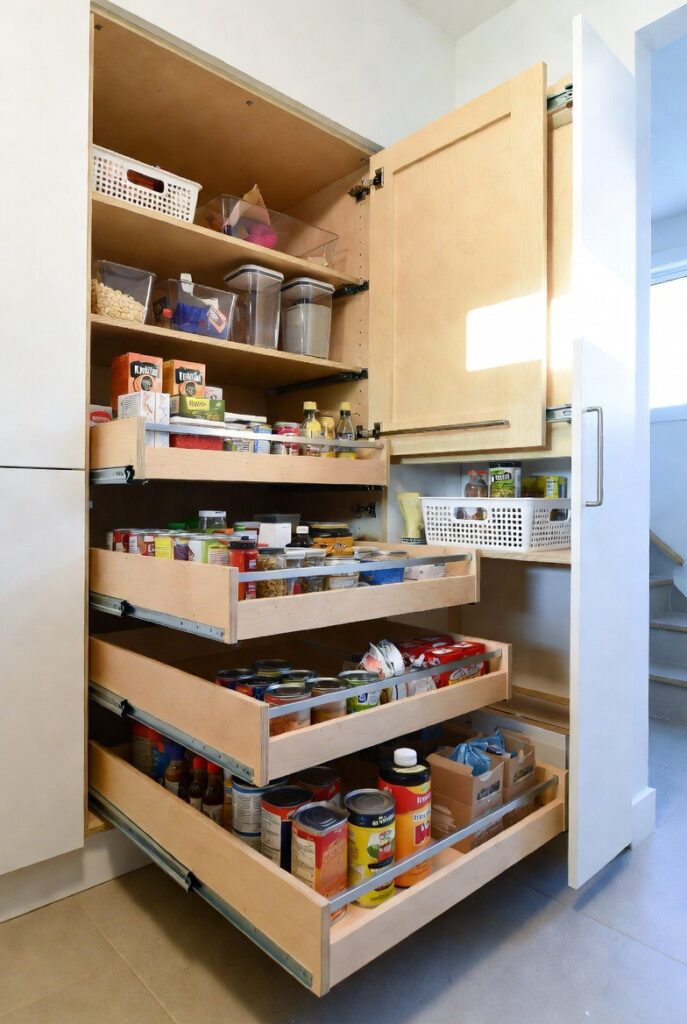
A slide-out pantry converts the under-stair space into a set of deep shelving units that roll out on heavy-duty casters, providing access to the full depth of each shelf without reaching into a fixed cabinet. The rolling mechanism solves the access problem that makes conventional deep shelving frustrating — items at the back of a fixed shelf are difficult to see and reach; rolling shelves bring the entire shelf surface to the front.
Full-extension shelves with adjustable heights accommodate everything from tall bottles and appliances to short canned goods. A well-designed under-stair pantry can store enough dry goods, spices, and small appliances to meaningfully free up kitchen cabinet space.
Smart tip: Install LED strip lighting inside the pantry on a motion sensor. Under-stair spaces are naturally dark, and a pantry where you can’t clearly see what’s stored becomes a space where things get lost and forgotten. Motion-activated LED strips that turn on when the door opens require no switching and ensure the entire pantry is visible at a glance.
Mistake to avoid: Using the slide-out pantry for perishables without ventilation. A sealed under-stair space without air circulation creates an environment where moisture and odors accumulate — inappropriate for perishable food storage. Plan a small ventilation gap or grille if fresh produce or anything moisture-sensitive will be stored there.
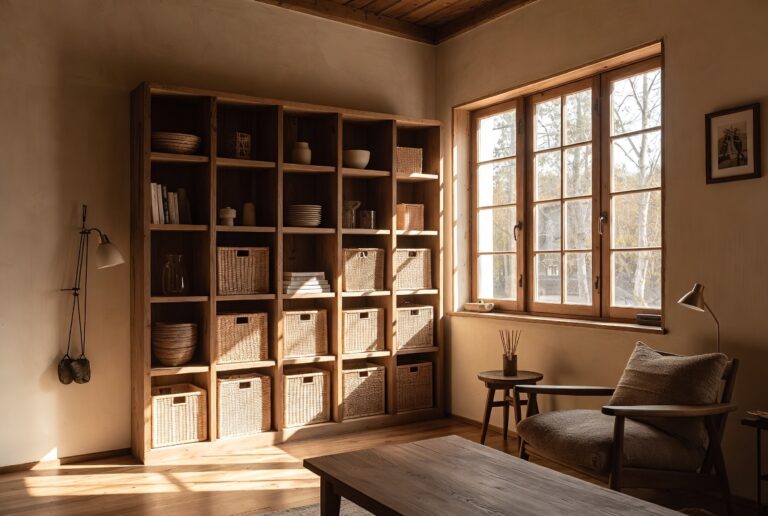
3. Install Open Shelving
Best for: Open-plan homes where the under-stair area is visible from the living space — open shelving integrates storage into the room’s visual design
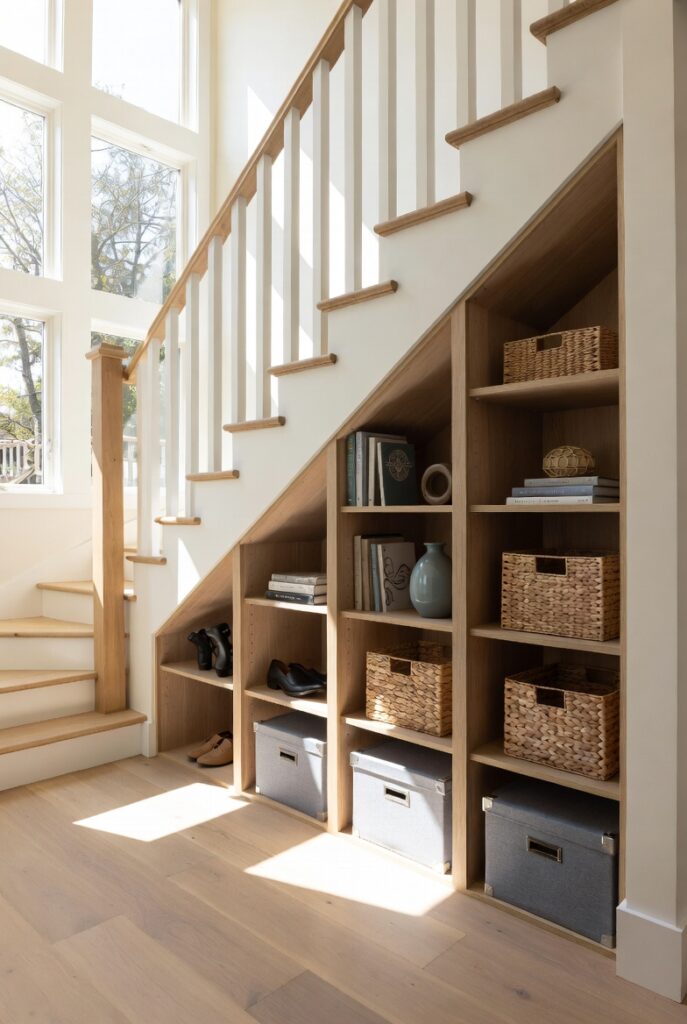
Open shelving under the stairs — shelves built into the under-stair space without doors, visible as part of the room — converts a hidden area into a display and storage feature that adds character to the living space. Styled correctly, open under-stair shelving looks like a considered design feature rather than added storage.
The most effective open under-stair shelving style: books organized by color or size; a mix of books, plants, and decorative objects; or a dedicated display of collections (ceramics, travel souvenirs, framed photographs). The key is treating it as a styled surface rather than a catch-all.
Smart tip: Use the tallest section of the under-stair space (nearest the opening where the ceiling is highest) for the most visually prominent shelves — the ones that display books, art, and plants at eye level. Reserve the lower, narrower section for storage baskets that contain less attractive items behind a consistent visual front.
Mistake to avoid: Leaving open under-stair shelving unstyled and allowing it to become a general dumping ground for whatever doesn’t fit elsewhere. Open storage that’s visible from the living room requires curation — a consistent visual approach that makes the storage look intentional. An unstyled open shelf under the stairs reads as clutter rather than storage.
4. Design a Mini Home Office
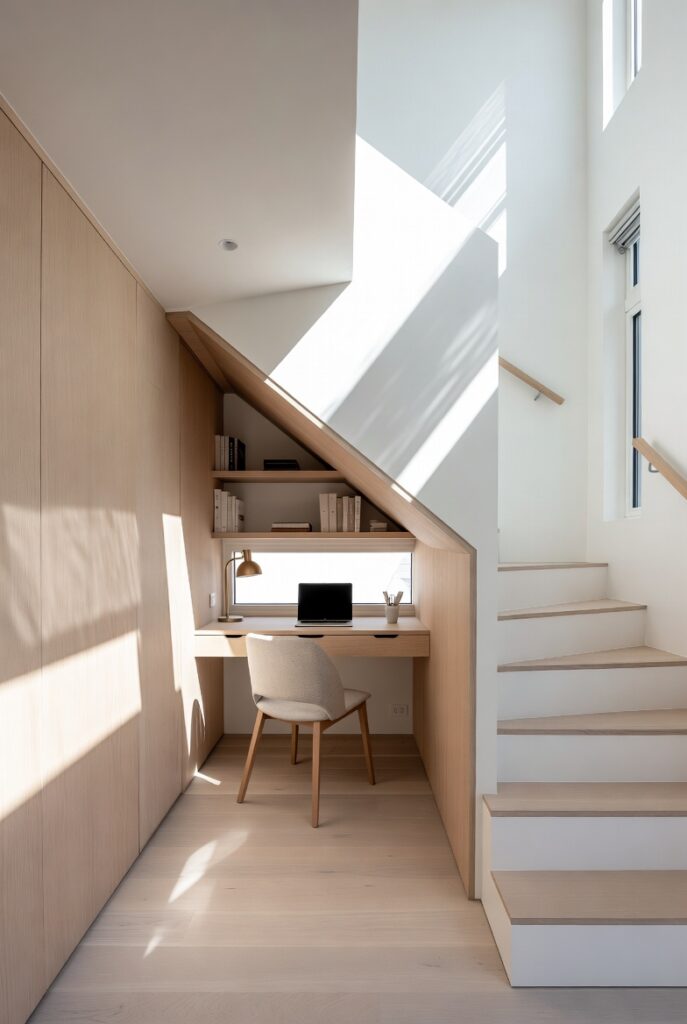
Best for: Homes without a dedicated office room — the under-stair space provides enough depth for a functional desk area
Even a modest under-stair space — 36 inches wide and 36 inches deep at the tall end — accommodates a functional desk, a chair, overhead shelving, and task lighting. The naturally enclosed quality of the space creates a focused work environment within an open-plan home without requiring a dedicated room.
The essential elements: a custom desk surface at the correct ergonomic height (28 to 30 inches); a task light (wall-mounted sconce or clamp lamp to save surface space); power outlets within the space; and shelving above the desk for reference materials, a monitor, or equipment.
Smart tip: Mount a fold-down desk surface if the space is narrow — a desk that folds flat against the wall when not in use keeps the area from feeling permanently occupied and allows the space to serve a different function during non-working hours. The fold-down mechanism is particularly valuable in small homes where the office needs to coexist with other room functions.
Mistake to avoid: Creating an under-stair office without adequate ventilation and lighting. Under-stair spaces have no windows and limited natural light — working in a poorly lit, stuffy enclosed space for extended periods is genuinely uncomfortable and reduces productivity. Install adequate artificial lighting and ensure at least a small ventilation gap before considering this a comfortable workspace.
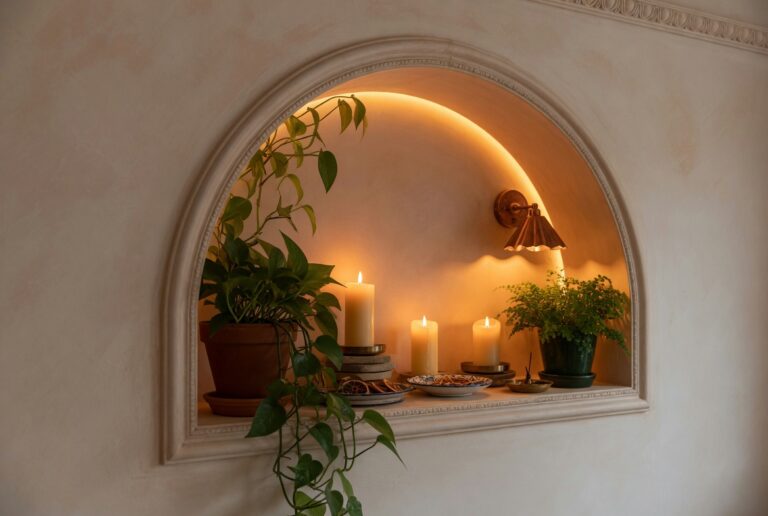
5. Build a Reading Nook
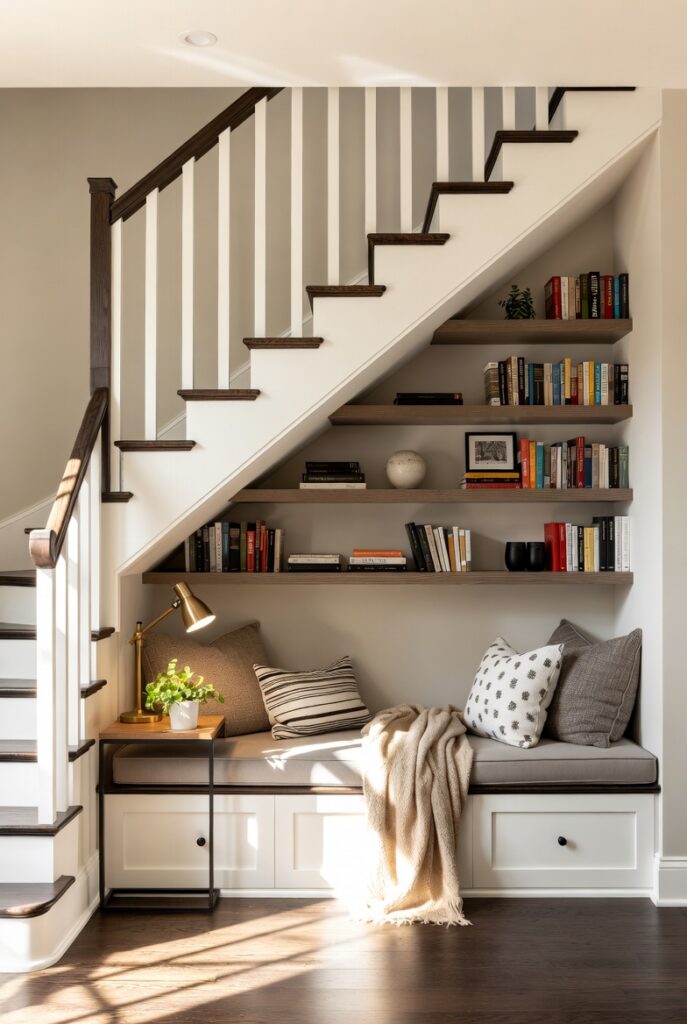
Best for: Wider under-stair spaces (at least 24 inches deep) in homes where a cozy reading corner is valued
A reading nook built into the under-stair space — a cushioned bench with storage drawers beneath, shelving on one or both sides, and a wall-mounted reading light — creates one of the most sought-after domestic spaces available: a defined, enclosed, personal space within a larger room. The slightly enclosed quality of the under-stair space is exactly what makes a reading nook feel special rather than just a chair placed near bookshelves.
The bench seat should be at least 24 inches deep for comfortable sitting with legs extended, and at least 36 inches long for a single adult. The cushion height (including the drawer base) should put the seat at approximately 18 inches from the floor.
Smart tip: Install a dimmer on the reading nook light rather than a standard on/off switch. The ability to adjust light level — bright for active reading, dimmer for relaxed browsing — makes the nook genuinely usable across different times of day and different moods. A fixed bright light in a small enclosed space feels more clinical than welcoming.
Mistake to avoid: Building a reading nook bench too shallow to sit comfortably. A bench depth of less than 18 inches forces a formal, upright sitting position that doesn’t suit reading. 24 inches is the practical minimum for comfortable reading; 30 inches allows someone to sit with their back against the stair side wall and legs extended along the bench.
6. Create a Mudroom Nook
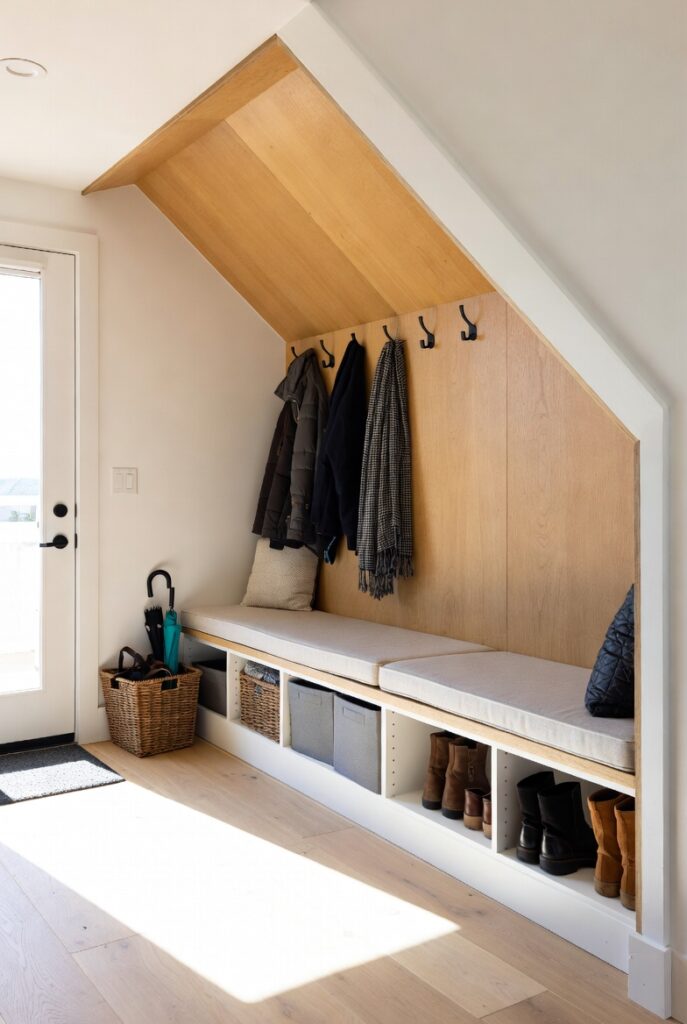
Best for: Under-stair spaces near the front or back door — the most practical location for a compact mudroom
A mini mudroom under the stairs — hooks for coats and bags on the back wall, a bench for sitting while putting on shoes, shoe storage beneath the bench, and a shelf above the hooks for hats and helmets — creates organized arrival and departure storage in a household that currently has none.
The design eliminates the hallway pile of shoes, the coat draped over a chair, and the bag left on the floor — all of which accumulate because there’s no dedicated place for them. A mudroom nook with a specific place for each category of arrival-and-departure item eliminates the daily clutter that these items create.
Smart tip: Use labeled cubbies or hooks assigned to specific family members rather than shared general hooks. When everyone has their own designated hook and shoe space, items are more consistently returned to the right place and the system stays organized without active management.
Mistake to avoid: Using carpet or fabric in an under-stair mudroom nook. Shoes and coats bring mud, water, and debris — the materials in a mudroom nook need to withstand this without staining or deteriorating. Use tile or sealed vinyl flooring, painted or melamine-coated walls, and easy-clean finishes on all surfaces.
7. Add a Wine Storage Area
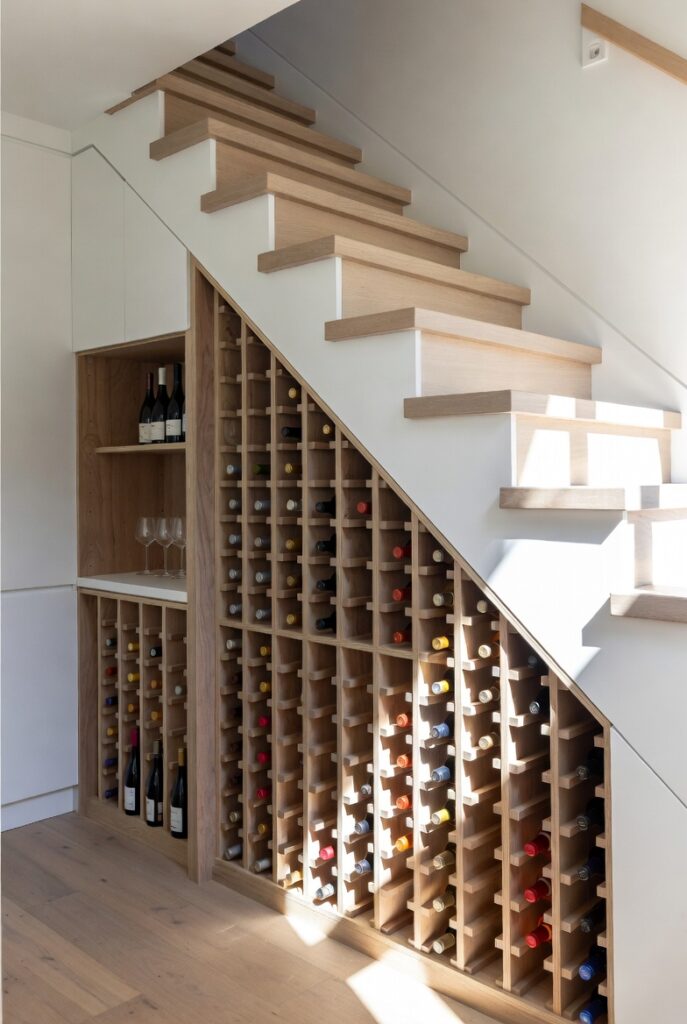
Best for: Under-stair spaces in homes with wine collections — the space offers natural darkness, relative temperature stability, and enough depth for wine racks
The under-stair space has characteristics that suit wine storage: it’s dark (no natural light), naturally cooler than the main living areas (heat rises), and the triangular shape accommodates wine rack configurations from small (12 to 24 bottles) to impressive (100+ bottles) depending on the available space.
A wine storage area can range from a simple set of wine rack cubbies built into existing shelving to a fully finished wine room with temperature control, glass doors, accent lighting, and a dedicated display area for special bottles.
Smart tip: If installing a temperature-controlled wine area, position the cooling unit at the upper part of the under-stair space where the ceiling is highest and heat from the unit can dissipate. Cooling units in the lower, narrower section of the space are difficult to access for maintenance and less efficient due to limited air circulation.
Mistake to avoid: Storing wine directly against the stair underside without insulation in an unheated or uninsulated space. Temperature fluctuations — particularly in a basement stair space that’s cold in winter and warm in summer — are more damaging to wine than consistent moderate temperatures. Either insulate the space adequately or use a temperature-controlled unit.
8. Turn It into a Kids’ Playroom
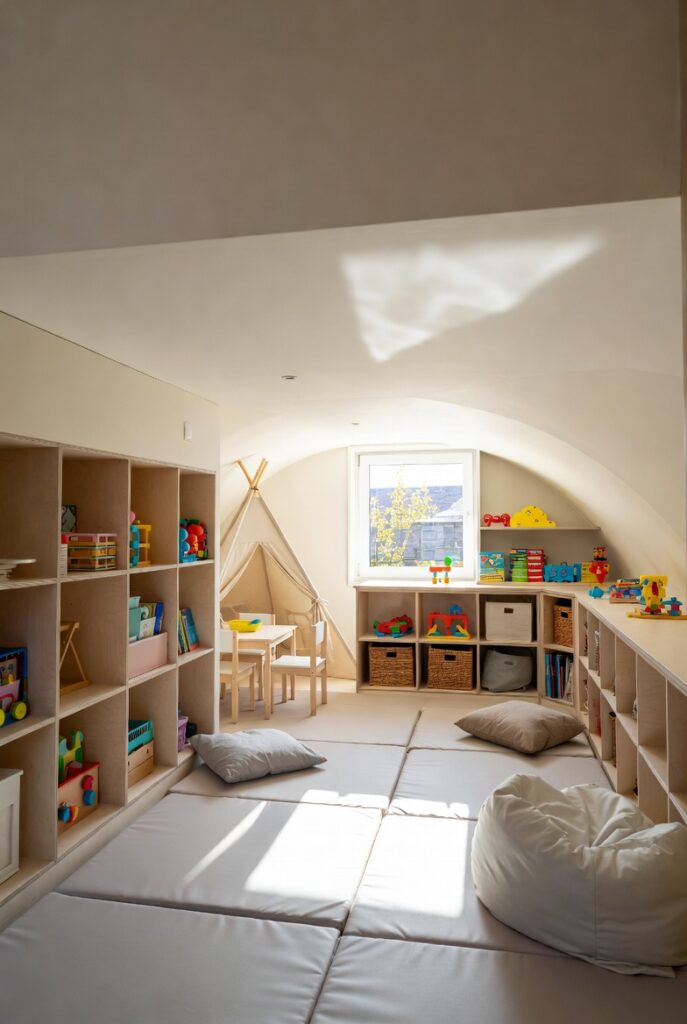
Best for: Families with young children — children love enclosed, den-like spaces with their own defined territory
An under-stair playroom for young children works with the space’s natural proportions — the lower ceiling height that would feel cramped for adults is perfectly appropriate for small children — and creates a defined play space within a larger room without requiring a separate room. Children’s toys, books, and games can be stored within the space, eliminating the spread of children’s items across the living room.
A small blackboard wall, a low bookshelf, storage bins for toys, and adequate lighting are all that’s needed to create a functional and appealing children’s space.
Smart tip: Install a half-door or curtain across the opening rather than a full door. A half-door allows parents to see into the space easily while giving children the sense of enclosure and privacy that makes the nook feel special. A full door makes supervision difficult; no door eliminates the den-like quality.
Mistake to avoid: Using the under-stair space as a children’s playroom without installing adequate electrical outlets inside. Children’s spaces need device charging, nightlights, and sometimes powered toys. An under-stair room without electrical access requires extension cords — an unsafe solution in a children’s space.
9. Install a Shoe Storage System
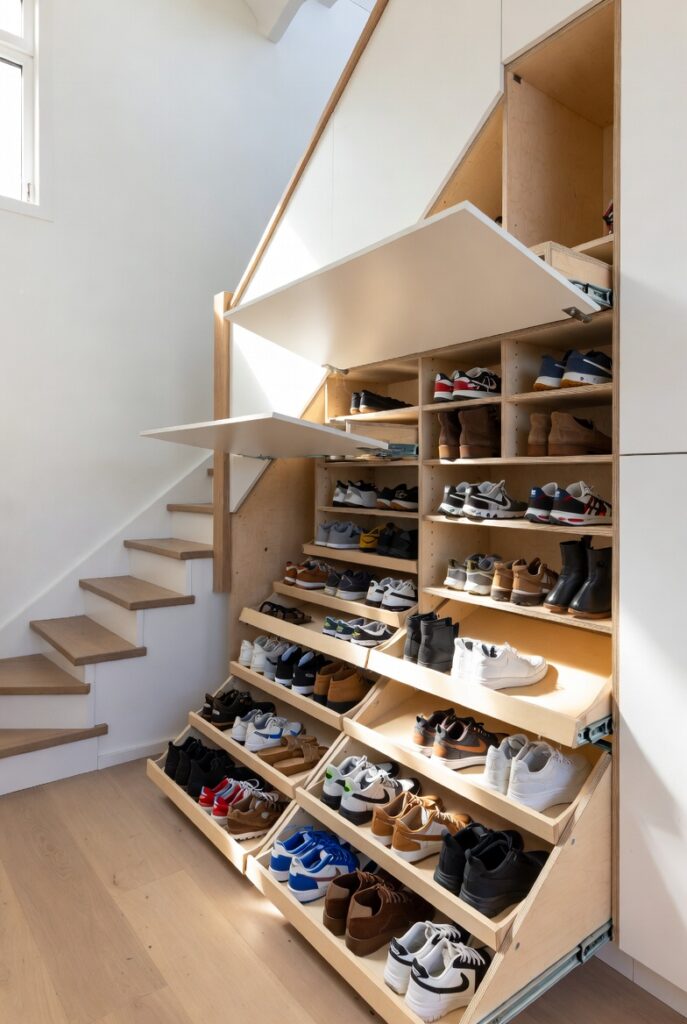
Best for: Households where shoe storage is a persistent problem — the under-stair space can typically hold 20 to 50 pairs depending on the size
A dedicated shoe storage system under the stairs — angled shelves that display shoes at a consistent angle, pull-out racks, or stacked cubbies — consolidates shoe storage in one location and eliminates shoes from bedrooms, hallways, and mudrooms. The under-stair location is ideal because it’s typically near the entry, making it convenient for shoes actually worn rather than stored.
Angled shoe shelves (at approximately 15 to 20 degrees) are more space-efficient than flat shelves because shoes displayed on an angle require less depth per pair than shoes lying flat. A custom angled system typically stores 50% more pairs in the same space than flat shelving.
Smart tip: Divide the shoe storage by household member rather than by shoe type. A section per person — clearly labeled and maintained individually — makes the system more likely to be used consistently and makes finding a specific pair significantly faster than a general mixed system.
Mistake to avoid: Building shoe storage in an under-stair space that doesn’t have adequate ventilation. Shoes retain moisture from wear, and a sealed, unventilated under-stair shoe storage area develops persistent odors within weeks of regular use. Install a small ventilation grille or leave a gap at the door to allow air circulation.
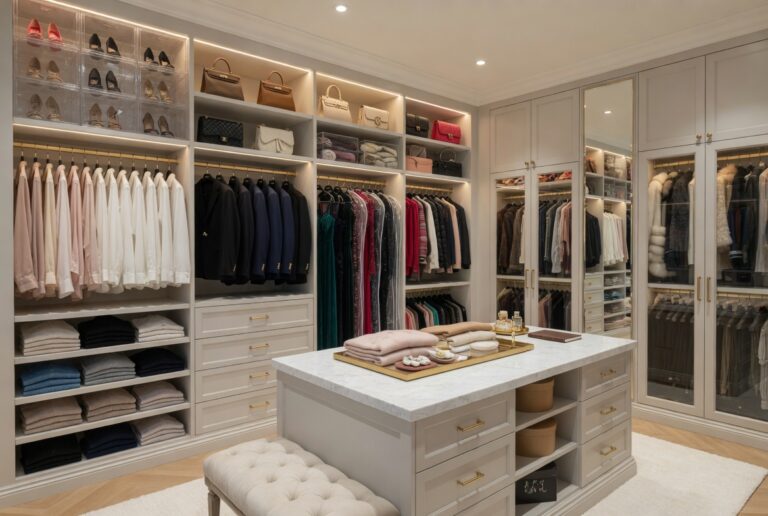
10. Create a Linen Closet
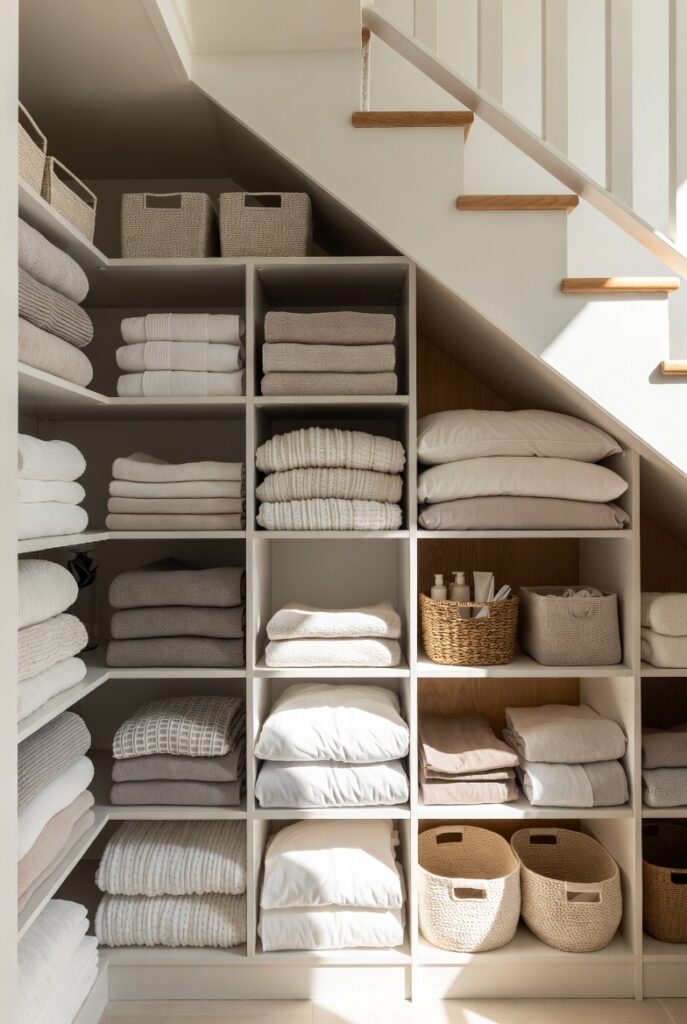
Best for: Homes without adequate linen storage — bedsheets, towels, and blankets require more space than most bedroom closets provide
Converting the under-stair space into a linen closet with adjustable shelving, organized by linen type and bed size, creates dedicated linen storage that frees bedroom and bathroom closets for clothing and personal items. A full-height section of under-stair shelving can accommodate the linen needs of a 3 to 4 bedroom home comfortably.
The most effective linen closet organization: shelves at the tall end (near the stair opening) for bulky items (duvet covers, blankets, pillows); middle shelves for bed sheets organized by bed size; lower shelves and floor level for towels, which are used most frequently and benefit from the most accessible position.
Smart tip: Store complete bed sets (fitted sheet, flat sheet, and pillowcases) together inside one of the pillowcases of the set. This “nested” storage approach keeps all the components of each bed size together, eliminates the searching for matching sheets, and dramatically reduces the time required to change bed linen.
Mistake to avoid: Installing fixed shelves at the same height throughout the linen closet. Linen items vary considerably in height — from flat-folded sheets to bulky duvets and pillows. Adjustable shelving that can be repositioned as storage needs change provides significantly more flexibility than fixed shelves designed for one specific storage configuration.
11. Build a Pet Alcove
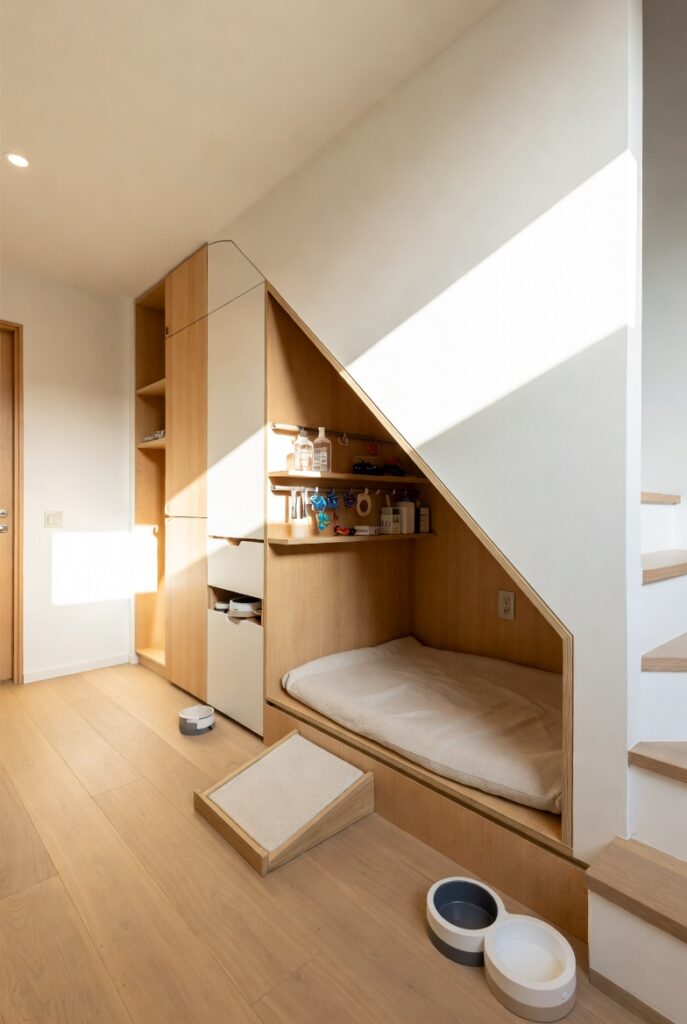
Best for: Families with dogs or cats — the enclosed, den-like quality of the under-stair space suits animals instinctively
Dogs especially respond positively to enclosed, den-like spaces that replicate the natural sheltered environments their ancestors sought. An under-stair pet alcove — with a raised platform or bed, a feeding station, and storage for leads, toys, and grooming supplies — creates a dedicated pet space within the home that separates pet items from the main living areas.
The pet alcove also contains the pet’s belongings in one place — eliminating the scatter of dog toys across the living room floor, leads hanging from doorknobs, and food bowls placed wherever there’s space in the kitchen.
Smart tip: Use tile or sealed laminate flooring in the pet alcove — not carpet or fabric. Pets bring mud, water, and shed fur into their resting areas. Easy-clean surfaces that can be wiped or mopped are essential in a space used daily by a dog or cat. Carpet in a pet area becomes permanently stained and odorous within weeks.
Mistake to avoid: Creating a pet alcove that’s too small for the pet’s adult size. A puppy-appropriate alcove may be uncomfortably small for the same dog at adult size. Measure the dog’s crate size or estimate the adult dog’s resting dimensions before finalizing the alcove dimensions — the space should be large enough for the adult dog to stand, turn, and lie comfortably.
12. Add Seasonal Storage
Best for: Homes without attic or basement access — the under-stair space provides climate-controlled storage for seasonal items
Seasonal items — holiday decorations, seasonal clothing, sports equipment, garden tools — need accessible storage that’s separate from daily-use items but retrievable without major effort when the season changes. The under-stair space, typically accessed through a door or set of doors, is ideal for this category of infrequent-use storage.
Organization by category within the seasonal storage area: clearly labeled bins for each holiday (Christmas decorations, Halloween, Thanksgiving); seasonal clothing in vacuum storage bags organized by person and season; sports equipment grouped by season and sport.
Smart tip: Manage holiday lighting in a dedicated container with cardboard tubes for wrapping strings of lights. Lights wound around a cardboard tube rather than loosely bundled take up less space, untangle in seconds rather than minutes, and maintain better over multiple storage cycles than lights stored in their original packaging.
Mistake to avoid: Using the under-stair seasonal storage area as a general storage space for items that have no better home. Seasonal items should be the only category stored here — mixing seasonal items with general overflow creates a disorganized space where specific items become difficult to locate and the seasonal rotation becomes disruptive.
13. Install Stair-Step Drawers
Best for: Open staircases visible from the side — this converts each step into a drawer, accessible from the stair’s side face
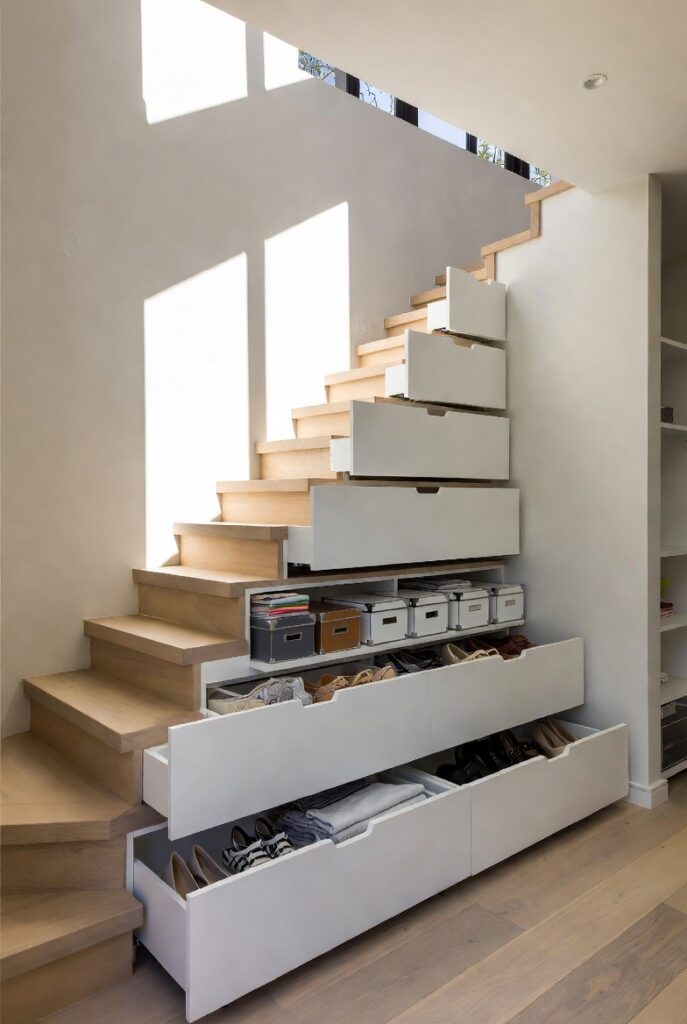
Stair-step drawers — where each individual step has a drawer built into its face, accessible from the side of the staircase — converts the solid structural volume of the staircase itself into storage without using the under-stair cavity at all. Each drawer is as wide as the stair tread and as deep as the step riser, creating a series of shallow, wide drawers ideal for flat items.
This solution is particularly effective for staircases positioned in the middle of an open-plan floor rather than against a wall — the step drawers are visible from multiple angles and create a design feature as well as a storage solution.
Smart tip: Use stair-step drawers for items that are used daily or near-daily — the accessibility of step drawers is their greatest advantage, but it’s only useful for items retrieved regularly. Shoes, remote controls, magazines, children’s school supplies, and chargers are examples of items that suit step drawer storage.
Mistake to avoid: Installing stair-step drawers without consulting a structural engineer or experienced carpenter about the specific staircase construction. Not all staircase designs accommodate drawer modification without compromising structural integrity. The feasibility depends on how the staircase is built — solid timber treads and risers allow drawer installation; laminated or hollow staircase components may not.
14. Create a Cleaning Supply Closet
Best for: Any home where cleaning supplies are currently stored in bathrooms, kitchens, or wherever there’s space
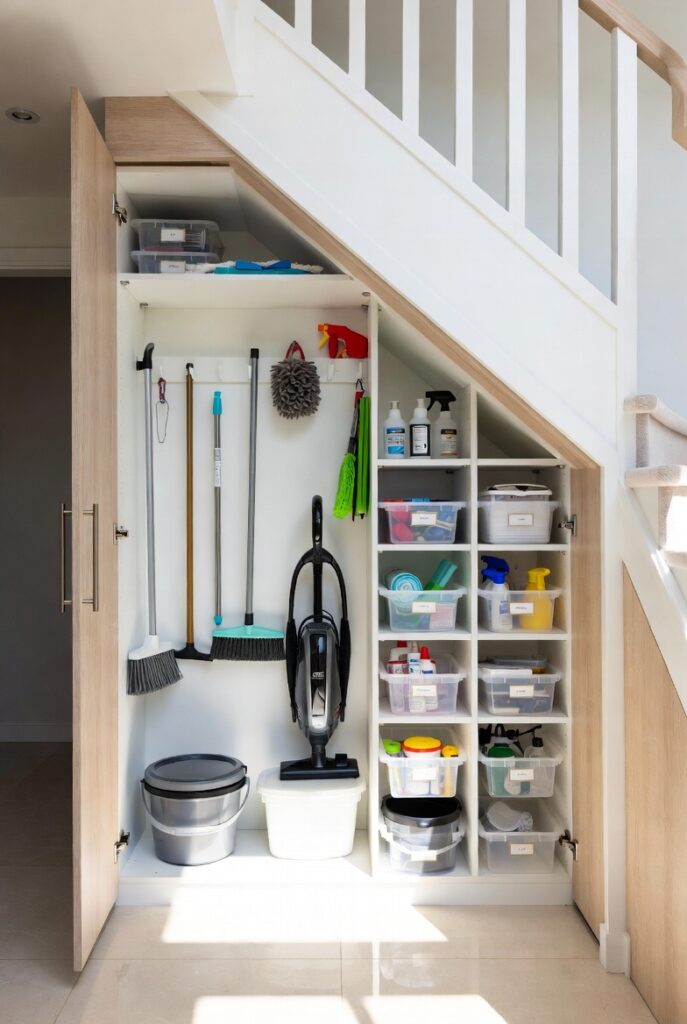
A dedicated cleaning supply closet under the stairs — with a mop and broom hanging system, shelving for cleaning products, a rolling cart for portable supplies, and a hook for vacuum accessories — consolidates all cleaning equipment in one location and makes cleaning more efficient by eliminating the search for supplies scattered across the house.
The rolling cart element is particularly useful: a cart that holds all portable cleaning supplies (spray bottles, cloths, rubber gloves) can be rolled to wherever cleaning is happening rather than requiring multiple trips between the closet and each room.
Smart tip: Install a tension rod near the top of the cleaning closet to hang spray bottles by their trigger handles. Spray bottles hanging from a rod are immediately accessible and organized by product type; spray bottles standing on a shelf require moving adjacent bottles to reach the one needed. The simple rod addition significantly improves access to the most frequently used cleaning items.
Mistake to avoid: Storing cleaning chemicals in an under-stair space adjacent to heating equipment or in areas that experience temperature extremes. Many cleaning products are flammable or react dangerously at high temperatures. Ensure the cleaning closet is away from any heat source and maintains a moderate, consistent temperature.
15. Add a Powder Room
Best for: Homes with one bathroom and frequent guests — a powder room adds genuine functionality and property value
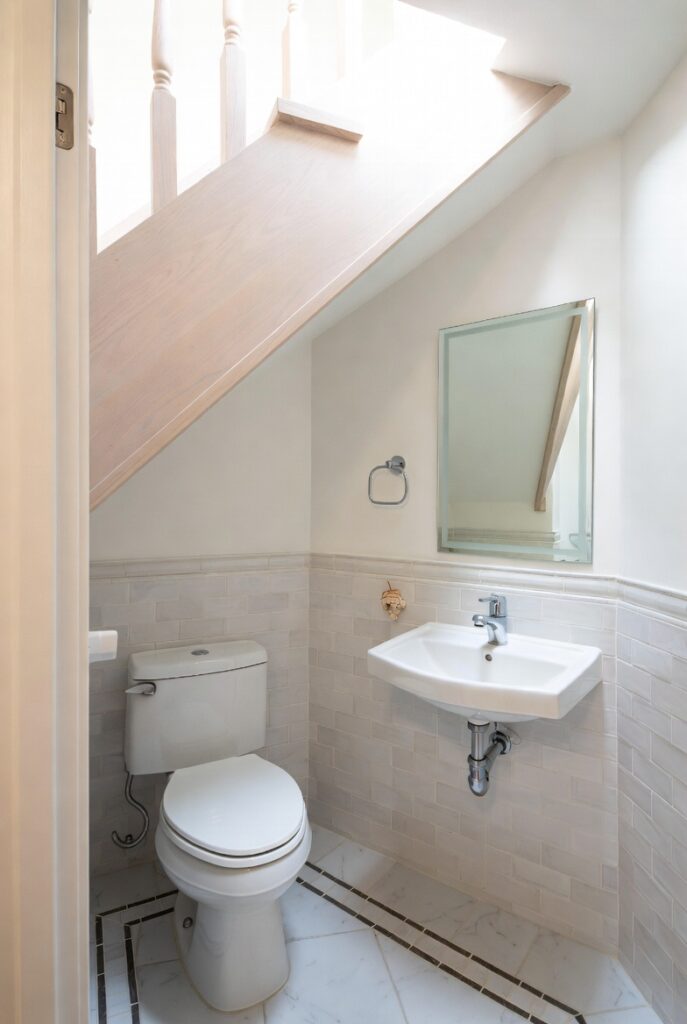
A powder room (half bathroom with toilet and sink, no shower) in the under-stair space is one of the highest-return renovations available in terms of property value and daily household convenience. The minimum space required is approximately 15 to 20 square feet — achievable in most under-stair configurations — though a comfortable powder room needs 25 to 30 square feet.
The key requirements: access to a water supply line and drain (most feasible when the space is adjacent to an existing bathroom, kitchen, or utility area on the same floor); sufficient ceiling height at the toilet position (minimum 80 inches for comfort); and adequate ventilation (a small exhaust fan vented to the exterior).
Smart tip: A wall-mounted toilet (concealed cistern in the wall) saves significant floor space compared to a standard floor-standing toilet and suits the limited footprint of an under-stair powder room. The concealed cistern also allows the toilet to be positioned at a custom height — useful when ceiling height at the toilet position is limited.
Mistake to avoid: Attempting an under-stair powder room without professional plumbing assessment first. The feasibility depends entirely on the proximity of existing drain lines and the floor slope required for drainage. A plumber’s assessment before committing to the design prevents costly surprises during construction.
16. Build a Library or Bookcase
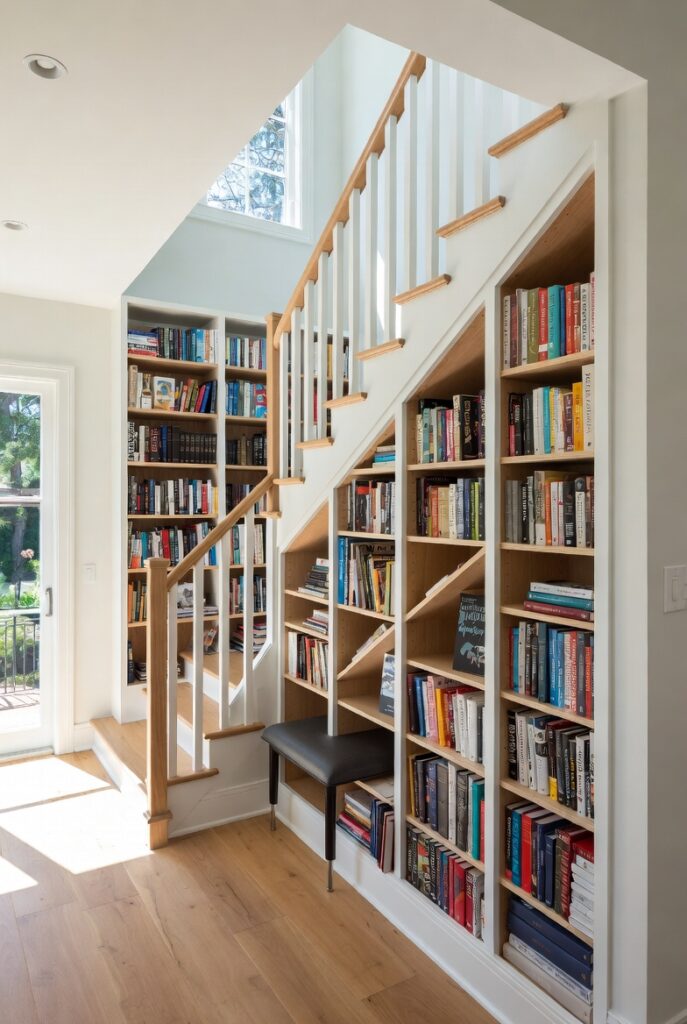
Best for: Book collectors, open-plan living rooms where the under-stair space is visible — a library feature wall adds significant visual character
A floor-to-ceiling bookcase built into the under-stair space — with the tallest section of shelving at the open end where the ceiling is highest and progressively lower shelves toward the narrow end — creates a library feature that has significant visual presence and turns the awkward triangular space into the room’s most attractive element.
The bookcase can be entirely open (books visible from the room), partially closed (lower shelves with doors for storage, upper shelves open for books and display), or designed with a combination of floating shelves and integrated cabinetry.
Smart tip: Organize books on an under-stair bookcase by color rather than alphabetically or by genre. A color-organized bookcase creates a visually striking gradient or pattern that reads as a design feature from across the room — particularly effective when the bookcase is visible from multiple viewing positions in an open-plan space.
Mistake to avoid: Loading an under-stair bookcase with the full weight of a large book collection before verifying that the shelf construction and wall fixings are adequate for the load. Books are significantly heavier than most other items stored on shelves — a running meter of standard books weighs approximately 15 to 20 kilograms. Ensure shelves are supported at intervals of no more than 60 to 80 cm to prevent sagging under this load.
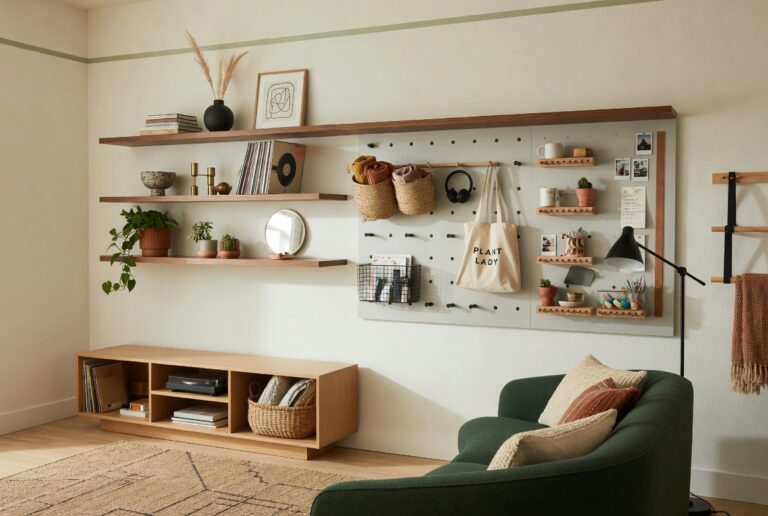
17. Use Cube Shelving Units
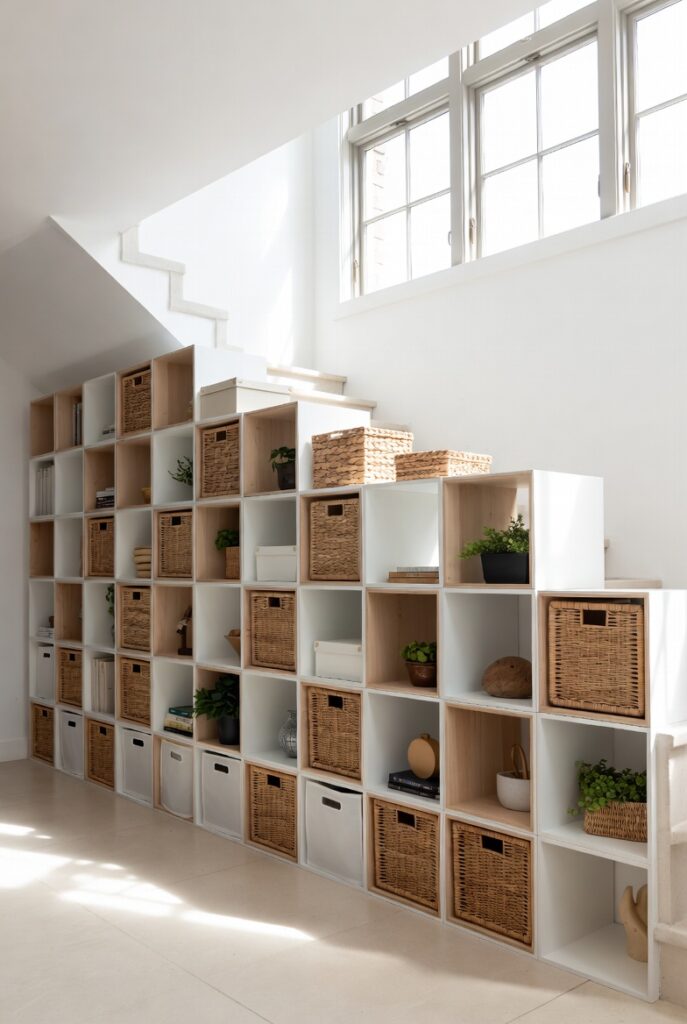
Best for: Anyone wanting a non-permanent, relatively affordable under-stair storage solution without custom construction
Modular cube shelving units — freestanding grid systems available from most furniture retailers — can be configured to fit many under-stair spaces without custom carpentry. The modular units stack and combine in configurations that can approximate the triangular shape of the under-stair area, and they can be disassembled and reconfigured if needs change.
Cube shelving works best with baskets or bins in each cube — providing organized storage within each square while maintaining a consistent visual front from the room. The combination of cube structure and basket storage creates a storage system that looks neat regardless of what’s stored inside.
Smart tip: Use baskets of identical style and material throughout a cube shelving installation — the visual consistency of matching baskets makes a varied collection of stored items look organized even without labeling. Mixed basket styles and materials create a more chaotic visual impression.
Mistake to avoid: Using cube shelving designed for flat walls in a sharply angled under-stair space without modification. Standard cube units are rectangular — fitting them into a triangular space results in significant wasted volume at the top of the unit where the stair angle cuts across the cube height. Either accept this limitation or build a custom platform/step arrangement to better match the available space.
18. Add Hooks and a Coat Closet

Best for: Homes without adequate coat storage near the entrance — the simplest and most accessible under-stair storage improvement
A coat closet under the stairs — hooks on the back wall at two heights (adult and children), a shelf above for hats and bags, and floor space or a shoe rack below — provides the entry storage that eliminates coats draped over chairs and bags left on the floor. This is the simplest under-stair storage solution and the one requiring the least construction.
For an existing enclosed under-stair space with a door: mount a coat rail or individual hooks on the back wall, add a shelf above for hats and miscellaneous items, and organize the floor with a shoe rack or baskets. No construction required — just hardware installation.
Smart tip: Install hooks at two heights in a family coat closet — adult height (approximately 60 to 65 inches from floor) and children’s height (approximately 36 to 40 inches). Children who can reach their own hooks are more likely to use them consistently. The two-height system also doubles the usable hook capacity within the same wall space.
Mistake to avoid: Installing too few hooks for the household’s actual coat and bag volume. Estimate the maximum number of coats and bags that will need to hang simultaneously (all household members plus frequent guests) and install that number of hooks. A coat closet with inadequate hooks becomes a pile rather than organized storage within weeks.
19. Create a Gift Wrapping Station
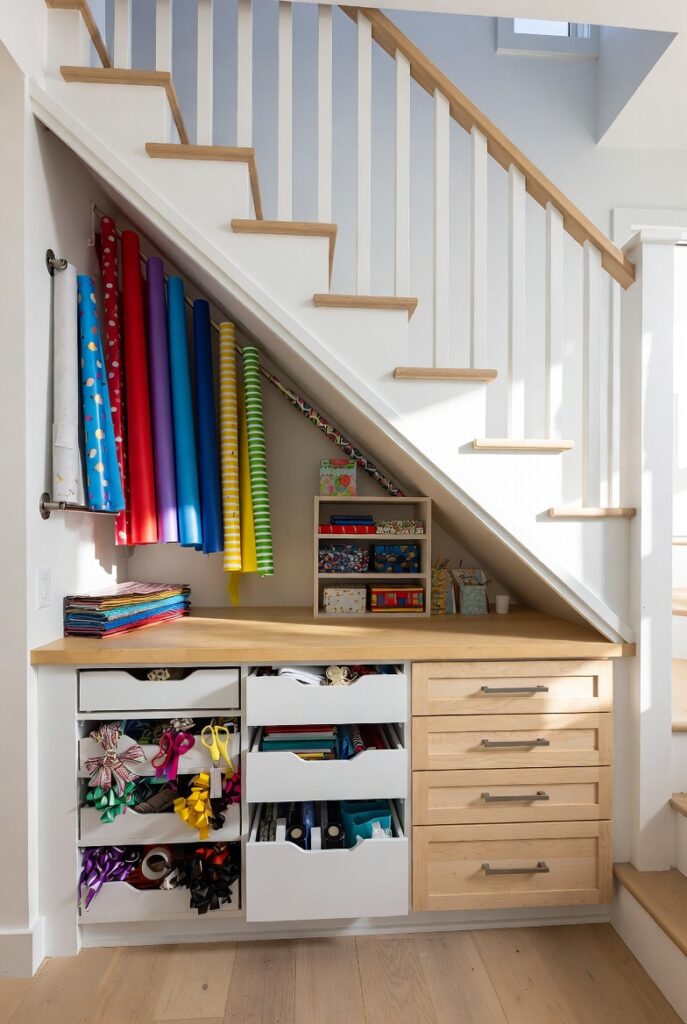
Best for: Households that wrap many gifts throughout the year — a dedicated space for wrapping supplies eliminates the scattered-across-the-table experience
A gift wrapping station under the stairs — with a flat surface for wrapping, a hanging system for rolls of wrapping paper, drawers or containers for tape, scissors, ribbon, and gift tags, and hooks for bags and tissue paper — creates an organized system for a task that most households currently handle by spreading supplies across a dining table and then spending as long gathering them as wrapping.
Wrapping paper storage: horizontal dowels or a specialized wrapping paper organizer mounted at the narrow end of the under-stair space keeps rolls organized and accessible. A cutting surface at an appropriate height (30 to 36 inches) built along the tall end of the space provides a dedicated flat surface without using dining table space.
Smart tip: Install a small pegboard panel in the gift wrapping station for hanging scissors, tape dispensers, markers, and ribbon. Pegboard’s flexibility — hooks can be repositioned as supplies change — suits a storage area where the organization evolves seasonally.
Mistake to avoid: Storing gift items (unwrapped presents) in the same space as gift wrapping supplies in a household with curious children. Gift items visible in the same space where wrapping happens eliminate the element of surprise that gift-giving depends on. Store unwrapped gifts in a separate, lockable location.
20. Plan the Space Before You Build
Best for: Anyone about to invest in under-stair storage — planning prevents expensive mistakes
The most common under-stair storage mistake is beginning construction before fully understanding the space’s dimensions, the existing structure within it (electrical, plumbing, structural elements that can’t be moved), and the specific storage needs the solution must address. Thorough planning before any work begins prevents costly changes mid-project.
The planning process: measure the space fully (height at multiple points along the slope, depth from front to back, width); identify any electrical panels, pipes, or structural elements that must remain accessible; list the specific categories of items to be stored and their approximate dimensions; and sketch two or three layout options before choosing one.
Smart tip: Budget for custom solutions rather than assuming off-the-shelf products will fit. The triangular geometry of under-stair spaces means that virtually no standard furniture or storage product fits without modification. Custom cabinetry or carpentry — built to the exact dimensions of the space — uses significantly more of the available volume than modified standard products and looks more finished.
Mistake to avoid: Prioritizing appearance over access. An under-stair storage solution that looks beautiful but requires significant effort to access will be used inconsistently and eventually ignored. Prioritize ease of access — pull-out drawers, full-extension slides, accessible shelving — and let the appearance follow from the functional design rather than compromising function for aesthetics.
Before You Start
- Identify what’s inside the space first. Before any construction, open the under-stair space and identify any electrical panels, junction boxes, water pipes, or structural elements. These must remain accessible and cannot be blocked. Discovering them mid-construction is expensive.
- Measure three times. Under-stair spaces are rarely perfectly rectangular. Measure the height at multiple points along the slope, the depth, and the width. Create a scaled drawing before ordering any materials or cabinetry.
- Decide between DIY and professional. Simple shelving and hook installations are reasonable DIY projects. Custom drawer systems, electrical work, plumbing (for a powder room), and structural modifications require professional trades.
- Consider ventilation and lighting from the start. Both are dramatically cheaper to install during construction than to retrofit afterward. Plan LED lighting and at least one ventilation gap before building anything.
Conclusion
The under-stair space rewards the investment of planning and appropriate construction with storage that makes a meaningful difference to the daily organization of a home. The key is matching the solution to the specific household’s storage needs rather than building what’s most common or most visually impressive. A well-designed pull-out pantry system for a household that struggles with kitchen storage does more practical good than an elaborate wine room for a household that drinks little wine. Start with the problem you actually need to solve, design around the specific geometry of your space, and build with access as the primary priority.