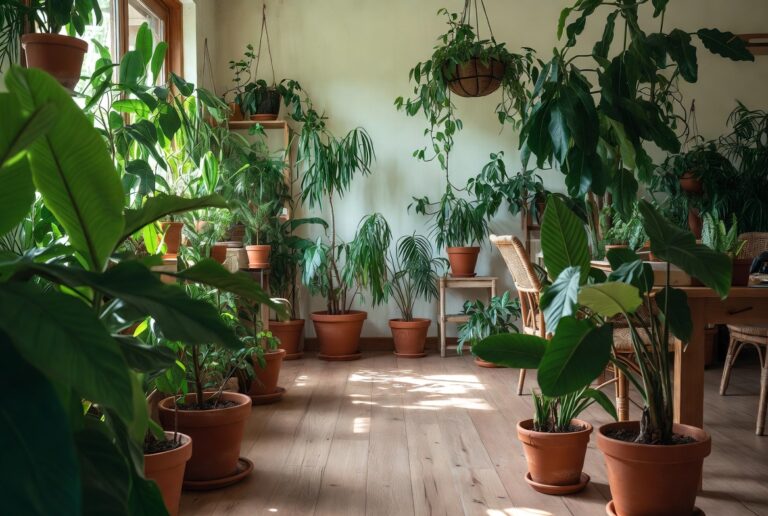
Growing herbs indoors is one of the most rewarding things you can do for your kitchen. You get fresh flavors within arm’s reach, a touch of living green in your home, and the satisfaction of growing something useful every single day. The best part? You don’t need a garden, a balcony, or even much sunlight to make it work.
Whether you have a bright south-facing window or a dim apartment corner, there’s a setup here for you. These 20 ideas cover every style, every budget, and every skill level — from a simple mason jar on the windowsill to a fully lit hydroponic system.
1. Start with a Sunny Windowsill
Best for: Beginners with a south or west-facing window — the simplest and most effective starting point
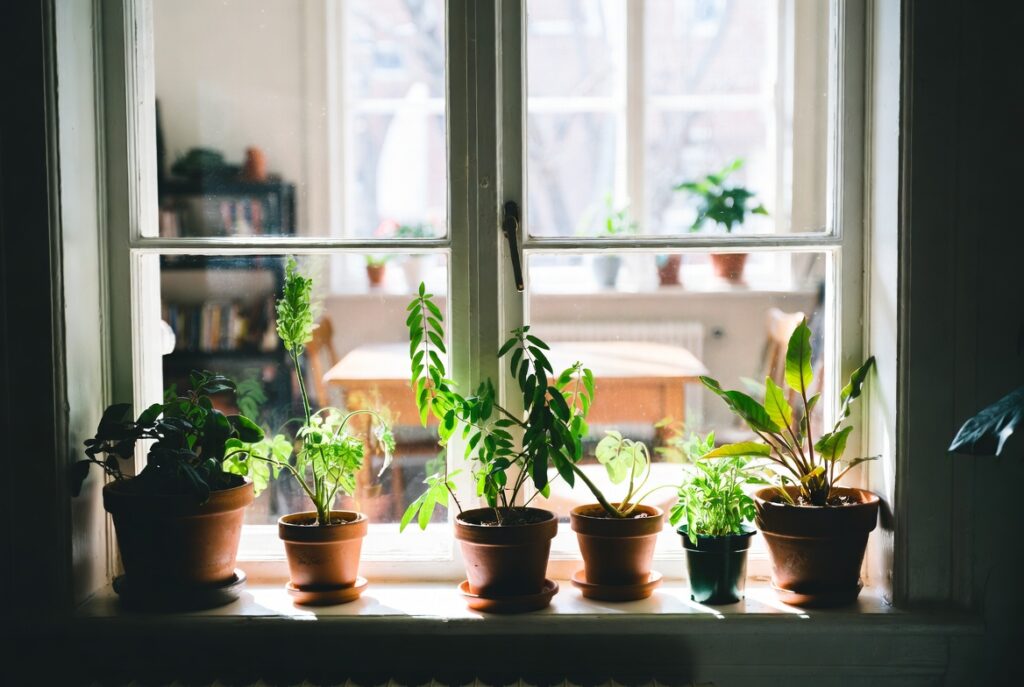
A sunny windowsill is the most natural home for indoor herbs. Most culinary herbs need 6 to 8 hours of bright light daily, and a south-facing window delivers exactly that without any equipment.
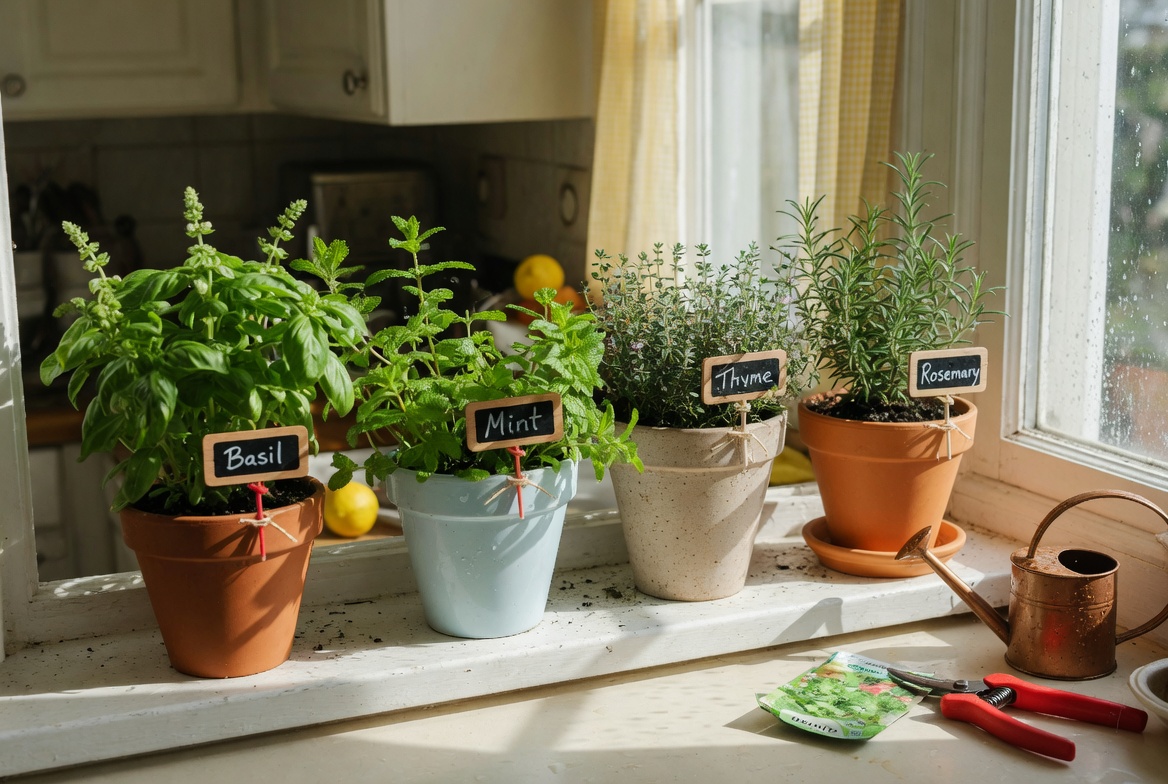
Line up three to five small pots of your most-used herbs — basil, parsley, chives, thyme — and you have a functional kitchen garden that costs almost nothing to set up.
The key is consistency. Herbs on a windowsill need to be rotated every few days so all sides receive equal light. Without rotation, the stems lean toward the glass and become lopsided and weak.
Smart tip: Place a shallow tray under all the pots to catch drainage water. Empty the tray after 30 minutes so roots don’t sit in standing water.
Mistake to avoid: Placing herbs directly against cold glass in winter. The temperature drop at night can damage cold-sensitive herbs like basil. Move pots a few inches back from the glass on cold nights.
2. Build a Vertical Wall Herb Garden
Best for: Small kitchens with limited counter space — vertical space is almost always underused
A vertical herb garden mounts directly on the wall, turning a blank surface into a living productive feature. Wall-mounted pocket planters, horizontal rails with hanging pots, or a grid panel with attached containers all work well.
This approach works especially well on the wall beside a kitchen counter, where herbs are close to where you cook and easy to snip while preparing a meal.
Smart tip: Use a wall near a window rather than an interior wall with no natural light. If the only available wall gets no natural light, supplement with a small LED grow light mounted just above the planter.
Mistake to avoid: Overloading the wall system with too many herb varieties at once. Start with three to four varieties only. A small thriving garden is far more rewarding than an overcrowded one that fails.
3. Use Mason Jars as Herb Pots
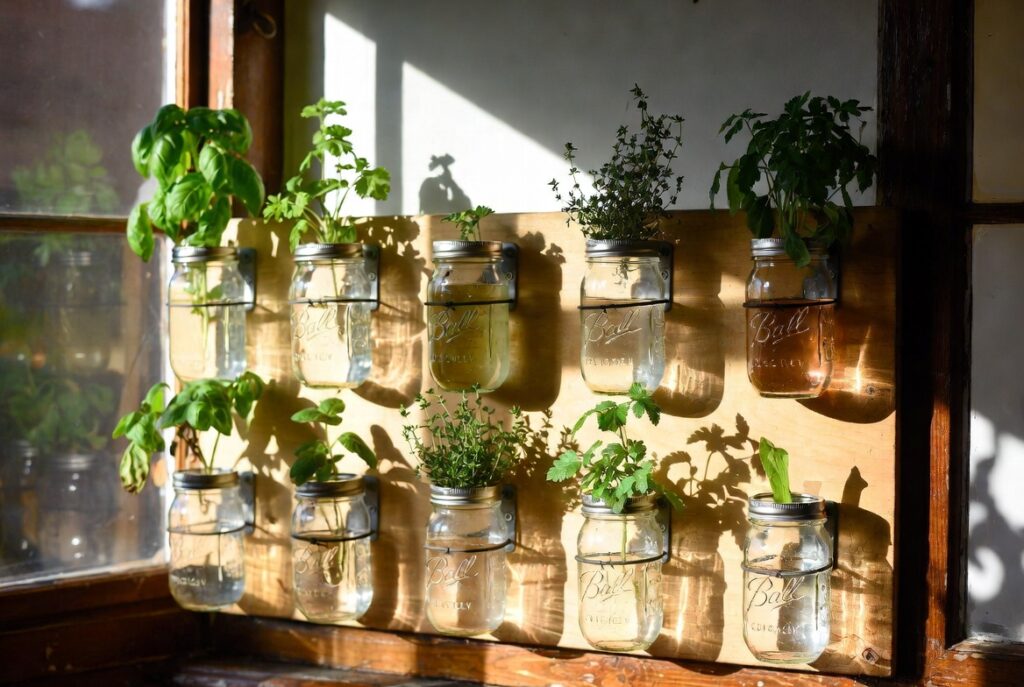
Best for: Anyone who wants a charming low-cost setup that looks as good as it functions
Mason jars make genuinely attractive herb containers. Their clear glass shows the soil and roots, the wide mouth allows easy watering, and they suit both rustic and modern kitchen aesthetics equally well.
The drainage issue is the one challenge. Add a layer of small pebbles or gravel at the base before adding soil — this creates a reservoir below the root zone and prevents root rot.
Smart tip: Use wide-mouth quart jars rather than standard mouth jars. The wider opening makes planting, watering, and harvesting significantly easier.
Mistake to avoid: Watering mason jar herbs as frequently as regular potted herbs. Without drainage holes, water accumulates faster. Water only when the top inch of soil is dry to the touch.
4. Hang Herbs Above the Kitchen Sink
Best for: Kitchens with a window above the sink — ideal light with the most convenient harvest location
Hanging herbs directly above the kitchen sink puts them exactly where they’re most useful — at the moment of washing and preparing food. A simple curtain rod mounted above the sink window, with hooks holding small hanging pots, creates a functional and beautiful installation.
The sink position also provides humidity from washing and cooking steam, which suits moisture-loving herbs like basil, parsley, and cilantro particularly well.
Smart tip: Use lightweight pots for the hanging installation. Terracotta is beautiful but heavy when wet. Lightweight plastic pots inside woven covers provide the aesthetic without stressing the mounting hardware.
Mistake to avoid: Letting hanging pots drip without a drip tray attached. Choose hanging pots with integrated drip trays to prevent water staining on the windowsill or counter below.
5. Try a Countertop Herb Garden Kit
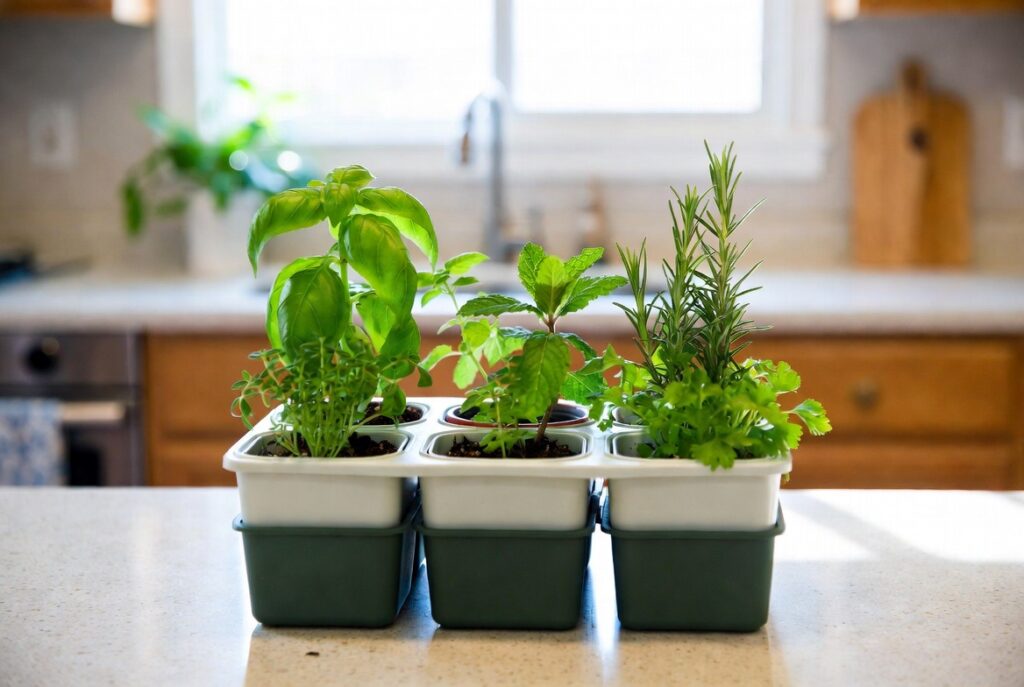
Best for: Beginners who want a completely foolproof setup with everything included
Countertop herb garden kits — typically a compact tray with pre-filled grow pods, a water reservoir, and built-in LED lighting — remove every barrier to starting an indoor herb garden. Brands like AeroGarden and Click & Grow have refined this format significantly.
The light, nutrients, and planting medium are all included. You add water and seeds, and the system does the rest. Herbs grow faster in these systems than in soil because the roots have constant access to nutrients and oxygen.
Smart tip: Start with the herb pod variety pack that most kits include rather than buying individual pods. This lets you discover which herbs you actually use most before committing to a single variety for future refills.
Mistake to avoid: Placing the kit in a spot where the LED light bothers you at night. These systems run lights on a timer for 16 hours daily — a light that’s fine during the day can be surprisingly disruptive on a kitchen counter near a dining area in the evening.
6. Grow Herbs Under LED Grow Lights

Best for: Apartments and homes with no suitable natural light — grow lights make any space viable
A full-spectrum LED grow light mounted above a shelf or counter gives herbs everything natural sunlight provides, regardless of the room’s window situation. Modern grow lights are energy-efficient, low-heat, and available in slim panel formats that mount flush to the underside of a cabinet.
The light spectrum matters. Look for lights labeled “full spectrum” or with a color temperature between 4000K and 6500K — this range covers the wavelengths herbs need for both vegetative growth and healthy flavor development.
Smart tip: Set the grow light on a timer for 14 to 16 hours daily. Herbs need a dark period just like they would get outdoors — continuous lighting actually stresses plants rather than benefiting them.
Mistake to avoid: Placing the grow light too far above the herbs. Most LED grow lights need to be 6 to 12 inches above the plant canopy to be effective. Too far away and the herbs grow tall and spindly reaching for the light — a condition called etiolation that weakens the plant significantly.
7. Repurpose a Wooden Ladder

Best for: Anyone who wants a rustic statement piece that doubles as functional herb storage
A vintage wooden ladder leaned against a kitchen wall, with herb pots placed on each rung, creates one of the most characterful indoor herb displays available. The varying heights of the rungs allow you to arrange herbs by size — taller plants on lower rungs, compact herbs at the top — creating a visually layered composition.
The ladder approach suits farmhouse, cottage, and bohemian kitchen aesthetics particularly well. A weathered wooden ladder with terracotta pots and trailing herbs looks genuinely designed rather than improvised.
Smart tip: Line each rung with a thin rubber mat or cork sheet before placing pots. This prevents the pots from sliding and protects the ladder’s surface from water damage over time.
Mistake to avoid: Using a ladder that’s structurally unstable. The combined weight of multiple wet herb pots is significant. Test the ladder’s stability thoroughly before loading it with plants, and consider securing it to the wall with a single hook at the top for safety.
8. Create a Magnetic Fridge Herb Garden
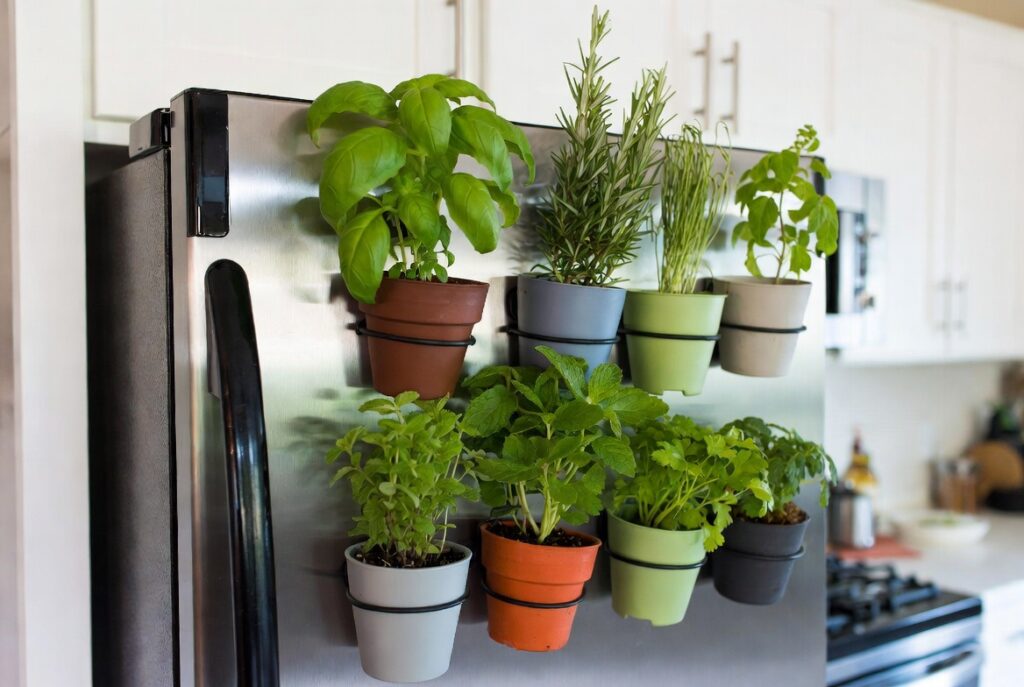
Best for: Very small kitchens where every surface is occupied — the fridge side is almost always empty
Magnetic herb planters — small containers with magnetic backs that attach directly to the side of a refrigerator — use space that’s completely wasted in most kitchens. A row of three or four magnetic herb pots on the fridge side closest to the cooking area puts fresh herbs within arm’s reach without occupying any counter or wall space.
This works best for compact herbs — chives, thyme, oregano, and small basil plants — that don’t require deep root space or heavy watering.
Smart tip: Position the fridge herb garden on the side closest to natural light rather than against a wall. Even a few hours of indirect light reaching the herbs daily will significantly outperform a position in shadow.
Mistake to avoid: Overwatering magnetic planters. The small volume of soil in a magnetic planter dries out at a different rate than you expect — sometimes faster, sometimes slower depending on the kitchen temperature. Check the soil with your finger before watering rather than watering on a fixed schedule.
9. Plant a Kitchen Island Herb Centerpiece
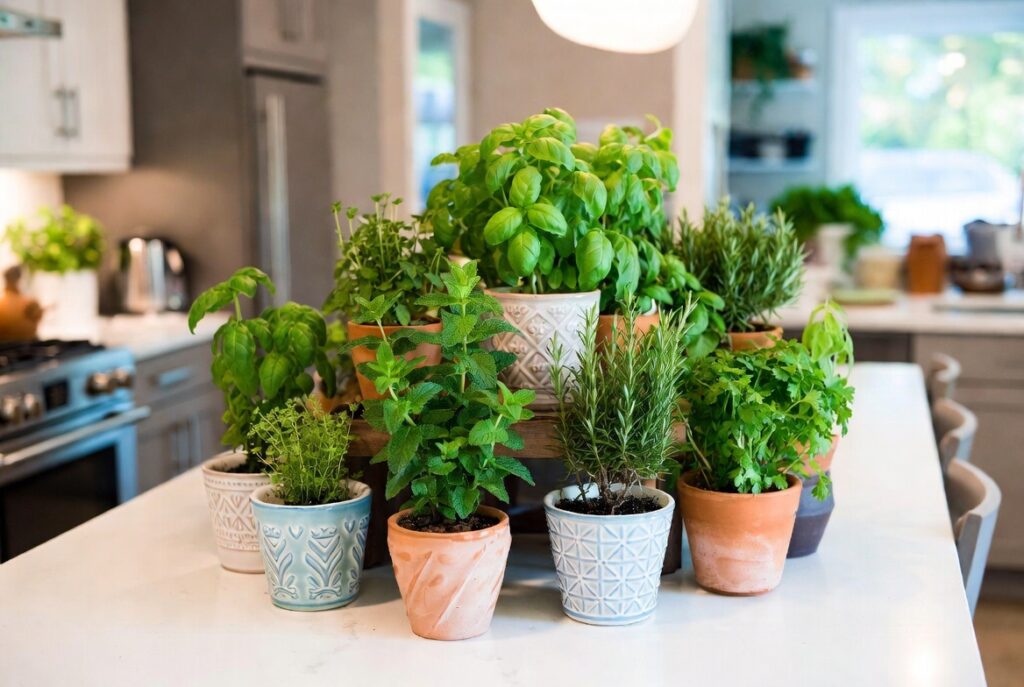
Best for: Kitchens with an island that has adequate natural light — a functional and beautiful focal point
A large ceramic pot or wooden planter placed at the center of a kitchen island, filled with a mix of herbs, creates a centerpiece that’s both decorative and immediately useful. Unlike a bowl of fruit or a vase of flowers, the herb centerpiece actively improves the cooking that happens around it.
Choose a mix of herbs with contrasting textures and heights — tall rosemary at the center, bushy basil and parsley at mid-height, and trailing thyme at the edges — for the most visually dynamic composition.
Smart tip: Choose a pot that complements the kitchen’s existing color palette rather than contrasting with it. A centerpiece herb garden that visually belongs in the kitchen reads as designed. One that doesn’t match reads as an afterthought.
Mistake to avoid: Placing the herb centerpiece on an island that’s too far from a window. Kitchen islands in the center of the room often receive significantly less natural light than they appear to. Monitor the herbs carefully in the first two weeks — if they begin to lean toward the nearest window, the light is insufficient and supplemental lighting is needed.
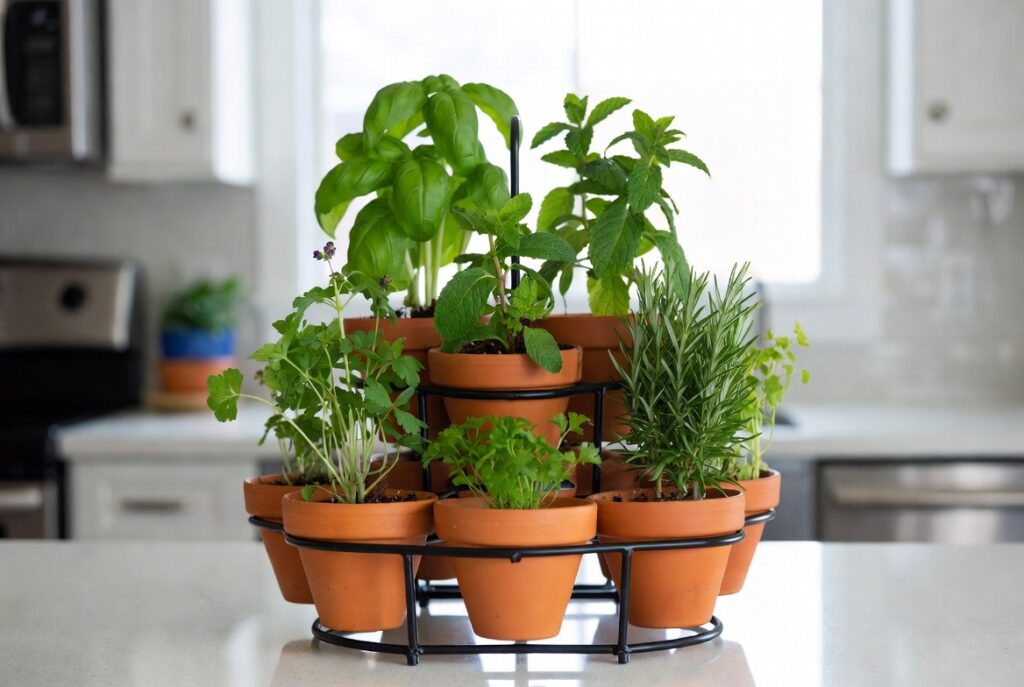
10. Use a Tiered Plant Stand

Best for: Anyone wanting to grow a larger variety of herbs in an organized, space-efficient way
A tiered plant stand — a freestanding structure with three to five shelves at increasing heights — allows you to grow eight to fifteen herb pots in the footprint of a single large pot. Each tier creates its own microclimate of slightly different light and air circulation, which suits a diverse herb collection well.
Position the tiered stand beside the brightest window in the kitchen and arrange herbs by their light requirements — most demanding at the top where light is strongest, more tolerant varieties on the lower, shadier tiers.
Smart tip: Choose a tiered stand with a drip tray on each level. Herb watering produces runoff, and a multi-level stand without drip trays creates a cascading water problem where the top shelf drips onto the shelf below. Built-in trays on each level solve this completely.
Mistake to avoid: Crowding pots so closely together that air can’t circulate between them. Poor air circulation encourages fungal disease, particularly on herbs like basil that are susceptible to downy mildew. Leave at least 2 to 3 inches of space between each pot.
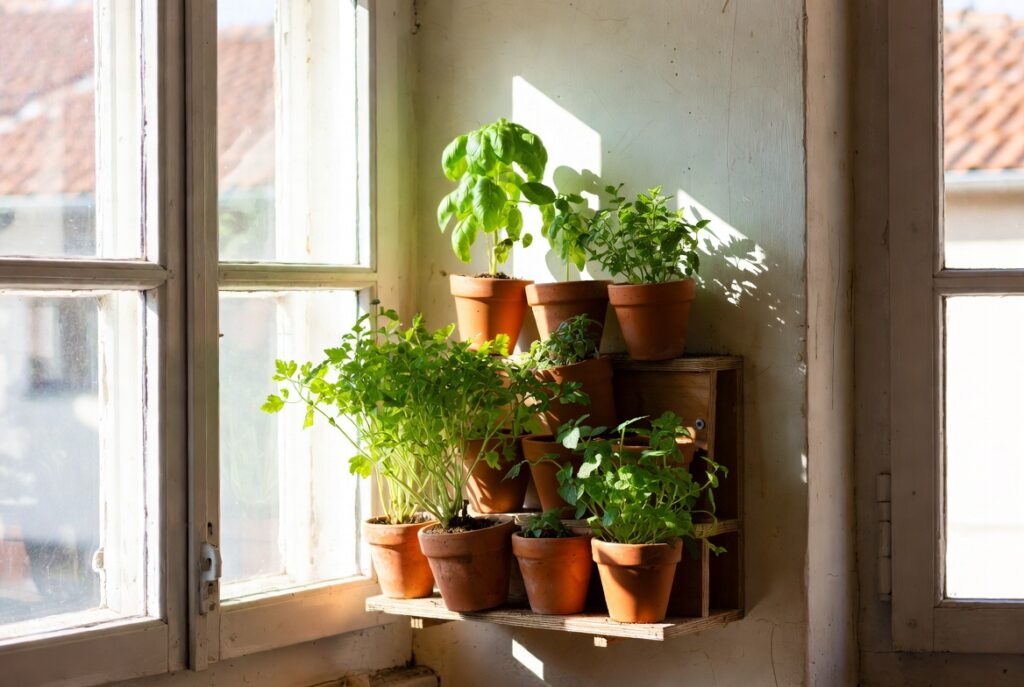
11. Grow Herbs in Terracotta Pots
Best for: Mediterranean herbs like rosemary, thyme, sage, and oregano — terracotta suits their preferred conditions perfectly
Terracotta pots are the traditional choice for herb growing for good reason. The porous clay material allows air and moisture to move through the pot walls, creating better root aeration and preventing the waterlogging that kills more indoor herbs than any other cause. The material also wicks excess moisture away from roots, which Mediterranean herbs — evolved in dry, rocky soil — strongly prefer.
A grouping of terracotta pots in graduated sizes on a windowsill creates a warm, organic aesthetic that suits herb gardens particularly well.
Smart tip: Soak new terracotta pots in water for an hour before use. Dry terracotta absorbs moisture rapidly from the soil — a new unsoaked pot can pull moisture away from freshly planted roots before they’ve had a chance to establish, stressing the plant in its most vulnerable period.
Mistake to avoid: Using terracotta pots for moisture-loving herbs like basil and cilantro without more frequent watering. The same porosity that benefits rosemary and thyme means moisture-loving herbs dry out faster in terracotta than in glazed or plastic pots. Check these herbs daily in warm weather.
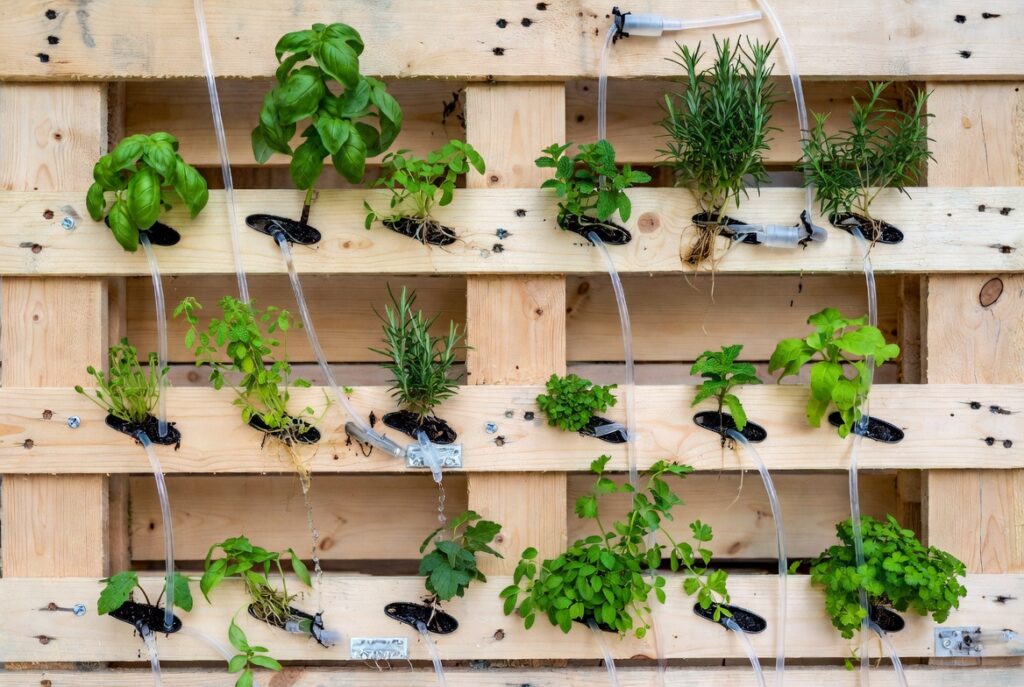
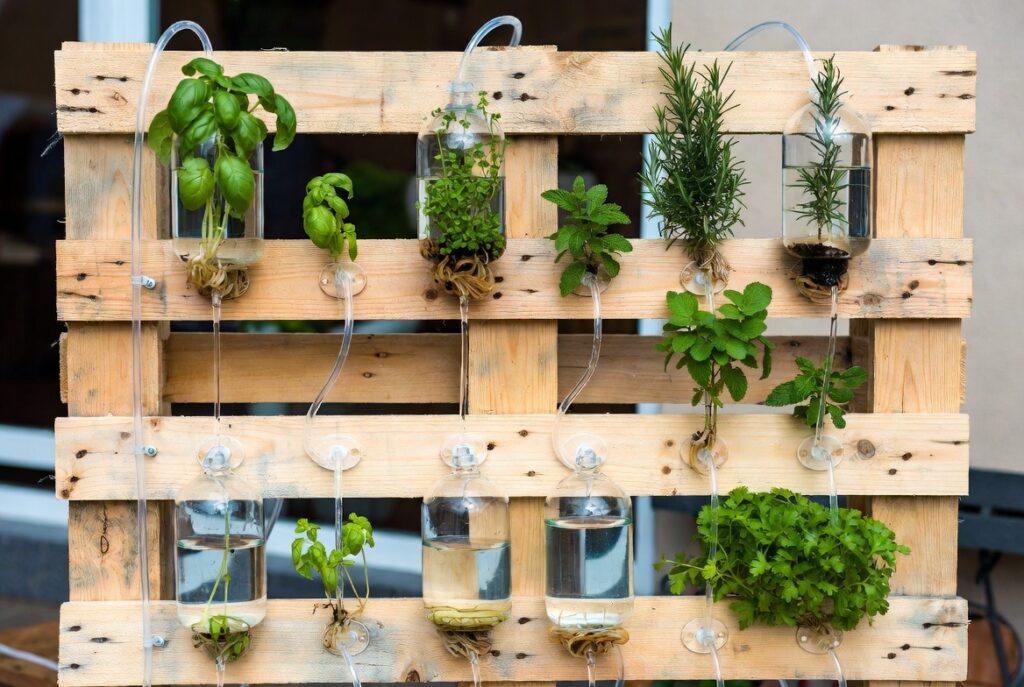
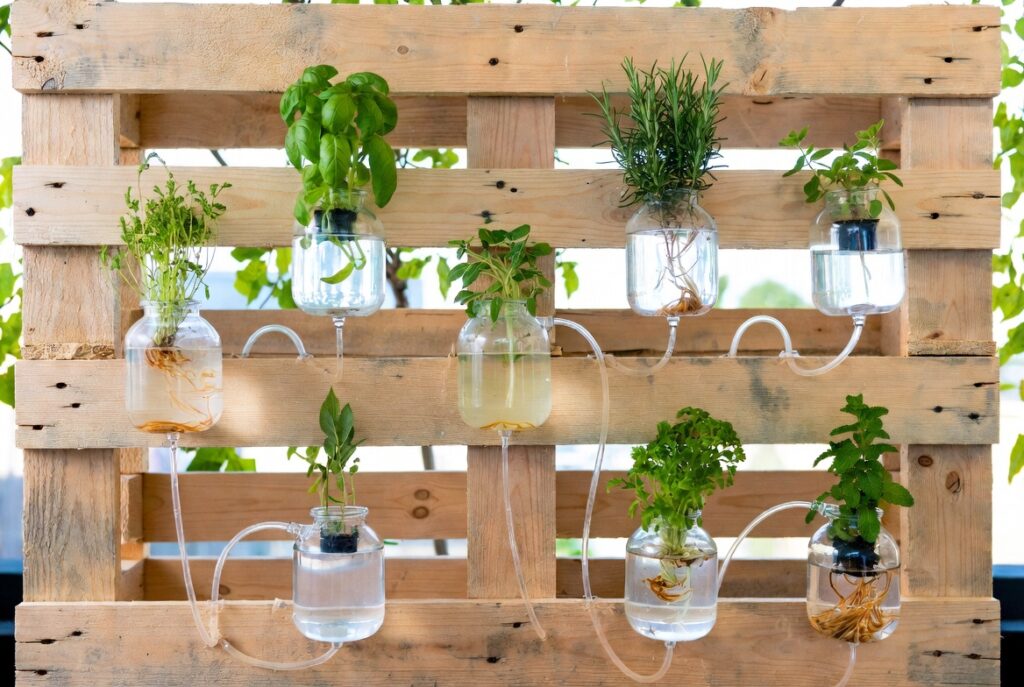
12. Build a Pallet Wall Herb Garden
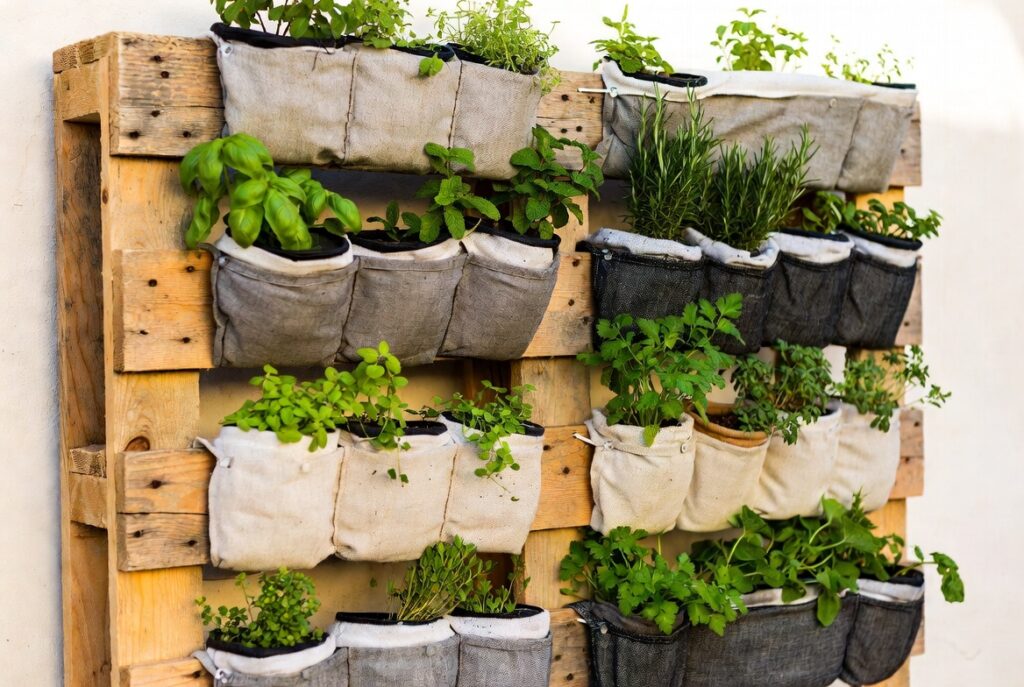
Best for: Anyone with outdoor DIY skills who wants a large-scale indoor herb wall at low cost
A wooden pallet mounted on the wall, with small pots slotted between the slats or attached to the front face, creates a substantial herb garden that covers a significant wall area at a fraction of the cost of purpose-built systems. The rustic timber aesthetic suits farmhouse and industrial kitchens particularly well.
Sand and seal the pallet before mounting it indoors — raw pallet wood can splinter and may have absorbed chemicals during its working life. A coat of food-safe sealant makes the installation safe for a food-growing context.
Smart tip: Line the back of each planting cavity with landscape fabric before adding soil. This prevents soil from falling through the slats while still allowing drainage. Without lining, the soil compacts and falls out with every watering.
Mistake to avoid: Mounting a fully planted pallet without first checking the wall’s load capacity. A pallet with eight to twelve pots of wet soil is genuinely heavy — often 60 to 80 pounds. Ensure the mounting hardware goes into wall studs, not just drywall.
13. Try Hydroponic Herb Growing
Best for: Anyone wanting maximum yield from minimum space — hydroponics consistently outperforms soil for indoor herbs
Hydroponic herb growing — cultivating plants in a nutrient-rich water solution rather than soil — produces herbs that grow 30 to 50 percent faster than soil-grown equivalents, with larger leaves and more intense flavor. The system works because roots have constant direct access to the nutrients and oxygen they need, without the energy expenditure of searching through soil.
Countertop hydroponic systems designed specifically for herbs — like the AeroGarden Harvest or similar units — make this technology completely accessible to non-specialists.
Smart tip: Change the water reservoir completely every two weeks rather than just topping it up. Topping up allows mineral salts to accumulate in the reservoir over time, which eventually becomes toxic to the plants. A complete water change resets the nutrient balance and keeps herbs thriving.
Mistake to avoid: Starting with too many nutrient solution additives. Most hydroponic starter kits include the correct nutrient formula — adding supplements before you understand the baseline system often causes nutrient imbalances that slow growth rather than accelerating it. Start simple and adjust only if you see specific deficiency symptoms.
14. Use Glass Cloches for Delicate Herbs
Best for: Delicate herbs like basil and cilantro that struggle with dry indoor air — cloches create a humid microclimate
A glass cloche placed over a potted herb creates a miniature greenhouse around the plant, trapping humidity and warmth that cold-sensitive and moisture-loving herbs particularly benefit from. The visual effect is also genuinely beautiful — a glass dome over a lush herb plant has an almost terrarium-like quality.
Cloches work especially well in winter when central heating dries indoor air significantly. The humidity under the cloche can be 30 to 40 percent higher than the surrounding room, creating conditions that tropical herbs like basil would naturally thrive in.
Smart tip: Lift the cloche briefly each morning to allow fresh air exchange and prevent fungal disease from developing in the humid environment. Five minutes of ventilation daily maintains the humidity benefit while preventing the stagnant-air problems that cloches can cause with extended sealed use.
Mistake to avoid: Placing a closed cloche over a herb in direct strong sunlight. The glass magnifies and traps heat dramatically — in a sunny window, a cloche can create temperatures that cook the plant within hours. Use cloches in indirect light or shaded positions only.
15. Plant Mint in Its Own Container
Best for: Every indoor herb gardener — mint requires isolation and rewards the effort with extraordinary productivity
Mint is the most aggressive spreader in the herb world. Its underground runners colonize any shared container within weeks, outcompeting every adjacent herb for water, nutrients, and space. Every experienced herb grower has learned this lesson — usually by losing a carefully assembled mixed herb planter to a single mint plant.
The solution is simple and permanent: grow mint in its own dedicated container, kept separate from all other herbs. A single mint plant in a reasonably sized pot produces more fresh mint than most households can use, indefinitely.
Smart tip: Harvest mint by cutting full stems rather than picking individual leaves. Cutting stems triggers the plant to branch and produce new growth vigorously. A mint plant harvested by stem cutting every two to three weeks becomes progressively bushier and more productive — one that’s merely picked at occasionally becomes leggy and sparse.
Mistake to avoid: Growing mint in too small a pot. Mint’s root system is vigorous and quickly becomes pot-bound in a small container — the roots circle the pot, water runs straight through without being absorbed, and the plant declines rapidly. Use a pot at least 8 inches in diameter for a single mint plant.
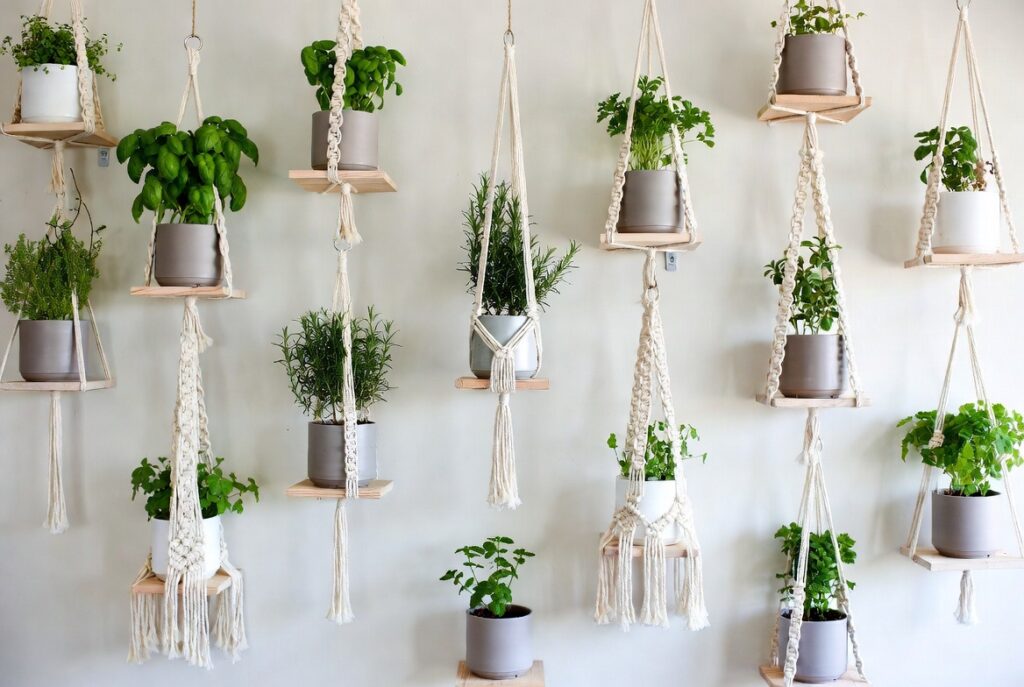
16. Create a Macrame Hanging Herb Garden
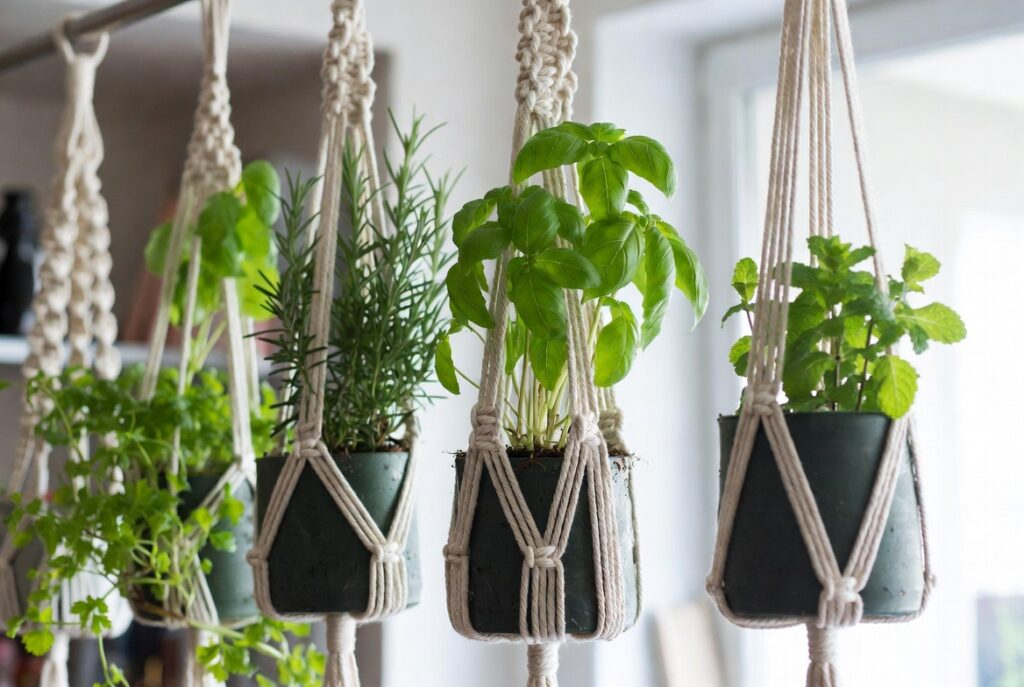
Best for: Boho, coastal, and natural aesthetic kitchens — hanging herb gardens add vertical interest without any wall mounting
Macrame herb hangers — knotted rope holders that suspend individual pots at different heights from a ceiling hook or curtain rod — create a beautiful layered installation that draws the eye upward and fills vertical space that’s otherwise empty. Each hanger holds one pot, and three to five hangers grouped together create a statement.
This approach works particularly well in kitchens with high ceilings, where the hanging herbs fill the vertical space and create a lush, abundant feel without any furniture.
Smart tip: Use pots of consistent size throughout the macrame installation for the most visually cohesive result. Mixing very different pot sizes in adjacent hangers creates a cluttered appearance. Matching white or terracotta pots in the same size, suspended at slightly different heights, is more effective.
Mistake to avoid: Hanging herb pots too high to reach comfortably for harvesting. The practical purpose of the herb garden is to provide herbs for cooking — a beautiful installation that requires a step stool to harvest from gets used rarely. Hang pots at a height where you can comfortably pinch leaves without stretching.
17. Mount Floating Shelves for Herbs
Best for: Any kitchen wall near a window — floating shelves are the most versatile and space-efficient herb display option
Floating shelves mounted on the wall beside or below a window provide stable, flat surfaces for herb pots at multiple heights. Unlike a tiered plant stand, floating shelves are fixed to the wall and take up no floor space — they’re particularly valuable in small kitchens where every square foot of floor matters.
Two or three shelves at different heights, each holding three to four herb pots, can accommodate a comprehensive kitchen herb collection in the space of a single narrow wall section.
Smart tip: Use shelves with a small lip or edge rail rather than completely flat shelves. The lip prevents pots from being accidentally knocked off the shelf during kitchen activity — a particular concern in busy kitchens where the shelf area gets traffic from cooking.
Mistake to avoid: Mounting shelves directly above the stove or cooking area. Heat and steam from cooking rise directly up and create conditions that stress most herbs — temperature fluctuations, excessive humidity during cooking, and dry heat the rest of the time. Position herb shelves to the side of the cooking zone, not above it.
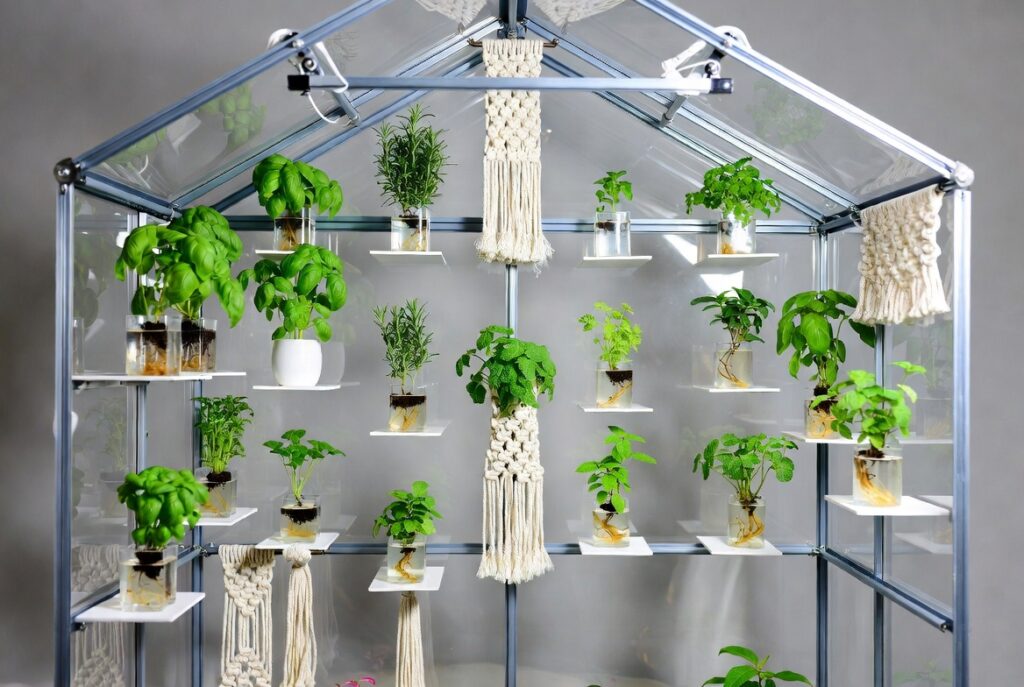
18. Grow Herbs in a Mini Greenhouse
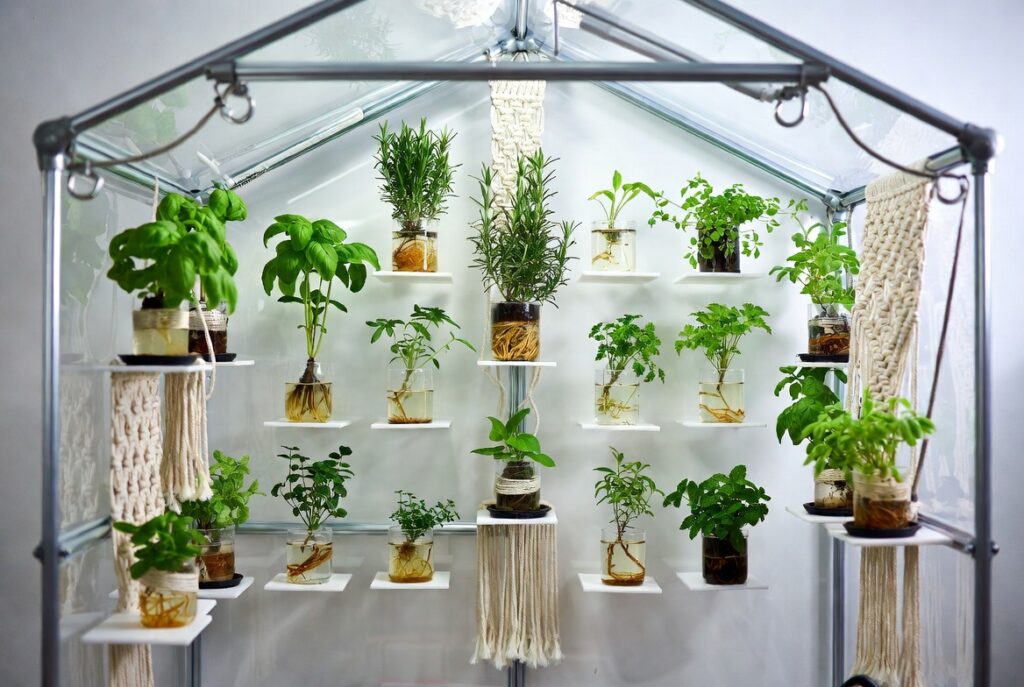
Best for: Anyone in a cold climate or dry home who struggles to maintain the right conditions for herbs
A small countertop or tabletop greenhouse — a compact structure with clear panels that create an enclosed, humidity-controlled environment — solves the most common indoor herb growing challenge in one installation. The greenhouse maintains consistent temperature and humidity regardless of the conditions in the surrounding kitchen.
Particularly valuable in winter, when central heating creates conditions that are too dry and too variable for many herbs, the mini greenhouse creates a stable microclimate that dramatically improves herb performance in challenging environments.
Smart tip: Position the mini greenhouse near the best available natural light source and supplement with a small LED grow light if needed. The enclosed environment retains light as well as heat — a well-lit mini greenhouse is significantly more productive than one in a dim location.
Mistake to avoid: Sealing the greenhouse completely without ventilation. Every greenhouse needs daily air exchange to prevent fungal disease and excessive humidity buildup. Open the door or ventilation panels for at least 30 minutes each morning — this brief airing dramatically reduces disease risk without losing the humidity and temperature benefits.
19. Best Herbs to Grow Indoors
Best for: Anyone choosing which herbs to start with — some varieties are dramatically better suited to indoor conditions than others
Not all herbs perform equally well indoors. The best indoor herbs share key characteristics: they tolerate some variation in light and temperature, they grow productively in containers, and they recover well from regular harvesting.
The most reliable indoor performers: basil (fast-growing, productive, needs warmth and good light); chives (the most forgiving indoor herb — tolerates low light and irregular watering better than almost any other); mint (vigorous and almost indestructible, keep in its own pot); parsley (slow to establish but very productive once settled); thyme (drought-tolerant, suits a sunny windowsill with minimal attention); rosemary (needs the most light of any common culinary herb — a full south-facing window or grow light is essential).
Smart tip: Start with chives if you’ve struggled with indoor herbs before. Chives tolerate the widest range of conditions — lower light, irregular watering, temperature fluctuations — and still produce usable growth consistently. Success with chives builds the confidence and understanding to manage more demanding herbs.
Mistake to avoid: Starting with cilantro as a first indoor herb. Cilantro bolts (goes to flower and seed) rapidly in warm indoor conditions, especially with any inconsistency in watering or light. It’s among the most challenging herbs to keep in continuous leaf production indoors. Master easier herbs first.
20. How to Keep Indoor Herbs Thriving
Best for: Every indoor herb gardener — these fundamentals determine long-term success more than any other factor
The difference between an indoor herb garden that thrives for years and one that slowly declines comes down to a small number of consistent practices. Understanding these fundamentals prevents the most common problems before they start.
Light is the most important factor. When herbs don’t get enough light, they produce thin, sparse, flavorless growth and become increasingly susceptible to disease. If natural light is insufficient, an LED grow light is not optional — it’s necessary. Watering correctly is the second most critical factor. More indoor herbs die from overwatering than from any other cause. The rule is consistent: water thoroughly when the top inch of soil is dry, then don’t water again until it’s dry again. Harvest regularly to keep herbs productive. Herbs that are never harvested put energy into flowering and seeding rather than leaf production. Regular harvesting — removing up to a third of the plant at a time — keeps the plant in active vegetative growth and continuously productive.
Smart tip: Feed herbs with a diluted liquid fertilizer every two to three weeks during the active growing season. Container-grown herbs exhaust the nutrients in their potting mix within a few months. Regular light feeding — at half the recommended concentration — maintains the growth and flavor that unfed herbs gradually lose.
Mistake to avoid: Keeping herbs in the same potting mix indefinitely without refreshing it. After six to twelve months, potting mix compacts, loses its structure, and becomes nutrient-depleted. Repot herbs into fresh potting mix annually — the improvement in growth and flavor is immediate and dramatic.
Before You Start
- Assess your light honestly. Walk through your kitchen at different times of day and identify where the strongest natural light falls. This location determines what’s possible without supplemental lighting.
- Start small. Three herbs you actually cook with regularly will serve you better than ten herbs grown for completeness. Start with your three most-used herbs and expand from there.
- Choose the right potting mix. General potting mix works for most herbs, but Mediterranean herbs (rosemary, thyme, oregano) prefer a mix with added perlite for better drainage.
- Have a watering plan. The most common reason indoor herb gardens fail is inconsistent watering — either too much or too little. Decide in advance how you’ll check soil moisture and water consistently.
Conclusion
An indoor herb garden succeeds when the basics are right — adequate light, appropriate watering, and regular harvesting. Get these three things right and almost any of the 20 setups described here will thrive. The style of the setup matters less than its function: herbs that are genuinely accessible, genuinely well-lit, and genuinely harvested are the herbs that keep producing and keep improving the food you cook with them.