Walls are the most underused storage space in any home. Every room has four of them, they run floor to ceiling, and in most homes they’re doing nothing more than holding up the ceiling and displaying a few pictures. The shift from floor-based storage to wall-based storage is the single most impactful organizational change available in any room — it frees floor space, reduces visual clutter, makes rooms feel larger, and puts storage exactly where you use things rather than in a separate storage room.
These 20 ideas cover every room and every approach — from simple floating shelves that take an afternoon to install to floor-to-ceiling built-in systems that transform entire rooms — with specific guidance on what makes each solution genuinely functional rather than just visually appealing.
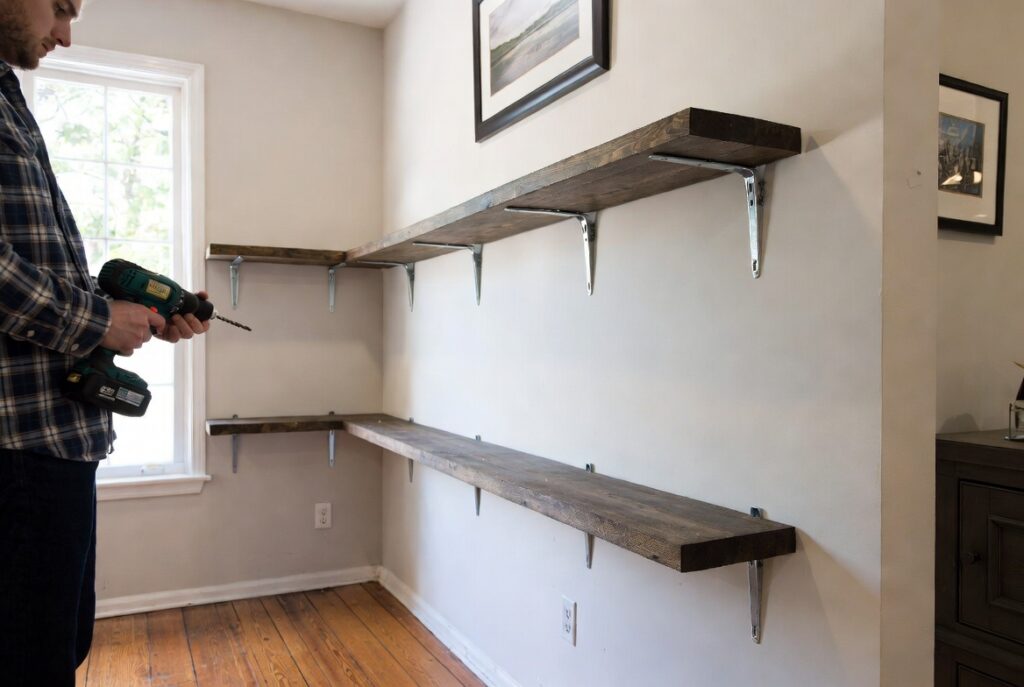
1. Install Floating Shelves
Best for: Any room — floating shelves are the most versatile, most widely applicable wall storage solution available
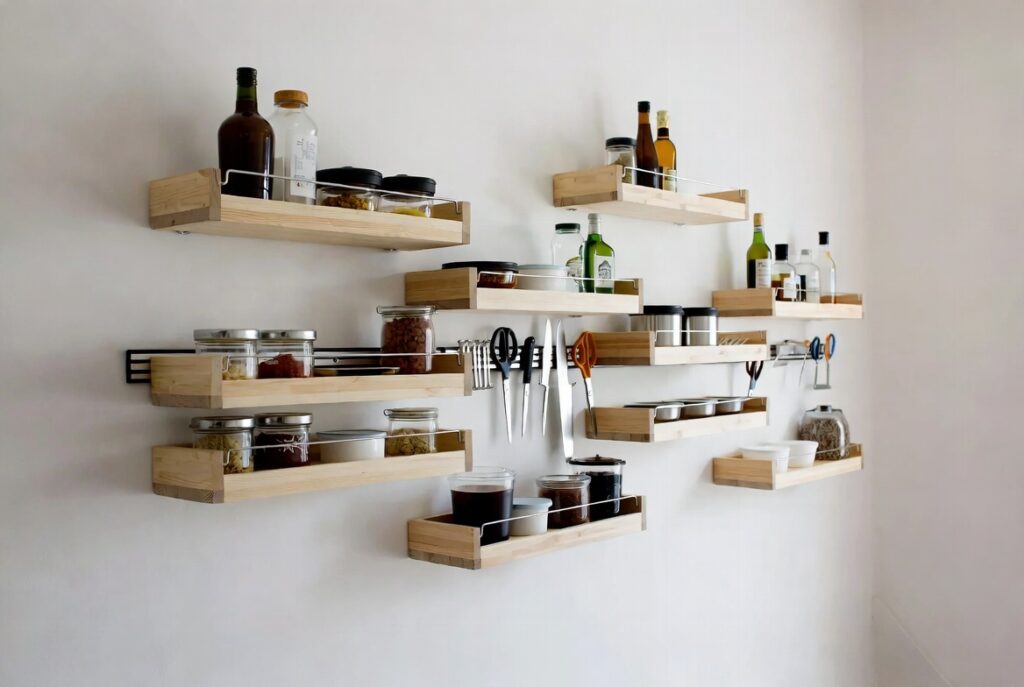
Floating shelves — shelves mounted directly to the wall without visible brackets, appearing to float — are the foundation of wall storage in most homes. They work in living rooms for books and display, in kitchens for frequently used items, in bathrooms for toiletries, in bedrooms for books and personal items, and in hallways for keys and everyday essentials.
The visual quality of floating shelves — the clean, uninterrupted line of the shelf surface without visible support hardware — suits both minimalist and more decorative interiors and adapts to almost any style through the choice of material and finish.
Smart tip: Mount floating shelves into wall studs rather than drywall anchors wherever possible. A shelf mounted into two studs can carry significantly more weight than the same shelf on drywall anchors — typically 50 to 80 pounds versus 10 to 20 pounds per anchor. Use a stud finder before drilling and position shelf brackets to align with studs for maximum load capacity.
Mistake to avoid: Installing floating shelves at uniform heights and equal spacing throughout a room. Shelves at identical heights and spacing create a mechanical, furniture-catalog appearance. Varying the heights — a lower shelf with taller items, a higher shelf with shorter items — and mixing shelf lengths creates a composed, designed appearance that suits a room better than mathematical regularity.
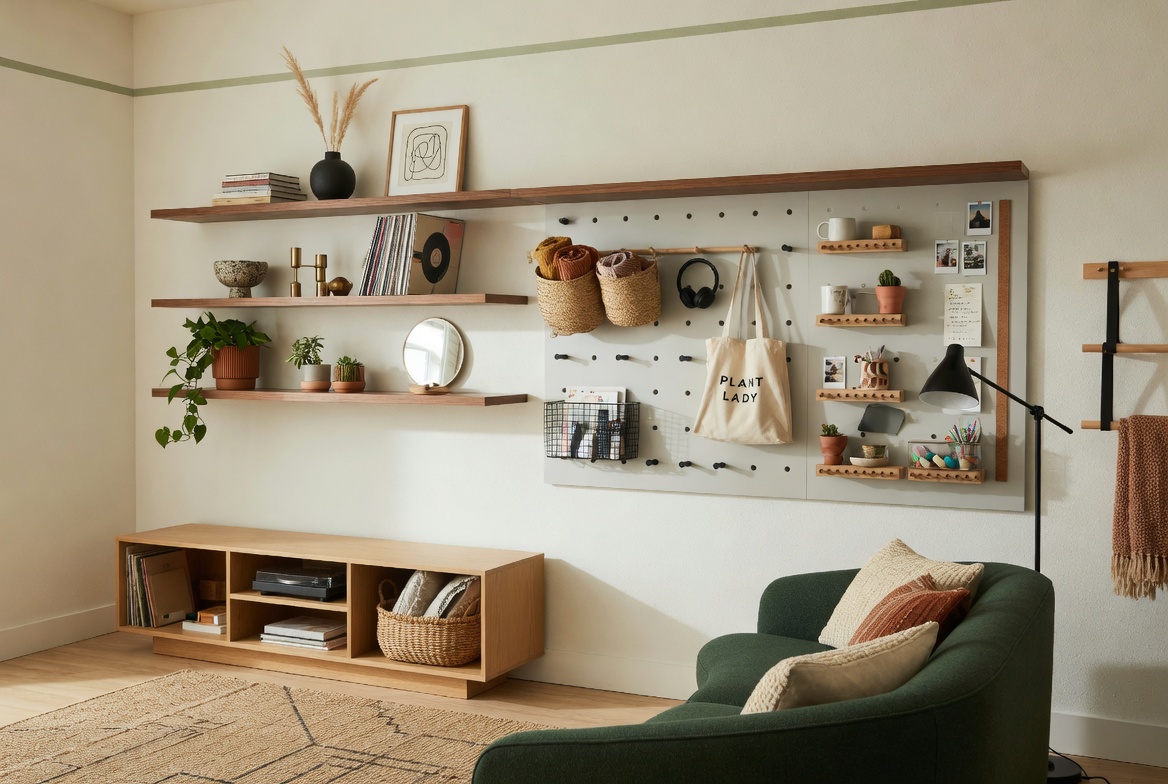
2. Use a Pegboard Wall System
Best for: Kitchens, garages, home offices, and craft rooms — any space where tools and frequently accessed items need immediate visibility and accessibility
A pegboard wall system — a perforated hardboard panel mounted on the wall with hooks, shelves, and containers attached to the holes — provides the most flexible wall storage available. Every hook, shelf, and container repositions without tools as needs change. The open visibility means everything stored is immediately locatable without opening drawers or moving other items.
Pegboards have evolved significantly beyond their utilitarian garage origins — painted in colors matching the room’s palette, with stylish hooks and wooden accessories, a kitchen pegboard has the quality of a designed feature rather than a workshop installation.
Smart tip: Mount the pegboard on standoffs (small spacers that hold the board 1 to 2 inches from the wall surface) rather than directly against the wall. The gap between the board and the wall is what allows hooks to be inserted and repositioned — a pegboard mounted flat against the wall can’t accept most hooks. The standoff gap is a functional necessity, not optional.
Mistake to avoid: Overloading a pegboard with every available item immediately after installation. The visual quality of a well-organized pegboard comes from leaving adequate space between items — hooks and containers with breathing room between them look organized. A pegboard packed to capacity with overlapping items looks cluttered regardless of how systematically it’s arranged.
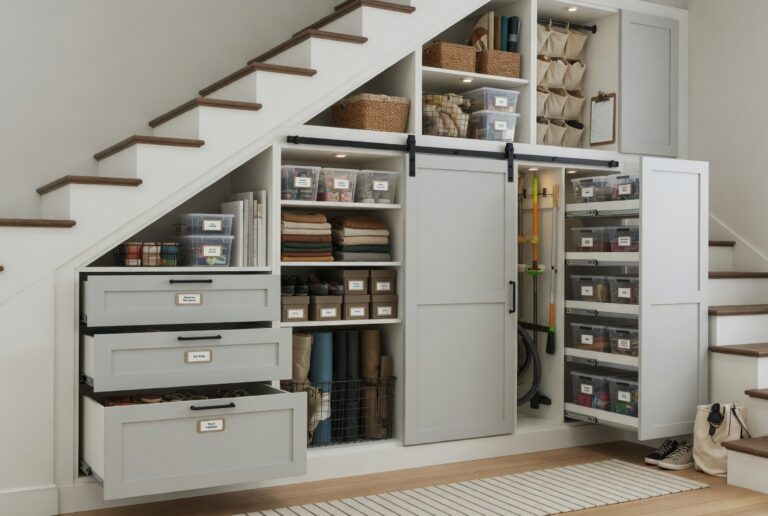
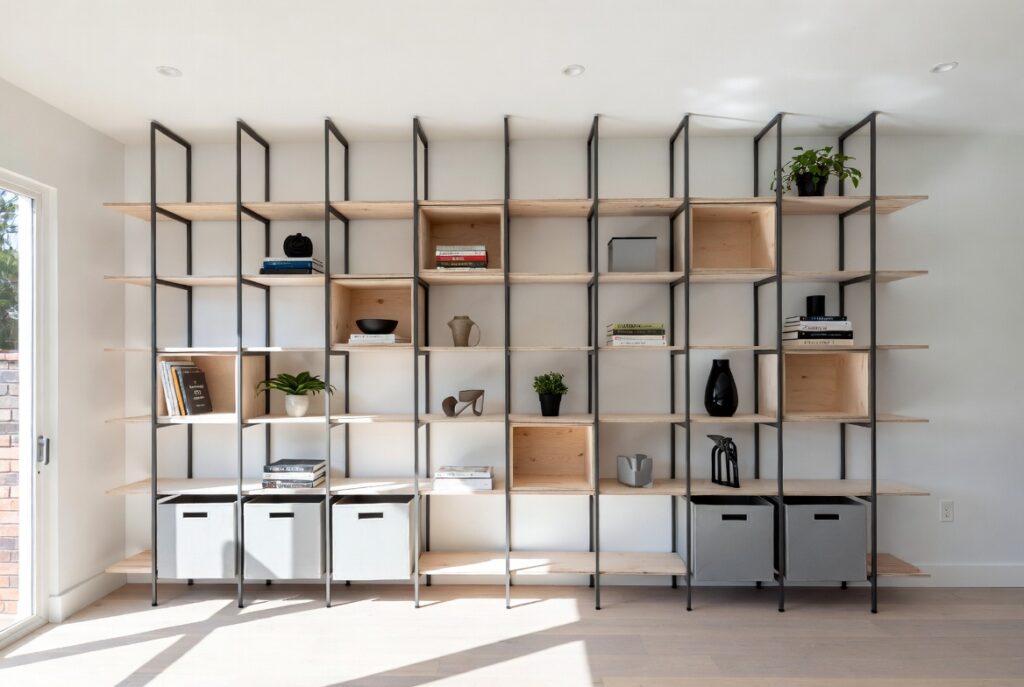
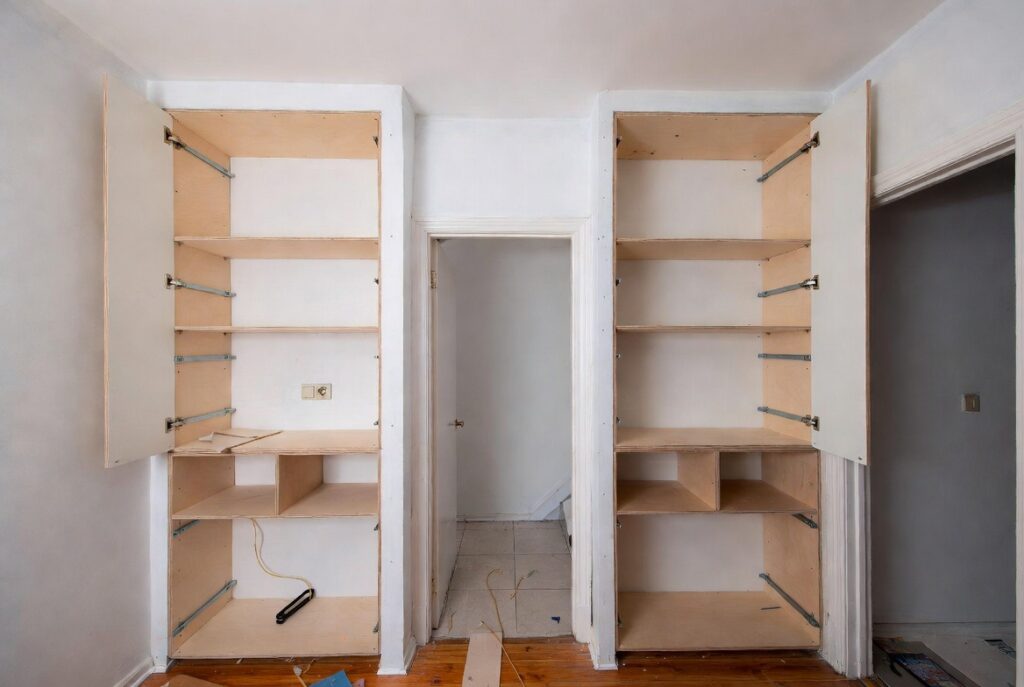
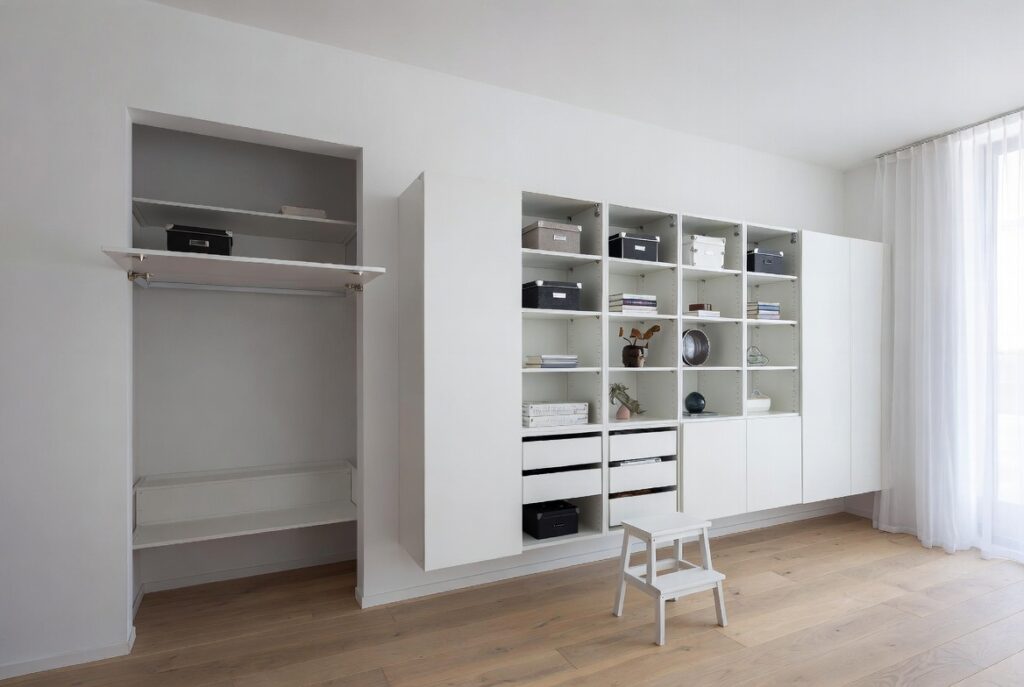
3. Build a Floor-to-Ceiling Storage Wall
Best for: Living rooms, home offices, and bedrooms where maximum storage capacity is the priority — the most efficient storage solution per square foot of wall space
A floor-to-ceiling storage wall — shelving, cabinets, or a combination of both running the full height and width of one wall — provides more storage than any other single piece of furniture or storage installation. The full-height format uses wall space that freestanding furniture ignores (the area above head height) and creates a visual statement that defines the room’s character.
The most effective floor-to-ceiling storage walls combine closed lower storage (cabinets hiding functional clutter) with open upper shelving (books, plants, and display items visible above eye level) — providing both practical concealment and visual richness in a single installation.
Smart tip: Install lighting within or above the shelving sections of a floor-to-ceiling storage wall. LED strip lights under each shelf, or spotlights directed at the shelving from above, transform a functional storage unit into a visual feature. Lit shelving looks more intentional and more sophisticated than unlit shelving in the same space.
Mistake to avoid: Building a floor-to-ceiling storage wall without a library ladder or step stool plan for the upper sections. Shelves above 7 feet are genuinely difficult to access without a ladder — items stored in unreachable locations accumulate and never get used, defeating the purpose of the storage. Either limit storage on the highest shelves to rarely-used seasonal items, or install a rolling library ladder track that allows full access to the entire wall.
4. Add Wall-Mounted Hooks and Rails
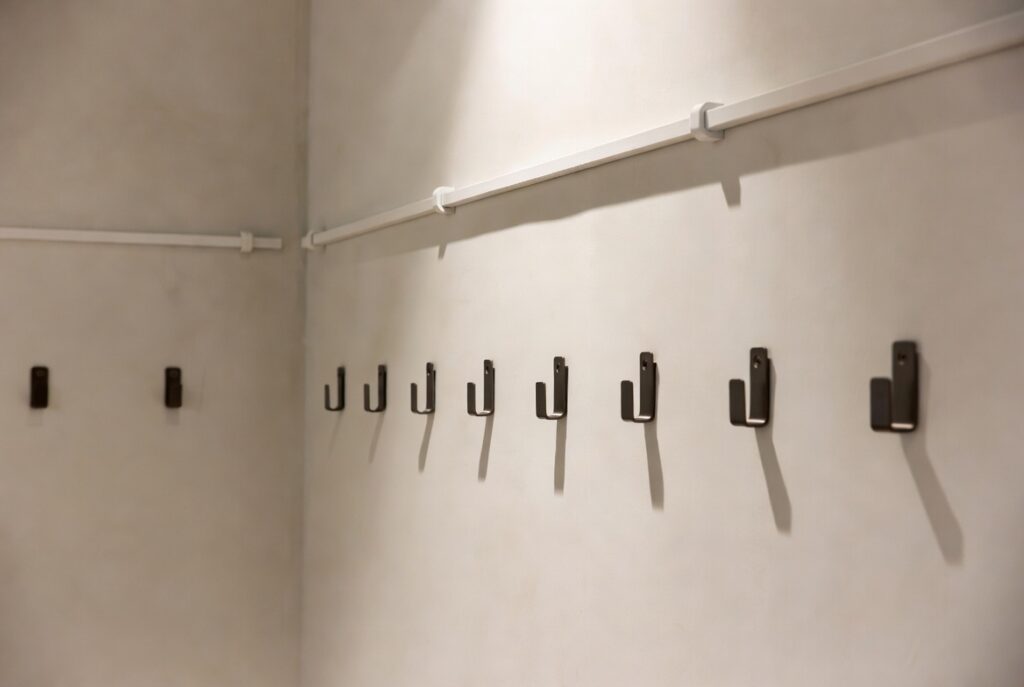
Best for: Entryways, kitchens, bathrooms, and bedrooms — the simplest and most immediately useful wall storage addition in any room
A row of hooks mounted on the wall — a coat rack in the entryway, a rail with S-hooks in the kitchen, a hook row in the bathroom for towels — converts wall space into immediately useful storage with minimal installation complexity. Hooks are the most accessible wall storage solution for renters and for homeowners who want to improve organization without significant construction.
The design of the hooks matters as much as their placement. A row of simple brass hooks on a wooden rail, or industrial pipe and fitting hooks, or minimalist matte black hooks on a white wall each create a different aesthetic that contributes to the room’s overall character.
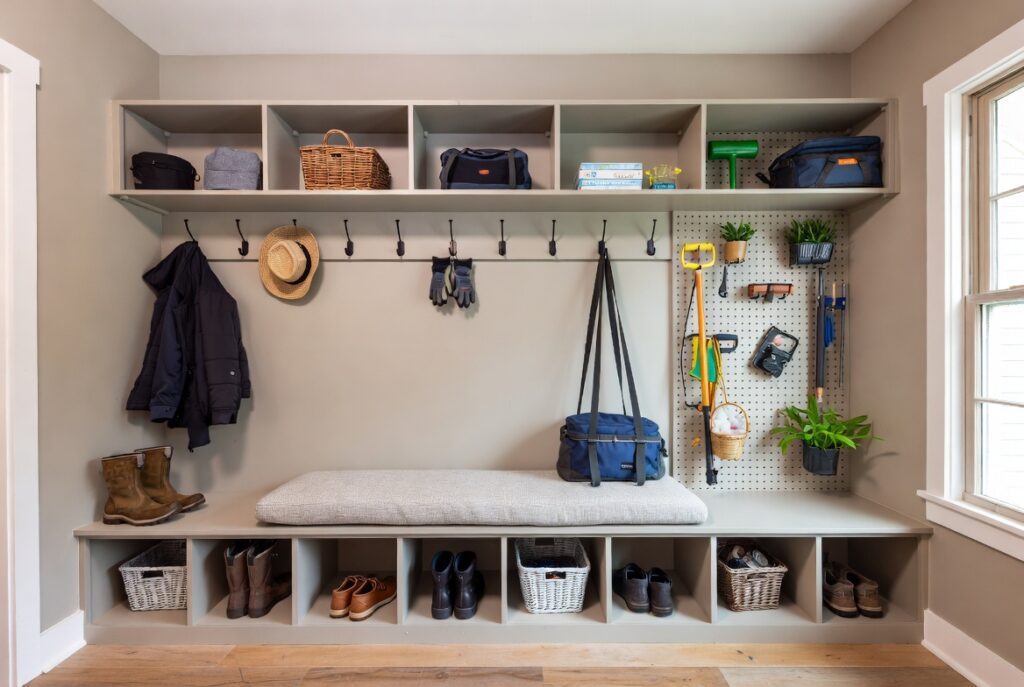
Smart tip: Install a shelf above a row of hooks to create a combined storage system rather than hooks alone. The shelf provides surface storage for items that don’t hang (keys, mail, bags) while the hooks handle coats, bags, and jackets. The combination of shelf and hooks creates an entryway or mudroom storage station that addresses multiple storage needs in a single installation.
Mistake to avoid: Installing hooks too close together for the items they’ll actually hold. Winter coats take significantly more horizontal space than the hook itself suggests — two coats on adjacent hooks spaced 6 inches apart overlap and bunch together, making them difficult to retrieve cleanly. Space coat hooks 10 to 12 inches apart; towel hooks in bathrooms 8 to 10 inches apart.
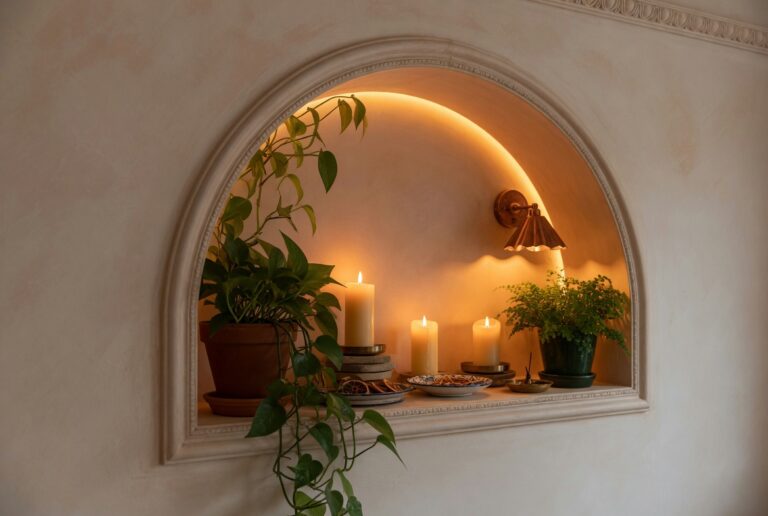
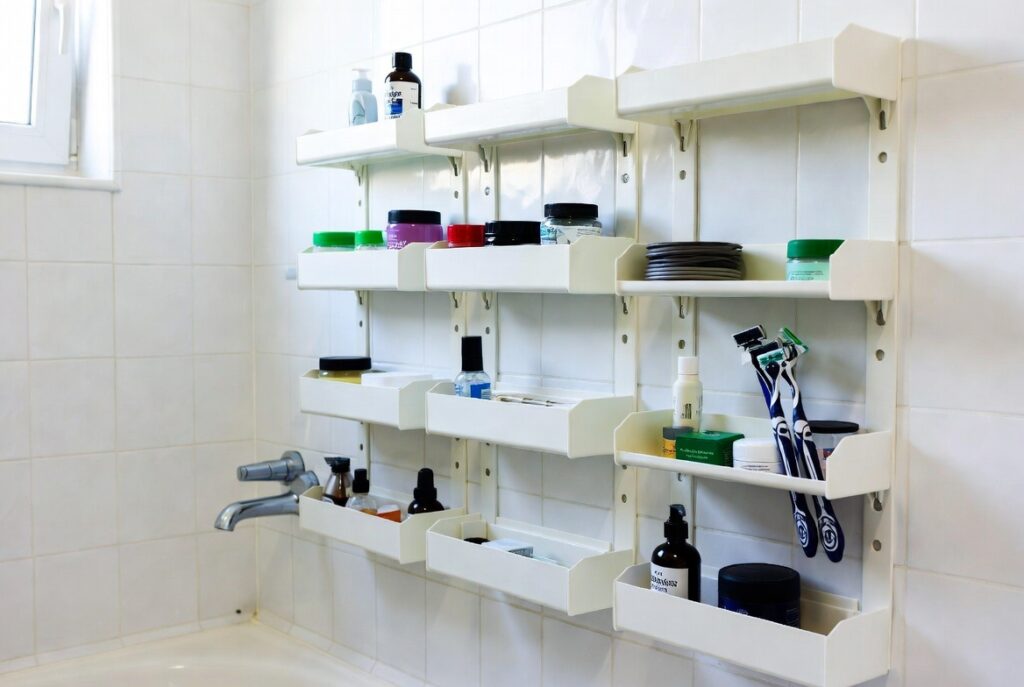
5. Create Recessed Wall Shelves
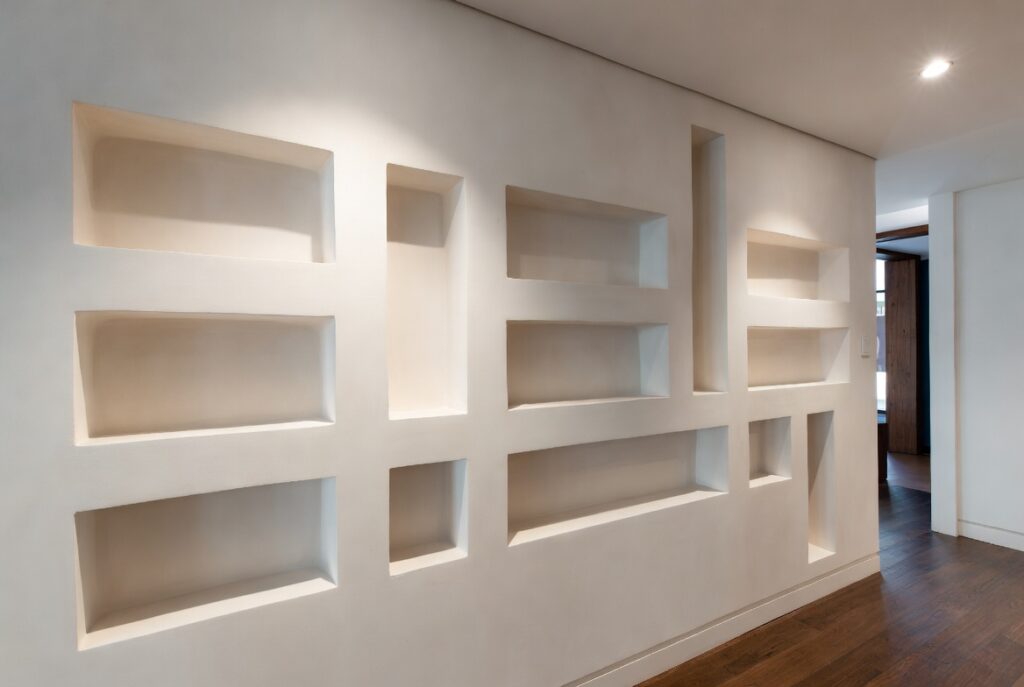
Best for: Bathrooms, hallways, and any room where floor space is extremely limited — recessed shelves add storage without adding any depth to the room
Recessed shelves are built into the wall cavity rather than projecting out from it — the shelf occupies the space between wall studs rather than extending into the room. In a standard 2×4 framed wall, this provides approximately 3.5 inches of depth — enough for toiletries, spices, small books, or display items — with zero impact on floor space.
The most common application is the recessed bathroom shower niche — a waterproofed cavity in the shower wall that holds shampoo and soap bottles without requiring a separate caddy or shelf. The same principle applies to any wall in the home for shallow display and storage.
Smart tip: Plan recessed shelves during any renovation or remodeling project — adding them to existing finished walls requires cutting into the drywall and potentially relocating electrical wiring or insulation. The ideal time to add recessed shelves is when the wall is already open for other work, when the cost and disruption is minimal.
Mistake to avoid: Creating a recessed shelf in an exterior wall in a climate with cold winters. Exterior walls contain insulation that cannot be removed without compromising the wall’s thermal performance. Recessed shelves in exterior walls in cold climates also create thermal bridges that can lead to condensation and moisture problems. Limit recessed shelves to interior walls only.
6. Mount a Wall Grid Panel
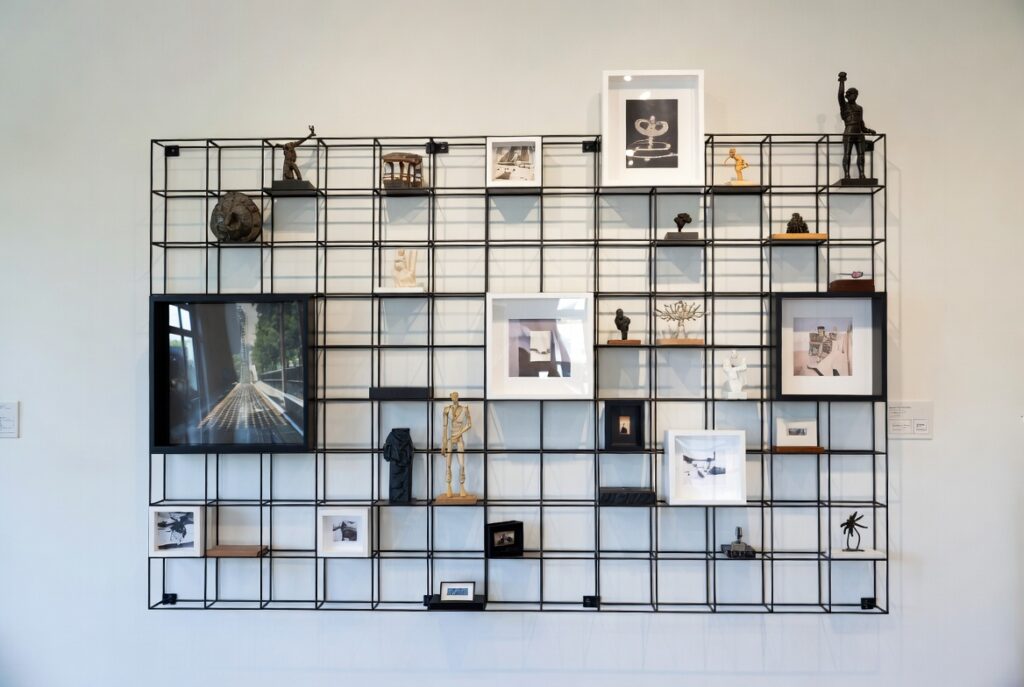
Best for: Home offices, craft rooms, bedrooms, and any space needing flexible, rearrangeable storage — the modern, refined alternative to pegboard
A wall grid panel — a metal grid of welded wire mounted on the wall, with hooks, shelves, baskets, and holders hanging from the grid wires — provides the same flexibility as pegboard with a cleaner, more contemporary aesthetic. Black powder-coated grid panels have become one of the most popular home office and bedroom wall storage solutions because they suit minimalist and Scandinavian interior aesthetics that traditional pegboard doesn’t match.
The grid accepts a wide range of accessories — small shelves for plants, hooks for headphones and cables, baskets for stationery, and card holders for notes — creating a complete desk organization system on a single wall panel.
Smart tip: Position the wall grid panel directly above the desk as the primary desk organization surface rather than on a side wall. The directly-above position puts everything accessible from the seated working position without turning or reaching to the side. The visual backdrop of an organized grid above the desk also improves the video call background quality significantly.
Mistake to avoid: Using wire grid panels that aren’t reinforced at the mounting points. Standard decorative grid panels are not designed for heavy loads — they flex and deform when accessories holding significant weight are attached. Purchase grid panels specifically designed for wall mounting with reinforced connection points at the top edge.
7. Use Wall-Mounted Cabinets
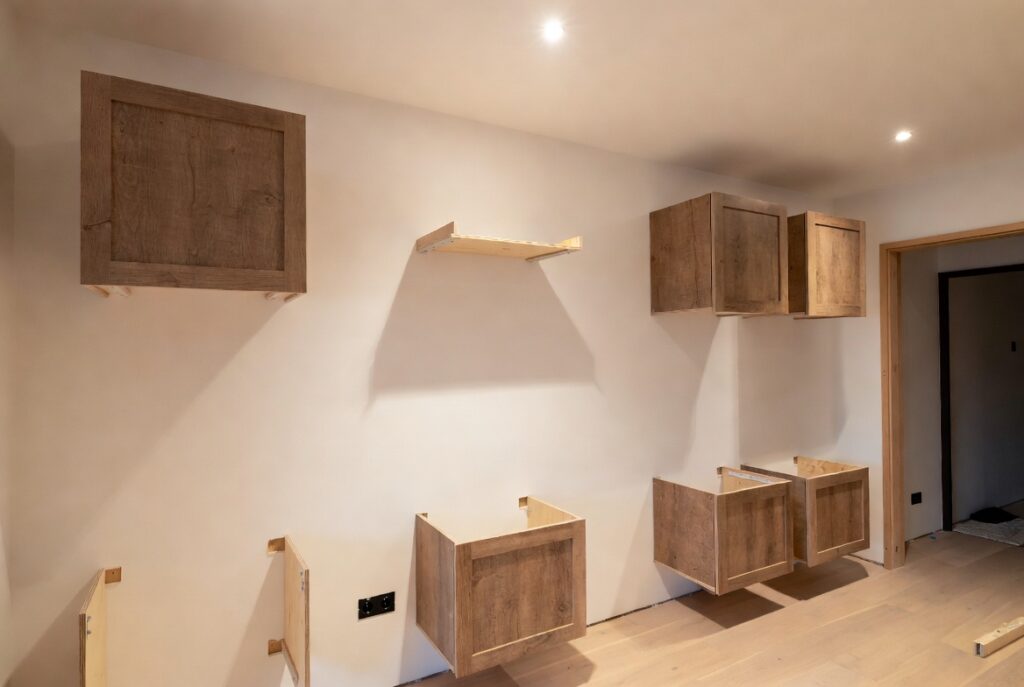
Best for: Kitchens, bathrooms, garages, and laundry rooms — wall-mounted cabinets provide concealed storage at any height without floor footprint
Wall-mounted cabinets — closed storage units fixed to the wall with no floor contact — keep their contents hidden and protected from dust while occupying wall space rather than floor space. The kitchen’s upper cabinet system is the most familiar application, but wall-mounted cabinets in bathrooms, garages, and laundry rooms provide the same functional benefit across the home.
The closed doors of wall-mounted cabinets allow the storage of items that look poor when visible — cleaning products, medications, tools, and general household clutter — in a clean, contained surface that doesn’t detract from the room’s appearance.
Smart tip: Install wall-mounted cabinets at a height that’s genuinely comfortable to use — not so high that the upper shelves require a step stool for everyday access. The bottom of wall-mounted kitchen cabinets is typically 18 inches above the countertop — this standard provides adequate clearance for countertop appliances while keeping the cabinet contents accessible without excessive reaching.
Mistake to avoid: Mounting wall cabinets without a level reference line across the full installation width. A single cabinet that’s slightly off-level is almost unnoticeable. A row of cabinets where each is independently leveled but not aligned with each other creates a visibly inconsistent top line that draws attention. Snap a chalk line at the intended top height of all cabinets before mounting the first one.
8. Add Shelves Above Doorways
Best for: Any room — the space above doorways is almost universally wasted and readily accessible for display and storage
The space above a doorway — typically 12 to 18 inches between the door frame’s top and the ceiling — is one of the most overlooked storage opportunities in any home. A simple shelf spanning the full width of the door opening, mounted at the door frame’s top, creates display and storage space that doesn’t impede traffic, doesn’t reduce floor space, and uses an area that’s otherwise entirely empty.
The above-doorway shelf suits books, decorative objects, seasonal items in baskets, and any items used infrequently enough that their height above normal reach is acceptable.
Smart tip: Use above-doorway shelves for items in a single category — all books, or all baskets, or all seasonal decorative objects — rather than as overflow storage for miscellaneous items. A consistent category makes the above-door shelf look curated rather than incidental, and it makes finding specific items straightforward.
Mistake to avoid: Storing frequently used items above doorways. The height makes these shelves genuinely inconvenient for regular access — reaching above a doorframe repeatedly is uncomfortable and potentially unsafe without a step stool. Reserve above-doorway storage for items accessed monthly or less frequently, and use more accessible shelf positions for everyday items.
9. Use the Back of Every Door
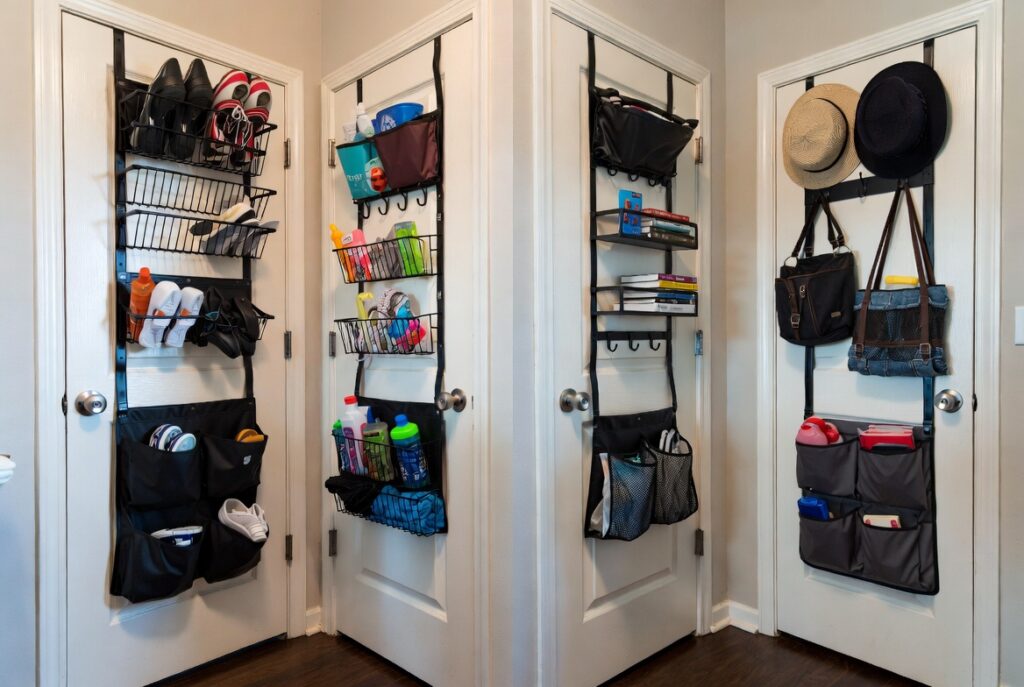
Best for: Every room — door backs are prime storage real estate that almost every home wastes completely
The back of a door — any door in the home — provides a vertical surface equivalent to a significant shelf section that’s almost universally unused. Over-door organizers, hooks, shallow racks, and mirror combinations all convert door backs into functional storage without any permanent installation in most cases.
Pantry door backs for spice racks and food storage are the most productive single door-back installation in most homes. Bathroom door backs for towels and toiletries, bedroom door backs for accessories and jewelry, and home office door backs for documents and supplies all create significant additional storage from surfaces that cost nothing.
Smart tip: Choose over-door organizers that grip the door’s top edge rather than requiring screws for installation in rental homes or where permanent installation isn’t appropriate. Tension-mounted and top-grip organizers are easy to install and remove and leave no marks on the door or frame.
Mistake to avoid: Installing door-back storage that prevents the door from fully opening or closing. An over-door organizer that extends too far beyond the door’s face hits the door frame or adjacent wall before the door reaches its full open position. Measure the available clearance between the door back and adjacent surfaces before purchasing any door-mounted storage.
10. Install a Wall-Mounted Desk
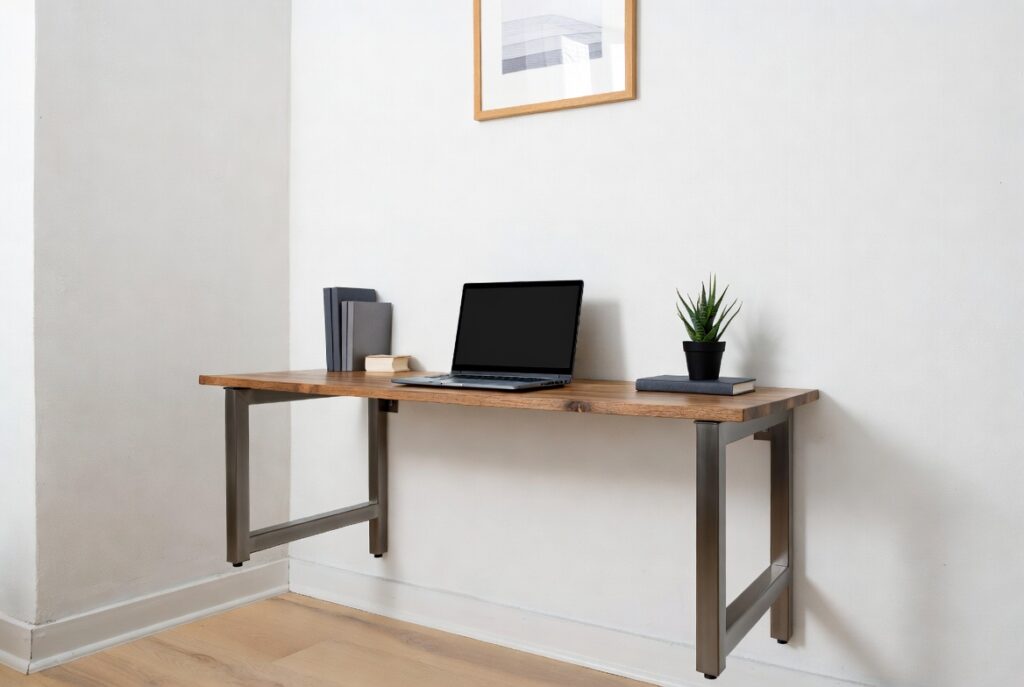
Best for: Small bedrooms, living rooms, and any space where a dedicated desk footprint isn’t available — a wall-mounted desk folds away when not in use
A wall-mounted fold-down desk — a hinged surface that folds flat against the wall when not in use and opens horizontally to a working surface when needed — provides a complete desk workspace in a footprint of approximately 2 inches of wall depth. When closed, it functions as a decorative wall panel; when open, it provides 18 to 24 inches of working depth.
The fold-down format suits any room where a dedicated home office space isn’t available — a bedroom that doubles as a workspace, a living room with a corner that serves as a study area, or a hallway with enough width for a minimal desk surface.
Smart tip: Add a small shelf above the fold-down desk surface for a monitor, books, and desk accessories that don’t need to be cleared away when the desk is folded. The combination of fold-down surface and permanent upper shelf creates a complete workspace where the frequently-used upper items are always accessible and only the surface itself folds away.
Mistake to avoid: Installing a fold-down desk without securing it in the open position. A fold-down surface held open only by the support cables or chains that came with the hardware flexes and moves during use — particularly when typing. Install a positive locking mechanism that holds the surface rigid in the open position for comfortable everyday use.
11. Create a Kitchen Wall Storage System
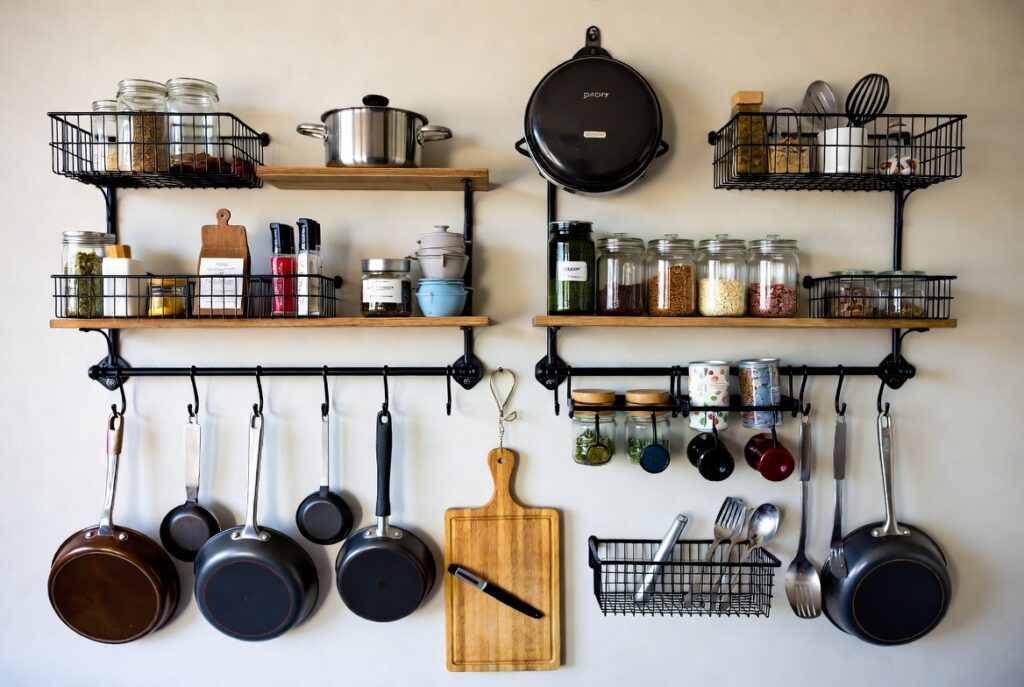
Best for: Kitchens with limited counter and cabinet space — wall storage keeps frequently used items accessible without consuming counter surface
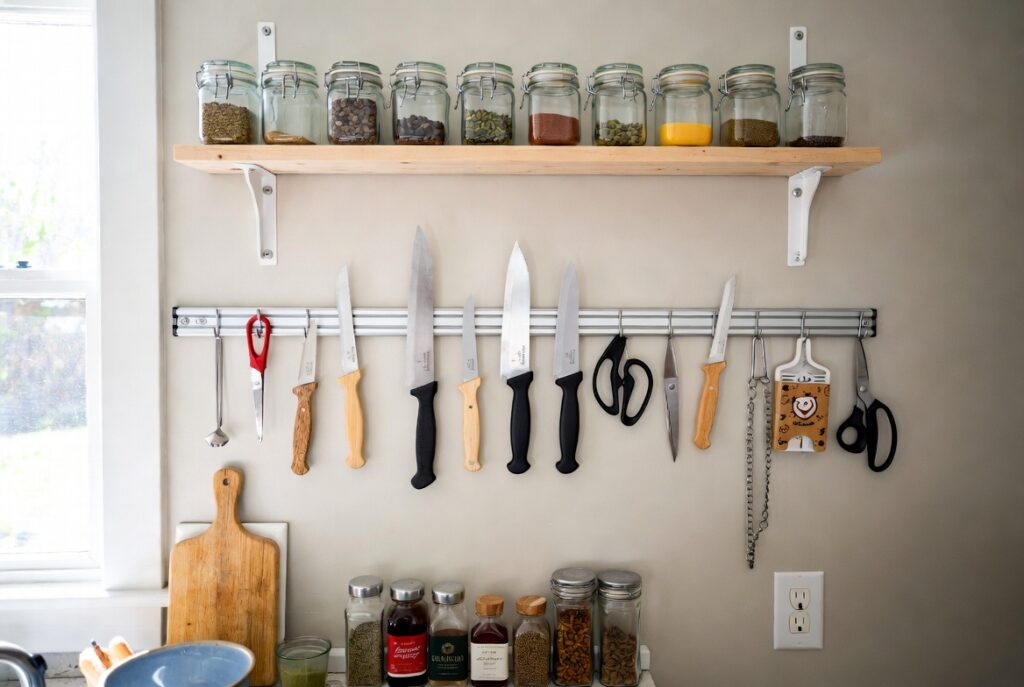
A kitchen wall storage system — combining a rail with hanging hooks, magnetic knife strip, small shelves for spices, and hooks for utensils — moves the most frequently used kitchen items from countertop and drawer storage to the wall between the counter and the upper cabinets. This backsplash zone — typically 18 inches of wall between counter surface and upper cabinet bottom — is the most valuable kitchen wall storage position because it’s within immediate reach of the primary working surface.
Smart tip: Install a stainless steel or brass rail system rather than individual hooks and magnetic strips on separate wall sections. A unified rail system with compatible accessories looks designed and allows accessories to be repositioned as cooking habits and equipment change — far more flexible than fixed individual installations.
Mistake to avoid: Storing items on kitchen wall rails that aren’t used frequently. A knife strip with eight knives when only three are used regularly, or a utensil hook with ten items when five are used daily, creates visual clutter at the most visible point in the kitchen. Display only what’s used regularly — store less-frequent items in drawers and cabinets.
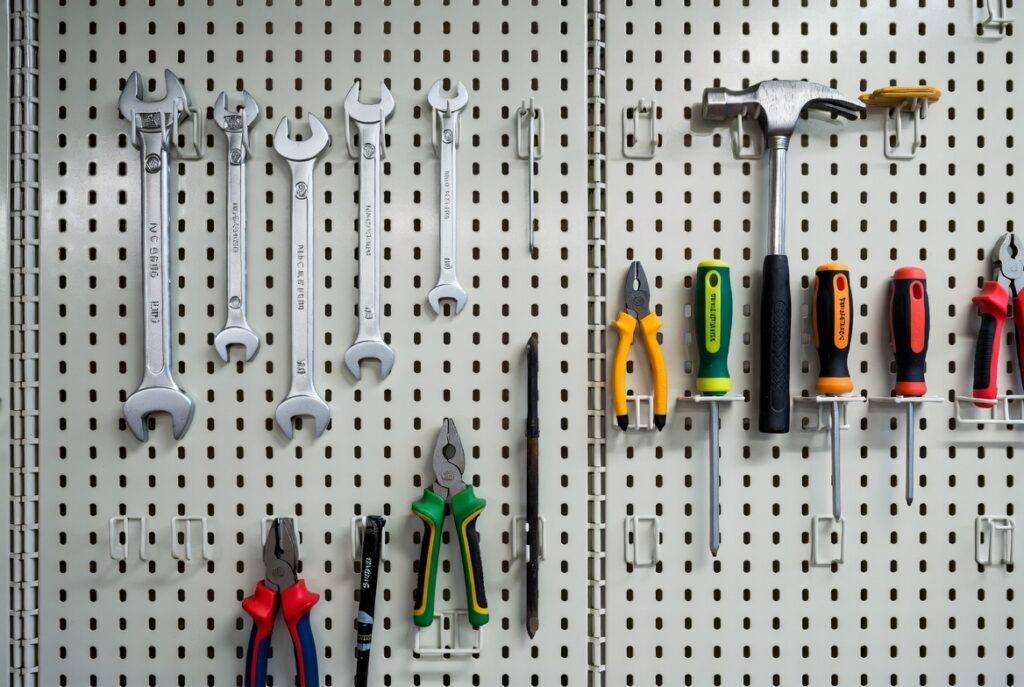
12. Add a Magnetic Wall Strip
Best for: Kitchens and home offices — magnetic strips provide tool-free instant organization for metal items
A magnetic wall strip — a strong magnet mounted horizontally on the wall, typically in stainless steel or wood — holds knives, scissors, metal tools, and small metal containers securely without individual hooks or holders. The magnetic surface holds items at any position along its length, allowing for flexible, tool-free rearrangement as often as needed.
Beyond the kitchen knife strip application, magnetic strips suit home office walls for holding scissors, rulers, and metal desk tools; workshop walls for screwdrivers and metal-handled tools; and craft rooms for scissors and metal implements.
Smart tip: Choose a magnetic strip with sufficient magnetic strength for the heaviest item it will hold — rated in pounds of holding force. A strip rated for 5 pounds per tool is adequate for kitchen knives; a strip holding heavy workshop tools needs significantly higher holding force. Test the strip’s actual holding strength with the heaviest intended item before relying on it for everyday use.
Mistake to avoid: Placing a magnetic knife strip directly above the primary food preparation area. Reaching across the working surface toward a wall-mounted knife strip during food preparation is an unnecessary safety risk. Position the strip to the side of the main cutting area — accessible without reaching over food or over the cutting board.
13. Use Staggered Shelf Arrangements
Best for: Living rooms, bedrooms, and hallways — staggered shelves create visual interest that straight-line arrangements can’t achieve
Staggered shelves — multiple shelves of different lengths at different heights arranged asymmetrically on a wall — create a gallery-like composition that looks curated and designed rather than simply functional. The asymmetric arrangement draws the eye across the wall in a way that a uniform row of identical shelves doesn’t, and the varying shelf lengths accommodate items of different sizes more naturally.
This approach suits rooms where the wall is a decorative feature as much as a functional one — living rooms, bedrooms, and dining rooms where the wall display contributes to the room’s character.
Smart tip: Plan the staggered arrangement on paper or with painter’s tape on the wall before drilling any holes. The visual balance of a staggered shelf arrangement is difficult to assess from the floor without the shelves in position — tape outlines of each shelf’s position and step back to assess the composition from the room’s main viewing positions before committing to drilling.
Mistake to avoid: Using too many different shelf lengths in a staggered arrangement. A composition with five different shelf lengths — very short, short, medium, long, and very long — looks chaotic rather than dynamic. Limit to two or three different lengths repeated in varying arrangements for the most composed visual result.
14. Build a Mudroom Wall System
Best for: Entryways and mudrooms — a dedicated drop zone for coats, bags, shoes, and daily essentials prevents the clutter that accumulates in every household entry point
A mudroom wall system — combining hooks for coats, a bench with shoe storage below, a shelf above for bags and hats, and individual cubbies for each family member’s items — converts the most chaotic zone in most homes into a genuinely organized arrival and departure station. The wall system provides a specific place for everything that enters the home daily, preventing the accumulation of dropped coats, kicked-off shoes, and abandoned bags that creates entry clutter.
Smart tip: Assign each family member their own section of the mudroom wall system — a specific set of hooks, a specific cubby, and a specific section of bench and shoe storage. Personal ownership of a defined zone dramatically improves compliance with the storage system compared to shared, unassigned storage where items accumulate without accountability.
Mistake to avoid: Building a mudroom wall system without adequate hook depth for winter coat storage. Standard decorative hooks are 2 to 3 inches deep — sufficient for lightweight jackets. Heavy winter coats require hooks at least 4 to 5 inches deep to hang without pressing against the wall and becoming difficult to retrieve. Choose hooks specifically rated for coat weight in cold-climate entryways.
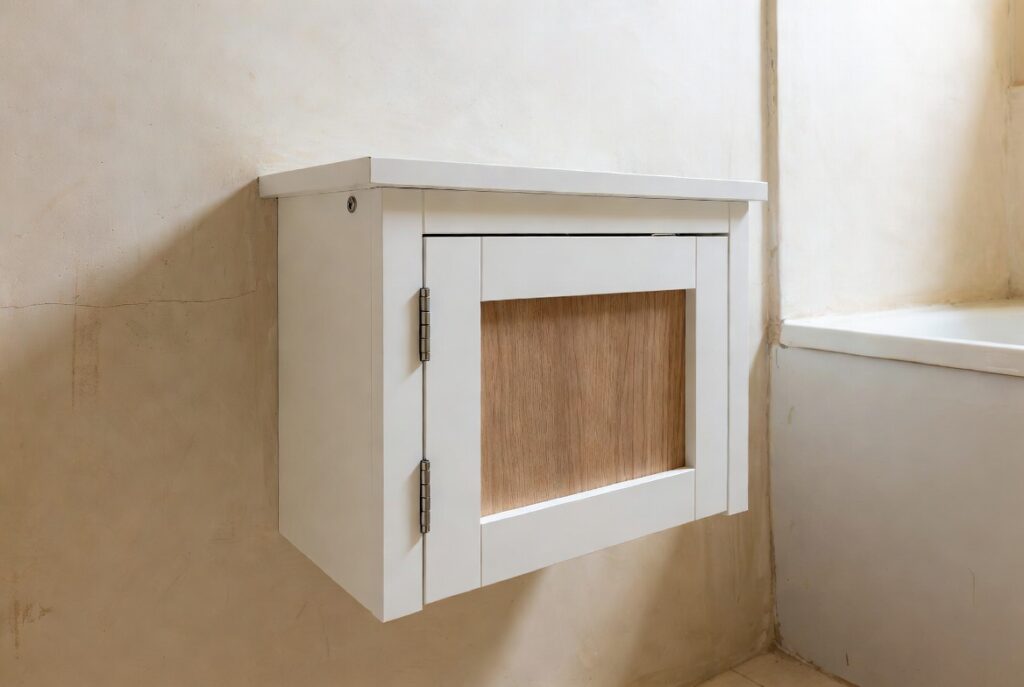
15. Mount a Bathroom Wall Cabinet
Best for: Small bathrooms — wall-mounted bathroom cabinets provide the most storage per square inch of any bathroom storage solution
A wall-mounted bathroom cabinet — the medicine cabinet, mirrored cabinet, or decorative wall cabinet — provides storage that’s completely off the floor, uses wall space between the vanity and ceiling that’s otherwise empty, and in mirrored versions performs double duty as a mirror and a storage unit simultaneously.
The recessed medicine cabinet — built into the wall cavity rather than projecting from it — provides the greatest storage without reducing bathroom space. Even a surface-mount bathroom cabinet projects only 4 to 6 inches from the wall — significantly less visual and physical intrusion than a freestanding storage unit.
Smart tip: Choose a mirrored bathroom wall cabinet rather than a plain door version. The mirrored exterior provides a full vanity mirror while the interior provides shelved storage — two essential bathroom functions in a single installation. The mirrored surface also makes a small bathroom feel larger by reflecting light and creating the impression of greater depth.
Mistake to avoid: Mounting the bathroom wall cabinet too high for comfortable use. A medicine cabinet or bathroom mirror cabinet should be centered at approximately eye height for the primary user — typically with the center of the cabinet 60 to 65 inches from the floor. Too high requires uncomfortable upward reaching for everyday items; too low makes the mirror unusable for anyone of average height.
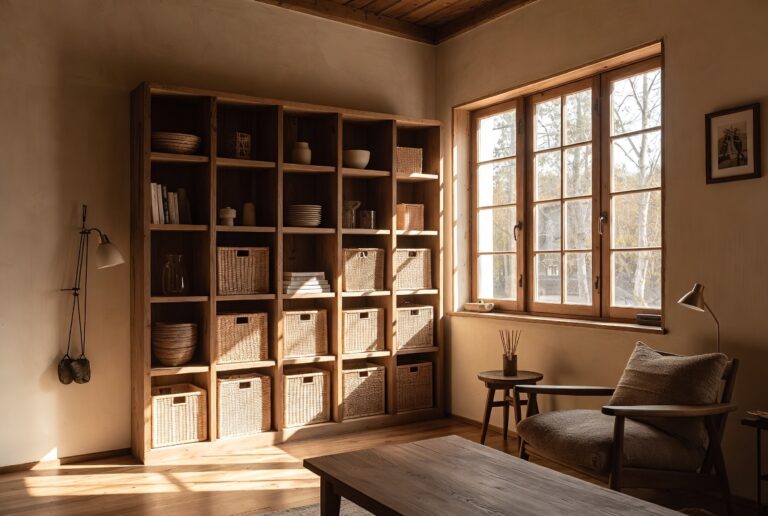
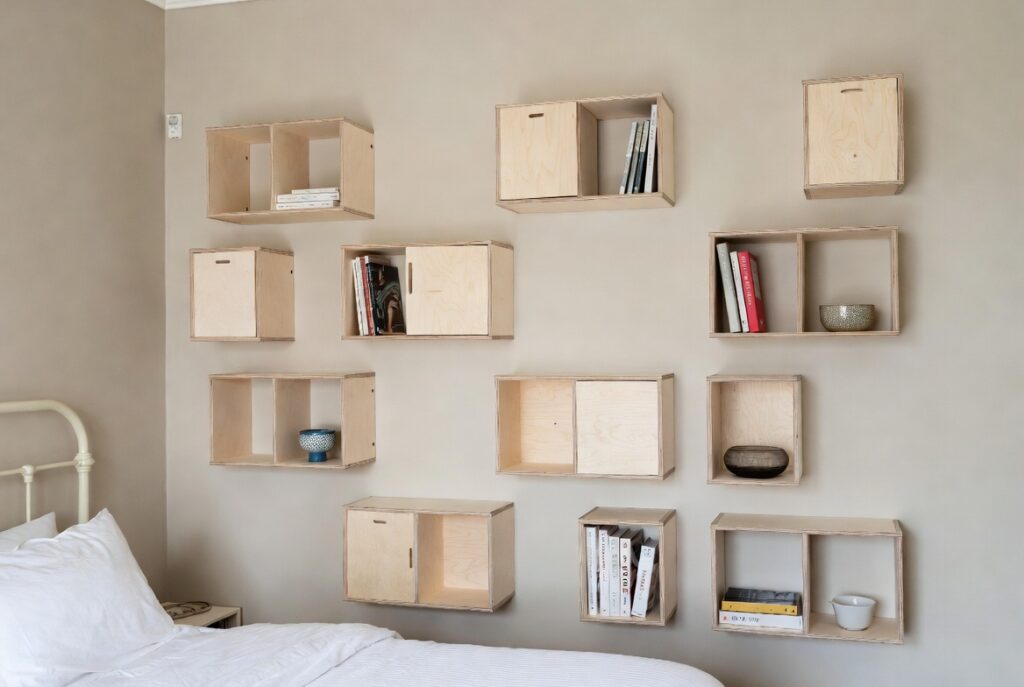
16. Use Modular Wall Storage Units
Best for: Any room where storage needs change over time — modular systems grow and adapt as requirements change
Modular wall storage systems — individual units (shelves, cabinets, drawers) designed to combine in any configuration and expand with additional modules — provide the flexibility that fixed custom built-ins can’t. A modular system installed in a living room today can be reconfigured for a home office tomorrow, with additional modules purchased as needs grow rather than requiring a complete new installation.
IKEA’s BILLY and KALLAX systems are the most widely installed modular wall storage units globally — inexpensive, widely available, and compatible with decades of accessories and modifications. More premium modular systems from specialist furniture brands offer higher quality materials with the same adaptability.
Smart tip: Start with fewer modules than seem necessary and add as actual usage reveals genuine needs. A modular system that’s 70 percent full from day one has room to accommodate the accumulation that inevitably occurs. A system that’s full immediately requires expansion within months — better to start smaller and add modules deliberately.
Mistake to avoid: Mixing incompatible modular systems from different manufacturers. Modular units from different brands rarely align precisely in height, depth, or connection points — the result is a storage wall that looks assembled from unrelated pieces rather than a cohesive system. Choose a single system from one manufacturer and add modules from the same range consistently.
17. Create a Bedroom Headboard Storage Wall
Best for: Bedrooms with limited nightstand and dresser space — a headboard storage wall replaces multiple pieces of furniture with a single wall installation
A headboard storage wall — shelving, cabinets, and display surfaces built into or mounted on the wall behind the bed — replaces the traditional headboard and nightstands with a wall-integrated solution that provides significantly more storage in approximately the same footprint. Bedside shelves, reading light positions, phone charging stations, and drawer storage can all be incorporated into a single cohesive wall installation.
The visual impact of a well-designed headboard storage wall is also significant — it creates a defined, designed sleeping alcove that makes the bedroom feel more considered and more complete.
Smart tip: Include integrated lighting in any headboard storage wall — LED reading lights mounted at each side of the bed position within the wall system, or LED strips illuminating the shelving from below. Integrated lighting eliminates the need for bedside lamps that consume the nightstand surface and makes the wall system functional for evening use without overhead room lighting.
Mistake to avoid: Building a headboard storage wall with shelves directly above the pillow area without adequate lip or rail protection. Open shelves above where people sleep create the possibility of items falling onto sleeping occupants. Install a front lip on any shelves within 18 inches of the pillow position, or position open shelves to the sides of the bed rather than directly above it.
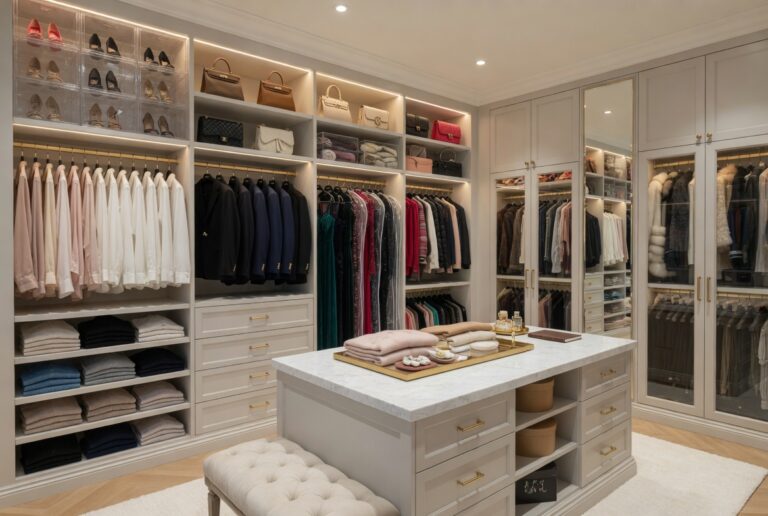
18. Add a Wall-Mounted Wardrobe System
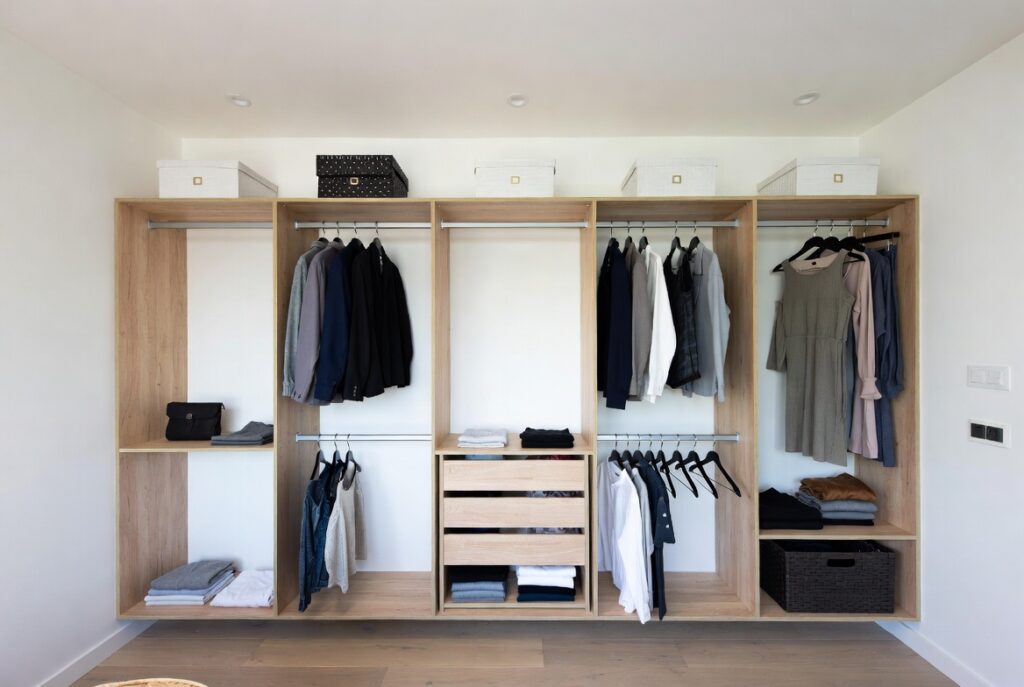
Best for: Bedrooms without adequate built-in closet space — wall-mounted wardrobe systems create organized clothing storage from a plain wall
A wall-mounted wardrobe system — hanging rails, shelves, and drawer units mounted to a wall rather than standing on the floor — provides organized clothing storage on any bedroom wall without requiring a dedicated closet. The wall-mounted format keeps the floor clear and visible beneath the system, which makes the room feel more spacious than a freestanding wardrobe of the same capacity.
The most effective wall-mounted wardrobe systems combine a double-hang section for shorter items (shirts, jackets, folded trousers), a single long section for full-length items (dresses, coats), shelving for folded items, and a drawer section for underwear and accessories.
Smart tip: Add a full-length mirror on a hinged panel alongside the wall-mounted wardrobe system. The mirror panel provides a dressing mirror while closed and opens to reveal additional hanging space or shelving behind it — a genuine space-multiplying combination that provides both a functional mirror and concealed storage in the same wall section.
Mistake to avoid: Installing a wall-mounted wardrobe system on a wall with insufficient structural support for the combined load. A fully loaded wardrobe system — with clothing, shoes, and accessories — is significantly heavier than its empty weight suggests. Ensure mounting hardware goes into wall studs or masonry anchors rated for the full anticipated load, not just the system’s empty weight.
19. Use Hidden Wall Storage
Best for: Living rooms and bedrooms where visible storage doesn’t suit the aesthetic — hidden storage maintains a clean appearance while providing genuine capacity
Hidden wall storage — storage concealed behind mirrors, artwork, decorative panels, or within wall cavities — provides functional storage without any visual evidence of storage in the room. A framed mirror that hinges open to reveal shallow shelving behind it, a section of wall paneling that swings open to reveal a recessed cabinet, or artwork mounted on a hinge over a storage niche all provide storage that’s completely invisible when closed.
This approach suits minimalist interiors, formal rooms, and any space where the visual priority is a clean, uncluttered wall surface.
Smart tip: Use hidden storage behind artwork specifically for items that are frequently needed but create clutter when visible — phone chargers, remote controls, medications, and small valuables. A hinged picture frame over a shallow wall recess provides these items within arm’s reach of the sofa or bed while maintaining the clean wall appearance that open storage would disrupt.
Mistake to avoid: Making hidden storage so well concealed that it becomes difficult to remember and access. Storage that’s genuinely invisible is also storage that’s not used — the inconvenience of accessing it eventually makes it a wasted installation. Balance concealment with accessibility by positioning hidden storage at convenient heights with opening mechanisms that are intuitive and easy to operate.
20. How to Plan a Wall Storage System

Best for: Anyone designing wall storage — planning prevents the most common mistakes before any drilling begins
Effective wall storage requires planning that accounts for the room’s specific requirements, the wall’s structural characteristics, and the practical habits of the people using the space. A wall storage system designed around how a room is actually used performs significantly better than one designed around how the room theoretically should be organized.
Assess weight distribution first. Heavier items belong on lower shelves and closer to structural wall supports. The higher a shelf and the further from a stud, the less weight it can safely carry. Plan heavy storage (books, tools, kitchen equipment) at lower positions with structural support, and lighter items (display objects, lightweight clothing) at higher, less-supported positions.
Plan access frequency. Items used daily should be between hip and shoulder height — the easiest reach zone. Items used weekly can go below hip height or above shoulder height with some bending or reaching. Items used monthly or seasonally can occupy the highest and least accessible positions. Organizing by access frequency rather than by category alone makes the storage system genuinely useful rather than merely organized.
Consider the room’s visual balance. A wall storage system affects the room’s visual weight — a heavy, dense storage installation on one wall makes the room feel unbalanced. Distribute storage across multiple walls or balance a large storage installation with intentionally empty space on adjacent walls.
Smart tip: Start with the problem — identify the specific clutter or disorganization issues in the room before choosing a storage solution. A kitchen with overflowing utensil drawers needs a different solution than one with insufficient pantry space. Choosing the right storage type for the specific problem produces better results than installing a general storage system and hoping it addresses the actual issues.
Mistake to avoid: Installing wall storage without first decluttering. Adding more storage to a room full of items that aren’t needed just organizes the clutter rather than eliminating it. Declutter before installing any wall storage system — remove everything that isn’t used, needed, or genuinely wanted. The storage system then needs to accommodate only what remains, which is invariably less than the pre-declutter total and easier to organize effectively.
Before You Start
- Locate your wall studs. Every wall storage installation that carries significant weight needs to be anchored into studs. A stud finder is a basic tool that prevents the most dangerous and most expensive wall storage failures.
- Check for electrical and plumbing. Before drilling any wall, verify that no electrical wiring or plumbing runs within the drilling area. An electrical cable or water pipe behind drywall is not visible — use a wire and pipe detector before any wall penetration.
- Measure twice, drill once. Wall storage installations are difficult and damaging to reverse. Take time to plan precisely, mark positions carefully, and verify measurements before drilling any holes.
- Match the storage to the room’s aesthetic. The best wall storage system is one that suits the room’s existing style — floating timber shelves in a warm, natural interior; black metal grid systems in an industrial or contemporary space; painted MDF cabinets in a traditional or Shaker-style room.
Conclusion
Wall storage transforms rooms in two ways simultaneously — it creates the storage capacity that floor-based furniture can’t provide, and it frees the floor space that freestanding storage consumes. The result is a room that’s both more organized and more spacious than the same room with equivalent storage capacity in freestanding furniture. Start with the wall that bothers you most, choose storage suited to that specific problem, mount it correctly, and fill it only with what you actually use — and wall storage consistently delivers the most significant organizational improvement available in any home.