Useful sports equipment storage ideas organize the trip out and the return home, not just a collection of matching baskets. A ball basket may solve one problem while an unopened kit bag quietly collects uniforms, small accessories and equipment that still needs attention. Start with the actual activity routine before choosing a larger cupboard.
These concepts focus on ordinary household sports gear and its separate storage tasks. Use the ideas that match your equipment rather than adding every pictured container. Product-specific care and handling come first, and a concept image is not a tested rack, installation or equipment assessment.
Contents
- 1. Start with one reachable gear zone
- 2. Use a contained basket for the large balls
- 3. Separate indoor-use balls from the outdoor set
- 4. Contain small practice balls in their own box
- 5. Keep rackets out from under loaded bags
- 6. Retain the useful tubes for shuttlecocks
- 7. Give paddle equipment its own shallow compartment
- 8. Let a glove rest without a pile on top
- 9. Choose a purpose-made place for bats
- 10. Keep sticks in a retained, full-length position
- 11. Reserve a separate shelf for the helmet
- 12. Group protective pads without compressing them
- 13. Give an emptied sports bag a return shelf
- 14. Keep footwear on a separate suitable tray
- 15. Provide an obvious laundry handoff
- 16. Keep the clean uniform together
- 17. Give clean sports towels their own small stack
- 18. Contain the pump and its small accessories
- 19. Stack training markers as one complete set
- 20. Return a portable goal to its intended carry bag
- 21. Keep a removable net with its own parts
- 22. Separate rolled mats from sharp or dense gear
- 23. Make a clear return place for the pool kit
- 24. Use a temporary departure basket for the next activity
- 25. Give different users recognizable return positions
- 26. Move the off-season set to a documented secondary bay
- 27. Separate items awaiting a decision from ready equipment
Plan the route from return to ready
List the activities used in a normal week, then unpack one representative kit. Separate equipment ready for its return position from items needing their own cleaning, drying or other care. Measure the complete storage shapes, openings and retrieval route. Choose furniture for the real contents and follow its assembly, restraint and load instructions. Keep specialized, powered or unusually heavy equipment out of a general arrangement unless the exact storage is suitable.
Choose storage from the job it needs to perform
- Large round balls: A contained, accessible basket that keeps the route clear
- Rackets and paddles: A separate supported position without pressure from other bags
- Clothing after use: A clear handoff to the actual laundry routine
- The next scheduled activity: A temporary packing position for one complete kit
- An off-season set: A suitable secondary bay with an understandable record
1. Start with one reachable gear zone

Begin with the equipment that leaves the house every week. Place it in one suitable, reachable zone instead of distributing it among several deep cupboards. Put the return location close to the ordinary route without blocking a doorway. Measure the actual bags and baskets before choosing the furniture, including the space needed to take them out.
Try this: Rehearse leaving for one regular practice before adding more storage.
2. Use a contained basket for the large balls

A broad basket can keep large balls visible without allowing them to occupy the walking route. Choose a container that holds the real ball shapes and stays suitable when one is removed. Avoid tightly packing different balls together just to fill a pictured organizer. Follow each ball’s care guidance, particularly where material and indoor or outdoor use differ.
Try this: Remove the lowest ball without tipping out the whole basket.
3. Separate indoor-use balls from the outdoor set

A shared basket can blur which equipment belongs on an indoor court and which is used outside. Give those groups separate return positions when that distinction matters to the household. Clean and care for each item according to its own instructions before returning it. Wilson’s basketball guidance calls for ventilated storage away from prolonged direct sunlight and heat.
Try this: Use a clear location distinction rather than a label that is hidden behind the balls.
4. Contain small practice balls in their own box

Tennis balls and other small practice items can disappear beneath larger equipment. A modest dedicated box makes the quantity easier to see and carry. Keep any packaging with a specific storage function, and avoid transferring unfamiliar products into an unmarked general bin. Choose a container that is straightforward to open and return without disturbing the neighboring group.
Try this: Count the set after practice so missing items are noticed before the next session.
5. Keep rackets out from under loaded bags

Give rackets a supported position suited to their cases and maker’s instructions. Keep heavier bags from pressing on the frames. Yonex’s badminton guidance warns that excessive loads and hot storage conditions can damage rackets; a crowded cupboard should not become the default simply because the equipment is thin. Retain the identity of each racket and its appropriate cover.
Try this: Check that a packed neighboring bag cannot settle onto the racket shelf.
6. Retain the useful tubes for shuttlecocks

Shuttlecock tubes can be easier to organize than a loose mixed box of delicate sports items. Keep the original useful containers together in a supported compartment and follow the product’s storage requirements. Do not assume a closed tube or an attractive shelf establishes the right environmental conditions. Keep spare supplies distinguishable from equipment already being used.
Try this: Store the currently used tube at the front of the group.
7. Give paddle equipment its own shallow compartment

A shallow compartment can keep paddle equipment separate from balls and shoes. Compare the full paddle, its case and the drawer opening rather than relying on an outside cabinet measurement. Keep the surfaces from becoming a platform for dense accessories. Use the storage method specified for the particular equipment, without treating all racket and paddle materials as interchangeable.
Try this: Open the drawer with its usual contents in place and remove one paddle cleanly.
8. Let a glove rest without a pile on top

A glove can have a dedicated return position instead of remaining at the bottom of a team bag. Follow the care and shape guidance for its exact material. Keep it separate from footwear, wet clothing and unrelated loads, and avoid improvising a conditioning or reshaping treatment from a storage photograph. A modest open compartment can make its condition easier to notice.
Try this: Assign the glove a place that remains available when the kit bag is away.
9. Choose a purpose-made place for bats

Long equipment needs retention that suits its shape. Compare a purpose-made bat holder with the real equipment and the people retrieving it. Follow the holder’s installation, stability and loading requirements, and keep the removal movement outside ordinary circulation. An attractive row of bats in a concept image does not establish that an improvised hook or cabinet is suitable.
Try this: Check how one bat is released without disturbing the next.
10. Keep sticks in a retained, full-length position

Sticks can be awkward because their heads project beyond an otherwise narrow storage line. Choose a retained position intended for the actual equipment and compare the complete outline, including the blade or head. Keep the surrounding route usable. If storing the item vertically makes removal difficult, review an appropriate alternative rather than merely choosing the tallest available corner.
Try this: Trace the whole removal movement with the room in its usual layout.
11. Reserve a separate shelf for the helmet

A helmet deserves a deliberate position away from the pressure of loaded bags. POC’s helmet-care guide specifies dry storage away from heat and use of the supplied helmet bag. Follow the instructions for your own model, including inspection and replacement guidance; a well-organized shelf does not establish that protective equipment remains suitable for use.
Try this: Keep the helmet’s information accessible with the equipment record.
12. Group protective pads without compressing them

Protective pads can stay recognizable as a set while still having space for their own care routine. Use a container suited to the actual shapes and fastening parts. Follow the equipment instructions before washing, drying or folding them, and keep the return position separate from items awaiting attention. Avoid creating a dense bundle that must be unpacked to locate one piece.
Try this: Check the complete set before closing the kit bag.
13. Give an emptied sports bag a return shelf

An emptied bag is easier to inspect than a permanently packed one that collects unrelated gear. Give it a supported return shelf and follow its specific material-care instructions. Complete any required drying before ordinary storage. Keep the straps and removable parts with the bag so it can be prepared for the next activity without searching through several compartments.
Try this: Check the small pockets as part of the post-practice return.
14. Keep footwear on a separate suitable tray

Footwear can have its own landing position instead of sharing a closed box with clean uniforms and rackets. Choose a tray and surrounding surface suited to the actual cleaning routine. Follow the shoe maker’s care instructions; an open tray alone does not guarantee drying. Review the arrangement with shoes in place so their projection does not narrow the ordinary route.
Try this: Test removing the tray for cleaning without moving the furniture.
15. Provide an obvious laundry handoff

Used clothing needs a clear next step after the bag is unpacked. Put an appropriate laundry handoff close to that task rather than letting clothing remain mixed with reusable equipment. Follow the care labels and the household laundry routine. Keep the hamper from occupying the only space needed to put down and open a bag.
Try this: Walk through the return with the bag, clothing and hamper together.
16. Keep the clean uniform together
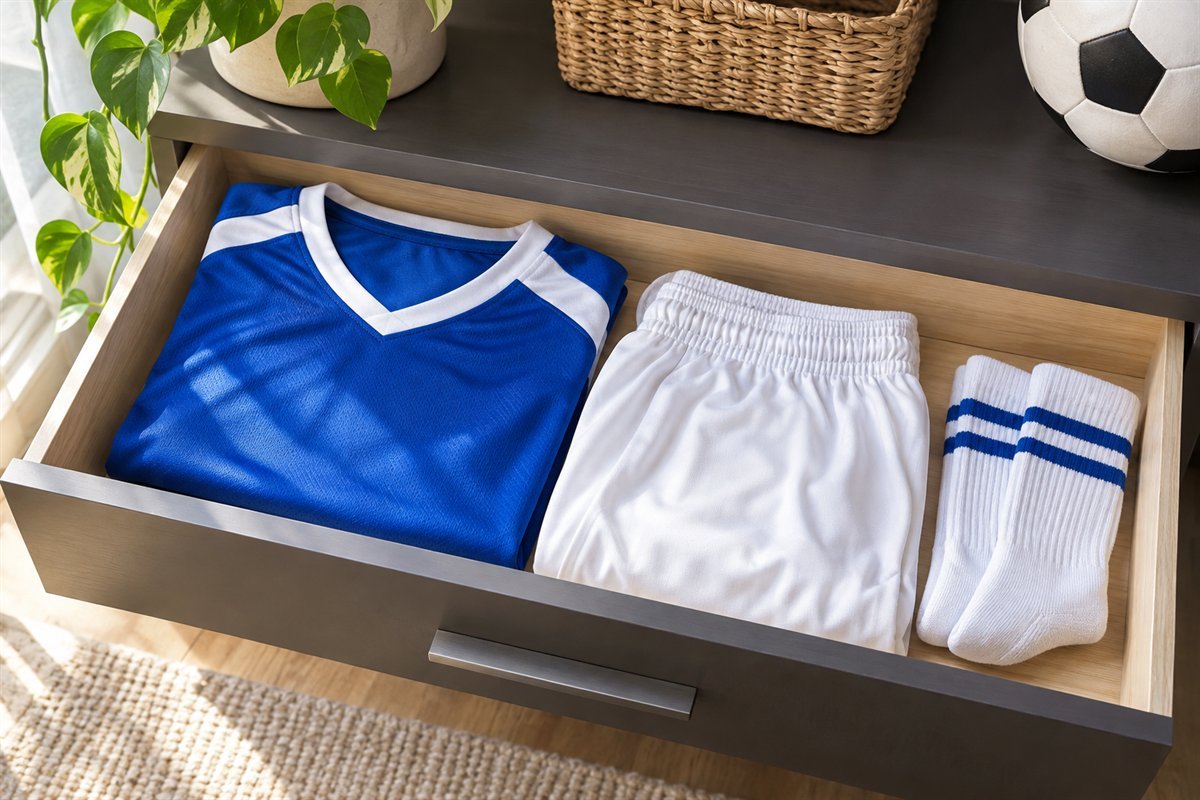
A clean kit can occupy one predictable drawer section or removable container. Group the pieces used together so preparing for practice does not involve several cupboards. Keep the arrangement proportionate to the actual number of uniforms, and separate outgrown or incomplete sets for a decision. A large collection of identical baskets will not solve missing pieces.
Try this: Assemble one complete kit before deciding how many divisions are useful.
17. Give clean sports towels their own small stack

Clean towels can be kept as a small, visible group near the packing position. Keep them separate from equipment still awaiting care and avoid filling the entire shelf with a reserve that is seldom used. A modest stack makes it easier to notice when the household needs to complete the laundry routine before the next session.
Try this: Match the accessible stack to the activities actually planned.
18. Contain the pump and its small accessories
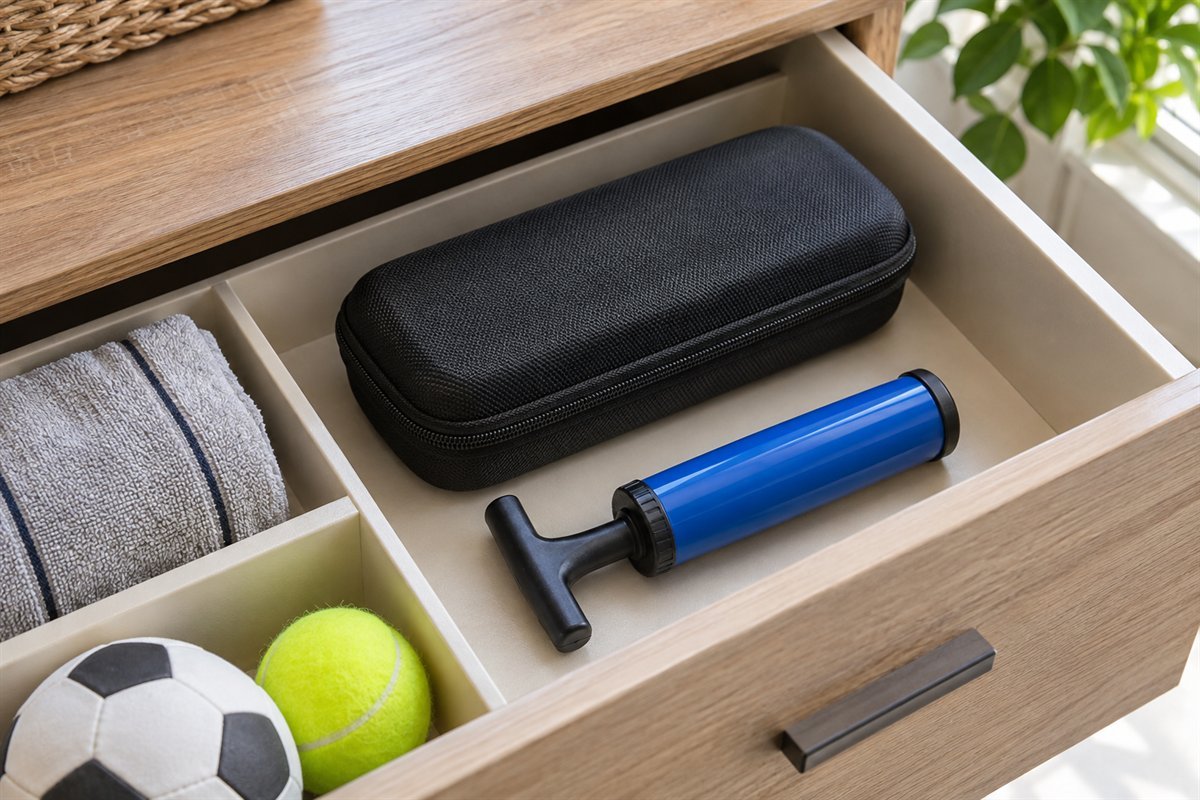
A pump and its compatible accessories are easier to find as one defined group. Retain the product identity and operating instructions. Keep small pointed accessories in an appropriate closed container, rather than loose among balls or clothing. Follow the ball’s specified inflation guidance; a storage article cannot establish the correct pressure or procedure for an unidentified model.
Try this: Keep the compatible parts together before replacing a supposedly missing pump.
19. Stack training markers as one complete set

Training markers can be grouped by the set taken to a session. Choose a crate or carrier that makes the actual stack manageable and leaves room to grip it. Avoid turning the container into overflow for unrelated small equipment. A clear return quantity helps the next person recognize whether the complete set has come back.
Try this: Count the markers during the return rather than at the next departure.
20. Return a portable goal to its intended carry bag

A portable goal can take much less visual space when returned to the packing arrangement supplied for it. Follow the exact folding, disassembly and storage instructions; models differ. Keep the complete bag supported and accessible without using it as a ledge for other equipment. Check that its full length fits the opening as well as the shelf.
Try this: Compare the packed bag with the route out of the room.
21. Keep a removable net with its own parts

A removable net and its permitted small components can remain one identifiable kit. Complete the product’s care routine before packing it, then use the intended bag or another suitable arrangement. Keep loose lines contained without assuming every material should be tightly compressed. Record which system the net belongs to so spare parts do not drift into an unrelated equipment box.
Try this: Keep the attachment information with the kit instead of relying on memory.
22. Separate rolled mats from sharp or dense gear

A small exercise mat can share the sports zone when its storage needs are respected. Follow the maker’s permitted rolling, folding and care method rather than copying the pictured shape for every material. Keep the mat away from equipment that could press into its surface. Compare the rolled length with the usable furniture opening before choosing a divided rack.
Try this: Return the mat without wedging it between another item and the shelf.
23. Make a clear return place for the pool kit
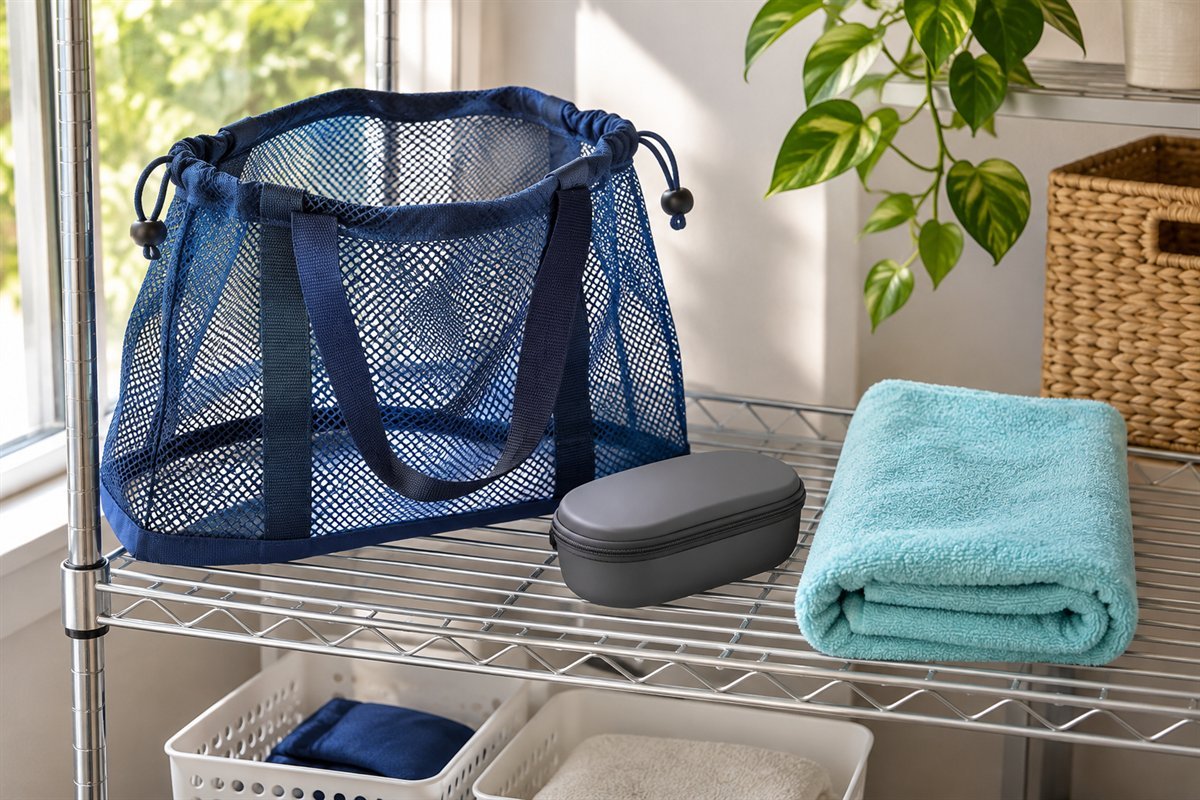
A pool kit benefits from a clear distinction between its post-use care and its ready-to-pack state. Follow the care requirements for each item rather than leaving the complete bag closed between visits. Give the prepared pieces a defined return location. Keep liquids, cleaning products and specialized equipment in their own appropriate storage instead of treating the swim bag as a universal container.
Try this: Check the kit before the next pool visit while there is time to finish its care.
24. Use a temporary departure basket for the next activity

A small departure basket can collect the ordinary items needed for the next planned activity. Treat it as a temporary packing aid, not a second permanent store. Once the bag leaves, return the basket to an empty state. This gives the household a visible place to assemble missing pieces without spreading equipment across the kitchen or entrance floor.
Try this: Prepare one upcoming kit from the actual activity list.
25. Give different users recognizable return positions

Shared storage works better when each person knows where a returned kit belongs. Recognizable positions can be more useful than a row of similar bags piled together. Choose an arrangement that the actual users can reach comfortably and that remains understandable when a bag is away. Keep furniture installed as required rather than encouraging climbing to reach a high personal compartment.
Try this: Ask each user to return their ordinary kit without rearranging another person’s bay.
26. Move the off-season set to a documented secondary bay

Equipment used less often can occupy a secondary suitable bay, leaving the easiest positions for the current routine. Complete its care requirements and record the contents before putting it away. Keep the container manageable and its location understandable. A seasonal move should not hide damaged or incomplete equipment until the next time it is needed.
Try this: Record the first date or event when the kit will be checked again.
27. Separate items awaiting a decision from ready equipment

An item awaiting inspection, replacement or another decision should not blend back into the ready kit. Give it a separate appropriate holding position and record the actual issue. Follow the maker’s instructions and obtain suitable help when needed. The purpose is to make an unresolved task visible, not to imply that storage, cleaning or an improvised repair makes protective equipment fit to use.
Try this: Assign the next action before returning an uncertain item to ordinary storage.
Create a return-to-ready equipment record
Make a short record for each regularly used kit: activity, user, complete contents, care step, ready-storage location and next action. Add the product identity and a link or location for its instructions where the equipment needs them. Keep this record with the packing routine, rather than buried inside the least accessible seasonal bag.
For a hypothetical soccer practice, the record might identify a ball, footwear and clean uniform, with footwear returning through its own care position and the uniform going to laundry. That is an example of the record format, not a universal packing list. Use the actual requirements from the activity and equipment. An item awaiting a safety or suitability decision stays outside the ready group.
Test the plan twice: first by collecting the next kit, then by returning after use. Note what was missing, what blocked removal and which items had no obvious next step. Change that specific position or task before buying more organizers. A useful system explains where equipment goes when it is empty, in use, awaiting care and ready for the next departure.
A practical next step
Choose sports equipment storage ideas from the kit you actually use. A contained ball basket, a supported racket shelf and an obvious return-to-care routine can do more than a large mixed cupboard. Keep the easiest positions for the current activity and give each unresolved item a clear next action.
Garage organization ideas for the complete parking and equipment route. Mudroom locker ideas for the furniture and arrival layout.
The images are original AI-generated organization concepts, not photographs of tested equipment or verified storage installations.
Sources and care references
- Wilson basketball maintenance: storage environment and product-specific care (Japanese)
- Yonex badminton guidance: racket loading, storage conditions and equipment care (Japanese)
- POC helmet-care guide: dry storage, heat and helmet-bag guidance
Optional digital guide for this topic
If you prefer a structured workbook, explore this related paid guide.