Basement ceiling ideas should begin with the room conditions, finished height and access that the real space needs. A quiet painted plane, a regular panel grid and a linear plank finish each create a different appearance. The most useful choice connects that appearance with the room you intend to use.
Begin with an appropriately assessed basement and resolve active water or moisture problems before covering surfaces. Establish required access and the suitability of the actual ceiling system, fittings and work. These ideas concern finished appearance and planning; they do not establish that a basement is ready for conversion or supply an installation specification.
The 24 original concepts below compare materials, color, ceiling changes and ordinary use. Use the access-and-finish brief to keep practical questions visible while choosing the look. All images are original AI-generated concepts rather than photographs of named ceiling products.
Contents
- 1. Keep one smooth pale ceiling plane
- 2. Let square white panels supply a regular rhythm
- 3. Use rectangular panels deliberately
- 4. Try a restrained recessed-panel profile
- 5. Choose black panels with a matching grid
- 6. Use a dark grid as a clear outline
- 7. Keep panel and grid colors close in tone
- 8. Use white planks for a quieter linear surface
- 9. Bring pale wood grain above simple walls
- 10. Use deeper wood with a light lower room
- 11. Compare plank direction with the room layout
- 12. Use a narrow contrasting perimeter finish
- 13. Keep an exposed ceiling visually consistent
- 14. Try one dark exposed overhead field
- 15. Relate a soffit face to the wall
- 16. Connect a soffit to the ceiling color
- 17. Keep a structural line legible in the composition
- 18. Use compact surface lights with the finished plane
- 19. Plan recessed lights with the ceiling layout
- 20. Give a media area a deliberate darker ceiling zone
- 21. Keep the ceiling over a desk visually quiet
- 22. Make required ceiling access practical to use
- 23. Resolve ceiling grilles as part of the finish group
- 24. Include the stair arrival in the ceiling review
Separate the ceiling appearance from the ceiling system
Name the look you prefer, then identify the actual product and assembly that could provide it. A textured white panel is not automatically acoustic or moisture-resistant, and a wood-looking plank is not necessarily solid wood. Keep the manufacturer’s current suitability, mounting and maintenance information with the room plan.
An original access-and-finish brief
- Room conditions: Record unresolved water or moisture questions before selecting a covering.
- Available height: Record actual dimensions, projections and requirements rather than estimating from photos.
- Required access: Locate each opening and the practical route to use it with furniture in place.
- Finish group: Compare actual ceiling, grid, wall and floor samples together.
- Lights and equipment: Coordinate the exact fitting, support and access with the complete ceiling assembly.
- Performance claims: Request the relevant product and assembly information for the specific need.
1. Keep one smooth pale ceiling plane
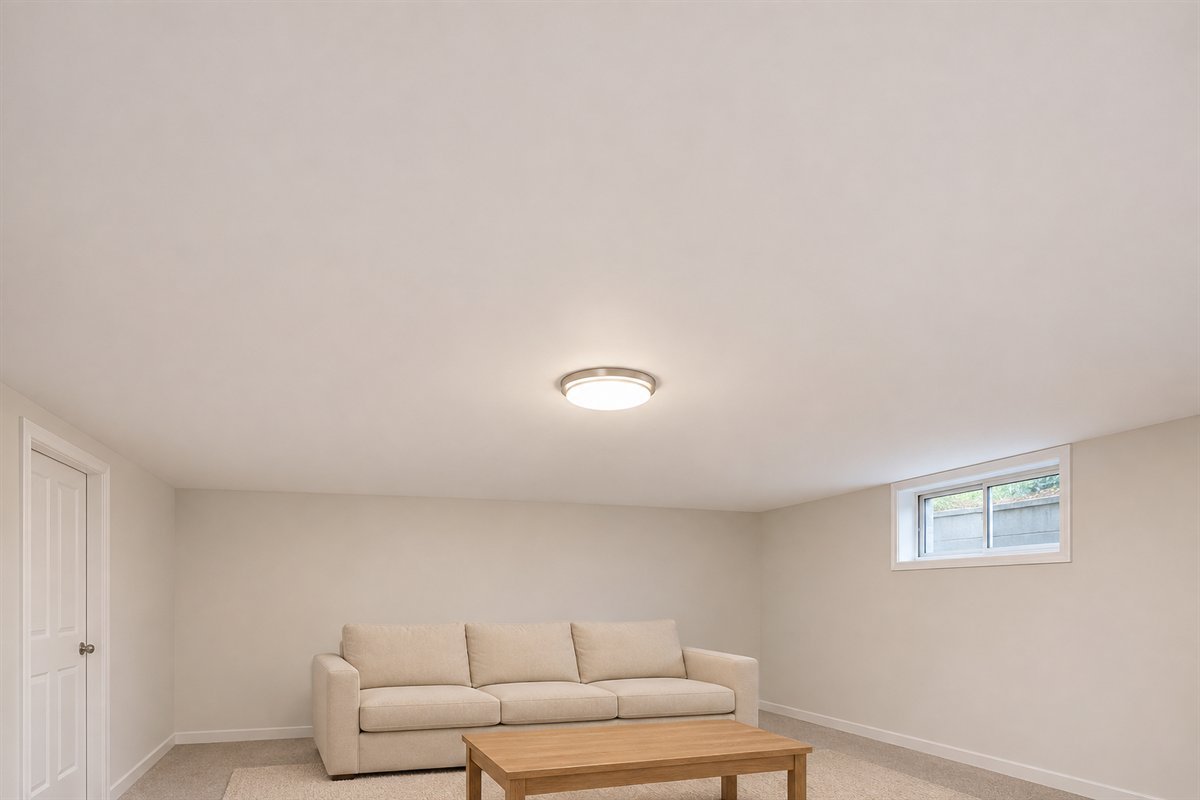
A smooth pale ceiling can give a basement room a quiet background above its furniture. Compare a neutral white with a slightly warmer sample beside the existing wall and floor. The useful choice is the relationship in this room, not a promise that white creates more physical height.
Establish what the existing ceiling is and which services must remain reachable before choosing a continuous finish. A clean rendered plane does not show the access strategy behind it. Keep necessary openings, suitable construction and the actual finished height in the proposal rather than resolving them after the decoration.
2. Let square white panels supply a regular rhythm

Square ceiling panels in a matching white grid can look orderly above a simple room. The repeated joints become a visible part of the design. Keep the panel texture quiet if the floor or seating already carries the room’s stronger pattern.
Review the actual module and border arrangement on a ceiling plan before ordering. Compare the material with the grid finish and surrounding wall. A panel’s appearance alone cannot establish its moisture, acoustic or fire-related performance; those decisions belong to the exact product and complete proposed assembly.
3. Use rectangular panels deliberately

Rectangular panels give a suspended ceiling a different direction from a square grid. Compare the long lines with the room’s shape and the main viewing position. A clear layout can feel considered without adding a decorative border or changing several room finishes.
Draw the full ceiling, including the perimeter cuts and fixed openings, instead of selecting a tile from one small sample. Ask the installer to resolve the actual layout and access. The visual direction is a preference to compare, not a method of increasing the room’s dimensions or correcting an unsuitable ceiling height.
4. Try a restrained recessed-panel profile

A shallow recessed profile can introduce relief within a regular ceiling grid. Keep the walls and large furniture quiet so the ceiling detail is readable. A simple white finish may provide enough variation through its edges and shadows.
Compare the real panel profile from the usual seat, where it will be seen at an angle. Its depth, compatible grid and installation conditions need to suit the actual project. Do not treat a decorative coffer-like appearance as evidence of a structural beam system or a particular tested performance.
5. Choose black panels with a matching grid

Black panels and a matching grid can create a deliberate dark overhead field. Pale walls or lighter upholstery can provide a separate area of contrast. Compare the effect from the actual seats rather than assuming every basement should have a pale ceiling.
Select an exact factory finish and suitable ceiling system, then review the room’s useful lighting. Do not assume that painting existing panels will retain their original ratings or warranty. Black is a visual direction here; neither darkness nor a textured tile proves sound isolation or a cinema-quality room.
6. Use a dark grid as a clear outline

A dark grid around pale panels makes the ceiling’s module more graphic. It can relate to a few existing dark furniture edges without requiring black walls. Keep the rest of the palette restrained while judging whether that repeated outline suits the room.
View a complete section of the actual panel and grid combination where possible. A strong outline becomes more prominent across a whole ceiling than in a sample corner. Confirm that the parts form a compatible specified system rather than combining components simply because their photographed colors work together.
7. Keep panel and grid colors close in tone

A soft gray panel with a related grid can make the ceiling pattern quieter than a strong black outline. Compare both actual finishes together. The slight difference can be deliberate while allowing the furniture to remain the room’s main feature.
Review the sample under the room’s ordinary lights before choosing a near-match. Product availability and compatibility matter alongside color. If a different grid or panel is required, reassess the complete combination rather than assuming every similarly sized component can be exchanged without further checks.
8. Use white planks for a quieter linear surface

White ceiling planks can introduce a narrow repeated line above a simple basement room. Keep their direction consistent and compare the seams from the doorway and main seat. The pattern can supply detail without another overhead color.
Identify the actual material and mounting system before choosing the finish. A white plank may be wood, a wood-based product or another manufactured material, each with its own conditions. Establish the finished depth, required access and suitable support rather than treating the appearance as a construction specification.
9. Bring pale wood grain above simple walls

A pale wood-looking ceiling can make timber the room’s main overhead material. Plain walls and restrained seating let the grain remain distinct. Compare the ceiling sample with the largest retained wood surface below before choosing more matching furniture.
The image does not identify a species, solid timber or a particular manufacturer’s plank. Choose a product suitable for the actual basement conditions and intended ceiling use. Resolve the mounting, finished depth and future access separately from the color relationship that first attracted you.
10. Use deeper wood with a light lower room

A deeper wood ceiling can be a deliberate contrast to pale walls and upholstery. Keep the grain clear rather than combining it with several other strong overhead patterns. A broad light surface below gives the dark plane a different visual companion.
Compare a real sample in the room’s evening lighting and review the complete finish with the floor. Darker wood is an aesthetic choice rather than evidence of comfort or acoustic performance. The exact ceiling material, support and room conditions still determine whether the proposal is suitable.
11. Compare plank direction with the room layout

Plank direction changes the ceiling’s visible rhythm. Compare it across and along a long room using the same material sample and furniture arrangement. Decide which relationship you prefer rather than using a general rule that every long room needs lines running one way.
Have the proposed direction reviewed with the actual support and mounting system. The preferred visual direction may require different preparation, and the perimeter layout needs to remain considered. Keep this decision on the ceiling plan with openings and access, not as an improvised change once material arrives.
12. Use a narrow contrasting perimeter finish

A restrained perimeter detail can give a plain ceiling a deliberate edge. Keep it visibly narrower than the main ceiling area so it frames the plane rather than becoming another large surface. Compare its finish with door trim and the room’s retained furniture.
Review every corner, doorway and ceiling change on the drawing before choosing the detail. Its projection and appropriate support need to suit the project. A decorative border is not a reason to cover access or interfere with a vent, detector or required fitting.
13. Keep an exposed ceiling visually consistent

Where an appropriately assessed exposed arrangement is suitable, a single pale finish can make the visible overhead lines more coherent. The effect differs from covering the structure with a new plane. Compare it with the room’s other materials before adding another color overhead.
Have the actual structure, services, required protection and product compatibility assessed before coating anything. The generated concept omits technical installation details. It is not permission to spray over wiring, labels, vents or equipment, or evidence that an exposed ceiling is appropriate for every basement use.
14. Try one dark exposed overhead field
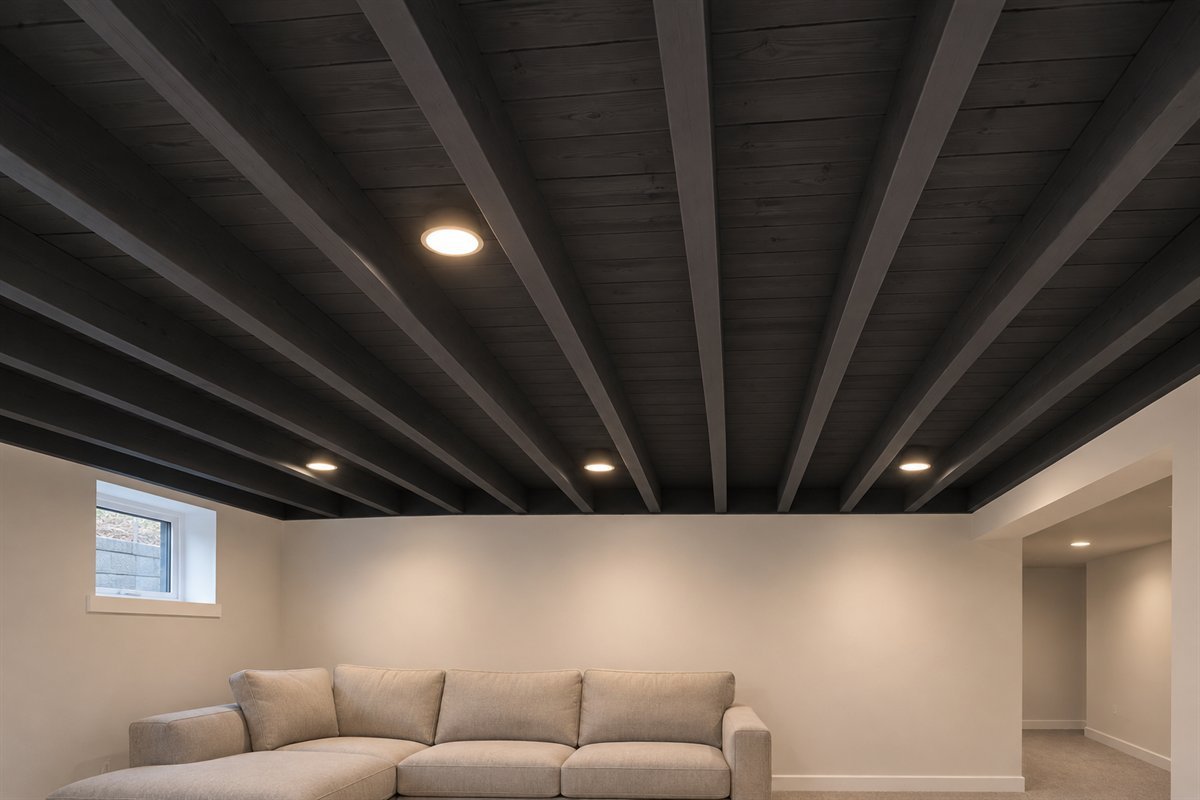
A uniformly dark exposed overhead can give a basement room a different character from a smooth white plane. Keep the lower room simple while comparing it. The visible joist rhythm may be enough pattern without additional decorative beams.
Separate the appearance from the project assessment. Actual services, coatings, protection and access determine whether this direction is viable. A black image does not establish more headroom, suitable fire protection or improved acoustics, and no technical component should be coated merely to make it disappear.
15. Relate a soffit face to the wall

A boxed ceiling change can relate to the wall by sharing its finish. The main ceiling remains a separate plane above it. This can make the lower vertical face feel part of the room’s perimeter rather than an unrelated overhead strip.
Record the actual ceiling change and its purpose before choosing the color. Do not move, reduce or conceal required access to achieve a cleaner line. The concept concerns an already resolved finished enclosure; its dimensions and services need to be established through the project, not inferred from the picture.
16. Connect a soffit to the ceiling color

Painting the visible faces of a resolved soffit in the ceiling color creates a different relationship from matching the wall. The overhead forms can read as one group while the wall carries a separate tone. Compare both options with the same room palette.
Use the actual shapes and standing routes in the review. Color cannot remove the physical projection or its headroom implications. Keep the required dimensions, protection and service access part of the ceiling brief even when the finished surface looks visually quieter.
17. Keep a structural line legible in the composition

An existing supported ceiling line can divide the overhead into two clear areas. Let a simple finish show that organization rather than adding another decorative pattern across it. The room’s furniture can relate to the two areas without pretending the line is absent.
Establish the real element and its role before planning any work around it. A finished enclosure may conceal more than its illustrated surface suggests. Retaining it and choosing a finish is a different decision from changing its depth, support or surrounding services.
18. Use compact surface lights with the finished plane

A few compact surface-mounted lights can belong to a simple ceiling without large hanging fixtures. Compare their actual projection with the room and intended activity. Keep the shapes restrained when the ceiling already has a strong grid or plank direction.
Review the fixture’s support, electrical requirements, controls and useful light distribution through the actual design. A low-profile photograph is not a headroom measurement or lighting calculation. Choose a fitting for the room’s use before deciding whether its finish should match the ceiling.
19. Plan recessed lights with the ceiling layout

Recessed lights can form a restrained group when their positions are considered alongside ceiling modules, furniture and fixed openings. Keep the layout understandable rather than placing a light at every convenient panel intersection. The room’s activities should guide the discussion.
Have the actual fixtures, surrounding assembly, clearances, support and access specified appropriately. An attractive pattern of bright dots cannot establish useful illumination or compatibility. Review the normal seating and table positions as part of that design instead of judging the ceiling while the room is empty.
20. Give a media area a deliberate darker ceiling zone

A dark overhead field can belong to a media corner within a larger finished room. Relate its boundary to the actual room plan so the change looks intentional. Keep the neighboring ceiling simpler rather than adding several competing zones.
Review the area with the screen on and off and with ordinary room lighting. The dark color is a visual choice, not a promise about glare control, acoustics or viewing performance. Keep system changes and the room’s suitability separate from the decorative boundary.
21. Keep the ceiling over a desk visually quiet
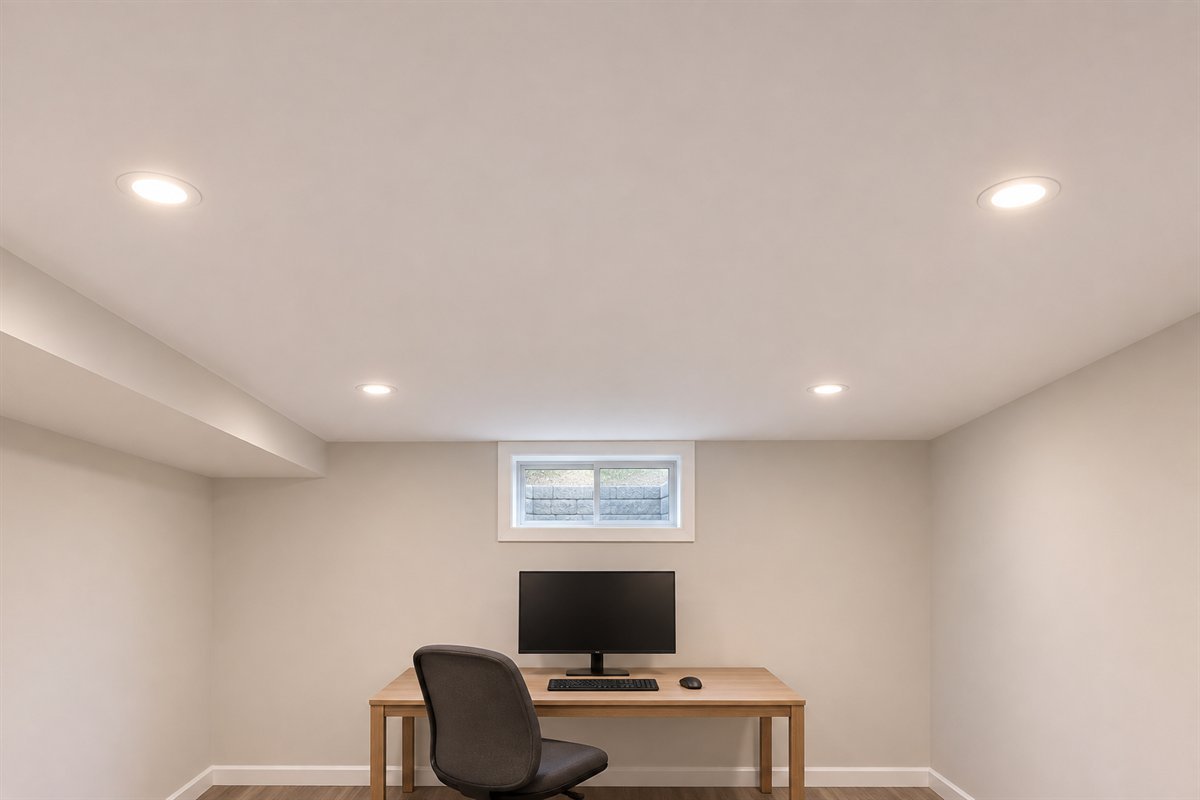
A quiet pale plane above a basement desk can let the work area sit within a shared room without a separate decorative canopy. The ceiling does not need to repeat every color used on the storage below. Simplicity can make the actual light positions easier to assess.
Review screen reflections and task lighting from the working position before selecting fixtures. A pale ceiling alone does not establish a suitable workstation. Keep access above the desk realistic: a ceiling panel is inconvenient to reach if routine service requires dismantling a permanently fitted furniture group.
22. Make required ceiling access practical to use

A closed access panel can be part of a finished ceiling when its position and surrounding furniture are planned together. Decide what must remain reachable before selecting a continuous decorative surface. A discreet outline is useful only when the real opening still works.
Ask for the actual access requirement, suitable panel and opening method to be included in the project. Keep a realistic way to reach it without moving heavy fixed furniture. The concept shows a closed finished panel and deliberately does not demonstrate service work or certify an access arrangement.
23. Resolve ceiling grilles as part of the finish group

A ceiling grille can be coordinated with the surrounding finish without being hidden by decorative material. Keep its location clear on the ceiling plan alongside lights and access. A quiet appearance should follow the actual working system rather than replace it.
Choose appropriate components and finish options through the equipment and ceiling specification. Do not cover openings or repaint a component simply because the image uses a matching color. The actual function, installation and future access remain more important than an uninterrupted decorative plane.
24. Include the stair arrival in the ceiling review

The ceiling is encountered before anyone sits down. Include the route from the stairs, doorway and first standing position in the review rather than judging only the sofa view. A simple consistent finish can help connect that arrival with the rest of the room.
Record real ceiling changes and actual required clearances through the project assessment. A photograph taken from a flattering angle cannot demonstrate acceptable headroom. Keep the arrival and service routes in the drawing while the material and lighting choices are developed.
Build an access record before choosing the final pattern
Use this original record to compare two ceiling directions without losing the working requirements. On a room drawing, mark each required access location and note what the person servicing it needs to reach. Obtain that information from the actual equipment and project assessment rather than guessing from a neat panel outline.
Add the furniture you intend to keep, including the desk, shelving and largest seat. Ask whether routine access would require moving a heavy fixed group or dismantling storage. Keep the practical approach separate from the decorative ceiling pattern. A removable-looking tile is not useful access if there is no appropriate way to reach and operate it.
Compare the same record with both proposed finishes. A continuous plane needs a resolved access strategy; a suspended system still needs the correct product, clearance and panel arrangement. Write down the unresolved point instead of declaring one system universally better. This record organizes the brief and is not a service-clearance schedule or a measured construction drawing.
Compare the full finish group from two ordinary positions
First view the ceiling proposal from the usual seat. Note whether the grain, panel grid or contrast is stronger than you want. Then review the room from its ordinary standing arrival. The same ceiling may look quieter from one position and more prominent from the other. Use the same real samples so the comparison remains about the arrangement rather than a different photograph.
Keep the ceiling perimeter and any soffit in the sample group. A white grid beside a warm-white panel can look different from a matched pair; an apparently pale wood can introduce more warmth than the floor below. Decide which contrast is deliberate before adding another material.
Check the proposed light positions with the actual activities and equipment. Do not treat the brightness of a rendering as a lighting test. Have the practical specification resolved alongside the finish layout, including the components and access that will need attention later.
Three hypothetical ceiling decisions
In a finished room where several services need regular access, compare a suitable panel system with a continuous finish that includes a properly planned access arrangement. Bring the same wall and floor samples to both proposals. The decision depends on the actual room and work, not which illustration appears tidier.
In a room with a retained perimeter soffit, compare its visible face in the wall color and the ceiling color before adding a decorative border. Keep the actual projection and access unchanged in both comparisons so you are evaluating color rather than pretending the physical form disappeared.
In a modest shared lounge and desk room, start with one quiet ceiling finish and a useful lighting plan. Add a second overhead zone only if it serves the actual composition. These are invented planning briefs, not tested rooms, cost comparisons or construction approvals.
How the references inform this guide
Kanopi by Armstrong describes suspended panels as one approach that can retain access above a finished basement ceiling and shows several visual options. Armstrong’s FAQ also separates appearance from product performance and warns that repainting can affect stated characteristics and warranty. Check the exact current product and system rather than transferring a general marketing claim to any tile.
EPA emphasizes fixing the water or moisture problem and advises against painting moldy surfaces. A new decorative ceiling should not conceal an unresolved condition. Our illustrations, access record and hypothetical comparisons are original planning resources; they are not manufacturer installation drawings.
What basement ceiling ideas work when access is important?
Compare a suitable removable-panel system with any alternative that provides the required access through a resolved design. Check how each opening can actually be reached with the room furnished.
Can I paint existing ceiling tiles?
Check the exact product and manufacturer guidance first. Repainting may affect stated performance or warranty. Do not assume a new color preserves acoustic, fire-related or other original characteristics.
Do ceiling tiles automatically soundproof a basement?
No. A decorative texture or a generic tile name does not establish the result. Identify the actual noise-control need and review relevant product and complete assembly information through an appropriate specification.
What should I consider with a low basement ceiling?
Use actual finished dimensions, ceiling projections and the applicable project requirements. Compare suitable systems with those facts. A pale color or low-profile rendering does not create or verify physical headroom.
Can a new ceiling cover a moisture problem?
A covering does not resolve the source of water or moisture. Address the actual condition before finishing the surface, and follow appropriate assessment and material guidance.
A practical next step
Choose the ceiling through the complete room: retained finishes, actual height, working openings and ordinary activities. A simple panel, plank or painted plane can feel considered when its practical questions are resolved alongside its appearance. Keep the access record with the final material and lighting proposal.
Plan the furniture and activities in a finished basement family room. Compare broader ceiling directions and levels of change. Develop a separate home-theater viewing brief when needed.
Images are original AI-generated ceiling concepts, not named products, tested acoustic assemblies, measured headroom or verified installations. The access record and hypothetical briefs are original planning aids.
Sources and care references
- Kanopi by Armstrong: basement ceiling approaches and visuals
- Armstrong: product-specific ceiling questions and repainting limitations
- EPA: moisture control and the limits of covering affected surfaces
Optional digital guide for this topic
If you prefer a structured workbook, explore this related paid guide.