Staircase ideas work best when the flight, stairwell wall and landing are considered together. Start with the parts you have: the timber worth keeping, the shape of the balustrade, the surrounding floor and the view from adjoining rooms. A paint or wall change may be enough to give those existing details a clearer setting.
Decide whether you are refreshing the surroundings, changing finishes or considering a stair renovation. Those are different scopes. A generated image cannot establish structure, suitable stair surfaces, handrail design, fixing details or compliance. Have physical alterations and product choices assessed for the actual home and applicable requirements.
These 26 original concepts show finished color and material relationships, including quieter changes that leave useful stair parts in place. They do not supply dimensions or installation instructions. All illustrations are original AI-generated decor concepts.
Contents
- 1. Pair pale wood treads with white risers
- 2. Give dark wood treads a light surround
- 3. Use black railing details against pale stairs
- 4. Keep a warm wood handrail with painted balusters
- 5. Choose a simple square spindle rhythm
- 6. Let turned balusters carry a traditional detail
- 7. Define the stair side with a darker string
- 8. Put a muted green on the risers
- 9. Try navy risers with warm timber
- 10. Use clay-colored risers as a warm accent
- 11. Set a white staircase against a warm wall
- 12. Keep a deeper timber staircase as the focal point
- 13. Make the stairwell wall the main green surface
- 14. Use a deep blue wall behind light stair details
- 15. Give a lower wall color a deliberate boundary
- 16. Use shallow wall panels without competing with the rail
- 17. Keep stairwell wallpaper to one understandable surface
- 18. Let one artwork anchor a broad blank wall
- 19. Build a small gallery around the full stair view
- 20. Keep an enclosed stair wall simple
- 21. Leave a narrow lower hall free of extra furniture
- 22. Resolve a turning stair as one connected composition
- 23. Include the top landing floor in the finish plan
- 24. Choose wall lighting with the stair route in view
- 25. Let one quiet runner connect the stair palette
- 26. Check the staircase from the adjoining room
Choose the scope before choosing a new stair style
Write down what will stay, what you want to change and what needs assessment before it can change. Separate a stairwell wall color from work on the treads, rail or enclosure. Then compare the retained materials with the proposed finish from the lower hall and upper landing.
An original staircase scope sheet
- Retained treads: Record the actual material, finish and visible wear before selecting nearby colors.
- Stairwell wall: Compare samples in more than one light position and plan appropriate access.
- Handrail and balustrade: Keep function and the complete stair system in the assessment, not only the silhouette.
- Runner or floor change: Choose the exact suitable product and resolve the complete fit and transition.
- Landing and doors: Review the finish relationship and ordinary route at the top and bottom.
- Enclosure or geometry change: Treat it as a building-design decision before ordering decorative materials.
1. Pair pale wood treads with white risers

Pale wood treads and white risers give the horizontal and vertical faces different roles. The wood can relate to the hall floor while the white connects to trim. Let those broad materials establish the composition before adding another stair color.
Compare the actual finished wood with the surrounding floor, especially where the first tread meets it. They can be deliberately different rather than an imperfect match. Have any proposed tread replacement or overlay assessed as part of the stair system; the image shows a finished appearance, not a cladding method.
2. Give dark wood treads a light surround

Deep brown treads can remain the distinctive feature of an existing staircase. White risers and a pale wall keep the surrounding group lighter without hiding the timber. Start by asking whether the current wood is worth keeping before specifying a replacement.
Look at the finish in the stairwell rather than treating every dark brown as the same color. A reddish wood and a cooler brown can lead to different wall choices. Choose suitable care or refinishing for the actual material, keeping the existing stair geometry and practical requirements separate from the palette.
3. Use black railing details against pale stairs
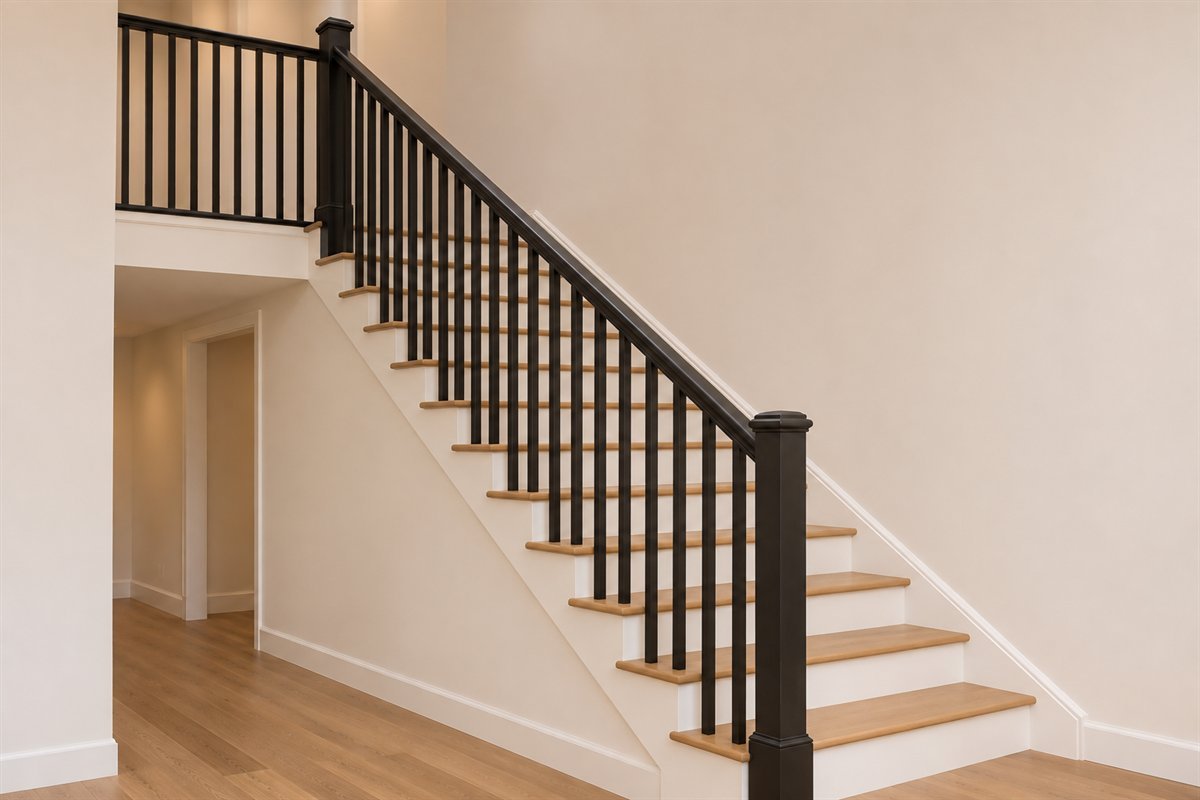
Black can give a pale staircase a clear outline through the handrail, newel and balusters. Keep the adjacent wall quiet so the railing reads as one continuous group rather than many unrelated dark pieces. The treads can stay warm wood.
Judge the complete run, including the landing return. Painting one visible newel without considering the rail above may create an accidental interruption. A change to structural or protective stair parts needs appropriate assessment; choosing a black finish does not establish the suitability of the underlying system.
4. Keep a warm wood handrail with painted balusters

A wood handrail can connect the stair to doors or furniture while white balusters keep the lower pattern quieter. This mixed finish suits a home where useful timber details already exist. It does not require every wood surface to be identical.
Compare the rail with the largest nearby timber surface from the hallway entrance. One clear relationship can be enough. Keep the handrail usable and its profile appropriate to the actual stair; an attractive timber cap is not a substitute for the functional part specified for the home.
5. Choose a simple square spindle rhythm
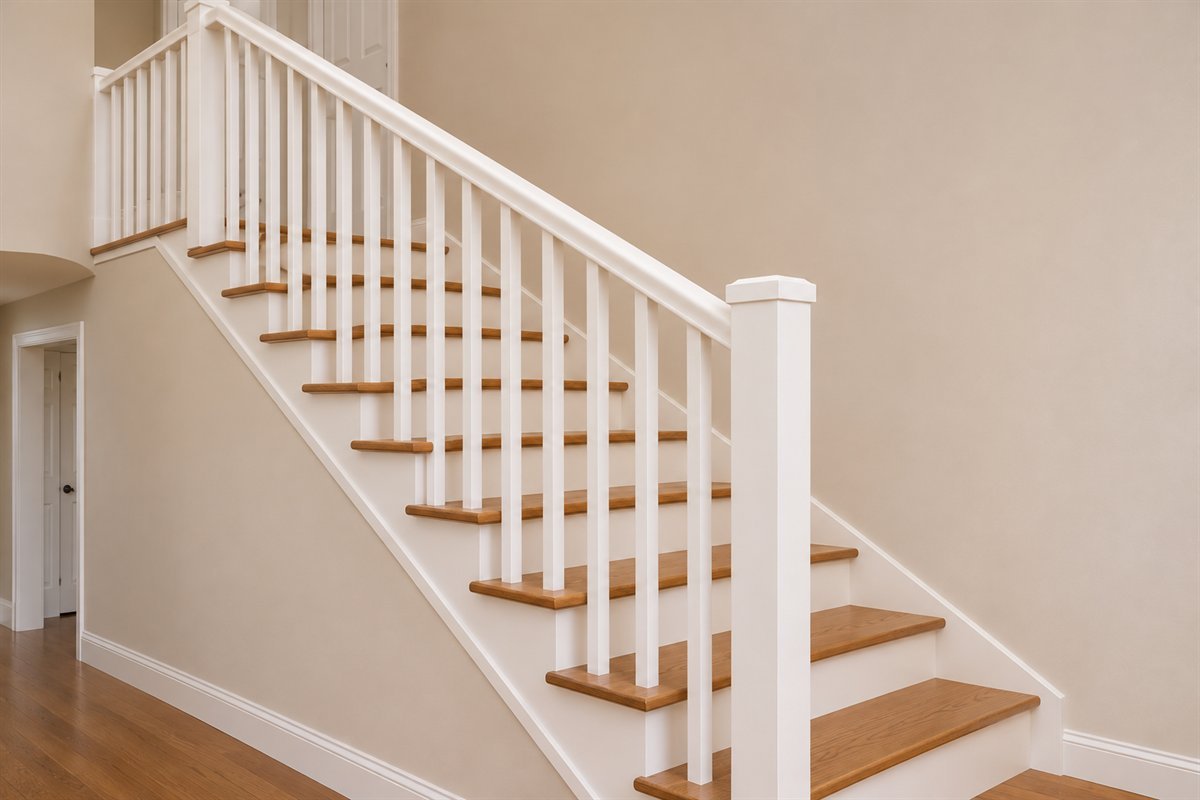
Square-profile timber balusters can make a staircase feel orderly without elaborate ornament. A restrained finish lets their repeated vertical lines provide the detail. Consider the newel profile in the same composition so one part does not look unexpectedly heavy.
If you are keeping the existing stair, first check whether its current profiles already suit the room. Replacement is a system decision rather than a styling shortcut. Review spacing, support and the landing with the appropriate professional instead of copying dimensions from a concept photograph.
6. Let turned balusters carry a traditional detail

A turned timber balustrade can supply character in an otherwise plain hallway. Keep the wall and floor restrained while judging its silhouette. A single traditional component can remain useful without turning the entire entrance into a period-themed display.
Look at the thickness and repetition from normal standing distance. If the pattern already has enough detail, a quieter wall may serve it better than additional molding. Retain sound existing parts where appropriate, and have changes reviewed as stair work rather than treating decorative appearance as evidence of adequate support.
7. Define the stair side with a darker string

A dark visible stair string can underline the flight while the risers and wall remain light. It is a different distribution of contrast from making every baluster black. The diagonal edge becomes the main line seen from the lower hall.
Compare the proposed color with nearby door trim and the entry floor before adding another dark element. The string should remain visually part of the stair rather than an isolated stripe. Its condition and any proposed covering need assessment; this idea concerns the finished color relationship.
8. Put a muted green on the risers

Muted sage risers can bring color to a timber staircase while the tread surfaces retain their own material. A pale wall and quiet balustrade allow the repeated green faces to become the main decorative choice. Keep the color consistent over the flight.
Test the actual green beside the finished wood and surrounding floor. The suitable coating and preparation depend on the real stair material and use. Keep this as a color comparison, with the stair’s condition and product specification resolved before any work rather than borrowing a wall-paint recommendation.
9. Try navy risers with warm timber
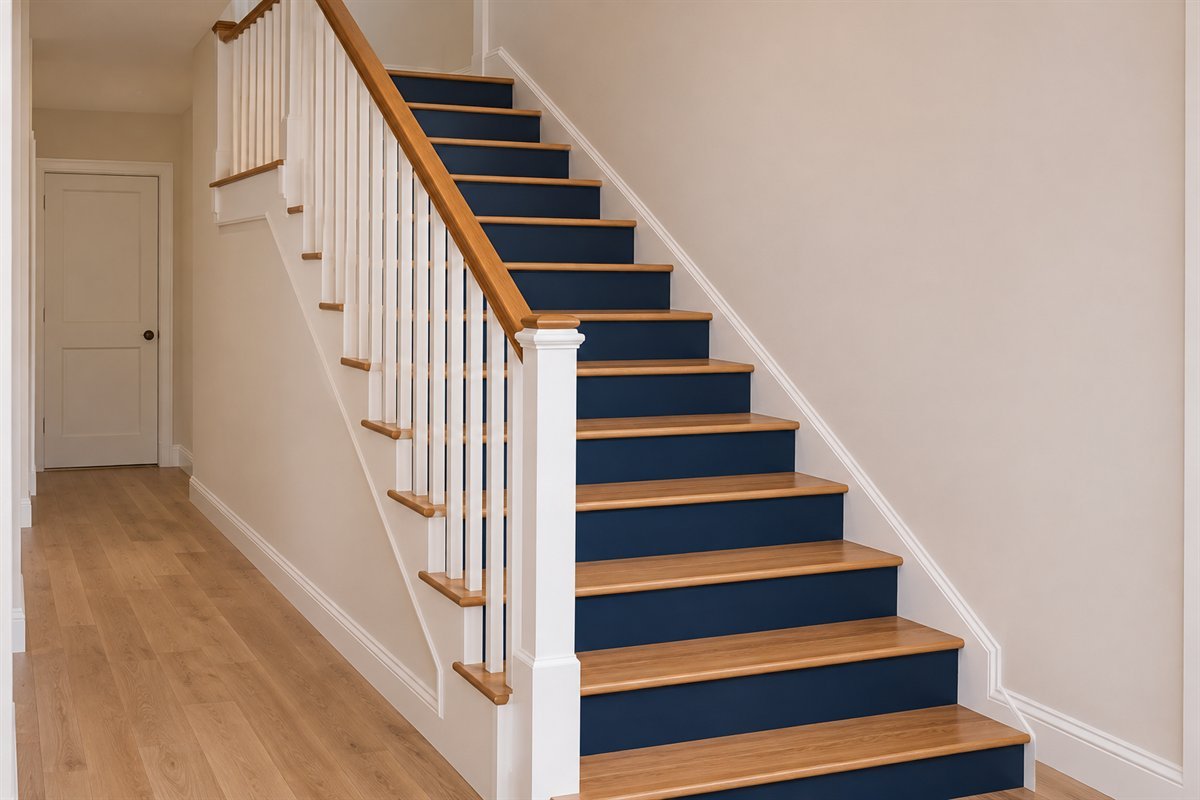
Navy risers can connect a staircase to blue used elsewhere in the house while warm treads keep the composition varied. Plain white surrounding trim can make the contrast easy to understand. Decide whether the navy should be obvious or nearly black.
View a real sample from the lower hall and upper landing, since the faces receive different light. Do not select a color only from a bright close-up. Choose the exact finish for the existing substrate and intended use, and keep each tread edge distinct from decorative patterns.
10. Use clay-colored risers as a warm accent
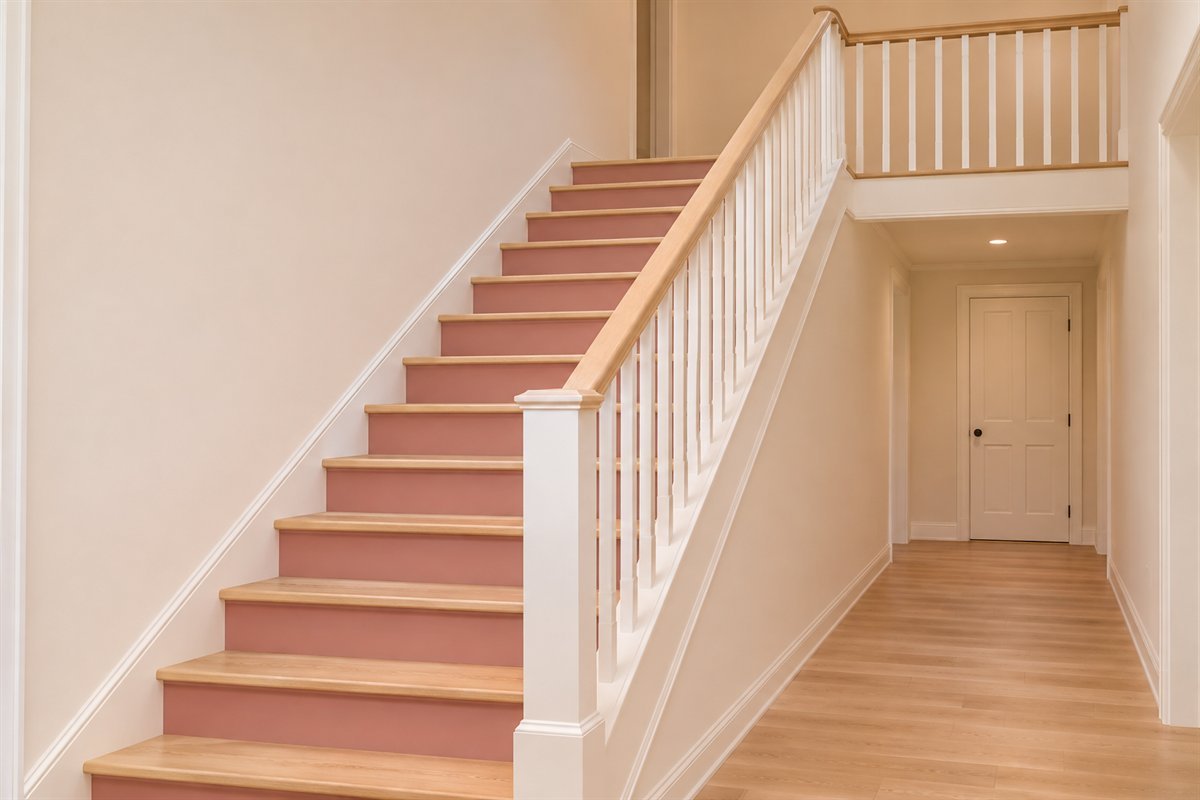
A muted clay tone on the risers can introduce warmth to a pale entrance without adding objects to the route. Keep adjacent walls and railing details quieter. The repeated faces provide a substantial color area even though the hall remains simply furnished.
Compare the clay with the entry flooring rather than choosing it in isolation. A redder tile and orange-brown wood may already make a strong warm group. Choose the sample that relates well to those retained materials, with the actual stair finish and work method specified separately.
11. Set a white staircase against a warm wall
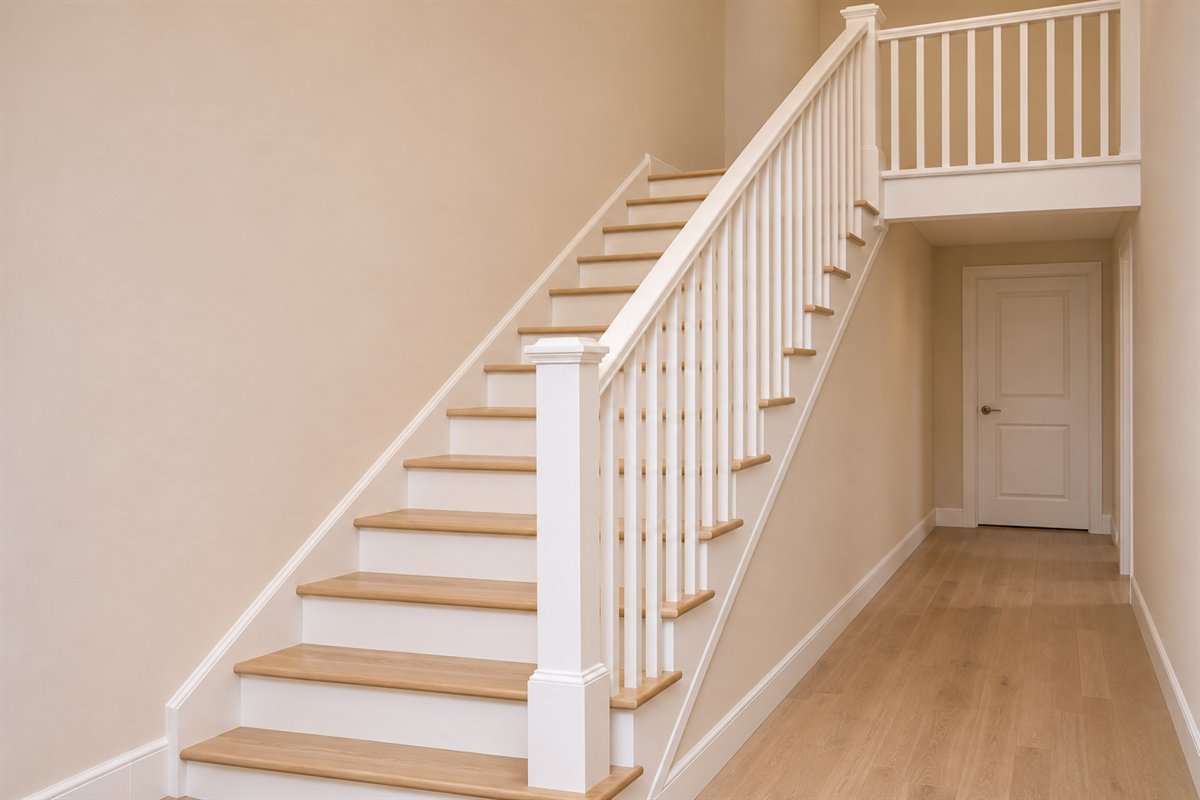
An existing white-painted balustrade can stand out against a restrained warm beige wall. The contrast is softer than black and white but still gives the profiles definition. Keep the wall shade visibly different from the rail rather than aiming for an uncertain near-match.
Use samples beside the actual white finish, which may appear cooler or creamier than expected. Look at the stairwell in the evening as well as daylight. The wall color can be the only decorative change if the stair itself is sound, suitable and already useful.
12. Keep a deeper timber staircase as the focal point
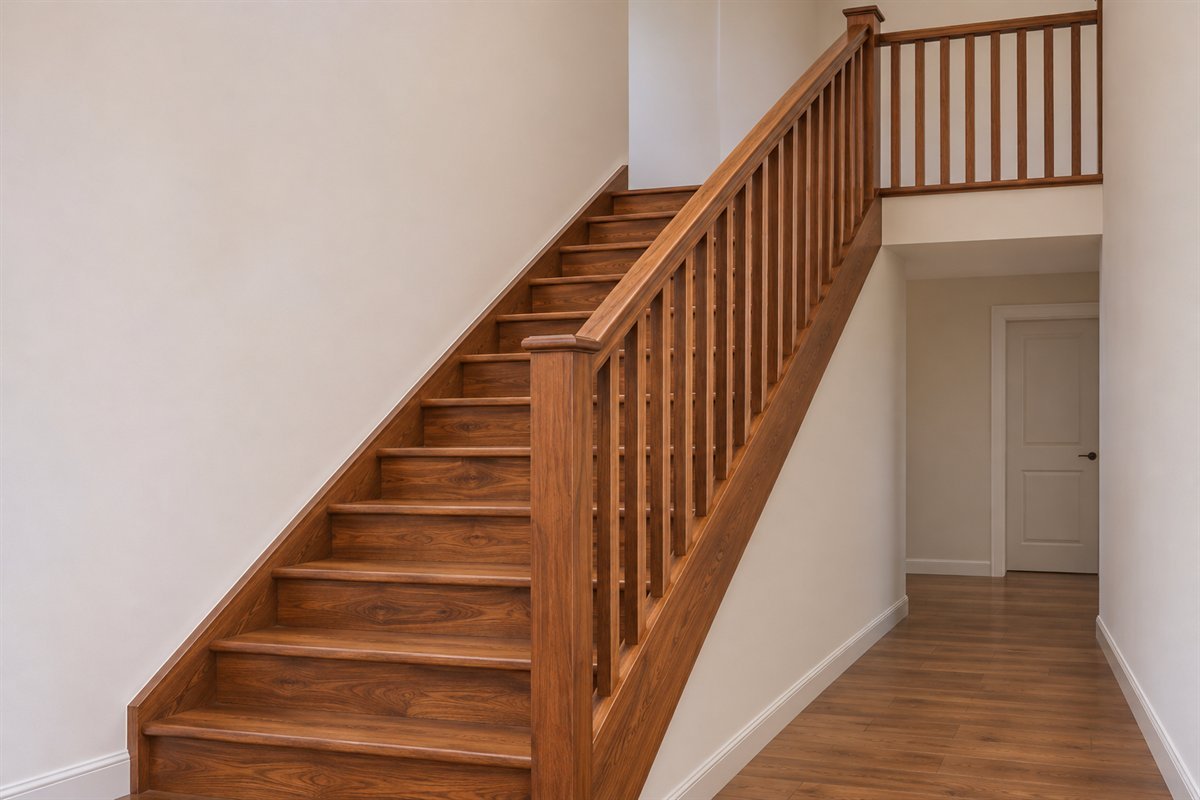
A staircase with rich visible timber can remain the entrance’s strongest material. Pale walls allow the grain and construction to read without several added colors. Consider whether cleaning, appropriate care and a quieter surrounding palette would achieve the change you want.
Review the full flight rather than only one beautifully figured tread. Different existing parts may have aged differently, and that variation can belong in the home. Do not assume a generated wood tone identifies a species, stain or refinishing process for the actual staircase.
13. Make the stairwell wall the main green surface

A green stairwell wall can change the setting while leaving the stair finishes alone. Choose the depth beside the existing rail, treads and entry floor. The large wall can provide enough color without repeating green on every decorative object.
Check the sample where the wall receives both stronger and weaker light. Moving a sample helps compare those positions without committing to the full area. Use appropriate access for any work at height; the finished concept does not demonstrate how a tall stairwell should be decorated.
14. Use a deep blue wall behind light stair details
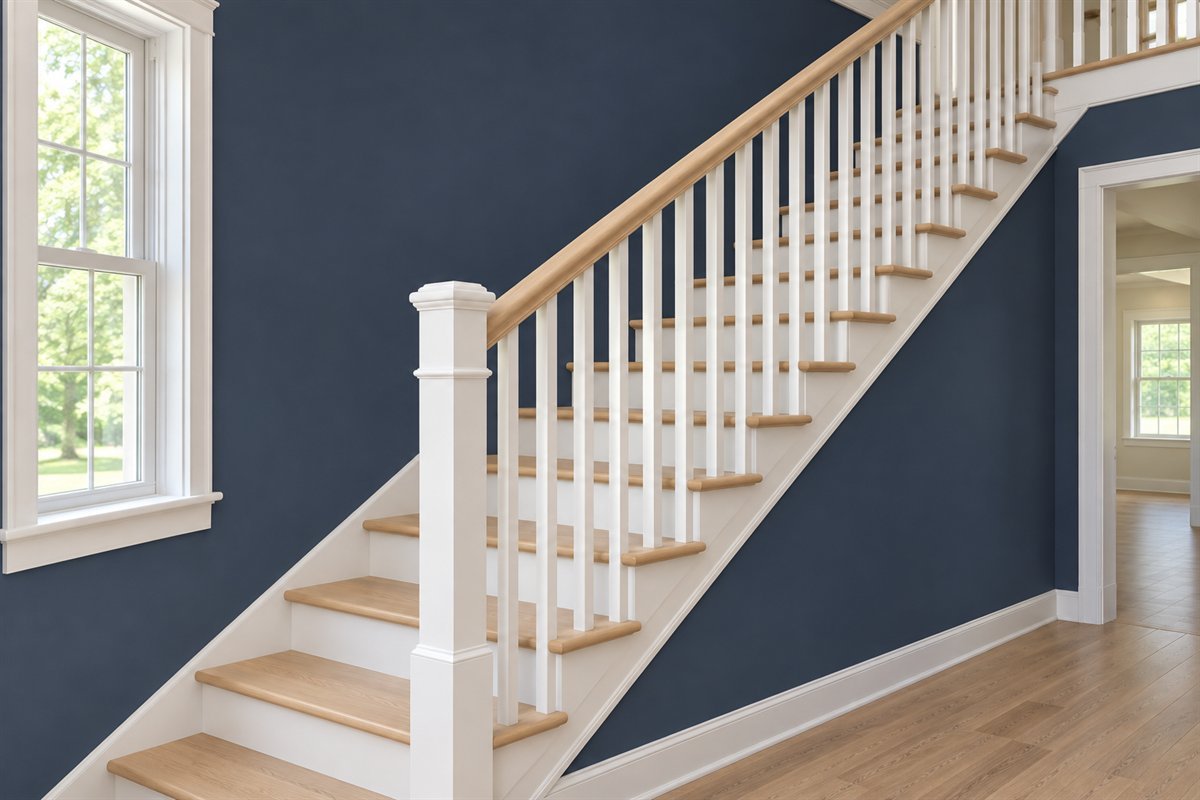
Deep blue can give a pale balustrade a strong background. Let the stair’s simple lines remain distinct and keep artwork limited while evaluating the color. A small adjoining glimpse of the hall can show whether the blue belongs in the wider house.
Compare the chosen blue with retained white trim and timber in ordinary lighting. A very dark sample can look close to black in a shaded stairwell. Decide whether you enjoy that change before choosing additional contrast, and assess useful lighting independently of the screen image.
15. Give a lower wall color a deliberate boundary
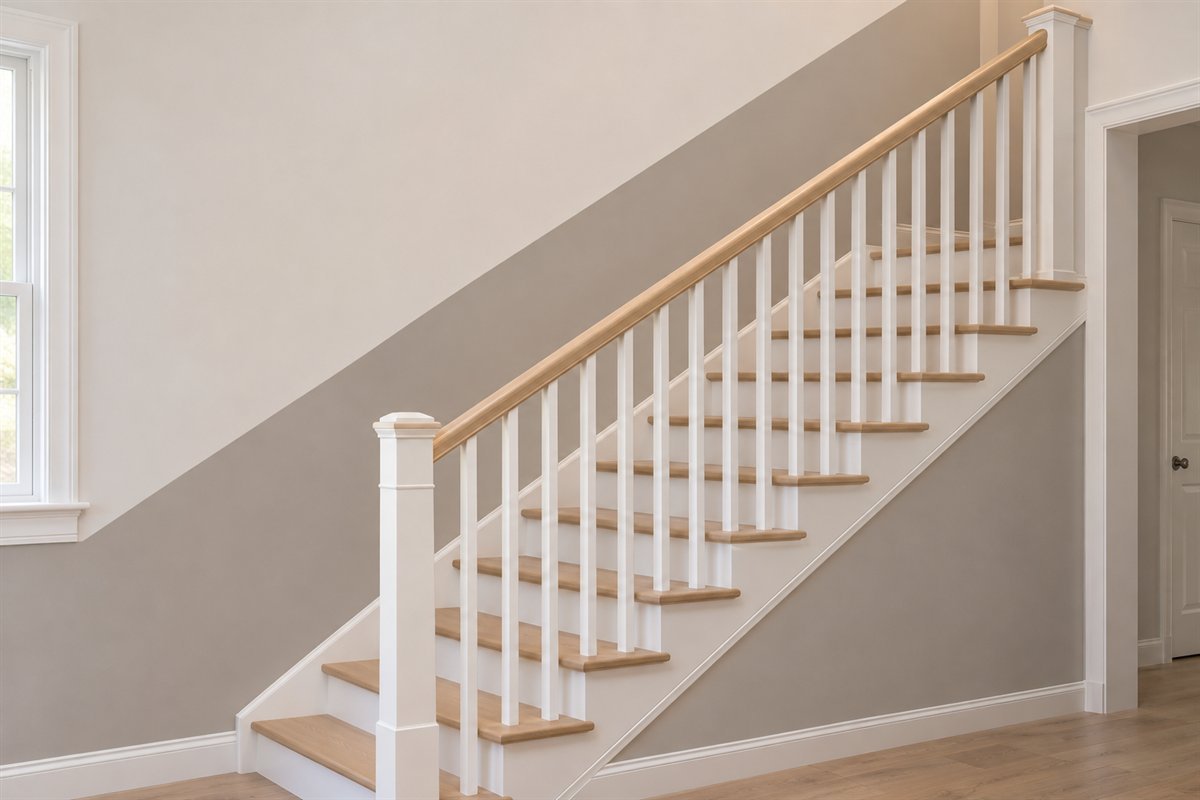
A two-color stairwell wall can provide a darker lower field beneath a pale upper area. Decide how the dividing line relates to the flight and landing rather than drawing it through the most convenient point. A clearly planned boundary feels more resolved than an accidental stop.
Mark the intended line on a drawing of the wall first and view it from both ends. Consider switches, door surrounds and the handrail. The illustration offers a composition to discuss, not a measured height or an instruction to alter the stair or its protective elements.
16. Use shallow wall panels without competing with the rail

Simple wall panels can add relief to a plain stairwell. Keep their proportions legible around the handrail and changes in wall shape. A restrained single wall color lets light and shadow supply detail rather than requiring several contrasting finishes.
Have the wall layout drawn as a whole, including the landing and doors. A pattern that fits one rectangle may meet a sloping rail awkwardly. Choose a suitable wall system and appropriate installation, keeping the handrail and clear passage functional rather than prioritizing decorative alignment.
17. Keep stairwell wallpaper to one understandable surface

A small repeating wallpaper motif can bring pattern to the wall beside the flight. Keep the railing and adjoining trim comparatively quiet. One continuous wall is often easier to evaluate than several patterned fragments around doorways and landings.
Review a complete repeat and the proposed joins on the actual wall plan. Include the top and bottom views, where the pattern may appear more compressed. Follow the specific wallcovering and substrate requirements, and arrange suitable access for the work instead of reaching across an open stairwell.
18. Let one artwork anchor a broad blank wall

A single original artwork can give a broad stairwell wall a focal point without filling every available patch. Choose the image because you want to see it from the hall, then judge its size beside the stair’s actual shape.
Check where the frame sits in both the lower and upper views before fixing it. It should not obstruct ordinary use or force an awkward reach for cleaning. Arrange suitable support and access for the real frame and wall; the picture placement is a composition, not a hanging instruction.
19. Build a small gallery around the full stair view

A limited group of personal pictures can relate to the flight without tracing every step. Consistent frame depth or a shared color can connect varied images. Leave enough wall visible for the staircase and picture group to remain separate readable elements.
Arrange the group on paper before choosing the final hanging positions. View it from the lower hall, turn and landing, then remove any frame that makes the group feel crowded. Use appropriate fixing and access; do not place loose frames on treads or railings while planning.
20. Keep an enclosed stair wall simple
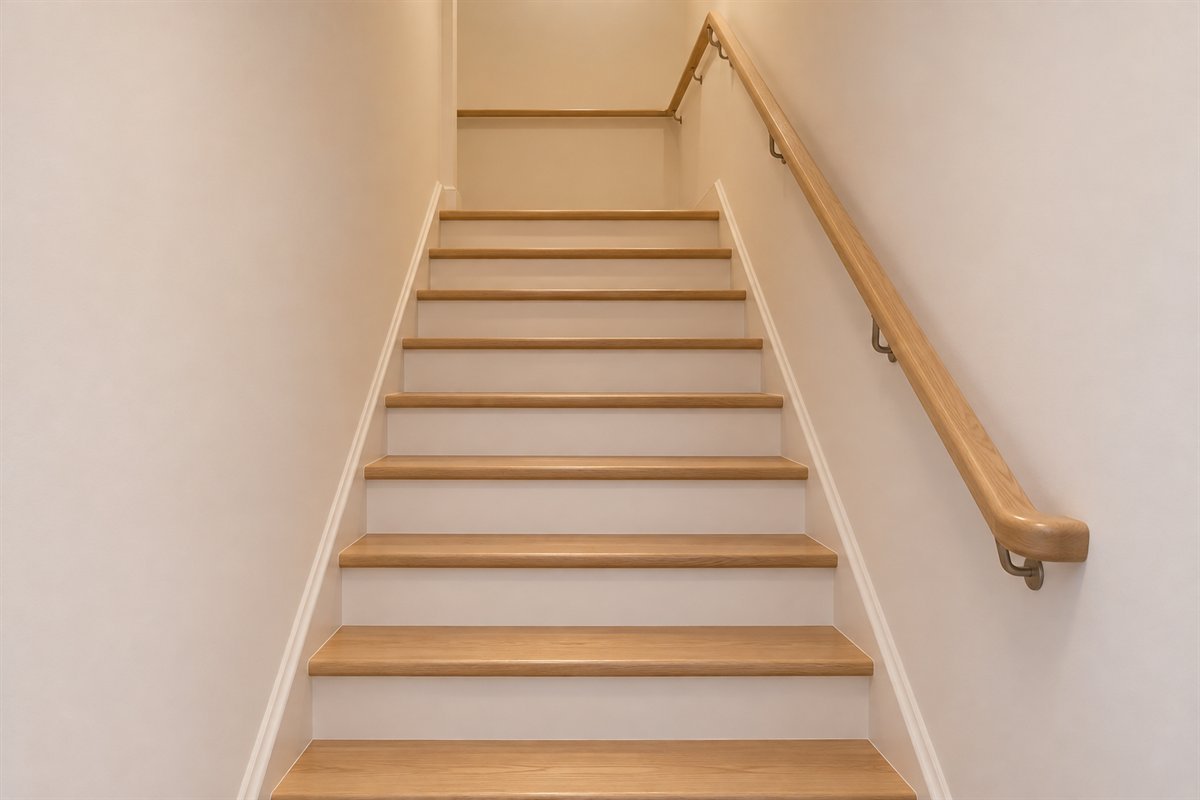
A staircase enclosed by walls can be a deliberate part of the home rather than a problem to open up. A quiet wall finish and simple continuous handrail can make its shape understandable. Let the existing enclosure provide the composition before considering major alterations.
Begin with the surfaces you can sensibly refresh. Removing a wall or opening the side of a staircase is a building project with requirements beyond appearance. Keep that decision separate from choosing paint, and have the existing structure and enclosure assessed before assuming either can be changed.
21. Leave a narrow lower hall free of extra furniture

A narrow hall can give the staircase room to read by leaving the approach simple. The wall color, handrail and first step can provide enough detail. A decorative console is optional when it would crowd the ordinary route.
Walk the approach with the doors operating as they normally do. Consider carrying a bag and moving between adjoining rooms before choosing any accessory. Keep useful existing furniture where it works, but do not let a staged photograph become a reason to add a piece the passage does not need.
22. Resolve a turning stair as one connected composition

A staircase with a half landing has several views of the same materials. Let the wall finish and balustrade relate across the turn rather than treating the lower flight as the whole project. A simple palette can make the change of direction understandable.
Review the landing floor, rail return and adjoining doors together. Decorative choices should follow the existing useful geometry. Any change to the turn, stair parts or protective elements requires its own design assessment; copying a photographed shape cannot establish a suitable stair arrangement.
23. Include the top landing floor in the finish plan

The transition at the top of the stair belongs in the original palette. Compare the proposed landing floor with the tread finish and door surrounds before ordering materials. A deliberate change of material can be more resolved than a near-match selected separately.
Have the actual transition and finished levels included in the flooring and stair specification. Color coordination does not settle those practical details. Review the appearance from the landing itself as well as from below, where only a small part of the floor may be visible.
24. Choose wall lighting with the stair route in view

A restrained wall light can belong to the stairwell composition while supporting its ordinary use. Judge the fixture beside the wall finish and rail rather than as a separate decorative purchase. The useful light needs to work at the times the household uses the stairs.
Review the actual light distribution, glare, switching and fixture position with a suitable professional. A bright illustration does not establish adequate illumination. Keep the route and handrail usable, and treat wiring or new fixture locations as work to specify rather than a placement to copy from an image.
25. Let one quiet runner connect the stair palette

A restrained runner can relate the stair to the hallway without becoming a separate color scheme. Begin with the visible wood, wall and rail, then compare a real carpet sample beside them. One quiet center can be sufficient when the stair already has detailed balusters.
Choose an exact product suitable for stairs and have the complete fit and landing transition specified. A loose hall rug is not an alternative. Our stair-runner guide covers pattern, borders and fitting questions in more detail; here the runner is one component in the whole entrance.
26. Check the staircase from the adjoining room
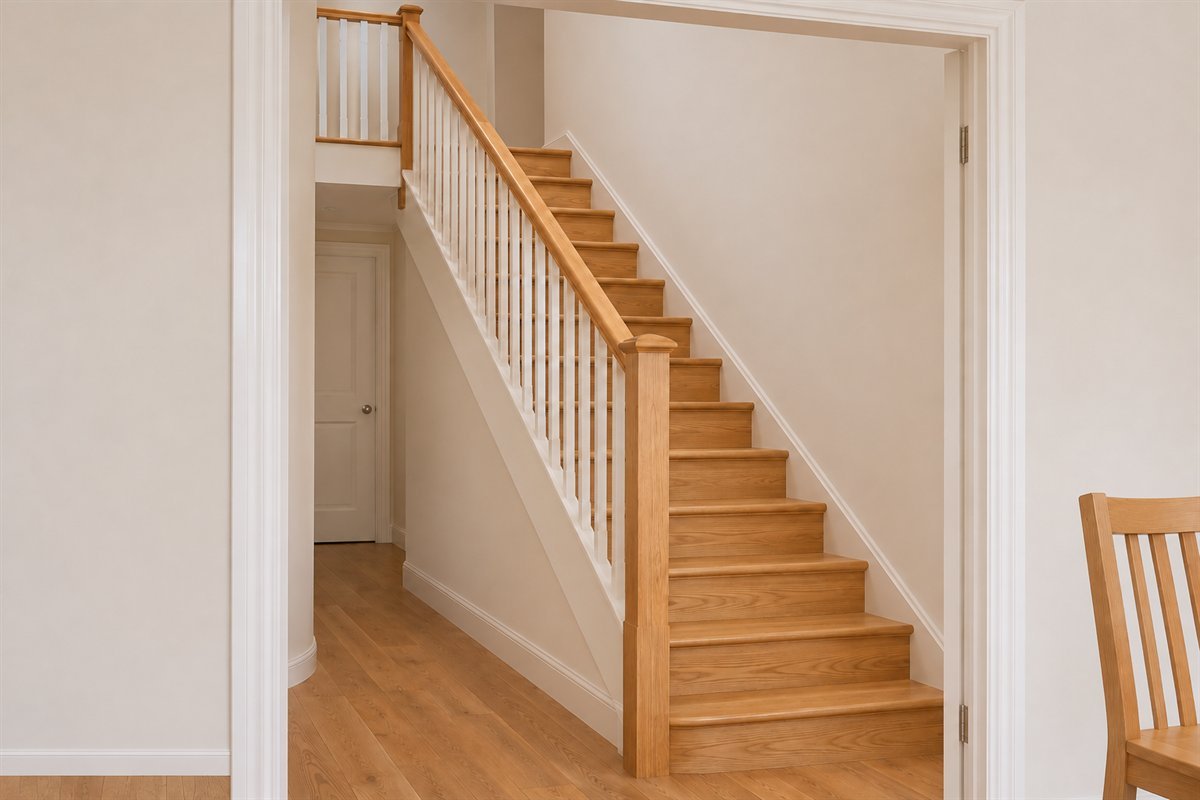
The staircase may be seen most often from a living room doorway rather than directly below it. Use that view to judge the wall color, rail and visible floor together. A repeated timber tone or restrained paint relationship can connect the spaces without matching every object.
Stand at the ordinary doorway with the door in its usual position and note which stair details actually remain visible. Simplify the detail that competes with the room you use most. This final check can prevent an attractive close-up scheme from becoming an unrelated patch in the wider home.
Use three views to settle one staircase scheme
This original review exercise uses the places from which the staircase is actually seen. Make a simple note from the lower hall, the upper landing and the adjoining room you use most. In each view, name the largest visible surface, the clearest outline and the detail that feels unrelated. You may discover that a wall color matters more than a baluster profile that is barely visible from the room.
Keep one small group of actual finish samples together. For example, compare the existing tread wood, the intended wall color and the retained rail finish as one group. Move that same group between the three viewing positions, where it can be assessed safely. Do not add a fourth material merely because it looked attractive on its own.
Finally, write which decision remains unresolved and who needs to resolve it. Color preference belongs to your room brief; condition, system suitability and work details may need professional assessment. This exercise organizes the conversation and the palette. It is not a measured stair survey or a substitute for one.
Three hypothetical starting points
For a sound timber staircase with white balusters, keep the stair itself in the first proposal and compare wall colors beside the existing wood. Review the result from an adjoining doorway. A different wall may change the setting enough that replacing the rail no longer feels necessary.
For a narrow hall with a busy first-step approach, remove the decorative furniture from the proposal before selecting more finishes. Decide which wall or rail detail should lead. A clear route is a practical requirement of the brief, not empty space that needs filling.
For a proposed replacement staircase, start with the designer or supplier’s measured process and the home’s requirements. Use the illustrations to describe the finish relationship you like after the viable arrangement is established. These are hypothetical planning examples, not completed client projects or tested renovation specifications.
What the references contribute
StairBox describes renovation as a set of related stair components, including balustrades, newels, treads, risers and strings. Its separate new-stair guide starts with measurement and design rather than an image alone. The supplier is UK-based; its product and regulatory statements should not be transferred as universal requirements for another location.
Benjamin Moore explains how to assess color samples under different lighting and distinguishes color samples from a final coating. Use that guidance for the palette discussion, then choose suitable products for the actual wall, wood or stair surface independently. Our scope sheet and three-view exercise are original planning aids.
What is the first step in choosing staircase ideas?
Decide whether the project changes the surroundings, finishes or the staircase itself. Record the parts you will retain and assess the real stair before selecting replacement components or surfaces.
Can I update a staircase without replacing the balustrade?
A wall color or a coordinated surrounding finish may provide the change you want when the existing stair is suitable and in appropriate condition. Do not replace functional parts solely because a concept image shows another profile.
Should stair treads match the hallway floor?
They can relate through tone or material without being an exact match. Compare physical samples at the actual junction, and have the finished levels and transition resolved as part of the specification.
Can ordinary wall paint be used on the steps?
Do not assume it is suitable. Identify the actual substrate and use, then follow an appropriate product and preparation specification for that surface. The images show color relationships rather than a paint system.
How should I use staircase inspiration images?
Use them to explain a finish, pattern or overall composition. Ask for measured design and suitable product, handrail, protection and installation decisions for the actual home rather than copying geometry from an illustration.
A practical next step
Let the retained stair, the surrounding wall and the landing form one considered group. Choose the smallest useful scope that achieves the appearance you want, then resolve the actual products and work before ordering. A clear finish relationship can give a simple staircase a deliberate place in the home.
Compare stair runner patterns, borders and complete fitting questions. Plan under-stair storage around belongings and the existing structure. Connect hallway lighting with the ordinary route through the home.
Images are original AI-generated decor concepts, not photographs of named products, completed projects or measured and code-verified stair designs. The scope sheet, three-view exercise and hypothetical briefs are original planning resources.
Sources and care references
- StairBox: stair components considered in renovation
- StairBox: measurement and design process for a new staircase
- Benjamin Moore: comparing color samples in the room
Optional digital guide for this topic
If you prefer a structured workbook, explore this related paid guide.