Oak kitchen cabinets bring more than a brown color to a room. The grain, door profile, amount of visible wood and neighboring finishes all affect the result. Start with the cabinetry worth keeping or the exact material you are considering, then decide what the rest of the kitchen needs.
These 23 original concepts explore oak-focused rooms and details. They include an original front-and-panel schedule to help clarify a supplier’s proposal. For a broader comparison of painted color families, use the separate cabinet-color guide rather than treating every finish as the same decision.
Contents
- 1. Keep useful honey oak as the starting point
- 2. Compare a pale finish without assuming it names the species
- 3. Give medium-brown oak a clear surrounding palette
- 4. Use dark-stained oak for depth while preserving its texture
- 5. Let broad grain patterns have enough visual space
- 6. Try straighter-looking grain on a long run
- 7. Review flecked grain as a feature rather than a flaw
- 8. Keep a simple framed door from becoming too busy
- 9. Use flat fronts to make the grain the main detail
- 10. Give detailed existing doors a quieter partner
- 11. Let oak lower cabinets ground painted uppers
- 12. Use a smaller oak upper group when the base stays painted
- 13. Make one oak island a complete material statement
- 14. Treat tall oak storage as one large plane
- 15. Separate the cabinet wood from the floor deliberately
- 16. Use a quiet stone-look floor to give the wood room
- 17. Keep a veined counter from competing with the fronts
- 18. Try a dark countertop as a clean boundary
- 19. Let a light backsplash show its own modest texture
- 20. Choose handles through the grain they sit against
- 21. Limit glass fronts to a useful group
- 22. Specify the exposed ends as carefully as the doors
- 23. Judge the finished oak room under evening light
Choose oak kitchen cabinets through representative samples
View a complete finished front with the retained counter and floor. Ask the supplier to identify the wood, front construction, finish and exposed-panel material separately. Use the actual product guidance for care, refinishing and permanent installation; a decor illustration cannot establish those specifications.
Include the visible parts in the oak material schedule
- Door frame and center: Name the material and construction of each part, rather than relying on a single oak label.
- Drawer fronts: Compare grain direction, variation and any intended relationship across the group.
- Exposed cabinet ends: Confirm the proposed panel material, finish and visible edge.
- Fillers and plinth: Record whether these pieces match the fronts or are designed to coordinate.
- Glazed doors: Include the frame and the interior surface that will be visible through the glass.
1. Keep useful honey oak as the starting point
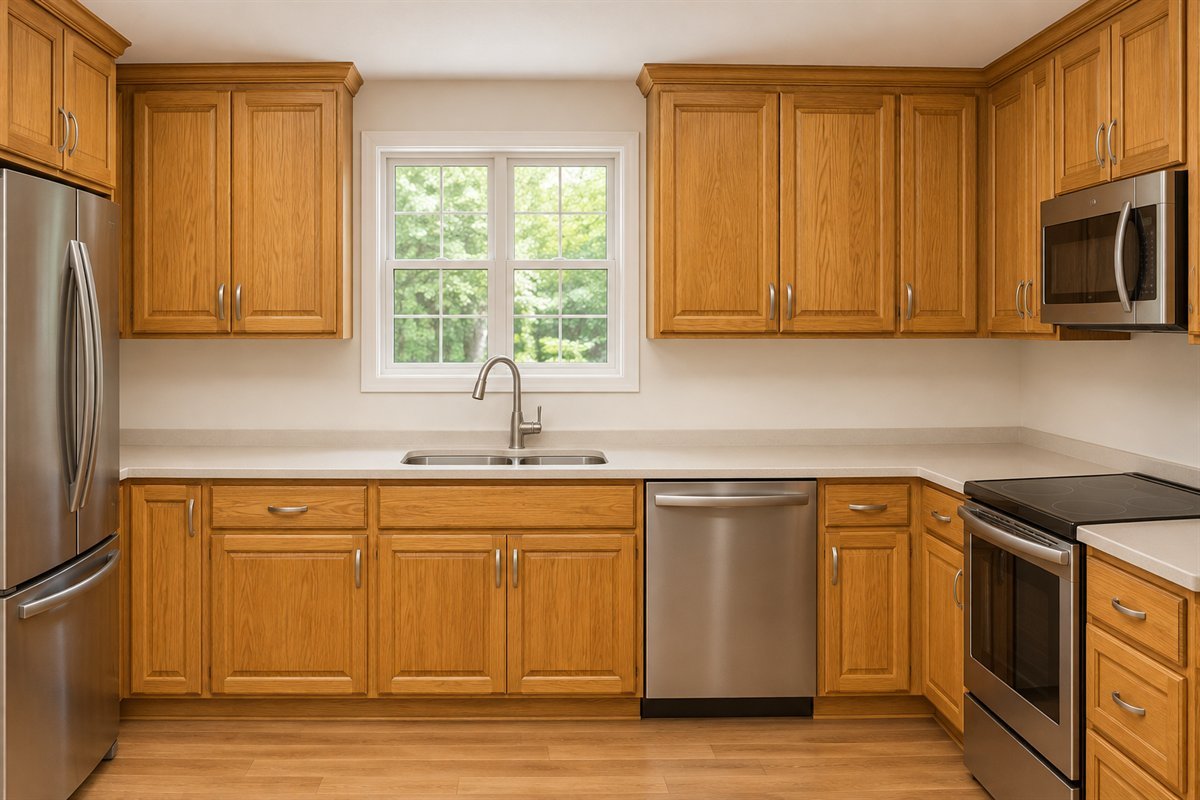
Oak kitchen cabinets do not need to disappear for a room to feel considered. If a sound existing run has a golden finish, begin with the counter, wall and hardware beside it. Change the surrounding relationship before assuming that every visible door needs a new color.
Photograph one ordinary approach to the kitchen and identify the strongest competing finish. A very busy backsplash may be doing more to date the room than the cabinet wood. Compare one quieter replacement sample while keeping the oak in view.
2. Compare a pale finish without assuming it names the species

A pale oak-looking finish can give the cabinet run a lighter presence while keeping visible grain. Compare it with the existing floor and counter, including the sample’s darker markings. A small clean corner of a sample is not a reliable preview of several complete doors.
Ask the supplier to name the actual wood and finish separately. A light tone alone does not identify white oak, the way the timber was cut or the construction behind the face. Keep those details in the material schedule rather than trying to infer them from a picture.
3. Give medium-brown oak a clear surrounding palette

Medium-brown fronts can provide depth without taking the room as dark as a nearly black finish. Compare the whole cabinet elevation beside a light counter, including the drawer lines. Decide whether the grain or the surrounding surface should carry the main pattern.
Keep the first trial simple. One quiet backsplash and the actual appliance front often explain the relationship more clearly than several new accessories. Look through the adjoining doorway as well as straight at the cabinets.
4. Use dark-stained oak for depth while preserving its texture

A deep oak finish can act as a substantial backdrop rather than a collection of small decorative accents. View the run with its floor, counter and ordinary lighting. The visible grain and the amount of dark surface both influence how strongly it reads.
Compare a complete door sample, not only a stain label. Check whether the chosen finish leaves the amount of texture you want. A lighter wall and working surface can provide contrast without outlining every cabinet edge in another color.
5. Let broad grain patterns have enough visual space

A broad grain pattern is easier to appreciate when the nearby surfaces are quiet. Compare a wider front with a group of smaller doors before committing to the same appearance across the whole run. The repeating door divisions become part of the pattern.
Use representative samples that include more than one marking. Do not select the least varied piece and assume that every delivered front will look exactly like it. Decide which degree of variation you would be comfortable seeing beside the worktop each day.
6. Try straighter-looking grain on a long run
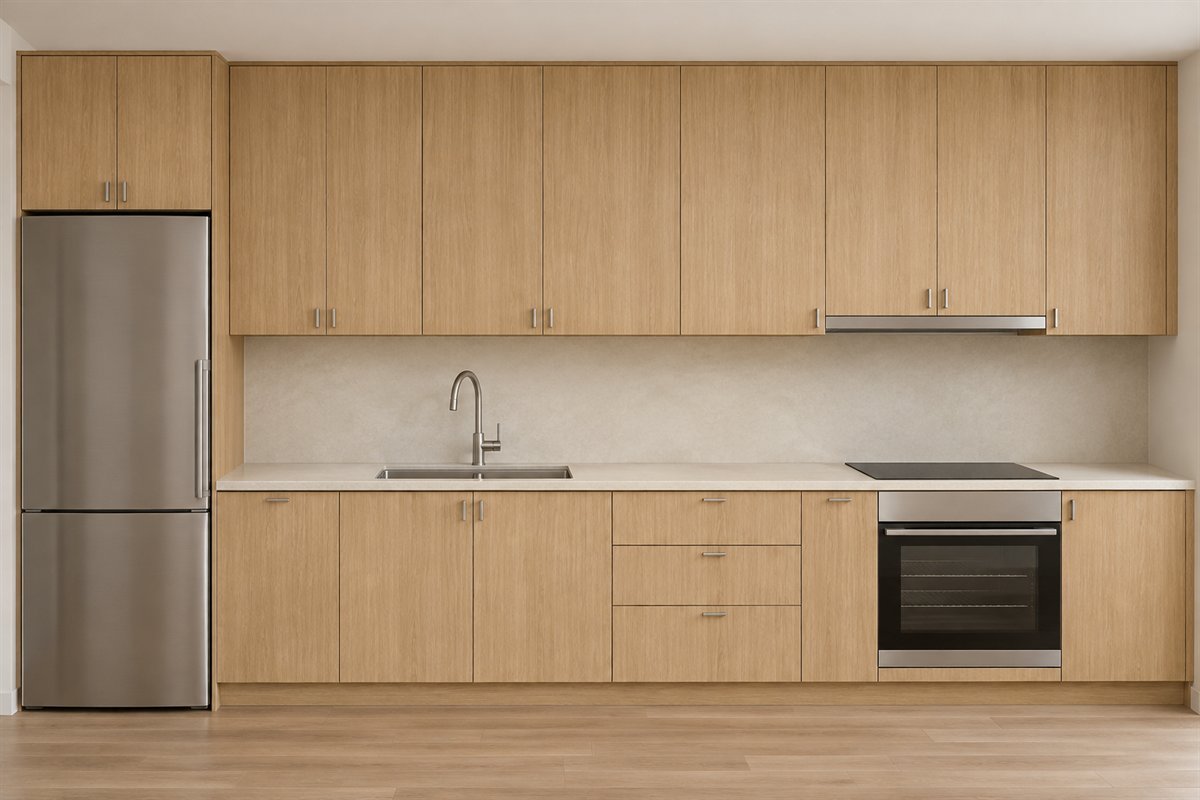
A straighter grain appearance offers a different rhythm across a long cabinet elevation. Compare the complete run with the same counter and handles rather than changing every material at once. This makes the effect of the grain easier to judge.
Ask to see the supplier’s representative range, including corners and drawer fronts. Decide whether the lines should read mainly up the doors or across a wider group. Keep the chosen direction on the elevation so it does not become an assumption at ordering.
7. Review flecked grain as a feature rather than a flaw

A flecked grain appearance can provide a finer layer of detail within an otherwise restrained kitchen. Compare it from the normal standing position as well as close up. A beautiful close photograph may show more pattern than the room will reveal at an ordinary distance.
KraftMaid’s oak guide explains the relationship between quartersawing and ray flecks. Use actual samples for the intended cabinet, then decide whether you prefer that character beside your other finishes. These concepts illustrate an appearance; they cannot identify the cut of real timber.
8. Keep a simple framed door from becoming too busy
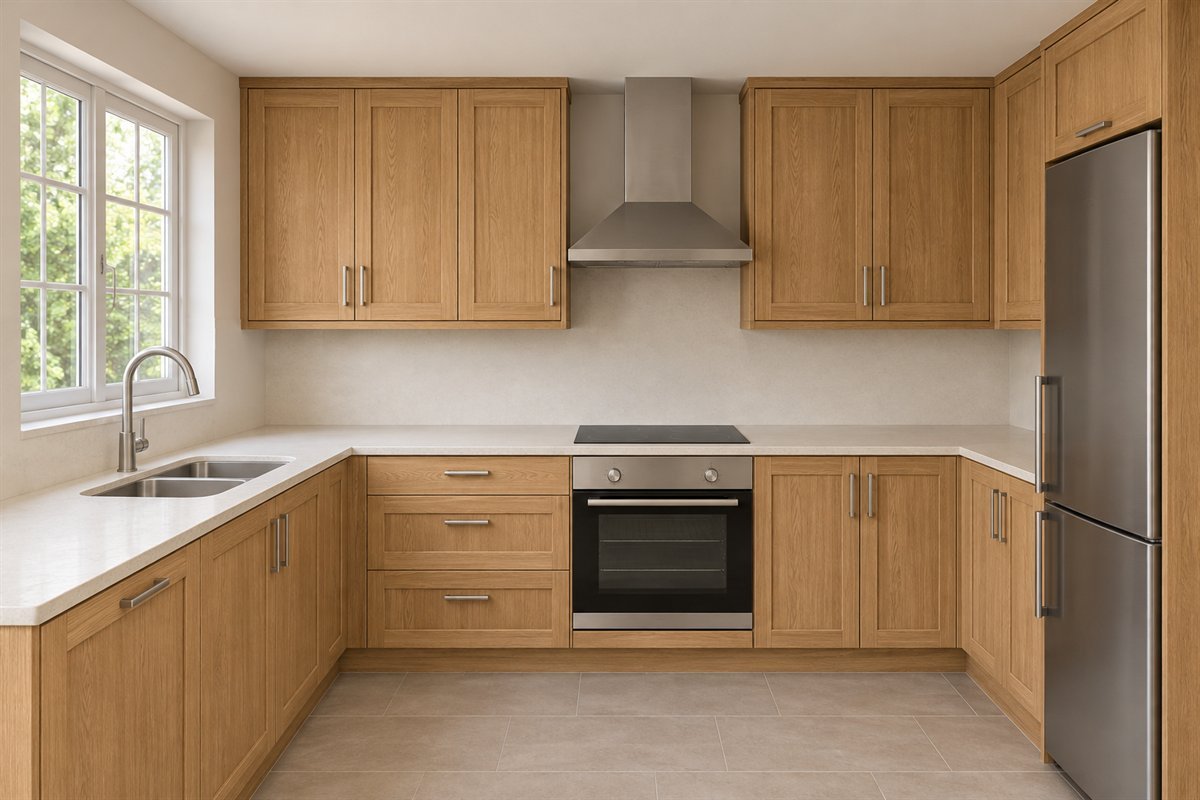
An oak frame adds its own outline to the grain inside the door. Compare the frame proportions with the number and size of cabinets in the room. A series of narrow fronts can become visually active even when the wood color is quiet.
Set the sample beside the proposed backsplash while considering its joints and pattern. If both surfaces compete, simplify one of them before adding decorative trim. The cabinet profile can provide enough detail by itself.
9. Use flat fronts to make the grain the main detail

Flat fronts can give oak a different character from a heavily framed door. Include the drawer divisions and tall units when comparing the effect. Those interruptions determine how the grain reads across the kitchen more than an isolated large panel does.
Look at a full elevation with the proposed handles in place. Keep any intended alignment written into the supplier discussion; a grain-like photograph is not proof that the real system provides matching across separate fronts.
10. Give detailed existing doors a quieter partner

Older raised-panel oak fronts can remain part of a useful kitchen. Compare their shadow lines with a plain backsplash and restrained worktop. Adding another ornate edge or a strong patterned wall may make the cabinet detail feel more crowded.
Keep the elements that are sound and useful while testing a smaller change beside them. A simpler handle or surrounding finish may be enough to clarify the composition. The aim is a coherent room, not disguising the age of every piece.
11. Let oak lower cabinets ground painted uppers

Oak below and painted cabinets above can divide the room into clear material groups. Compare the visible wood with the floor before choosing the upper paint. The counter acts as the meeting line between the two groups.
Draw the corners and any tall pantry unit into the same elevation. Decide where the material changes and how the exposed ends will be finished. Keep the change tied to complete cabinet groups rather than alternating individual doors.
12. Use a smaller oak upper group when the base stays painted
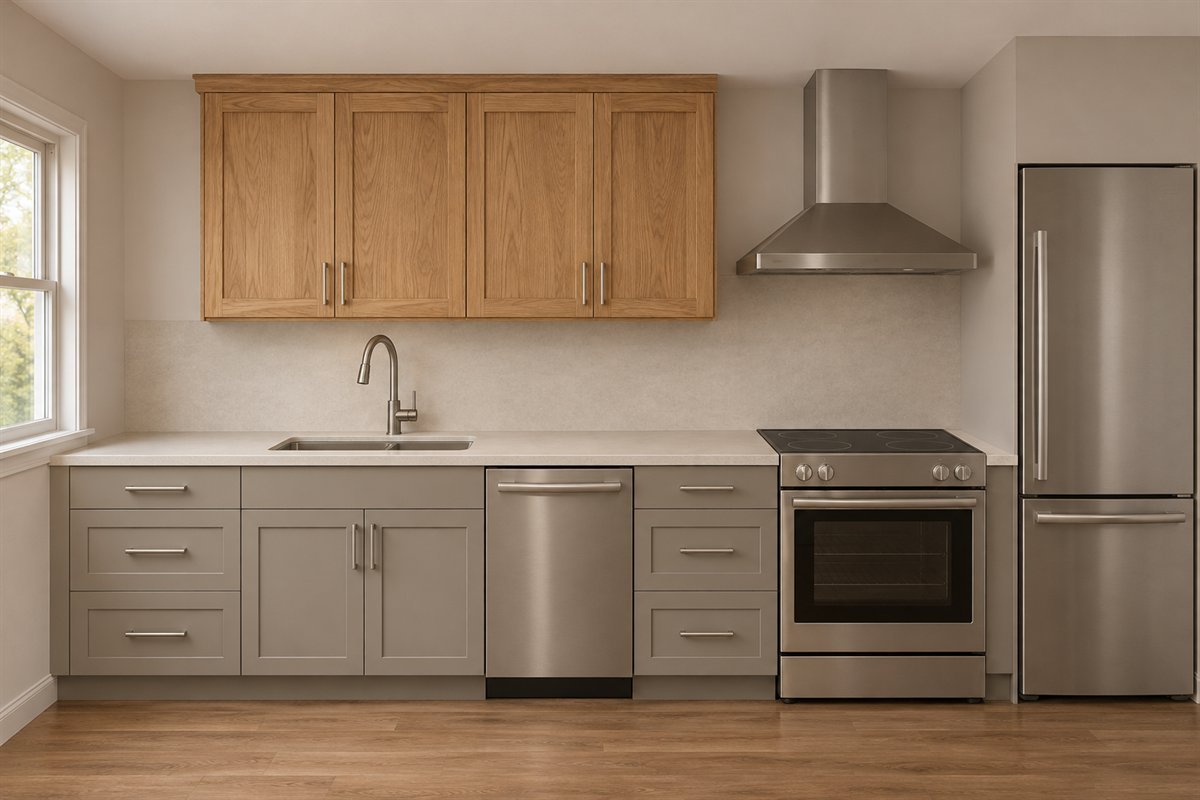
A limited upper group can introduce wood while preserving a useful painted base run. Compare the amount of oak from the main approach, where the upper doors may be especially prominent. Keep the surrounding wall comparatively quiet while judging it.
Include the actual items you need to reach and the openings in the kitchen plan. A material contrast should not decide the storage arrangement on its own. Choose the useful cabinet layout, then make its visible wood group deliberate.
13. Make one oak island a complete material statement

An oak island can provide one substantial wood element within a painted perimeter. Compare its end panels and seating face as well as the drawers seen from the cooking area. It may be the first cabinet group visible from an adjoining room.
Keep the island only if the actual room and occupied layout support it. The material choice comes after its useful footprint has been resolved. Treat the exposed sides as part of the same wood decision rather than a later finishing detail.
14. Treat tall oak storage as one large plane

Tall storage creates a much larger wood surface than a few base doors. Compare the whole elevation before adding another strongly patterned floor or wall. A quiet neighboring cabinet group can give the oak enough visual room.
Review the door divisions and the point where the tall group meets the shorter worktop. Ask for the visible end treatment in the same quotation. A convincing large plane depends on the smaller pieces being considered with it.
15. Separate the cabinet wood from the floor deliberately

Oak cabinets do not have to copy a retained wood floor. Compare their finished samples together and decide which should be the more prominent grain. A deliberate difference can read more clearly than two almost-matching browns selected independently.
View the cabinet sample vertically and the floor sample horizontally. Then look at the group with the counter between them. This reveals the real relationship more usefully than lining up three small flat swatches on a desk.
16. Use a quiet stone-look floor to give the wood room

A restrained stone-look floor introduces a different surface beneath the cabinet grain. Compare its broad tone and joints with the oak rather than judging a single attractive tile. The complete floor field changes how much pattern the room contains.
Keep the actual product and its suitability for the kitchen separate from the appearance you like. For the palette trial, bring several representative pieces together and include the intended joint color. Leave the grain as the main repeating detail if that is your preference.
17. Keep a veined counter from competing with the fronts

A veined counter and visible woodgrain can work together when each has a clear role. Compare the strongest part of the counter sample with the most varied representative cabinet front. Choosing only the calmest corner of each hides the relationship you need to judge.
If the combination becomes busy, simplify the backsplash before introducing another material. View the pair from across the room as well as beside the sink. Decide whether the counter or the fronts should carry the first visual impression.
18. Try a dark countertop as a clean boundary

A dark counter can form a clear horizontal boundary above oak fronts. Compare its complete line with the appliances and floor. It may provide enough contrast without adding dark window trim, dark shelves and another strong wall color.
Resolve the material and ordinary care for the actual worktop before ordering. For the visual comparison, keep the other large surfaces quiet and inspect the transition around a corner. The oak should remain readable rather than disappearing beneath several dark surfaces.
19. Let a light backsplash show its own modest texture

A light backsplash can support oak without trying to mimic its grain. Compare a small assembled tile-and-joint sample beside the front. A slightly uneven surface or restrained joint can supply enough detail while leaving the wood prominent.
Check the exact material, preparation and care for the working-wall location. Keep the visual choice focused on how much texture the room needs. There is no need to repeat the wood pattern in the tile as well.
20. Choose handles through the grain they sit against

A handle is viewed against both the cabinet color and its markings. Compare one actual pull on the representative front, including a more varied part of the grain. A tiny isolated metal sample cannot show the same relationship.
Choose operation as well as appearance for the real doors and drawers. Keep the number of competing metal finishes limited while evaluating it. The hardware can be an intentional functional detail without a collection of matching decorative objects.
21. Limit glass fronts to a useful group

A small glazed group can interrupt a larger oak elevation without turning the whole kitchen into display storage. Compare which ordinary plates or cups will actually be visible. Their shapes and colors become part of the cabinet composition.
Keep most storage closed if that better suits the household. Consider the glass group’s interior and evening appearance with the rest of the wood. An attractive glazed door still needs a useful cabinet behind it.
22. Specify the exposed ends as carefully as the doors

An oak peninsula is seen from its side as well as from the kitchen. Include the exposed end, fillers and plinth in the material discussion. Their grain and finish can change the whole impression when you approach from the dining room.
Ask which visible components use the same material and which are designed to coordinate with it. Record any intended grain direction or finish difference before approving the order. Do not leave an important side panel to the shorthand phrase oak kitchen cabinets.
23. Judge the finished oak room under evening light

Oak can look different once daylight gives way to ordinary room and task lighting. Compare the real sample group in the lighting you expect to use while preparing food. Include the counter and backsplash in that evening view.
Keep a note about the relationship you would change, such as the wood becoming more golden or the counter appearing cooler. Change one candidate at a time. Finish selection is easier when the observation is specific rather than a general feeling that everything needs replacing.
Build an original front-and-panel schedule
Begin with a simple elevation of the kitchen and mark every cabinet surface visible from the main approach. Use separate entries for door frames, centers, drawer fronts, tall-unit sides, peninsula ends, fillers and plinth. The purpose is to make the proposed appearance explicit, not to produce a construction drawing.
For each entry, record five things: its location, the stated material, the proposed finish, the grain appearance you are comparing and the sample or drawing that answers the question. Leave an item marked unresolved when the proposal does not yet identify it. That is more useful than assuming every piece described as oak is constructed alike.
Ask to see a representative range. A supplier may be able to show more than one front or a larger display that reveals variation. Keep the most attractive small sample as one reference, not a promise that every piece in a natural-material kitchen will reproduce it exactly. Compare the exposed ends with the fronts at the same visit.
Keep the existing kitchen in the schedule if you are retaining its cabinets. Record the present finish and the surfaces that will remain beside it before considering a change. The first useful intervention may be a quieter backsplash, a better-related counter or more suitable hardware. Assess condition and any necessary repair independently of the palette.
Consider a hypothetical quotation that says oak fronts and matching ends. Before approval, ask what matching means: the same material and finish, or another material intended to coordinate. Request a sample of the actual end treatment alongside a door. This example does not imply that one construction is universally better; it shows how a vague phrase can hide a decision that matters to the visible room.
End with one agreed set of references and an explicit list of remaining questions. Keep product names and supplier descriptions with the drawing so a later substitution can be compared with the same brief. The schedule organizes material and appearance decisions; the actual cabinet specification and installation remain with the real project.
Read wood and finish labels carefully
KraftMaid describes plain-sawn oak with visible sweeping grain and its quartersawn option with a straighter appearance and possible ray flecks. Its oak page identifies the wood in that range as Red Oak and also lists finishes intended to suggest a White Oak appearance. A pale finish name alone is therefore not a species specification.
IKEA’s VEDHAMN guide describes oak fronts with veneer or glass-panel options. Read the details for the exact component you are considering rather than assuming that every part of an oak-labeled kitchen has identical construction.
Kitchen Craft’s Winter on Rift Oak page provides a particular translucent gray-brown finish example and advises viewing an actual dealer sample. Use that example to understand how a finish and material are named separately, not as a color certified in these generated images.
How can I update honey oak kitchen cabinets without painting them?
Start with sound useful cabinets and compare the counter, backsplash, hardware and ordinary lighting around them. Identify one competing surface and test a quieter or better-related sample before changing the wood itself.
Are pale oak and white oak the same description?
No. One may describe an appearance while the other names a wood. Ask for the specified species and finish separately, then compare an actual representative front.
Should oak cabinets match a wood floor?
They need a deliberate relationship rather than an automatic match. Compare the finished cabinet and floor samples in their intended orientations, with the counter included.
Do oak kitchen cabinets have to be entirely solid oak?
Do not infer the construction of every part from the room’s broad label. Ask which materials are specified for frames, centers, drawer fronts, exposed ends and the cabinet box, and review the actual product information.
Can oak and painted cabinets share a kitchen?
Yes. Resolve the material change across complete groups, including tall units, corners and exposed ends. Keep the useful layout and storage as the starting point.
Will these illustrations identify a real grain cut or named stain?
No. They show broad design concepts. Confirm the real wood, grain range and finish through the supplier’s specification and physical samples.
A practical next step
Choose oak kitchen cabinets as a complete material arrangement. Keep useful existing pieces, compare representative grain and finish samples, and include the exposed ends in the same decision as the fronts. A precise brief gives the wood a clear place in the room.
Compare other color families in the kitchen-cabinet color guide. Consider useful pulls and finishes with kitchen cabinet hardware ideas. Explore a white-dominant scheme in the separate white-kitchen guide.
Images are original AI-generated kitchen concepts, not verified species samples, exact named stains or photographs of the cited products. The front-and-panel schedule and quotation example are original planning aids.
Sources and care references
- KraftMaid: oak grain, quartersawn appearance and finish descriptions
- IKEA: woodgrain kitchen compositions and material pairings
- IKEA: a particular oak-front range with veneer and glass options
- Kitchen Craft: a named finish on Rift Oak and physical-sample guidance
Optional digital guide for this topic
If you prefer a structured workbook, explore this related paid guide.