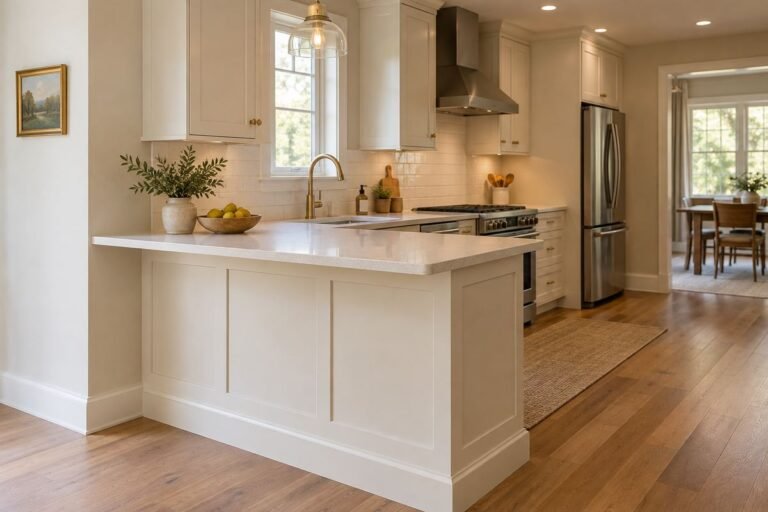
Kitchen cabinet hardware is a small detail you touch repeatedly, so appearance and everyday use deserve equal attention. A handle can look right on a cabinet photograph yet feel awkward on your actual drawer or collide with a neighboring door.
Start with the cabinet fronts you already own. Note their shape, finish and existing holes, then compare a few suitable hardware forms. The combinations below offer different visual directions without treating one size, finish or placement as correct for every kitchen.
Order a trial piece before committing to a complete set. Test it on the appropriate front, using the hardware and cabinet instructions, and check the kitchen with doors and drawers both closed and open. The images are original concepts, not a catalog of identifiable products.
The images are original AI-generated decor concepts, not installation diagrams or photographs of completed client projects.
Browse These 27 Kitchen Cabinet Hardware
Jump to an idea
- Start with round kitchen cabinet hardware on Shaker doors
- Use a low mushroom knob on a flat front
- Give a square knob a simple painted background
- Try an oval knob beside detailed cabinetry
- Use a small faceted knob as one deliberate detail
- Choose arched kitchen cabinet hardware for a softer line
- Give slab doors a restrained straight bar
- Try rounded-end pulls on a busy cooking run
- Pair cup pulls with a simple wood front
- Mix plain door knobs with matching drawer cups
- Keep edge-mounted kitchen cabinet hardware visually quiet
- Use recessed pulls as part of the cabinet design
- Let a fluted pull add texture to plain doors
- Try ceramic knobs with a restrained warm palette
- Repeat wood knobs on a simple painted cabinet
- Use glass kitchen cabinet hardware in a limited area
- Pair warm brass tones with white cabinetry
- Use satin nickel with cool gray fronts
- Try dark bronze against muted green
- Give pale oak a clear black accent
- Mix kitchen cabinet hardware finishes with one clear rule
- Use one longer pull on a broad drawer
- Plan paired knobs deliberately on a wide front
- Coordinate vertical and horizontal pull positions
- Compare a backplate against existing marks
- Check kitchen cabinet hardware at the tightest corner
- Finish with an installed sample you can use
Measure kitchen cabinet hardware by its mounting points
For a replacement pull, record the distance between the centers of its mounting holes separately from the overall handle length. Also note projection, the space available for your fingers, the front thickness and nearby moving parts. Amerock’s instructions distinguish hole-center spacing from total pull length. A matching center measurement is only one part of fit; the complete product drawing and required fasteners still matter.
| Record separately | Why it matters | Check with the actual front |
|---|---|---|
| Mounting-hole centers | Determines the replacement pull’s fixing pattern | Measure center to center, not outside edge to outside edge |
| Overall length | Shows how much front the handle occupies | Compare with rails, adjacent handles and trim |
| Projection and grip space | Affects hand access and neighboring movement | Try the installed sample with the door open |
| Front construction | Door and drawer assemblies can differ | Use the specified thread and suitable fasteners |
| Quantity by type | Prevents a mixed order becoming guesswork | Count doors and drawers on a simple cabinet map |
Read a replacement-pull listing without confusing two lengths
For example, imagine an existing pull has 128 mm mounting centers. Candidate A is listed as 128 mm center to center and 160 mm overall. Candidate B is 128 mm overall but 96 mm center to center. Only Candidate A matches the example’s hole spacing; neither total length alone nor a similar photograph establishes compatibility. Check the remaining dimensions and fasteners before ordering. These are illustrative measurements, not recommendations for a specific product.
Count the different pieces before comparing finishes
A simple example kitchen might have 12 doors receiving one knob each and 7 drawers receiving one pull each: 19 hardware pieces in total. Write down any different drawer sizes or paired-handle arrangements separately. If two wide drawers use two pulls each, the quantity changes. Keep the existing cabinet map beside the order so the right sizes and matching finish names are easy to verify.
1. Start with round kitchen cabinet hardware on Shaker doors

A simple round knob lets a Shaker door’s frame remain the main detail. Choose a finish that relates to the room’s larger surfaces without asking a small piece of metal to carry the entire palette.
Try the knob on the actual door and open it with your normal grip. Compare its stand-off and shape with the space available beside the rail.
Practical tip: Test the sample with the cabinet in its normal position.
2. Use a low mushroom knob on a flat front

A mushroom-shaped knob gives a flat door a small curved detail. The contrast between a plain front and a rounded piece can be enough without adding a decorative backplate.
Compare the knob’s edge and projection in person. A shallow piece may look restrained but should still allow a comfortable grip on that particular door.
Practical tip: Check grip space with the sample installed correctly.
3. Give a square knob a simple painted background

A square knob can echo the straight edges of a cabinet frame. A plain painted front keeps the hardware’s outline visible without introducing another strong material pattern.
Look at the corners as well as the front face. The shape should feel comfortable during ordinary use, especially where you reach from an angle.
Practical tip: Handle the sample from your usual approach direction.
4. Try an oval knob beside detailed cabinetry
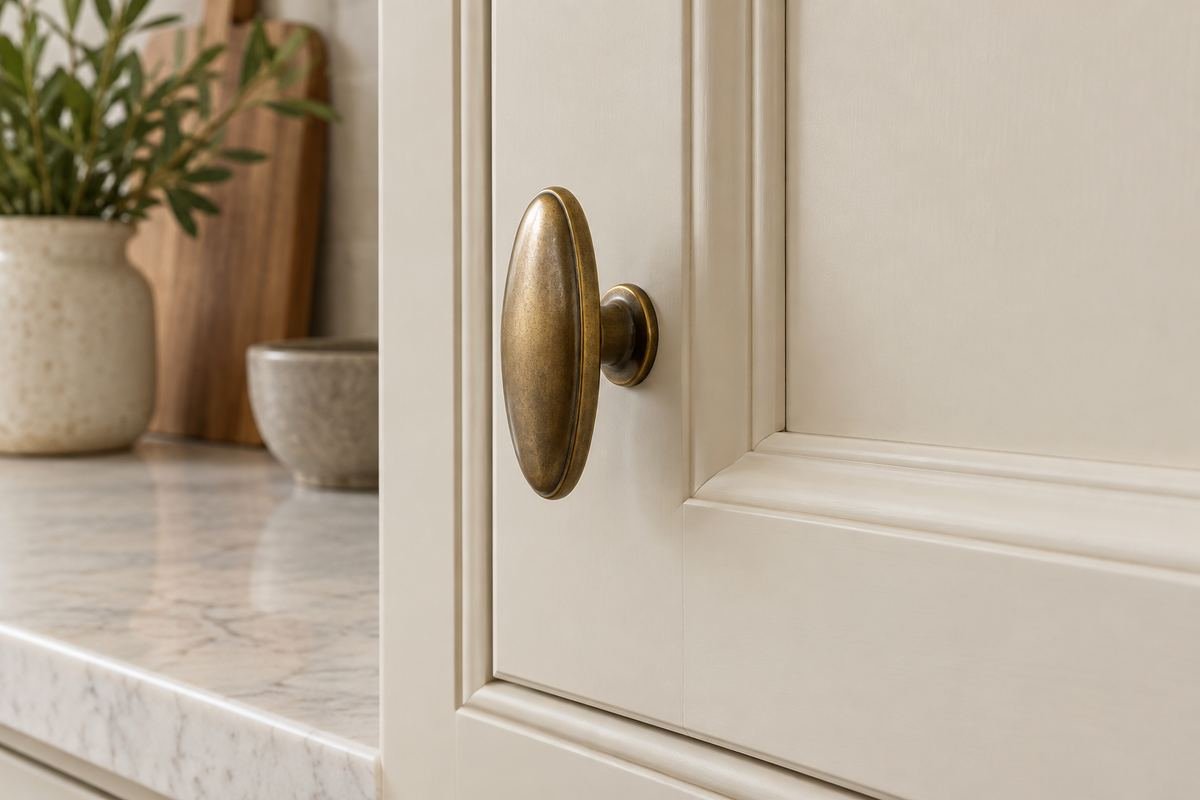
An oval knob offers a softer outline beside a more detailed door. It can bridge traditional cabinet profiles and comparatively simple modern accessories.
Check its orientation on a full door rather than a tiny sample board. A vertical oval and a horizontal oval create different relationships with the surrounding frame.
Practical tip: Compare the knob against the complete door profile.
5. Use a small faceted knob as one deliberate detail

A faceted knob can provide a small decorative accent when the rest of the kitchen is restrained. Keep the surrounding pulls or hinges relatively simple so several details do not compete.
Compare the sample under the kitchen’s actual light. Reflections can make a faceted surface more noticeable than its size suggests.
Practical tip: View the sample with both task lights and general lights on.
6. Choose arched kitchen cabinet hardware for a softer line

An arched pull can soften the appearance of a straight-sided drawer front. The curved form works as a repeated detail without requiring a strongly decorative finish.
Check the space between the arch and the front. Its overall length does not tell you how comfortably your hand will fit beneath the handle.
Practical tip: Compare usable grip space separately from the fixing centers.
7. Give slab doors a restrained straight bar
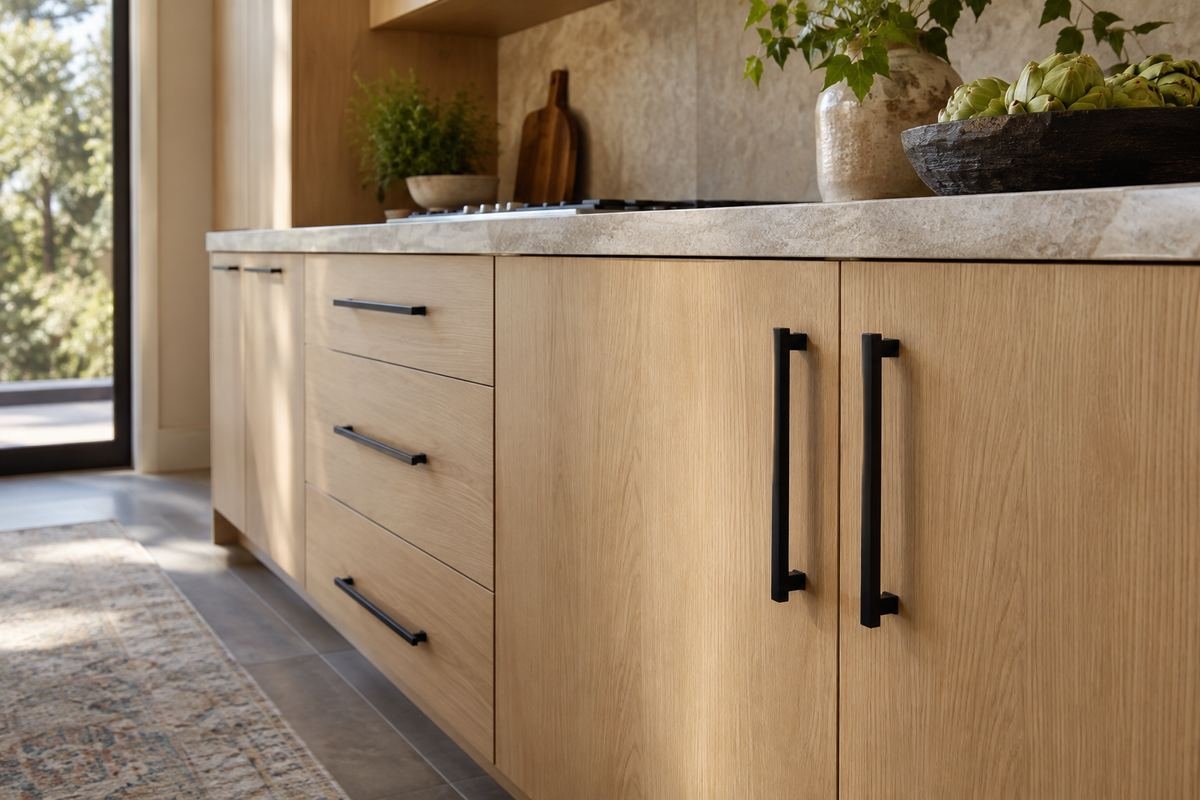
A straight bar can make a simple cabinet layout feel orderly. Keep the lengths considered across the room, particularly where narrow doors sit beside broad drawers.
Open neighboring fronts during the trial. Long projecting ends should be checked against the actual corners, handles and walking route.
Practical tip: Test the tightest cabinet junction before ordering the set.
8. Try rounded-end pulls on a busy cooking run

A pull with rounded ends offers a different outline from an extended straight bar. It can be useful where you prefer fewer projecting corners around frequently used fronts.
Treat the shape as a candidate to test, not a guarantee against snagging. Check the installed piece with your normal clothing and hand movements.
Practical tip: Try the drawer while standing where you normally prepare food.
9. Pair cup pulls with a simple wood front

A cup pull gives a drawer a contained, traditional detail. Plain timber grain and an uncomplicated counter allow its shape to remain visible.
Check the direction from which you naturally reach into the pull. Its opening should suit your usual grip without forcing an awkward wrist position.
Practical tip: Test the drawer at its actual height.
10. Mix plain door knobs with matching drawer cups

Knobs and cup pulls can share a finish while serving different fronts. Repeating one metal tone connects the pieces without requiring every handle to have the same silhouette.
Keep a clear reason for the mix, such as knobs on hinged doors and cups on drawers. A cabinet map makes that decision easier to apply consistently.
Practical tip: Mark each type on the order list before counting pieces.
11. Keep edge-mounted kitchen cabinet hardware visually quiet

An edge pull can reduce the amount of hardware visible on the face of a door or drawer. It suits a simple cabinet design where the front material is intended to lead.
Confirm that the selected product suits the front construction and surrounding gaps. A minimal appearance does not eliminate the need to check movement and grip.
Practical tip: Use the exact product drawing with the cabinet maker’s requirements.
12. Use recessed pulls as part of the cabinet design

A recessed pull changes the front itself, so it works best as a considered cabinet choice. The inset shape can provide detail without a projecting handle.
Compare the complete grip opening and the way it is cleaned. This is a different decision from swapping one surface-mounted pull for another.
Practical tip: Discuss the required front preparation before choosing the shape.
13. Let a fluted pull add texture to plain doors

A fluted or ribbed pull can supply a tactile detail on otherwise simple cabinetry. Keep the surrounding cabinet profile quiet so the hardware texture is easy to appreciate.
Check the sample’s feel and its care requirements. Fine grooves are a visual choice as well as a surface you will touch and clean repeatedly.
Practical tip: Handle the sample before judging it only by a close-up photograph.
14. Try ceramic knobs with a restrained warm palette

A ceramic knob can add a softer-looking material beside painted cabinetry. A plain cream version can connect to light dishes or tile without adding a large pattern.
Compare the actual glaze with the backsplash and counter. Whites and creams can differ noticeably, particularly when several small samples are placed together.
Practical tip: Check glaze color under the kitchen’s working lights.
15. Repeat wood knobs on a simple painted cabinet

Wood knobs can connect painted fronts to an oak shelf or table elsewhere in the kitchen. Use the grain and tone as a deliberate material relationship rather than expecting every wood to match exactly.
Check the knob’s finish and suitable care guidance for its location. The appearance of untreated timber does not establish that a particular piece is appropriate for the working area.
Practical tip: Compare the finish sample with the wood surface that will stay.
16. Use glass kitchen cabinet hardware in a limited area

Glass knobs can introduce a small reflective detail, especially on a display cabinet away from the busiest working run. Plain surrounding fronts keep the effect restrained.
Compare the grip and fixing construction in person. The decorative appearance should be considered alongside the complete piece’s suitability for repeated use.
Practical tip: Try one piece before extending the choice to every cabinet.
17. Pair warm brass tones with white cabinetry
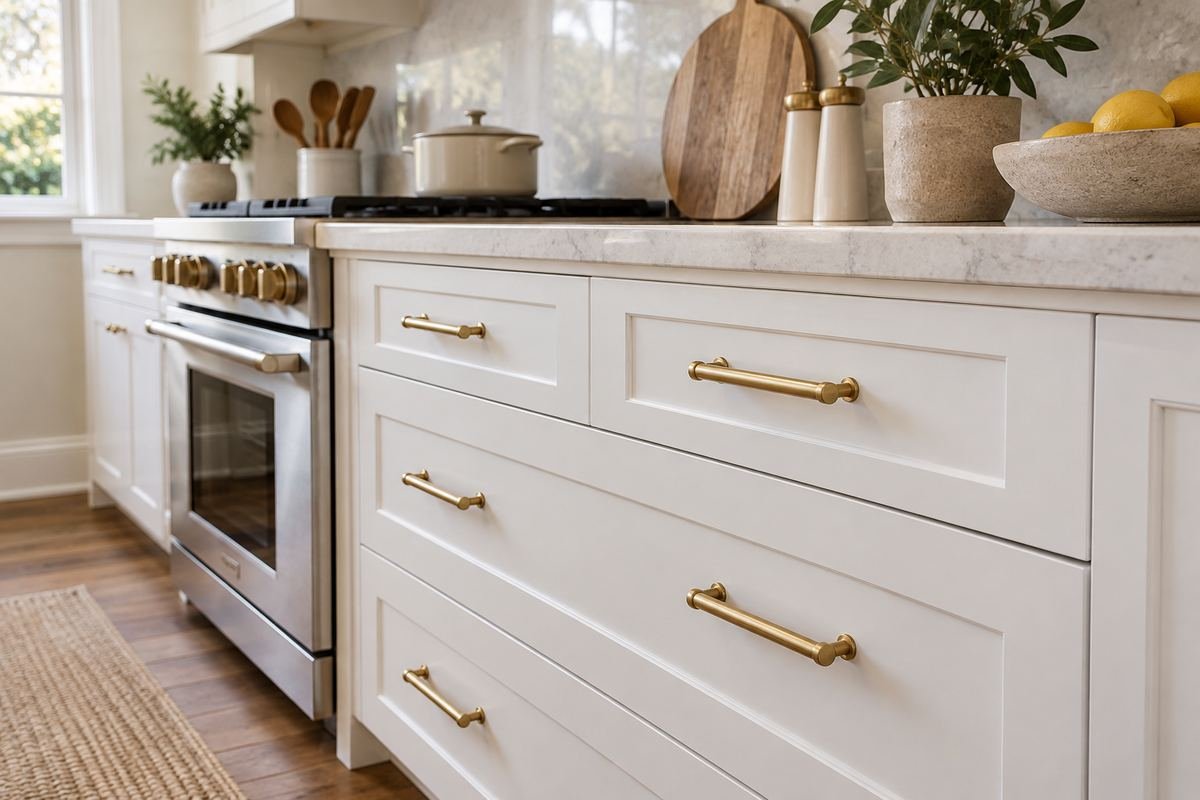
A warm brass-colored finish can add definition to plain white fronts. A few related warm details elsewhere in the room can make the choice feel connected without matching every metal surface.
Place the physical finish sample beside the faucet and lighting. Similar finish names from different manufacturers do not guarantee the same color.
Practical tip: Compare samples together in the room rather than on separate screens.
18. Use satin nickel with cool gray fronts

Satin nickel can provide a restrained relationship with gray-painted cabinets. Its quieter appearance allows the door profile or a neighboring stone pattern to remain the stronger detail.
Check the actual gray and metal together. Some grays lean blue or purple, while the hardware may look warmer than expected under the kitchen lamps.
Practical tip: Use the installed lighting during the finish comparison.
19. Try dark bronze against muted green

Dark bronze can give muted green cabinetry a distinct outline without the sharper effect of a very bright metal. Plain counters and a limited palette keep the pairing readable.
Compare the darkest part of the finish against the cabinet. Some pieces have tonal variation that is difficult to judge from a single product photograph.
Practical tip: Ask for a sample of the actual finish you intend to order.
20. Give pale oak a clear black accent

Black hardware can define pale oak fronts while allowing the grain to remain visible. Keep the handle shape simple if the timber pattern already supplies plenty of detail.
Check how the repeated black pieces look across the full cabinet run. A small sample can feel subtle even when many handles together create a strong graphic rhythm.
Practical tip: Count the visible handles in the main doorway view.
21. Mix kitchen cabinet hardware finishes with one clear rule

Two finishes can work when their placement has a considered reason. For example, one finish on a separate island and another on the perimeter can make the grouping easy to understand.
Keep the handle forms related if you want the metal change to be the main difference. Changing finish, shape and scale everywhere at once can make the comparison harder.
Practical tip: Sketch where each finish will be used before ordering.
22. Use one longer pull on a broad drawer

A longer pull can relate to the width of a broad drawer front while keeping the arrangement simple. Its exact length should suit the front, hardware requirements and way you use the drawer.
Test operation with the drawer appropriately loaded for normal use. Appearance alone does not show how the complete drawer system will feel.
Practical tip: Use the actual drawer rather than an empty display sample alone.
23. Plan paired knobs deliberately on a wide front

A planned pair of knobs creates a different rhythm from one central pull. The layout can suit a traditional cabinet design when the other fronts use related pieces.
Test how you will open the drawer in everyday use and follow the drawer system’s guidance. Two decorative knobs do not automatically make a drawer easier to operate.
Practical tip: Check operation before committing to additional mounting holes.
24. Coordinate vertical and horizontal pull positions
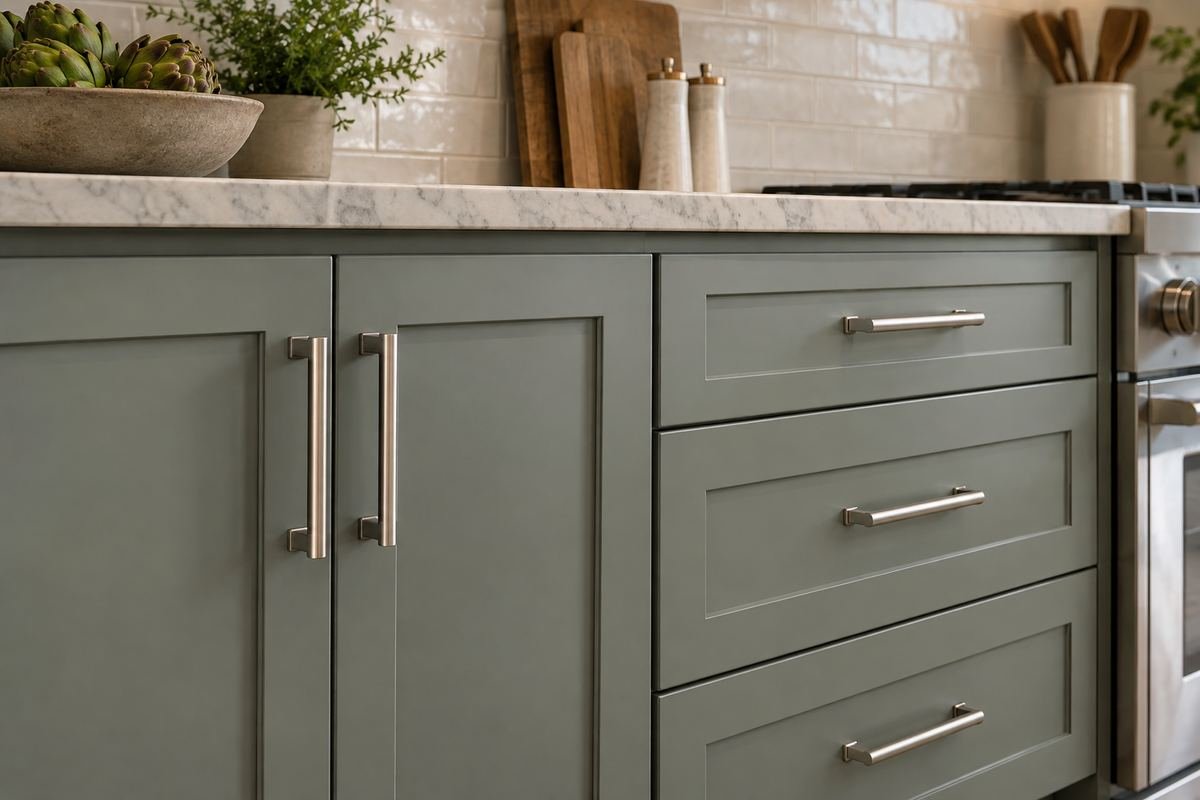
The same pull can connect vertical door handles and horizontal drawer handles. A clear placement plan helps the repeated pieces relate across different cabinet shapes.
Use the actual rails, hinges and front dimensions when laying out the arrangement. A photograph of another kitchen is not a reliable drilling template for yours.
Practical tip: Confirm the approved template before any permanent preparation.
25. Compare a backplate against existing marks

A suitable backplate can become a decorative detail while covering some existing fixing marks. Its outline should relate to the front rather than looking like an unrelated patch.
Measure the marks and the actual plate footprint. Also check the hardware’s compatible fixing arrangement; a similar shape in a photograph is not proof that the old holes will be covered.
Practical tip: Make an outline of the plate at its actual size.
26. Check kitchen cabinet hardware at the tightest corner

A compact knob or carefully chosen pull may suit a tight cabinet junction better than a strongly projecting form. The right choice depends on the complete door and drawer movement.
Test the fronts together, including the handle on the neighboring unit. Check the area that becomes closest when both are being used.
Practical tip: Start the trial at the most constrained junction in the kitchen.
27. Finish with an installed sample you can use

A single trial piece on the actual front makes the final choice more concrete. You can judge the color, grip, projection and visual scale together instead of relying on separate product pictures.
Live with the correctly installed sample through ordinary kitchen routines before placing the full order. Record the exact size and finish name that worked so the remaining pieces can be checked against it.
Practical tip: Keep the trial piece and its specification beside the final order.
Frequently Asked Questions
Should kitchen cabinets have knobs or pulls?
Either can work. Compare the front’s proportions and the way you use it. A common mixed arrangement uses knobs on doors and pulls on drawers, but test the actual hardware instead of following a visual rule alone.
How do I measure replacement cabinet pulls?
Measure the distance between mounting-hole centers and record overall length separately. Then check projection, front construction, thread and the product’s complete requirements.
Must cabinet hardware match the faucet?
An exact match is optional. A related finish or a deliberate contrast can work when the room has a clear relationship between its major materials. Compare physical finish samples together.
Can a backplate cover old handle holes?
A suitable backplate may cover them, but confirm its actual footprint, fixing pattern and compatibility. Do not assume that every plate will hide the specific marks on your cabinet.
What handle size should I use on a wide drawer?
Compare suitable options on the actual drawer front and test operation. One longer pull and a planned pair of smaller pieces create different looks and handling; neither arrangement is established by drawer width alone.
Choose the Details That Work in Your Home
Choose a form that fits the existing front, feels comfortable in use and relates to the kitchen’s larger finishes. Confirm a trial piece before ordering the full set, then keep a simple count and size record. Good hardware should make the cabinet easier to use as well as more coherent to look at.
For related ideas, explore kitchen cabinet colors, kitchen drawer organization, kitchen backsplash ideas.
Planning References
Amerock: knob and pull installation instructions, manufacturer-authored PDF. Follow the instructions for the exact products you choose.
Optional digital guide for this topic
If you prefer a structured workbook, explore this related paid guide.