Wood slat wall ideas are most useful when the repeated lines suit the room and the product is chosen for the actual project. Start with one deliberate field, then compare the material, direction and visible edges. The best-looking concept still needs a workable relationship with the door, baseboard, services and furniture already in the space.
These 25 ideas combine room compositions with the decisions that often get missed in a gallery: modules, cut edges, light, care and the difference between appearance and a performance claim. Use the original planner before buying a system. This is a design and product-selection guide, not a universal cutting, fixing or soundproofing method.
Contents
- 1. Give one wall a clearly defined field
- 2. Compare vertical and horizontal direction
- 3. Plan the panel modules before the final width
- 4. Compare the real surface and core materials
- 5. Resolve the exposed end before installing a large field
- 6. Decide how the slats meet the baseboard
- 7. Keep the ceiling junction deliberate
- 8. Treat an outside corner as a visible detail
- 9. Let door trim remain readable
- 10. Include outlets and service access in the elevation
- 11. Keep the television support separate from the finish
- 12. Use a panel to define an entry position
- 13. Frame a dining zone without filling the room
- 14. Let the bed and the wall have separate roles
- 15. Keep a work-call background visually simple
- 16. Use the back of a niche as a contained field
- 17. Compare a lower field with the chair position
- 18. Judge the texture under side light
- 19. Choose the gap contrast as part of the palette
- 20. Coordinate different wood tones through a retained piece
- 21. Consider a factory-finished painted look
- 22. Keep the new projection out of the working route
- 23. Write a separate brief when sound performance matters
- 24. Check how the chosen surface will be maintained
- 25. Make the final choice with a complete sample board
Separate appearance, product suitability and installation
Choose a room goal and a proposed field before comparing exact products. Record the face, core, backing, finish and approved uses rather than treating every wood-look panel as the same material. Installation, support, services and any acoustic requirement need their own applicable guidance. Do not infer structural support, moisture suitability, fire performance or sound isolation from an AI image or a decorative product name.
Choose the decision that matters to your wall
- The room already has strong patterns: Try one contained field beside plain retained surfaces.
- The exposed edge faces a doorway: Choose the actual finishing detail before ordering modules.
- You need a TV or loaded shelf on the wall: Resolve its appropriate support independently of the decorative slats.
- The project is intended to solve a sound problem: Define the goal and seek evidence for the exact product and assembly.
1. Give one wall a clearly defined field

Choose the wall from the room’s main view rather than adding slats to every available surface. A single defined field can provide enough repetition beside plain upholstery and a simple floor. Draw its left and right boundaries with the furniture in place. If the field ends halfway behind a chair or becomes a thin strip beside a door, compare another width before choosing the panel quantity.
Photograph the proposed outline from the doorway and the usual seat.
2. Compare vertical and horizontal direction

Vertical and horizontal layouts change how the repeated lines meet the room’s edges. Compare both against the actual wall proportions, door positions and furniture. A horizontal concept does not mean every ready-made panel is approved for that orientation. Check the exact system before planning joints or purchasing materials. Keep the direction that makes the complete wall composition easier to read rather than relying on a promise that lines will enlarge the room.
Make two simple elevation sketches using the real wall and product dimensions.
3. Plan the panel modules before the final width

Ready-made modules bring their own slat rhythm, backing and edge conditions. Lay out the actual module dimensions across the proposed field, including any manufacturer-specified joint. A visually convenient width may otherwise leave an awkward last cut or a different-looking gap. Review the whole elevation before ordering, and ask how the final exposed edge is finished for that exact product.
Include full modules, any proposed cuts and the end detail on the same drawing.
4. Compare the real surface and core materials
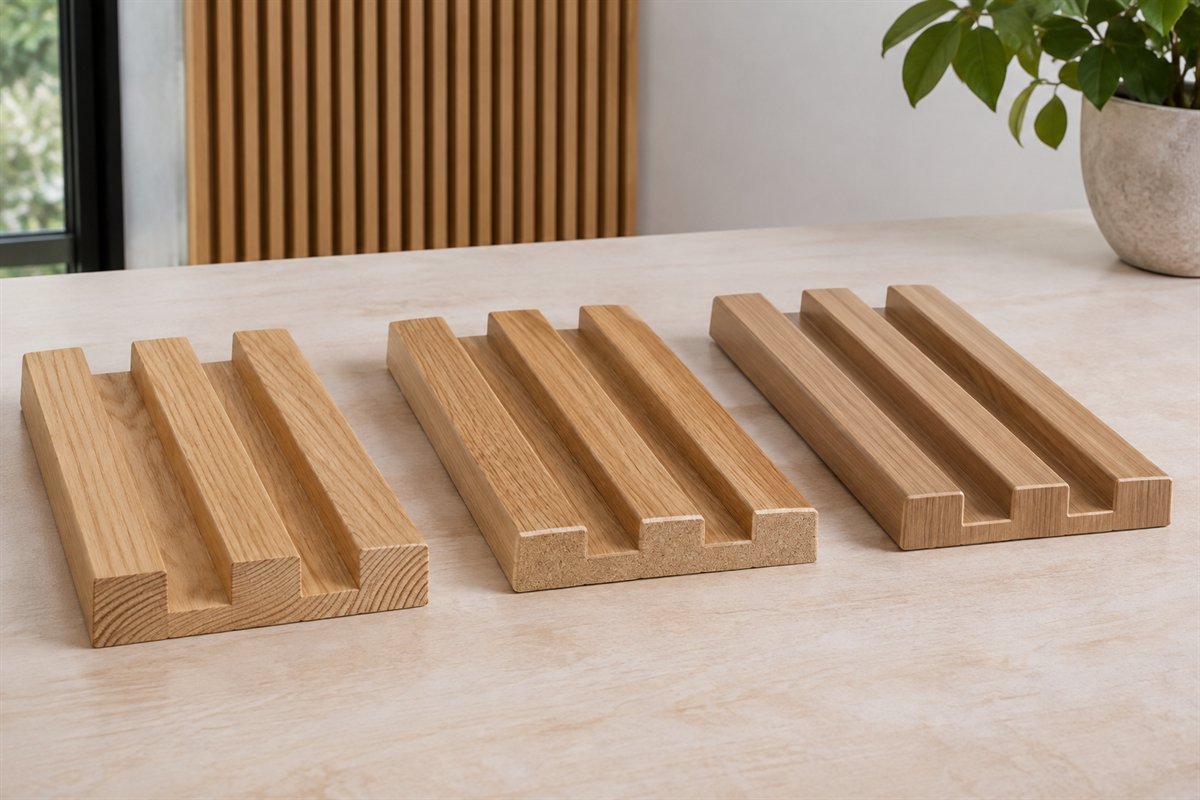
A wood appearance does not identify the whole material. Some panels use wood veneer over MDF with a separate backing, while other finishes or systems differ. WoodUpp’s product information illustrates why the exact variant matters. Ask what covers the front, side and cut edge, then compare its use and care instructions. Do not describe every wood-look panel as solid timber or assume a photograph establishes its construction.
Keep the exact product name and material description with the sample.
5. Resolve the exposed end before installing a large field
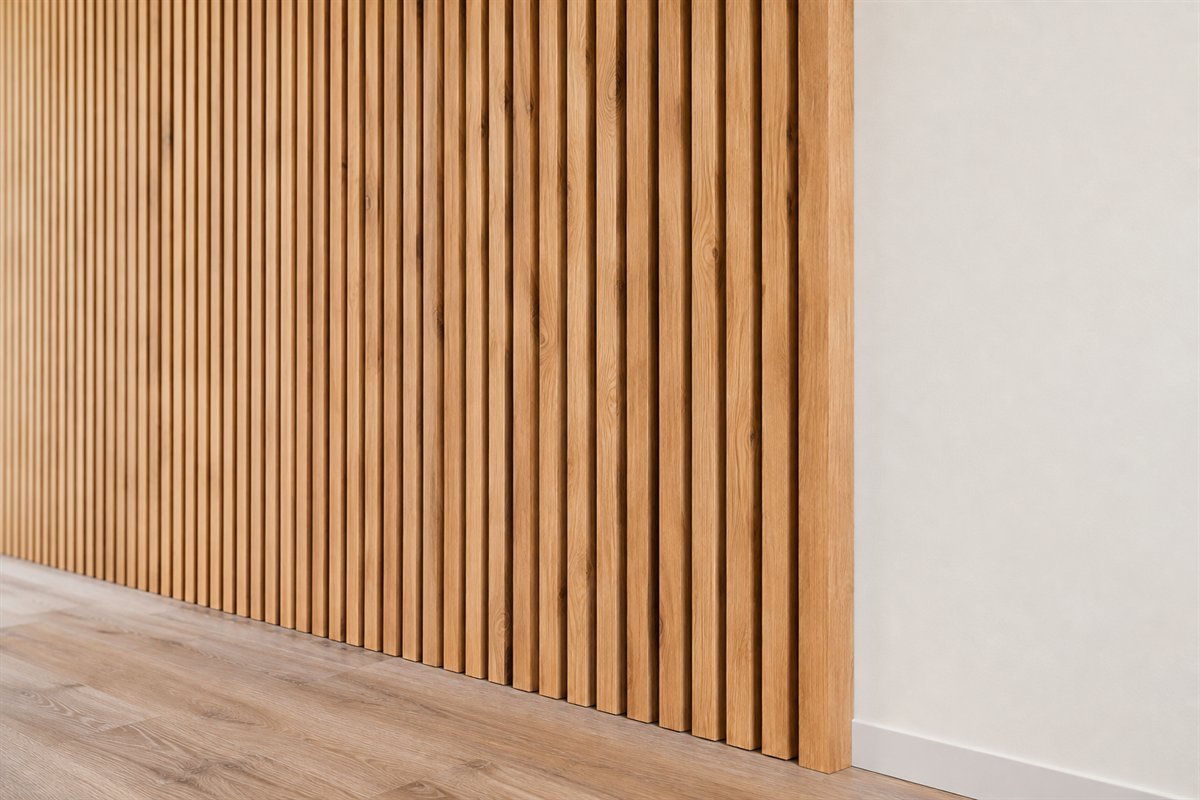
The side of a panel can be prominent when viewed from a doorway. Compare a matching finishing piece, a designed return or another approved edge treatment with the actual system. Do not leave the decision until the last module is fixed. Look at the sample from an angle as well as the front, especially where the core or backing differs from the face.
Choose the end detail from the most exposed approach to the room.
6. Decide how the slats meet the baseboard

The lower junction affects the whole wall’s appearance. Compare retaining an existing baseboard with another properly detailed termination, keeping the product and installation requirements in view. A narrow accidental gap or an uneven line will be easier to notice across many repeating slats. Include the full wall and floor variation in the installer’s assessment rather than assuming the floor is perfectly level.
Show the proposed lower edge on the elevation before ordering the finish pieces.
7. Keep the ceiling junction deliberate

Choose whether the field reaches a properly detailed ceiling junction or stops at a clear horizontal boundary. Compare the line across the whole wall, including any ceiling variation and required product allowances. Keeping the ceiling plain can be an effective companion to a strong wall texture. Extending wall panels overhead is a separate suitability and fixing question, not an automatic next step.
Ask the installer how the actual upper junction will remain visually consistent.
8. Treat an outside corner as a visible detail

At an outside corner, both the face and the return may be visible from ordinary routes. Compare a finished stop with a deliberately wrapped design using compatible pieces. Keep the transition legible instead of assuming the repeated pattern must continue around every turn. The exact system should guide how the corner is made; a concept image cannot establish a workable cut or support detail.
Review the corner from both adjoining spaces before choosing the finish.
9. Let door trim remain readable
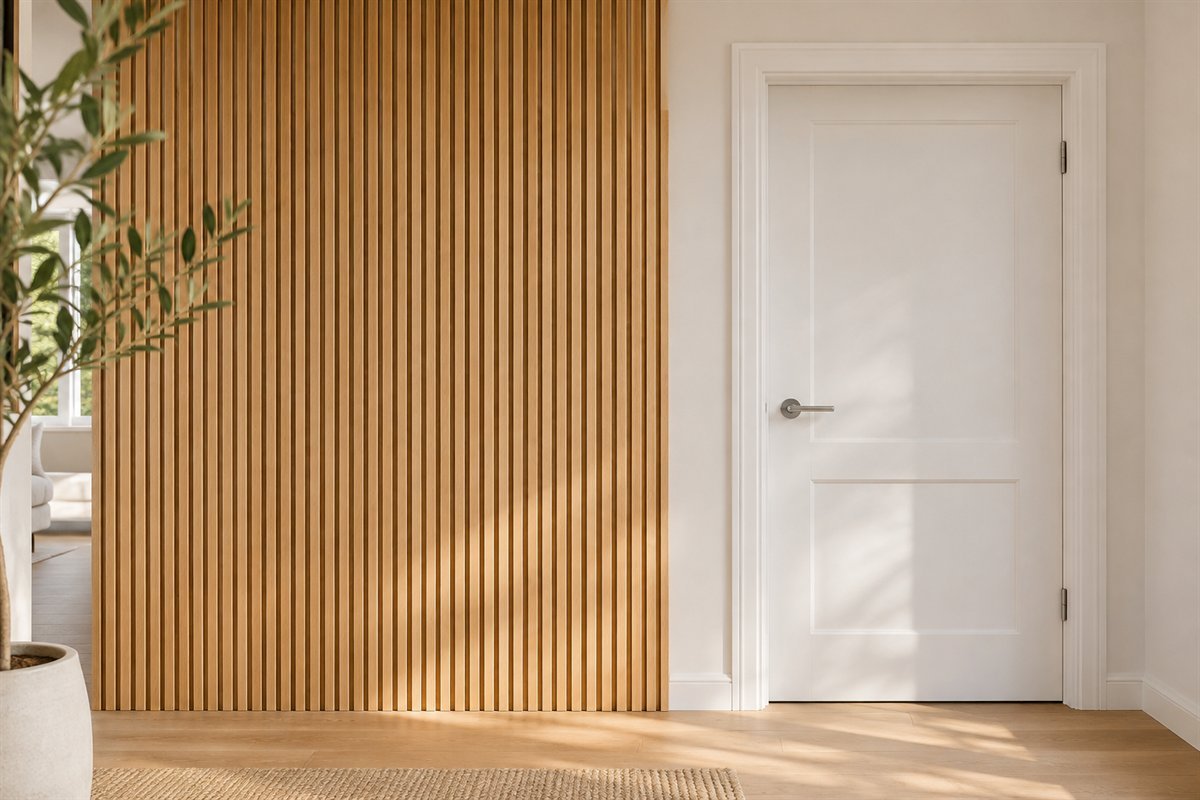
Door casings create a useful boundary, but the panel depth and side view still need attention. Compare a deliberate gap or finished stop with the actual trim profile. Check the door, handle and movement before fixing the field width. Avoid a thin leftover strip that looks accidental or trim that can no longer function as intended after another layer is added.
Draw the door opening and the full projecting trim, not only the flat wall width.
10. Include outlets and service access in the elevation

Mark outlets, switches and access points before choosing the rhythm of the field. Their position may change the most useful start or end line. Keep the fittings accessible and have any necessary electrical work assessed and completed appropriately. Do not bury services behind a decorative panel or improvise a fitting detail because a rendering makes the faceplate look flush.
Resolve service locations with the actual product and qualified project guidance before installation.
11. Keep the television support separate from the finish

Slats can supply a media wall’s texture, but they are a decorative finish rather than a television support specification. Plan the exact bracket, wall fixing, cable access and equipment clearances independently. Compare the whole arrangement from the sofa before choosing how much of the wall to cover. The existing TV-wall guide considers those wider furniture and viewing choices in more detail.
Put the equipment plan and decorative elevation side by side before committing.
12. Use a panel to define an entry position

A panel can give a simple entry bench a clear background without covering the whole hall. Set the field around the actual bench and the view from the door, then check the route with the household’s ordinary carried items. Any hooks, mirrors or shelves need their own suitable support and product compatibility. Adding a finish does not make the wall automatically ready for loaded accessories.
Choose the bench footprint and ordinary entry route before sizing the decorative field.
13. Frame a dining zone without filling the room

A dining wall can carry repeated texture while the table and chairs remain simple. Compare the slats with the chair backs, tabletop grain and any neighboring cabinetry so the room has one clear leading pattern. Pull the chairs out during the layout check. The decorative treatment should not become a reason to push the table too close to a projecting wall or introduce fragile display pieces behind seats.
Judge the wall with the dining arrangement in use, not only with every chair tucked in.
14. Let the bed and the wall have separate roles

Slats can provide the backdrop while a suitable headboard supports the bed arrangement visually and practically. Compare the field with the mattress, tables and the normal view from the bedroom door. Keep any bed fixing, lighting and services within their own requirements. A decorative panel should not be treated as a headboard or a support for heavy objects simply because it sits behind the pillows.
Mark the complete bed-and-table composition before selecting the panel boundaries.
15. Keep a work-call background visually simple

A limited slat field can create a recognizable background in a shared office without requiring a full room makeover. Check the view from the actual camera and ordinary desk positions. Keep busy artwork and closely spaced display shelves out of the same background if they compete with the repeated lines. Any acoustic requirement remains a separate brief that needs evidence for the actual system and installation.
Take a test call image before deciding that a wider panel field is necessary.
16. Use the back of a niche as a contained field

An existing niche can provide natural boundaries for a small slat treatment. Check the depth after the finish is added and decide how the panel meets each return. Keep the contents modest enough for the repeated back surface to remain visible. This approach can be useful when a whole textured wall would compete with other retained features, provided the niche and product are suitable.
Measure the finished usable depth before assigning an object to the niche.
17. Compare a lower field with the chair position
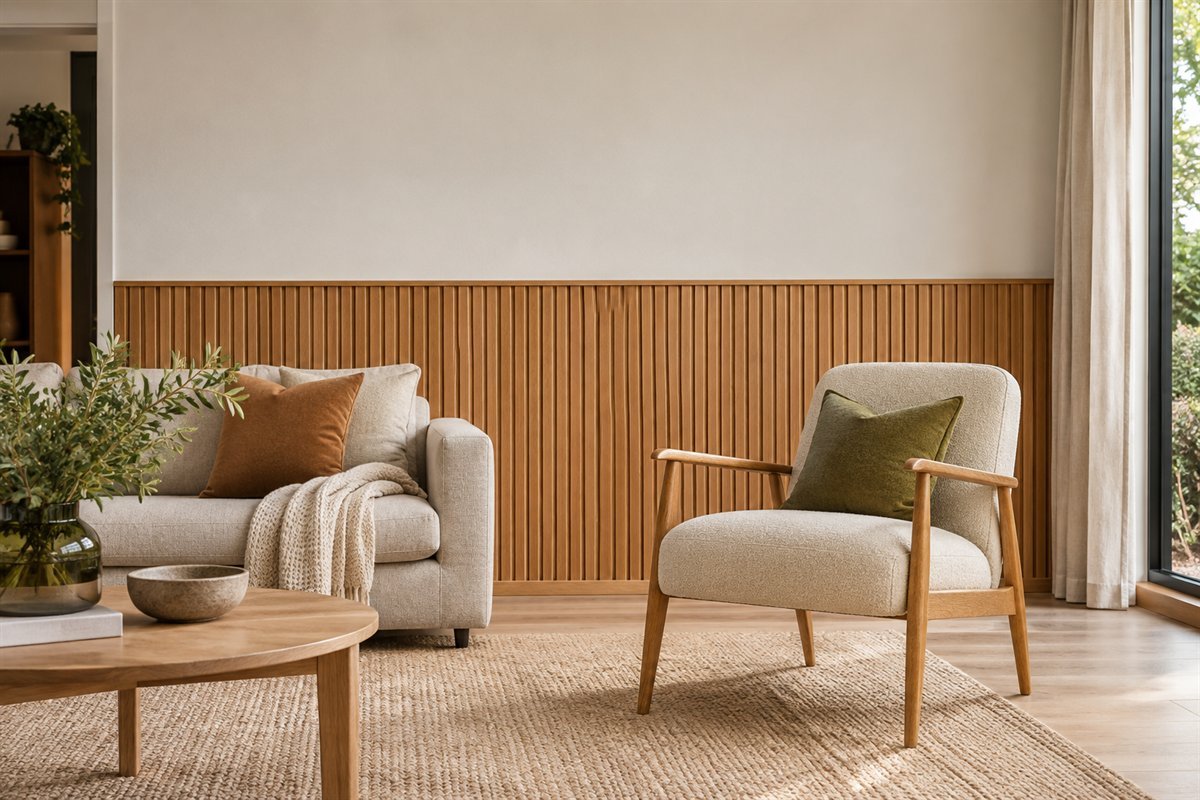
A lower field changes the relationship between the slats and furniture. Compare the top boundary with chair backs and nearby horizontal lines, then resolve the cap with the exact system. It should look like a considered finish rather than an abruptly shortened full-height panel. Check contact and cleaning access behind chairs; decorative slats are not automatically a protective chair rail.
Mock up the top boundary with the actual furniture before choosing the height.
18. Judge the texture under side light

Side light can make the gaps and grain more noticeable than a front-facing product photograph suggests. Compare the sample on the intended wall at the time you normally use the room. Keep any added lighting properly specified and check it for unwanted glare from the actual seat. Do not plan concealed electrical fittings or heat-producing equipment inside a decorative gap without suitable guidance.
View the sample in both ordinary daylight and the room’s actual evening light.
19. Choose the gap contrast as part of the palette

The visible background can be as influential as the wood face. A dark gap creates a different rhythm from a backing close to the face color. Compare the full sample with the floor and sofa rather than choosing from a close-up alone. Do not paint or alter an existing backing merely to imitate another product; confirm what modifications, if any, the maker permits.
Choose the face and gap together, then record the exact finish combination.
20. Coordinate different wood tones through a retained piece

Different wood tones can coexist when one retained piece guides the comparison. Place the real panel sample beside the existing floor or cabinet, looking at grain scale and undertone as well as color. They need not match exactly. Give the room one leading repeated surface and use the other wood more quietly so the wall and furniture do not compete at every viewing angle.
Bring the sample to the retained furniture instead of judging two separate online photographs.
21. Consider a factory-finished painted look

A painted or wrapped finish can suit a room where exposed wood grain would introduce another competing material. Compare an actual approved finish and its edge appearance before making the choice. A factory-colored product and a panel painted after purchase are different propositions. Follow the exact maker’s guidance rather than assuming that paint, stain or cleaning products are interchangeable across cores and surfaces.
Record the supplied finish and any permitted maintenance before ordering.
22. Keep the new projection out of the working route
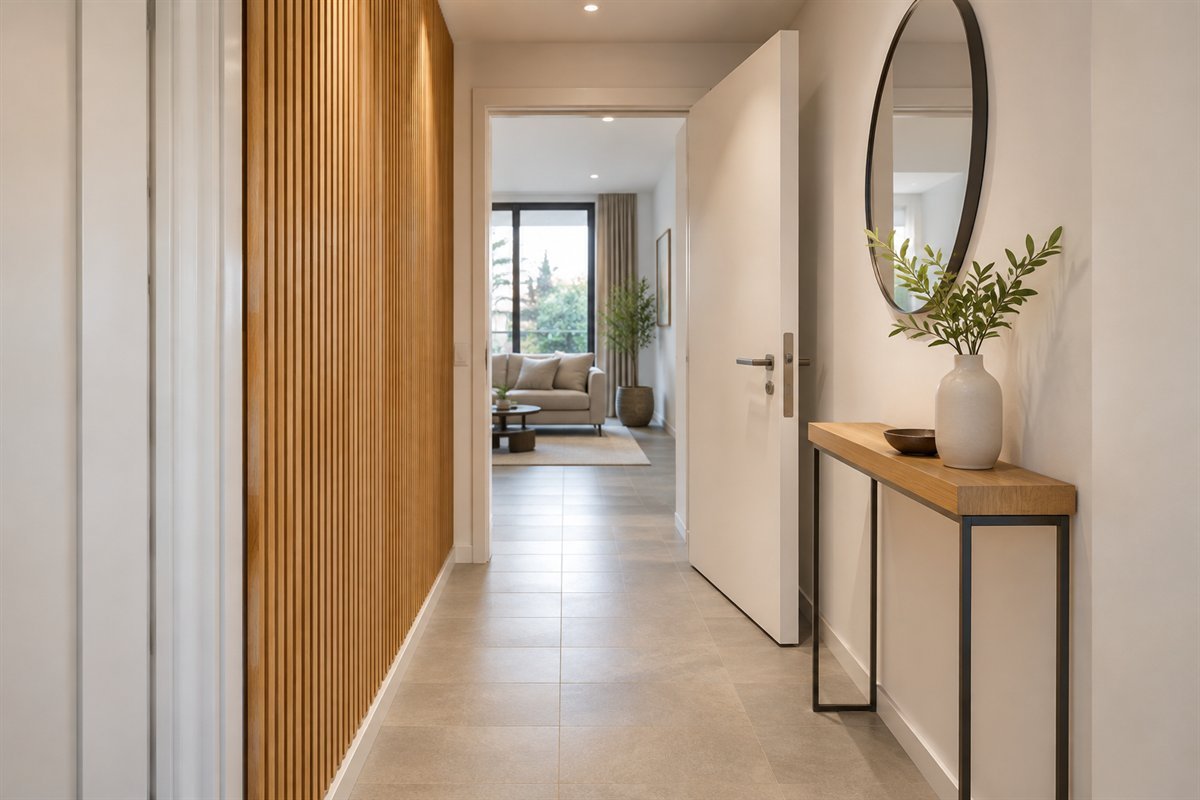
A new surface adds depth, and an edge or return may project beyond the old wall line. Include the complete installed thickness when checking a narrow route, adjacent door or furniture clearance. Compare the occupied arrangement rather than a flat elevation alone. If the finish makes an everyday movement awkward, reduce the field or choose another wall instead of keeping a difficult layout for the photograph.
Mark the proposed finished face on the floor plan and test the ordinary route.
23. Write a separate brief when sound performance matters

If sound performance is a reason for the project, ask for evidence for the exact product and proposed assembly. Do not infer a result from the word acoustic, the presence of felt or the depth of a decorative groove. A room-noise problem needs a defined goal and an appropriate assessment. The images here illustrate finishes and layouts; they do not demonstrate tested absorption or sound isolation.
State the actual sound problem and request relevant evidence before choosing the wall by appearance.
24. Check how the chosen surface will be maintained

The gaps and surface finish belong in the maintenance decision. Read the exact variant’s instructions and compare them with the household’s ordinary routine before covering a large wall. A care method for one veneer, coating or backing does not establish what another panel can tolerate. Keep the product record so future cleaning or repair does not depend on guessing from its wood appearance.
Ask about approved cleaning, replacement pieces and finish changes before committing to the system.
25. Make the final choice with a complete sample board

Bring the panel, adjacent paint and retained furniture materials into one comparison. Look at them on the actual wall in more than one light, then confirm the edge, service and module details on the drawing. A small sample does not predict an entire installed wall, but it can expose a mismatch before the project grows. Keep unresolved product or installation questions separate from the decorative choice.
Use the original material-and-elevation worksheet below to record the decision and what remains unverified.
An original wood-slat material-and-layout planner
Use one sheet for the product comparison and another for the wall elevation. The product sheet should identify the exact variant, face material, core, backing, supplied finish, intended use, care and available finishing pieces. Leave an unknown field marked unknown rather than filling it from a similar-looking product. A manufacturer’s sample can help compare the real surface, but it does not replace the complete specification.
For the elevation, record the usable wall width and height, door casing, baseboard, ceiling junction, outlets and access points. Add the furniture at its actual size and show the main viewing directions. Then draw the product’s real modules and any required joints. Ask how each proposed cut and exposed side would be finished. The module layout should answer those questions before the quantity is finalized.
A hypothetical comparison explains why module planning matters. If a decorative field is 96 inches wide and a hypothetical module covers 24 inches, four complete modules nominally cover that width: 96 divided by 24 equals four. A 100-inch field would nominally add a 4-inch remainder. Those numbers are an original arithmetic example, not a real product size, cutting instruction or order quantity. Joints, tolerances, wall variation, usable coverage and the exact edge system can change the real plan. Compare a revised field boundary with an approved cut detail rather than automatically buying another full module.
Keep an installation-question column separate from the design column. For example, the design may call for a full-height field behind a television; the installation questions include appropriate wall fixing, equipment support, services and product requirements. A selected oak tone does not answer any of those. Ask the relevant supplier or qualified installer to resolve the actual project details.
Finally, compare the samples in ordinary daylight and evening lighting. Record which retained surface each one relates to, what the side view looks like and how the proposed gap reads from across the room. Choose a manageable field that works as a whole. Keep the selected product information with the home’s maintenance records rather than relying on a cropped inspiration photograph.
Compare a decorative panel with the room problem you actually have
Three different briefs can produce similar-looking photographs. One room may simply need texture beside plain furniture. Another may need a clearly defined background for a desk or bench. A third may have a sound problem requiring an appropriate assessment and product evidence. State which brief applies before comparing panels; a design choice should not silently become an unverified performance claim.
Keep your comparison honest. The illustrations show original concepts, not named tested installations. Neither a dark backing nor a particular slat pattern certifies an acoustic result, and a wood-like surface does not establish a solid-wood construction. Choose the appearance and the complete project specification together, then retain both in the planner.
Are wood slat wall panels always solid wood?
No. The appearance alone does not identify the face, core or backing. Check the exact product and finish variant; veneer-faced, wrapped and other systems can look similar in a photograph.
Can wood slats support a TV or shelves?
Do not assume so. Resolve the appropriate support and fixing for the actual load and wall independently of the decorative finish, following the relevant product and project requirements.
Should slats run vertically or horizontally?
Compare both on the actual wall elevation, then check that the chosen product supports the intended orientation and edge details. There is no direction that automatically makes every room look larger.
Will a wood slat wall soundproof a room?
The appearance cannot establish that result. If sound performance matters, define the problem and seek suitable evidence and assessment for the exact product and complete proposed assembly.
A practical next step
Choose a clearly bounded field, compare actual materials and resolve the visible edges before ordering. Let the room composition and the complete product specification guide the project together.
Coordinate a slat finish with a complete TV-wall plan. Compare wall texture with the room’s existing ceiling treatment.
Images are original AI-generated room and material concepts, not product identification, construction details, specified assemblies or tested acoustic installations. The planner and module calculation are original hypothetical examples. No structural, fire, health, moisture or acoustic performance is certified.
Sources and care references
- WoodUpp: compare the exact panel variant, materials and care information
- WoodUpp: an example of product-specific wall installation and end details
Optional digital guide for this topic
If you prefer a structured workbook, explore this related paid guide.