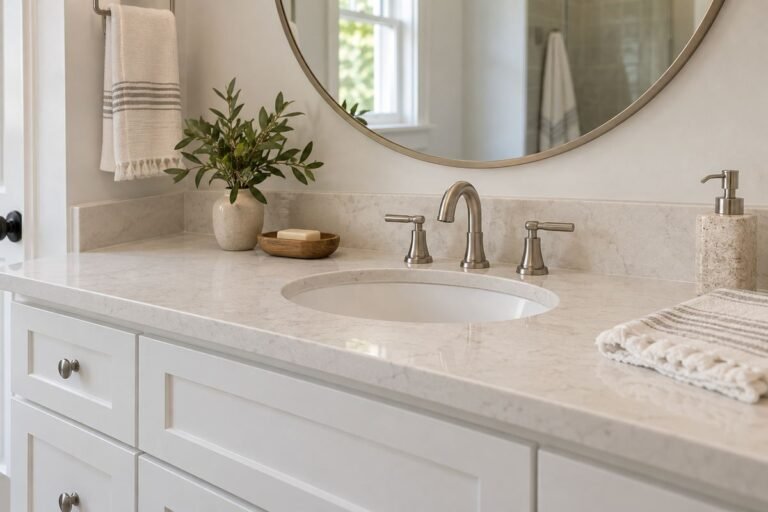
The best shower tile ideas still look considered where the walls turn a corner, the valve interrupts a joint or the tile meets the bathroom outside. Those details are difficult to judge from a close-up sample, yet they often determine whether a finished shower feels calm or cluttered.
This guide concentrates on shower walls and the way they work together. A matching shower floor needs its own product approval and drainage-compatible layout; a tile suitable for a vertical wall is not automatically suitable underfoot. The illustrations show design concepts, while the complete waterproofing assembly must follow the selected system’s instructions.
Choose one main visual move first: a color, a pattern or an unusually quiet surface. Then use the ideas below to decide where that move starts, how it wraps the room and which details should stay in the background.
The images are original AI-generated decor concepts, not installation diagrams or photographs of completed client projects.
Browse These 23 Shower Tile Ideas
Jump to an idea
- Start with horizontal white subway tile
- Stack ivory rectangles vertically
- Use sage green as the complete wall color
- Give dusty blue walls a quiet companion floor
- Choose restrained limestone-look porcelain walls
- Plan marble-look veining across the main wall
- Balance charcoal walls with a lighter ceiling
- Make terrazzo-look tile a single back-wall feature
- Use small gray mosaic on one wall
- Outline white tile with considered grout contrast
- Let matching grout soften a square-tile grid
- Give herringbone one uninterrupted feature wall
- Try basketweave as a contained wall panel
- Divide two tile colors along a planned horizontal line
- Continue a narrow color band around the enclosure
- Align a vertical feature strip with the fixtures
- Blend the niche back into the field tile
- Treat exposed tile edges as a visible finish
- Compose tile carefully around an existing window
- Coordinate a bench with the wall layout
- Use a small mosaic on a curved shower wall
- Give a tub-shower one stronger end wall
- Coordinate the floor without repeating the wall format
Draw shower tile ideas on four wall elevations
Measure each finished wall separately and draw it as a flat elevation. Mark the entrance, valve, showerhead, niche, bench and any window. Add the actual tile dimensions and proposed joints, then compare a layout centered on a tile with one centered on a joint. Ask the installer to resolve exposed edge cuts and corner transitions before ordering. A centered back wall is only one part of the composition; the returns also need usable cuts.
| Check | Record before approval | Decision it helps you make |
|---|---|---|
| Product approval | Exact tile, finish and shower-wall suitability | Whether the sample belongs in this location |
| Wall grid | Actual tile dimensions and proposed joint | Where full tiles and cuts land |
| Interruptions | Valve, niche, window and bench positions | Which lines should align |
| Edges | Trim type, thickness and visible terminations | How the tile finishes outside the enclosure |
| Care | Approved cleaner and grout instructions | Whether the surface suits your routine |
Calculate each wall before adding an allowance
For an illustrative enclosure with a 60-inch back wall, two 32-inch returns and an 84-inch tiled height, the simple rectangular area is (60 + 32 + 32) × 84 ÷ 144, or about 72.33 square feet. This is a starting measurement, before accounting for openings, niche reveals, bench surfaces or extra tile for cuts and spares. Give the installer each elevation rather than just the total. Ask for a separate takeoff for field tile, accent tile and trim so a small decorative area does not get lost in one combined order.
Approve a physical mockup before committing
Assemble several pieces with the proposed grout and edge treatment. Fireclay notes that handmade tiles can vary in color, dimensions and finish, and recommends a dry layout to assess the result. That does not mean every ceramic tile behaves identically. Use the selected product’s specifications, and test a strongly pigmented grout with a light glaze when the manufacturer calls for it. Photograph the approved sample in the bathroom’s normal light and keep the actual sample for comparison.
Keep waterproofing decisions in the complete shower plan
Schluter explains that a tiled shower needs a waterproofing system; the visible tile finish does not do that job on its own. Niches, benches, windows, corners and penetrations need compatible details within the selected assembly. Resolve those details with the installer before treating a feature as a purely decorative change. The images here show finished appearances rather than layers, fastening or construction instructions.
1. Start with horizontal white subway tile

Horizontal white rectangles give a shower an easy-to-read structure and leave room for a more expressive vanity or floor outside. A running bond introduces movement without needing a second color. Choose a white that belongs beside the actual tub, basin and paint rather than assuming every white will match.
Compare the offset permitted for the selected tile and inspect how the pattern reaches both corners. Ask the installer to show the first and last cuts on the back wall, then carry the chosen rhythm onto the returns.
Practical tip: Test the grout with the bathroom’s fixed white fixtures in view.
2. Stack ivory rectangles vertically

A vertical stack creates straight columns that can give an uncomplicated shower a crisp architectural rhythm. Ivory works well beside pale timber and warm stone-look flooring, particularly when bright white tile feels disconnected from the rest of the bathroom.
Map the joint grid around the valve and showerhead before selecting the final starting line. Small alignment errors become conspicuous in a straight stack. Keep the tile and grout relatively close in color if you want the columns to read softly from the doorway.
Practical tip: View a full-height sample drawing, not just three tiles on a counter.
3. Use sage green as the complete wall color
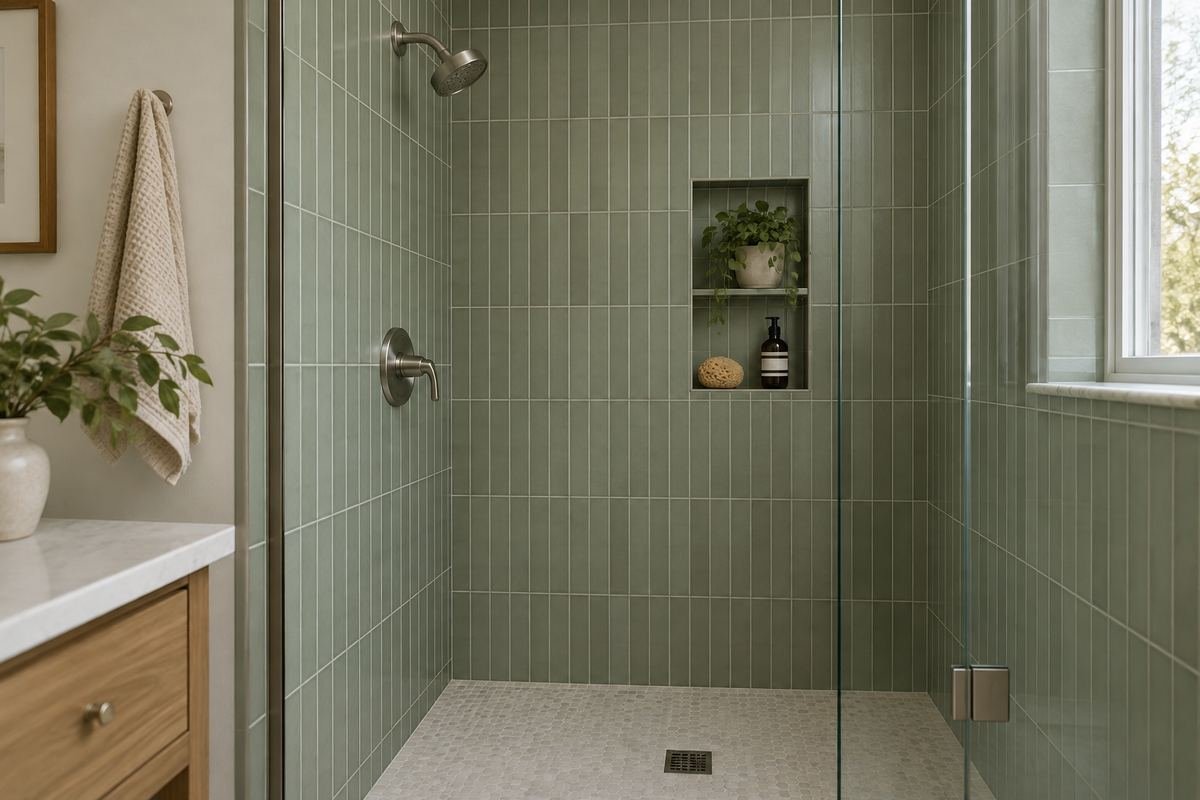
Sage shower walls can supply the room’s main color without a separate accent band. Pair the green with a plain floor and one metal finish, allowing the tile’s color and subtle surface variation to do the decorative work.
Compare several pieces under the shower lighting and beside any existing beige or gray finish. A green that looks gentle in daylight can shift beside a warm cabinet. Approve the assembled palette before introducing another corrective color elsewhere in the room.
Practical tip: Use a restrained grout color so the green remains the subject.
4. Give dusty blue walls a quiet companion floor

Dusty blue tile offers color without the intensity of cobalt or navy. It can work especially well in a simple alcove shower, where one continuous shade makes the three walls feel related. Keep the surrounding bathroom finishes restrained.
Place the proposed shower-floor sample directly below the wall sample. Check undertones and scale together, and confirm floor approval separately. A blue wall with a strong grid may be better balanced by a floor whose pattern blends at normal standing distance.
Practical tip: Limit the sample board to one blue, one floor and the actual metal finish.
5. Choose restrained limestone-look porcelain walls
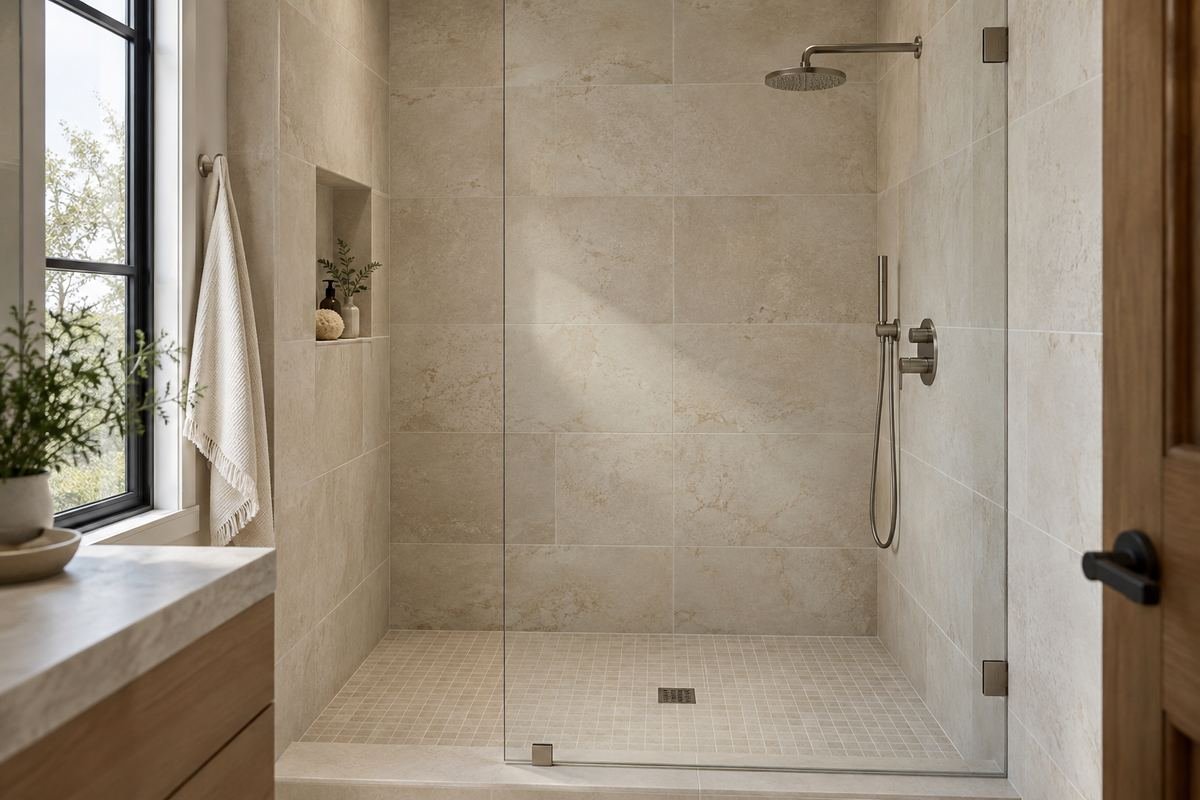
A pale limestone-inspired print can make the enclosure feel layered without introducing a clear geometric pattern. Choose a restrained design when the bathroom already includes timber grain, a decorative floor or a busy countertop.
Ask to see the tile’s print variation across several pieces and plan their direction before installation. Avoid judging from one attractive sample. The appearance should read as a deliberate field rather than repeated identical marks gathered on the most visible wall.
Practical tip: Check the exact porcelain product’s shower-wall approval and care guide.
6. Plan marble-look veining across the main wall

Marble-look porcelain can provide a strong focal surface without requiring a separate decorative tile. Let the most visible wall carry the clearest vein movement, while the returns support it with a calmer arrangement.
Spread the actual pieces out and photograph an approved sequence. Unless the product is designed for a specific bookmatch, do not expect every vein to join perfectly. Plan attractive transitions and compatible movement instead of forcing unrelated prints into a continuous picture.
Practical tip: Keep the niche and hardware simple beside dramatic veining.
7. Balance charcoal walls with a lighter ceiling

Charcoal wall tile can create a contained, restful shower, especially beside warm wood outside the enclosure. A plain light ceiling and clear glass keep the darker color from spreading into every part of a compact bathroom.
Check the finish under the actual shower lighting and discuss how the household’s water and cleaning routine may affect its appearance. A dark tile can make pale deposits more visible. Choose it because you like the complete room and can maintain the specified surface.
Practical tip: View a wet and dry sample only as the manufacturer permits.
8. Make terrazzo-look tile a single back-wall feature
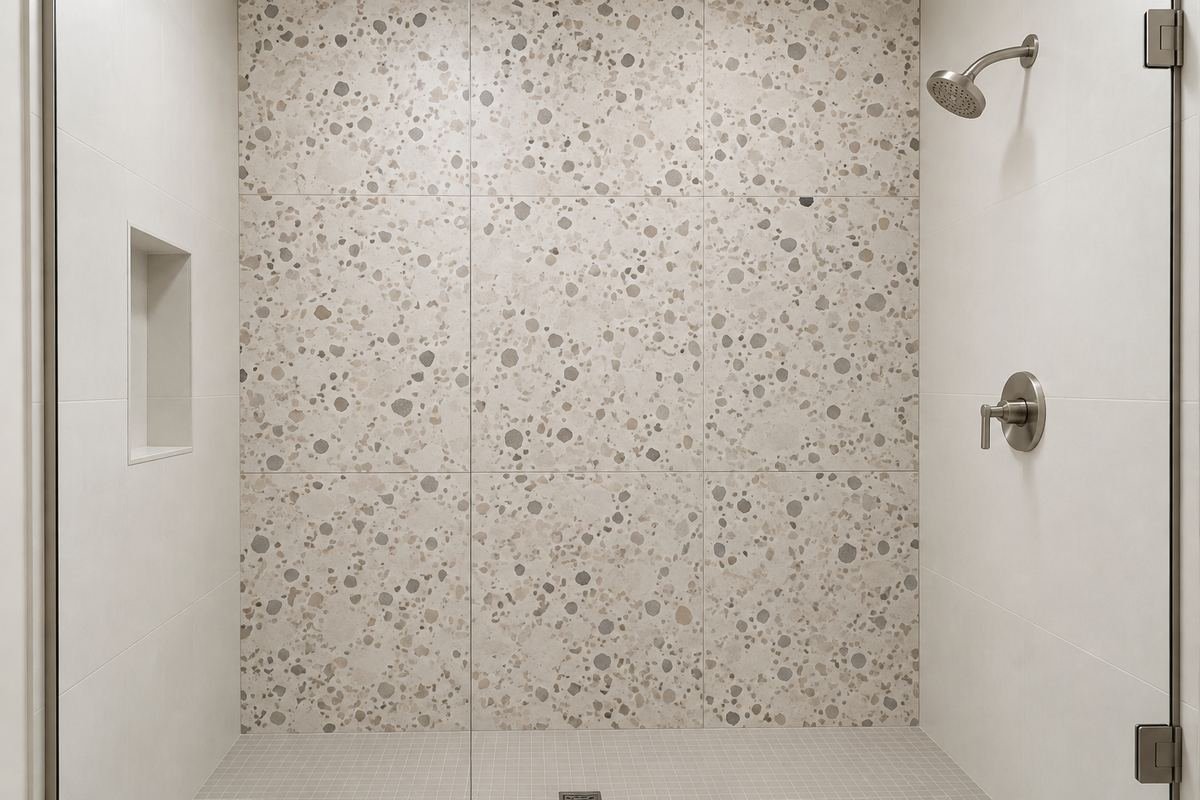
A terrazzo-inspired back wall can connect several bathroom colors through one controlled surface. Choose a chip palette that repeats existing cream, gray or timber tones rather than adding a completely new set of colors.
Use plain coordinating tiles on the returns and compare their background color with the terrazzo print. A nearly matching white that is visibly cooler can make the feature seem accidental. Decide how the feature terminates at the corners before ordering two tile types.
Practical tip: Assess the chip scale from the bathroom entrance as well as close up.
9. Use small gray mosaic on one wall
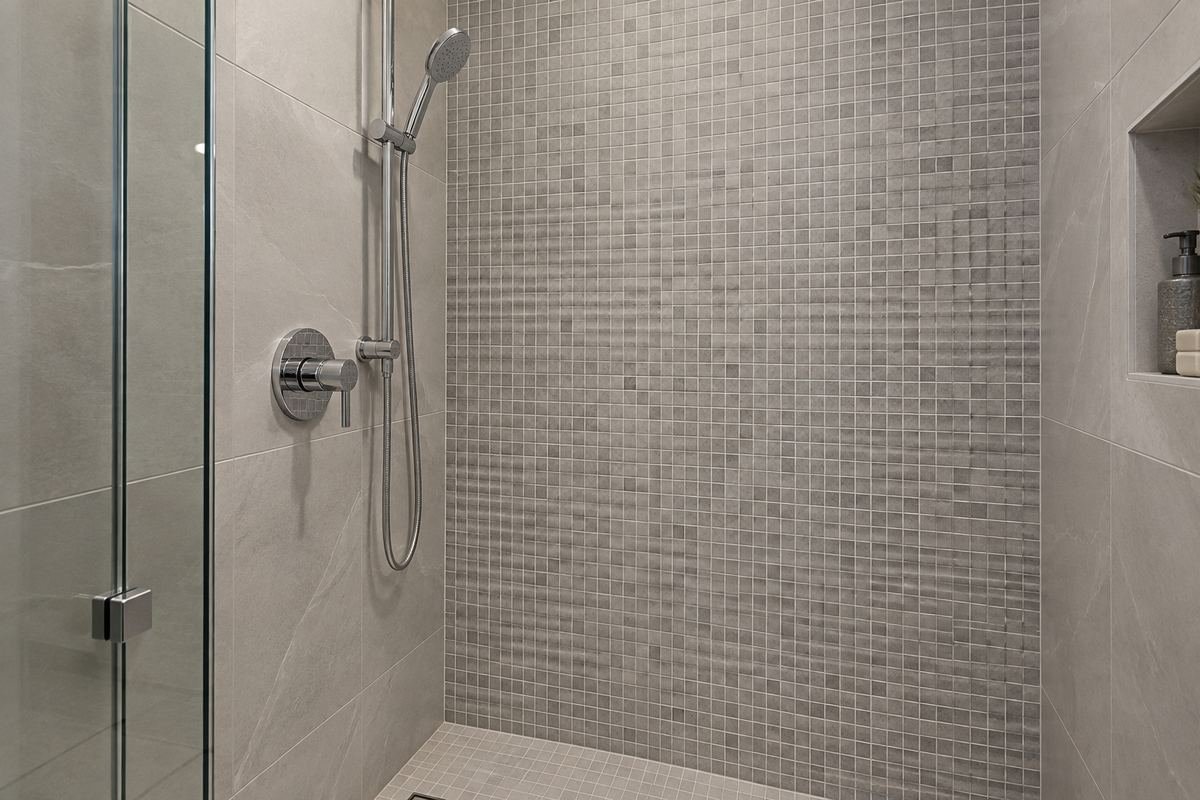
A fine gray mosaic supplies texture and a dense joint pattern without needing a vivid color. Restricting it to one wall can make the effect easier to live with and keeps the other surfaces visually settled.
View several joined sheets with the intended grout. Check whether sheet boundaries disappear into the overall field, and ask how the installer will handle edges beside a larger tile. Differences in thickness need a resolved detail rather than a last-minute improvised strip.
Practical tip: Choose a mosaic explicitly suitable for the intended wall application.
10. Outline white tile with considered grout contrast
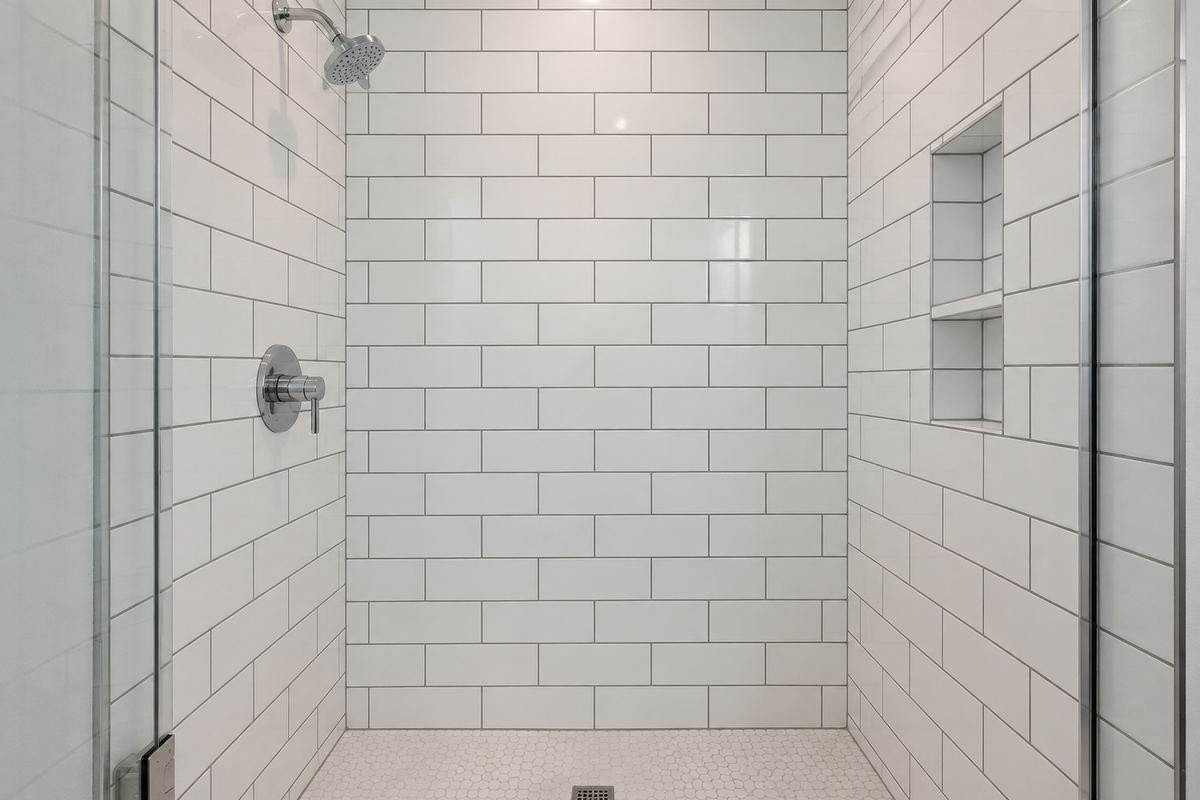
Contrasting grout makes a simple white tile layout a visible design element. A medium gray often provides definition without the intensity of a black-and-white grid, particularly in a small shower with many joints.
Test the selected grout with the actual glaze before committing. Strongly pigmented grout is not appropriate for every light tile without specific preparation. Compare the sample at arm’s length and from the bathroom doorway; a grid that feels subtle close up can dominate the room.
Practical tip: Follow the tile supplier’s compatibility and test requirements.
11. Let matching grout soften a square-tile grid

A close tile-and-grout combination lets square tiles read as a gently textured field. This is useful when you want the familiarity of a small grid without making every joint compete with the rest of the bathroom.
Compare a cured grout sample with the lightest and darkest tiles in the batch. One color may not disappear beside every piece, and that can be part of the appeal. Aim for a considered relationship across the field rather than an impossible exact match to each tile.
Practical tip: Keep the metal finish simple so the quiet wall treatment remains coherent.
12. Give herringbone one uninterrupted feature wall
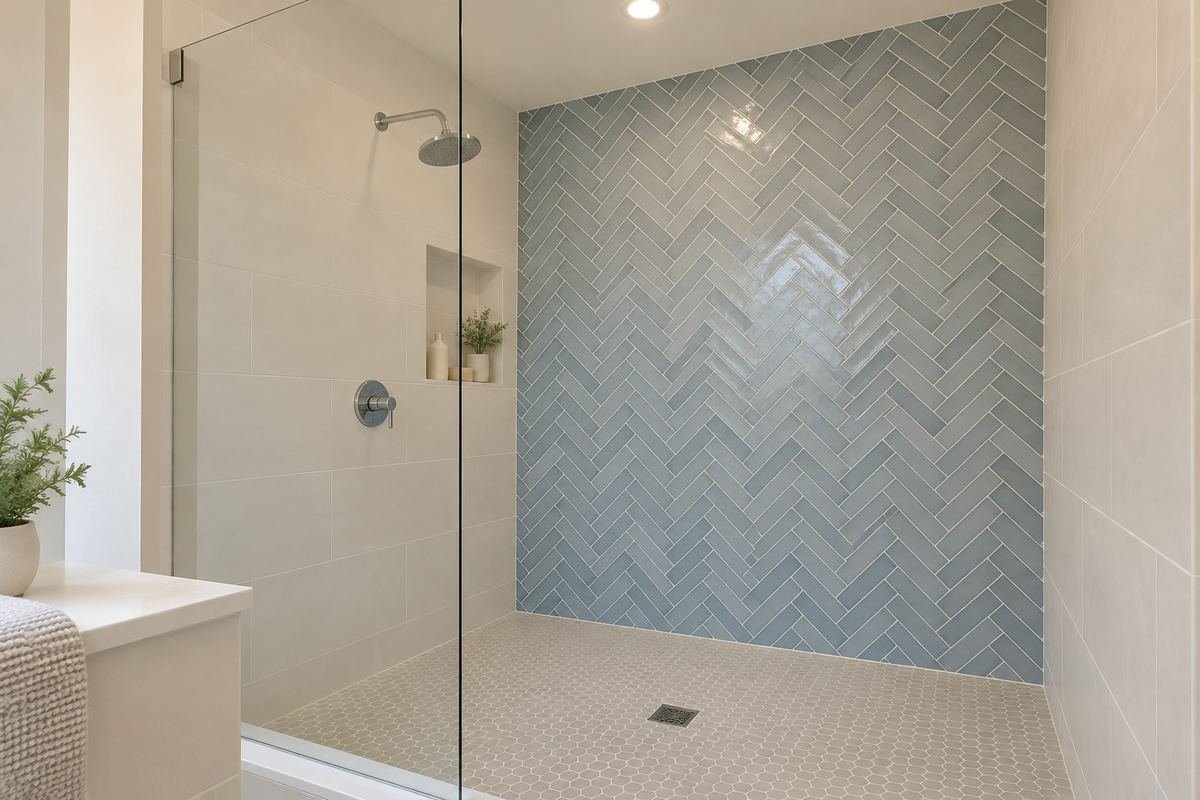
Herringbone is most legible when it has enough uninterrupted wall to show its rhythm. A single back wall can provide the pattern while plain returns keep the enclosure from feeling crowded.
Draw the pattern around the valve and any niche before approving it. Decide where the main axis lands and how the outer cuts finish. A centered zigzag may matter less than avoiding awkward fragments around the feature that attracts the eye first.
Practical tip: Use a quieter floor pattern beneath a directional wall feature.
13. Try basketweave as a contained wall panel
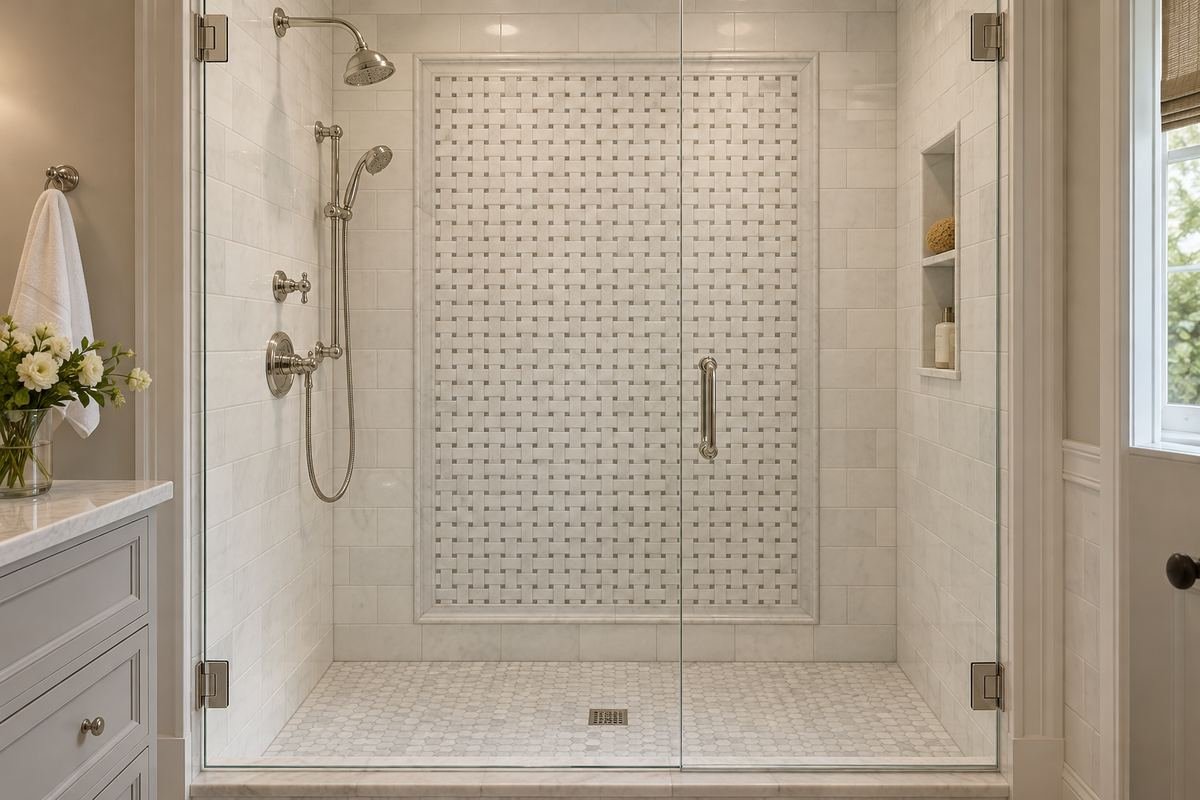
A basketweave mosaic can give a traditional shower a decorative center without covering every surface in pattern. A simple surrounding field makes the panel read as a deliberate composition.
Size the panel from complete repeats and align it with the main shower view. Ask the supplier and installer to confirm the tile pairing, thickness and transition detail. A narrow leftover strip around a complex repeat usually looks less resolved than a simpler, well-proportioned panel.
Practical tip: Use the panel’s background color for the surrounding field tile.
14. Divide two tile colors along a planned horizontal line

Two colors can give a shower a grounded lower section and a lighter upper field. Using the same tile format makes the transition easier to understand visually, while a restrained palette keeps it from resembling an unrelated border.
Set the dividing line on an elevation with the valve, niche and adjacent bathroom details visible. Both colors must be suitable for the wet wall location. Check that their actual dimensions and thickness are compatible before assuming the joint grid will continue neatly.
Practical tip: Choose the transition height from the whole wall composition.
15. Continue a narrow color band around the enclosure
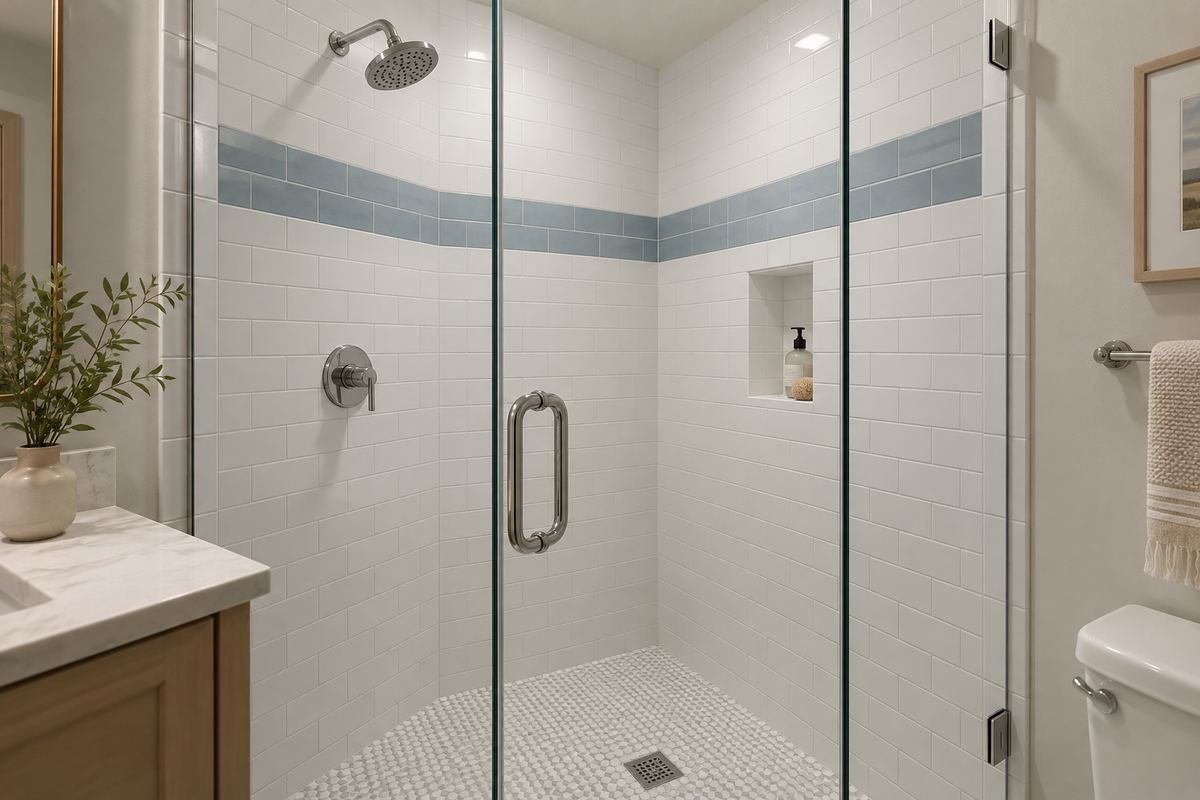
A restrained color band can link three shower walls and give the eye a clear horizontal line. It works best when the band belongs to the same visual family as the field rather than acting as a collection of unrelated accent pieces.
Plan its passage through corners and around any window or niche. Confirm actual sizes, joint positions and trim needs. If the band must stop awkwardly at several interruptions, a full feature wall or one continuous field may produce a calmer result.
Practical tip: Draw the band on every wall before deciding it belongs in the plan.
16. Align a vertical feature strip with the fixtures

A vertical strip can organize the showerhead and valve as one composition. Choose a measured, relatively simple accent and keep the adjoining field quiet so the strip feels integrated rather than pasted onto a finished wall.
Confirm the fixture centerline and trim dimensions with the plumber and installer before the tile layout is approved. The visible escutcheon can cover or interrupt more of the pattern than expected. Draw the actual hardware outline over the proposed accent, including its edges.
Practical tip: Use one fixture-centered axis instead of adding several competing vertical lines.
17. Blend the niche back into the field tile
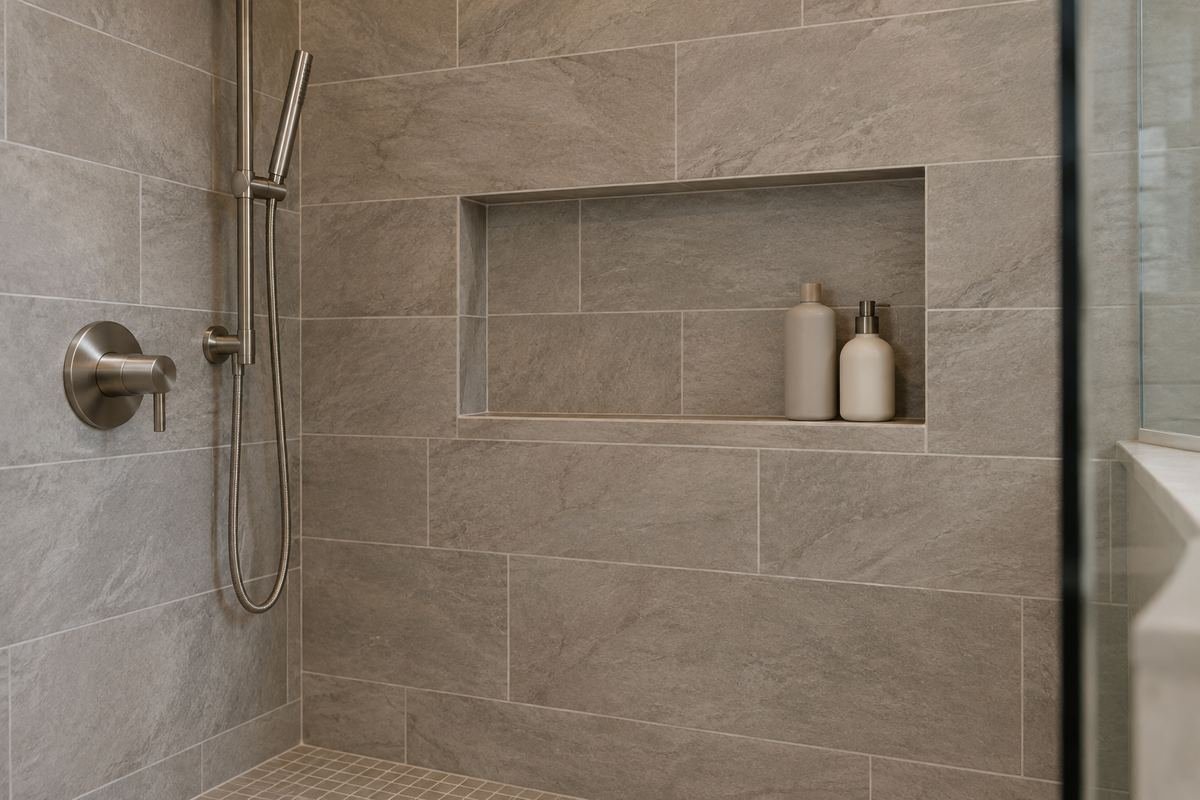
A niche does not need a contrasting mosaic to look intentional. Continuing the main wall tile into its back can keep storage visually quiet, especially when bottles already add color and small shapes.
Coordinate the niche opening and tile layout before construction, within the selected waterproofing system. Do not treat the opening as a purely decorative hole cut after the wall is finished. Check how joints, edges and shelf surfaces will meet in the complete detail.
Practical tip: Keep bottle storage from obscuring the tile feature you most want to see.
18. Treat exposed tile edges as a visible finish

The shower entrance often reveals the edge treatment more clearly than the back wall. A compatible glazed edge, bullnose or specified profile can make the tile stop feel deliberate beside the painted bathroom wall.
Compare the real trim with the field tile, including thickness, glaze and corner pieces. A metal profile needs a size suited to the tile assembly, while ceramic trim can have its own variation. Approve a sample junction rather than choosing an edge solely from a tiny catalog image.
Practical tip: Include entrance edges and outside corners in the material takeoff.
19. Compose tile carefully around an existing window

An existing shower window can become part of the wall composition when the tile grid and reveals are planned together. Use a restrained field if the window already divides the wall into several narrow sections.
Have the relevant professionals assess the window, glazing, water exposure and complete waterproofing detail. Then draw the visible cuts around the frame. Do not move or enlarge an opening based only on a decorative image; the surrounding construction and shower assembly need their own assessment.
Practical tip: Compare the tile layout above, below and beside the actual frame.
20. Coordinate a bench with the wall layout
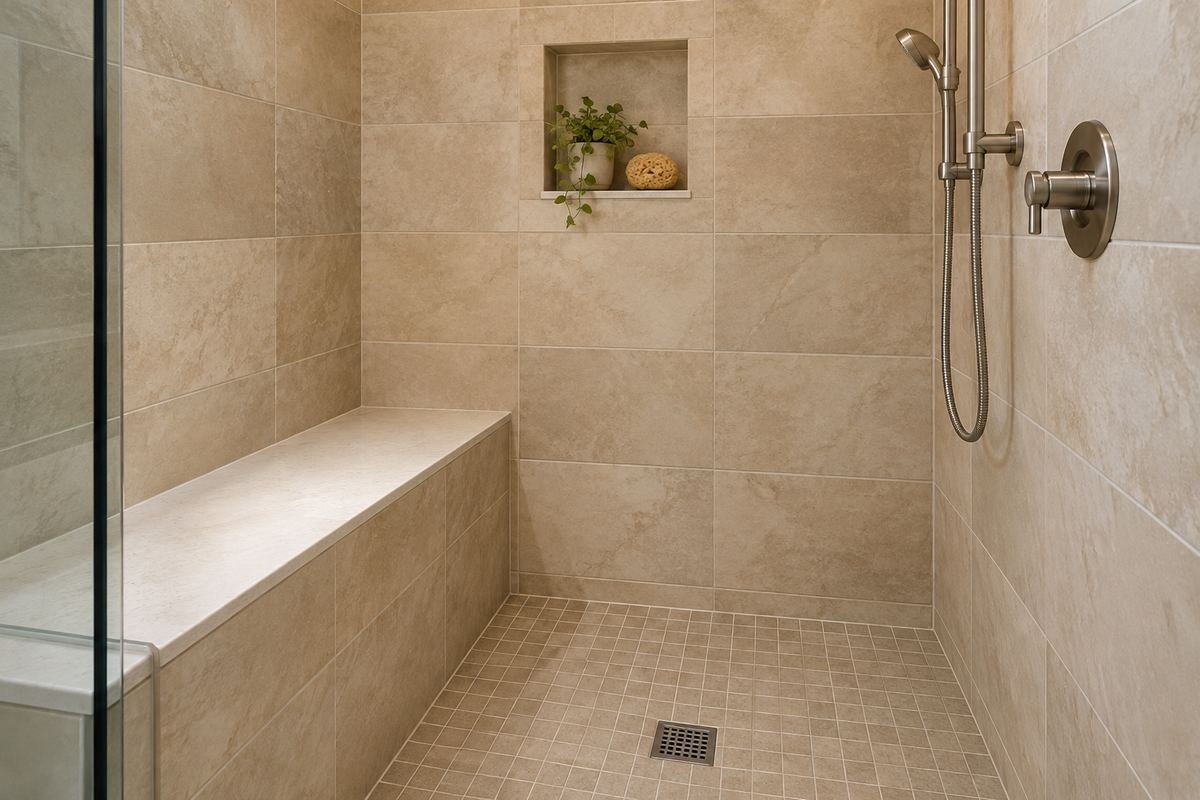
A shower bench can look integrated when its front and neighboring walls share a considered grid. A quiet seat finish can provide a visual pause beside a more detailed wall pattern.
Resolve the seat, junctions, drainage and waterproofing within the specified assembly before choosing their appearance. Compare full-size samples at the bench edge and ask how the finished surfaces meet. The decorative concept should support a properly designed bench rather than determine its construction by itself.
Practical tip: Mark the bench on both the plan and wall elevation.
21. Use a small mosaic on a curved shower wall

A small-format mosaic can follow a curved wall more readily than a broad rigid tile face, but the usable radius and backing still depend on the exact product and assembly. A close grout color helps the curve remain the main feature.
Ask the supplier and installer to assess the actual curve before ordering sheets. Check how sheet joins, exposed edges and adjoining flat walls will finish. Keep accessories restrained so the curved surface has room to read as a clear architectural shape.
Practical tip: Confirm the product’s suitability for the specific curved wet-wall application.
22. Give a tub-shower one stronger end wall
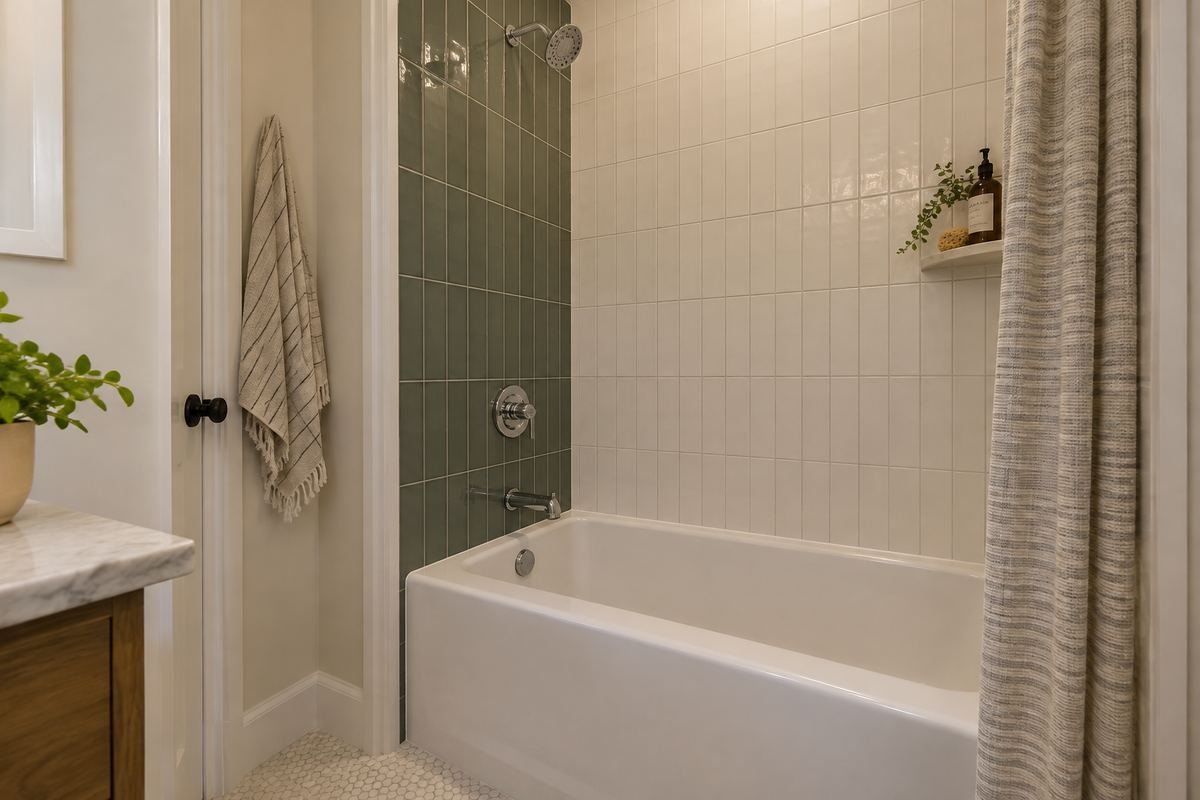
In a tub-shower combination, the short end wall can carry a controlled feature while the longer wall stays simple. A deeper color or a different orientation gives the enclosure character without surrounding the bath in several competing patterns.
Draw the junctions with the tub rim, shower curtain or screen and neighboring field tile. Confirm that the feature works from the bathroom entrance, not only from inside the tub. Keep all wet-area surfaces and transitions within the complete specified system.
Practical tip: Repeat the feature color once outside the tub to connect the room.
23. Coordinate the floor without repeating the wall format
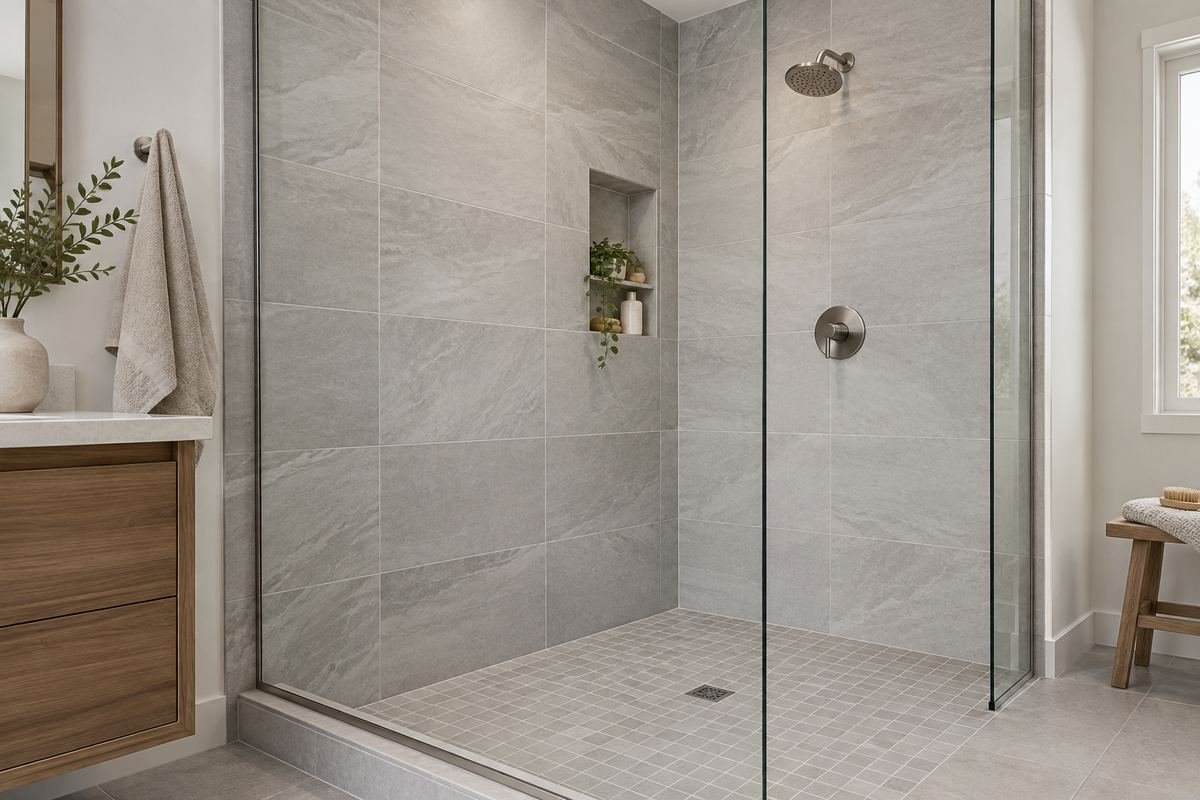
A shower can feel unified even when its floor uses a different tile size from the walls. Repeat an undertone or restrained color relationship, allowing the floor format to respond to its own application and drainage requirements.
Check wall and floor products separately, even when they share a collection name. Compare their real samples together and review the floor layout with the installer. A visually matching large wall tile should not be carried onto a sloping base merely to preserve the photograph’s appearance.
Practical tip: Choose coordination through color first, then verify each product and assembly.
Frequently Asked Questions
Should all shower walls use the same tile?
They can, and using one field tile often makes corners easier to compose visually. A feature wall also works when its edges, adjoining grout lines and relationship to the showerhead are planned. Compare the whole enclosure from the bathroom entrance before adding a second pattern.
Can a wall tile also be used on the shower floor?
Only when the exact tile and finish are approved for that use and work with the shower base and drainage layout. Check the manufacturer’s documentation separately for each product. A coordinating floor mosaic is an option, but its collection name alone does not establish suitability.
Which grout color is best for shower walls?
A close match makes the wall quieter, while contrast makes the grid more prominent. Assess a cured sample with several actual tiles. Follow the tile and grout manufacturers’ compatibility, cleaning and sealing instructions rather than choosing by color alone.
How do I avoid thin cuts around the shower edges?
Have the installer draw or dry-lay the actual tile module, including joints, on each wall elevation. Compare starting points and consider the most visible edges. Fixture positions, corners and niche dimensions can change the best starting line. Resolve these together rather than centering one wall in isolation.
Can I mix handmade tile with factory-made trim?
Sometimes, but compare actual thickness, size, glaze and edge appearance before ordering. Nominally similar sizes may not align. Use a supplier-approved pairing or ask the installer to develop a compatible detail from real samples.
Is large-format shower wall tile easier to install?
Its quieter joint pattern does not make installation simpler. Substrate preparation, handling, cuts and the complete setting assembly still matter. Have the installer assess the specific product and wall conditions before assuming fewer pieces will reduce the work.
Choose the Details That Work in Your Home
Narrow your shower tile ideas to a main surface, a clear wall grid and a small set of compatible finishes. Approve the corners, interruptions and exposed edges as carefully as the color. A complete set of elevations and a physical sample give your installer a much clearer brief than a collection of unrelated inspiration photos.
For related ideas, explore bathroom floor tile ideas, bathroom vanity ideas, bathroom lighting ideas.
Planning References
Schluter: tiled shower systems and waterproofing; Fireclay Tile: variation, samples and product care; Daltile: choosing tile for the intended application. Follow the instructions for the exact products you choose.
Optional digital guide for this topic
If you prefer a structured workbook, explore this related paid guide.