Useful laundry room backsplash ideas begin with the work happening in front of the wall. A deep utility sink, a folding counter and a narrow appliance alcove create different design conditions. A tile pattern that looks attractive in isolation may be difficult to finish neatly around those existing features.
Start with the sink, faucet, cabinet line, window and appliance access. Decide where the surface should begin and end before choosing its color or shape. Then compare a real sample with the counter and floor, including the proposed grout and edge detail.
These 28 concepts focus on wall surfaces and their relationship with the laundry routine. They complement storage and shelving plans without treating every attractive tile as an interchangeable choice. The images illustrate design possibilities; they do not establish product suitability, waterproofing or an installation specification.
The images are original AI-generated decor concepts, not installation diagrams or photographs of completed client projects.
Browse These 28 Laundry Room Backsplash Ideas
Jump to an idea
- Define one backsplash field around the utility sink
- Continue the sink surface around a short side return
- Organize the tile around an existing sink window
- Choose the upper boundary from a taller faucet
- Fill the band between a counter and upper cabinets
- Give an existing sink alcove a complete surface plan
- Use a restrained band behind a separate folding counter
- Define the wall beside a stacked appliance alcove
- Keep the wall treatment independent of a top-loader lid
- Relate a backsplash to an independently supported counter
- Stop the tile at a real tall-cabinet boundary
- Resolve the exposed edge beside the room doorway
- Use a larger rectangular tile along a long work run
- Give a compact utility sink a simple square grid
- Use a vertical stack within a narrow sink bay
- Let a horizontal stack follow a wide folding surface
- Pair an offset brick layout with a traditional utility sink
- Contain a herringbone pattern within one deliberate panel
- Choose a picket pattern for a carefully bounded wall section
- Use small round mosaics with quiet cabinet fronts
- Add one restrained stripe within a simple sink-wall grid
- Compare a glossy surface under the actual room lighting
- Choose a quieter matte field beside a patterned floor
- Limit surface relief near a frequently used utility sink
- Use a stone-look surface with restrained veining
- Take a muted wall color from one detail in the floor
- Keep adjoining wall fields related around a window change
- Choose grout as part of the complete cabinet-counter palette
Plan laundry room backsplash ideas from the wall boundaries
Draw the actual sink, counter, upper cabinets, window, door and accessible appliance components. Mark the proposed tiled area and inspect every exposed edge. Compare the material and grout under the room’s normal light. Select the exact product and complete installation system for the real exposure, following its requirements and the appliance instructions.
| Existing condition | Design decision to compare | Practical check |
|---|---|---|
| Deep utility sink | A defined backsplash field around the actual sink | Faucet movement and the real splash area |
| Separate folding counter | A contained wall band or taller field | Usable counter depth and its support |
| Window over the sink | Tile organized around the sill and returns | Window operation and the exposed edges |
| Top-loading appliance | An independent wall finish | Full lid movement and required access |
| Busy patterned floor | A quieter tile field and restrained joints | The whole-room view with samples |
| Very short wall section | A tile scale that leaves deliberate edge pieces | The actual set-out rather than one loose sample |
Choose the wall extent before the tile pattern
A backsplash is a defined wall surface, not automatically a floor-to-ceiling installation. Mark the area associated with the sink or counter, then compare the endpoints with the room’s architecture. The actual exposure and selected system should guide its specification.
Compare the material with the way the room is used
Fireclay Tile’s laundry guide discusses material choice alongside function and appearance. Use that as a prompt to compare the actual product’s care requirements with your routine. A decorative surface name alone does not establish stain resistance, suitable cleaning methods or a waterproof wall assembly.
Relate the backsplash to the counter without forcing a match
Daltile’s backsplash guide discusses coordination as well as matching. In a laundry room, the counter, appliance fronts and floor are often visible together. Bring those finishes into the sample comparison before choosing a new patterned surface.
Keep appliance requirements separate from the decorative plan
Preserve the access, clearances and installation conditions required by the exact appliances. A tile concept does not permit moving plumbing, electrical equipment, ventilation or service access. Have alterations planned appropriately, and keep laundry products stored according to their own instructions.
1. Define one backsplash field around the utility sink

A defined field can give the utility sink a clear place within a longer laundry counter. Let its width relate to the sink cabinet or another deliberate boundary. The tiled area should look connected to the task rather than like a loose rectangle centered on the wall.
Review the actual faucet movement and splash exposure before choosing the extent. Keep the surrounding counter useful for handling laundry. Resolve the complete wall system and perimeter details for the real materials rather than treating the concept as a protective specification.
Practical tip: Mark the complete sink zone before selecting the tile scale.
2. Continue the sink surface around a short side return
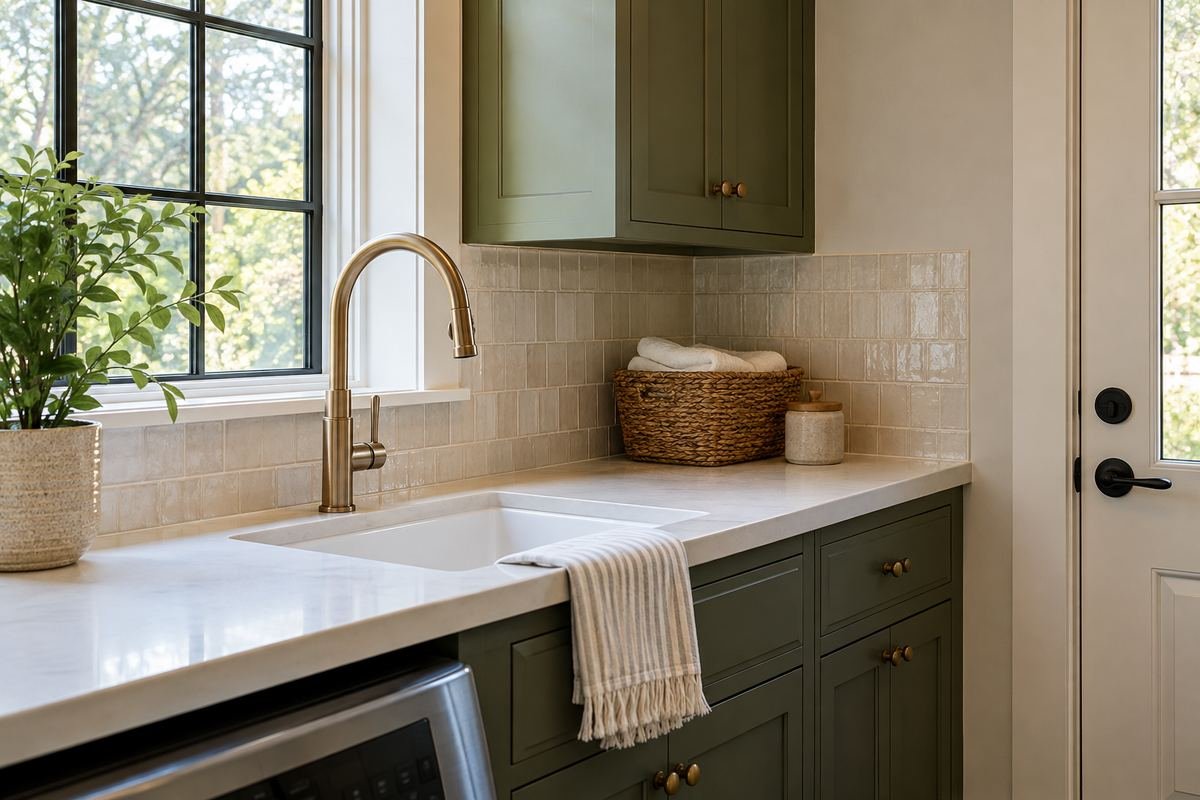
A utility sink near a corner can benefit from a backsplash composition that turns onto the adjoining wall. The return gives the corner a deliberate visual relationship with the sink. Keep the material and tile rhythm related across the change in plane.
Check both exposed ends and the corner detail with the installer. A continuous appearance does not eliminate the need for an appropriate joint and complete installation. Compare the faucet and usable counter space so the corner remains practical during ordinary sink tasks.
Practical tip: Include both sides of the sink corner in the set-out review.
3. Organize the tile around an existing sink window

A window over the laundry sink can become the main reference for the backsplash layout. Compare the tile divisions with the sill and side edges. A restrained pattern can frame the opening while leaving the window as the source of daylight and view.
Review the actual opening, trim and operating space. Do not conceal a needed detail merely to maintain a tile pattern. Have the sill and perimeter junctions specified for the real materials and exposure, then compare the complete corner sample rather than one loose tile.
Practical tip: Treat the sill and window returns as part of the design.
4. Choose the upper boundary from a taller faucet

A taller utility faucet can change the visual and practical relationship between the sink and the backsplash. Compare the complete faucet outline with the proposed tiled field. Keep the upper boundary deliberate rather than ending the tile at an arbitrary line through the fitting.
Assess the actual faucet use and exposure with the selected wall system. The photograph does not establish a universal minimum height. Review the faucet’s operation, surrounding counter and any cabinetry before deciding where the finish should stop.
Practical tip: Include the full faucet outline in the wall drawing.
5. Fill the band between a counter and upper cabinets

A tiled band can connect a useful counter to the upper cabinetry above it. Let the cabinet underside create a clear upper boundary when the room arrangement allows. The result can read as one work zone rather than several unrelated pieces.
Check the tile set-out at cabinet ends and any changes in height. Preserve useful access to the actual counter and storage. Choose the surface for the real exposure and care routine, with the complete installation details resolved for that wall.
Practical tip: Compare the complete band at both cabinet ends.
6. Give an existing sink alcove a complete surface plan
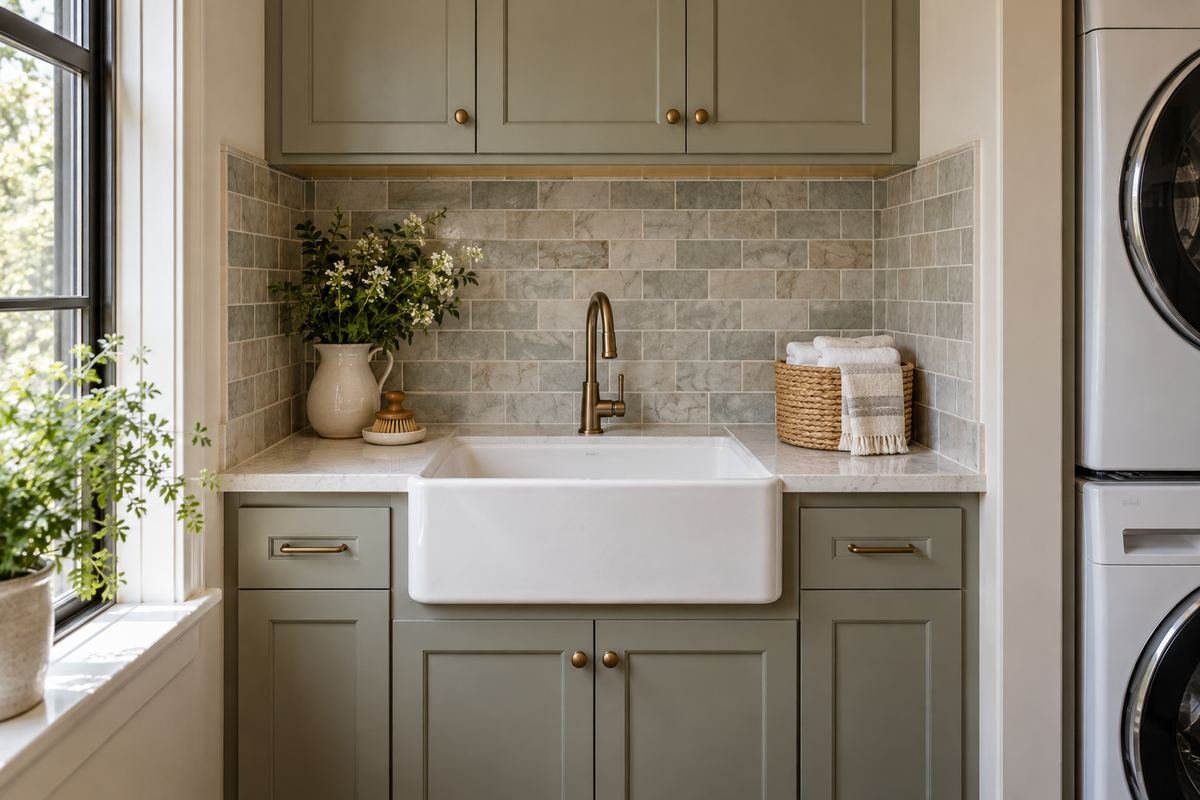
An existing alcove can contain the laundry sink and its wall finish within a defined architectural space. Compare the back wall and short returns as one composition. Keep the tile scale related to the actual recess rather than forcing a large pattern into it.
Review the depth available for the sink, faucet and usable counter. A visually contained alcove still needs appropriate access and installation. Have the junctions and any alterations resolved for the real room instead of treating the image as a construction diagram.
Practical tip: Check the back wall and both returns together.
7. Use a restrained band behind a separate folding counter

A sinkless folding counter can have a quieter wall treatment than a utility sink. A contained tiled band can give the work surface a defined background without making the whole room a patterned feature. Keep the counter’s purpose visible in the design.
Choose the wall extent from actual use and the selected materials. The decorative band does not establish protection against every possible spill. Review its upper edge and the counter junction, and keep storage from occupying the folding area.
Practical tip: Choose this wall from the folding task rather than a sink photograph.
8. Define the wall beside a stacked appliance alcove
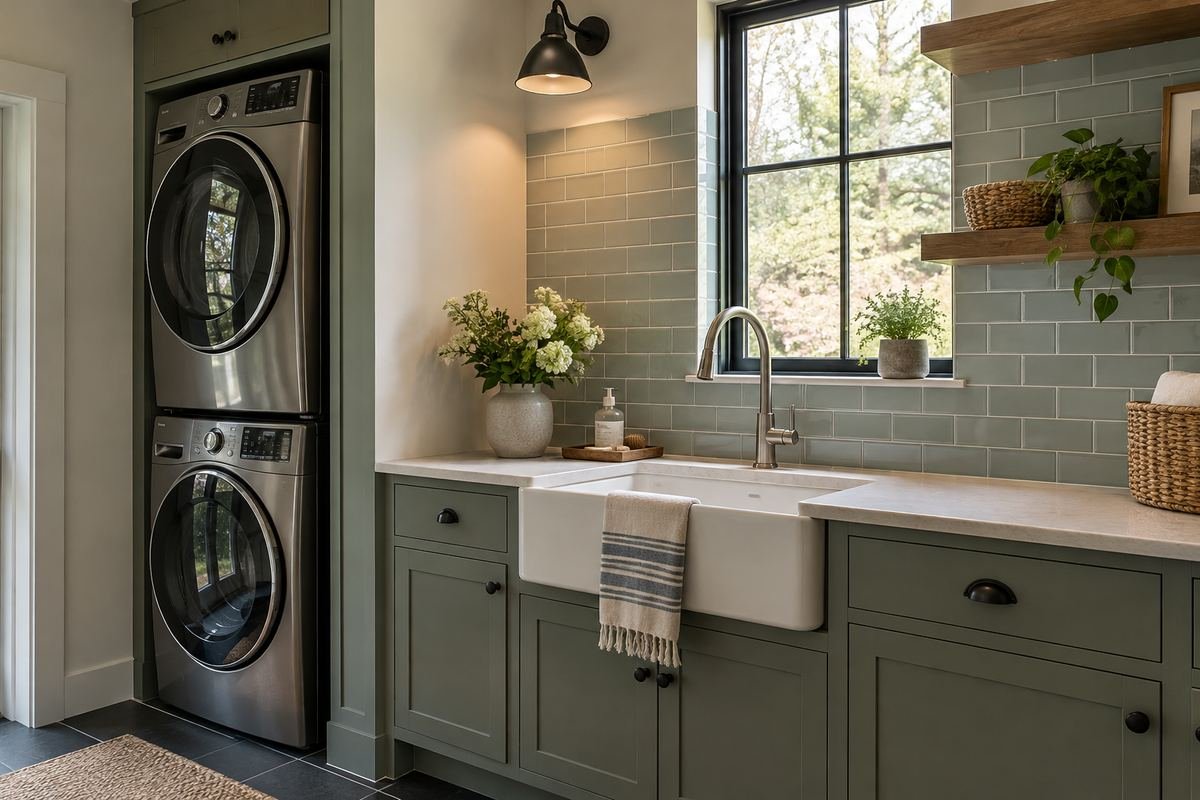
A backsplash surface can belong to a neighboring sink or counter while the stacked appliances retain their own clear alcove. Use a real cabinet edge or wall return to establish the endpoint. The two zones can feel related without tiling across every appliance component.
Follow the exact appliance access and installation requirements. Do not conceal service points or reduce required space for the sake of a continuous tile field. Compare the boundary with the appliance zone in use rather than only in a closed-front photograph.
Practical tip: Keep the decorative endpoint independent of required appliance access.
9. Keep the wall treatment independent of a top-loader lid

A top-loading washer can sit beside a tiled sink wall when its full movement remains part of the plan. Keep the backsplash as a wall finish rather than a reason to bridge across the machine with storage. The open lid belongs in the layout review.
Follow the actual appliance requirements for clearance and access. A concept cannot establish the right gap or permission to fit a machine tightly against the wall. Compare the complete room with the lid open before choosing nearby shelves or a tile endpoint.
Practical tip: Review the appliance with its lid fully operated.
10. Relate a backsplash to an independently supported counter

A folding counter near front-loading appliances can have its own deliberate backsplash composition. Keep the counter and wall visually connected while treating their support and appliance relationship as separate practical decisions. A quiet tile field can leave the room’s working surfaces easy to read.
Use the appropriate counter support and appliance layout for the exact equipment. Do not assume an image permits resting a counter on the machines. Review service access and required space before selecting a continuous surface merely for its appearance.
Practical tip: Confirm the counter support separately from the wall finish.
11. Stop the tile at a real tall-cabinet boundary
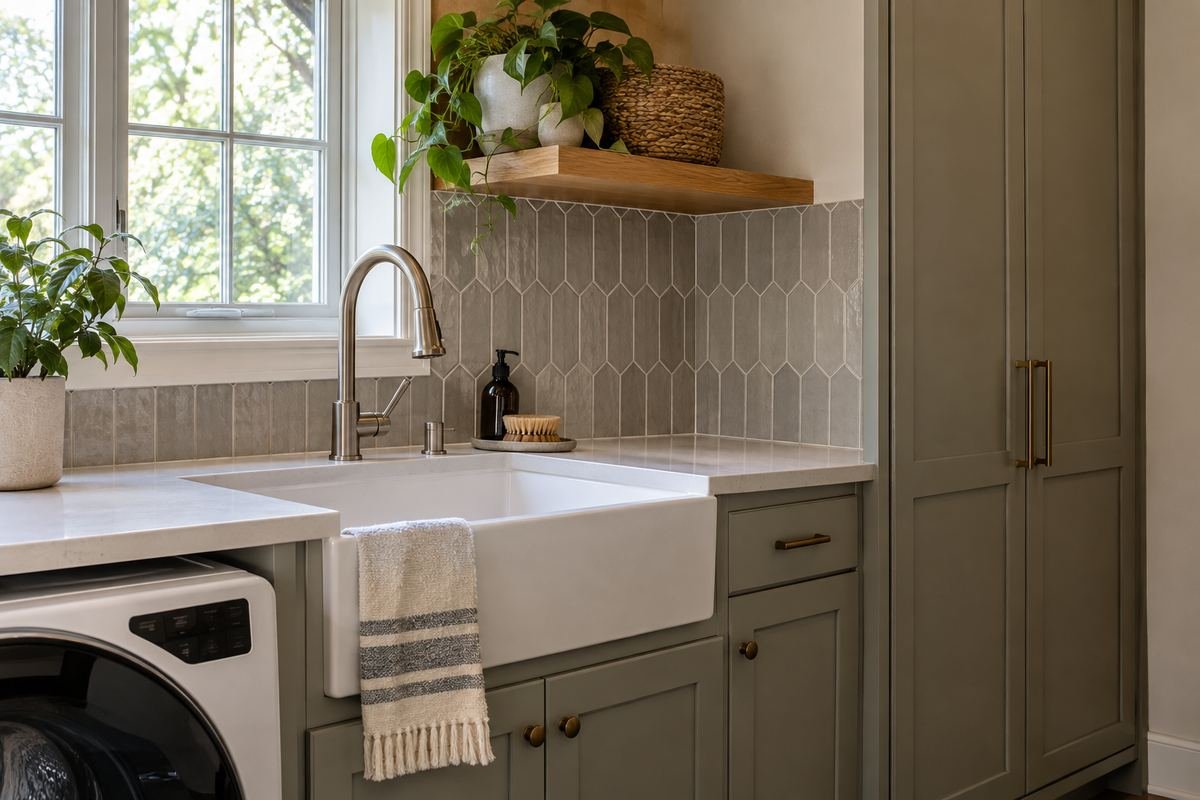
A tall storage cabinet can provide a clear endpoint for the backsplash beside a sink or counter. Let the tile meet the cabinet line deliberately. The arrangement can feel integrated when the cabinet, counter and wall divisions are reviewed together.
Check the actual set-out and required junction detail rather than assuming the last tile will fit neatly. Keep cabinet doors and nearby appliance access workable. Resolve the material change through the appropriate installation plan before choosing an accent border.
Practical tip: Include the tall-cabinet junction in the sample drawing.
12. Resolve the exposed edge beside the room doorway

A doorway can make the backsplash’s exposed side particularly visible. Compare the endpoint with the casing and the counter below. A modest tile field can look complete when its edge belongs to the room’s existing lines.
Select an appropriate finished edge for the exact material and installation. Do not assume every tile has a suitable exposed side. Review the detail from the doorway, where visitors often see the wall at an angle rather than straight on.
Practical tip: Judge the endpoint from the approach into the room.
13. Use a larger rectangular tile along a long work run

A larger rectangular format can give a long laundry work wall a restrained rhythm. Compare its proportions with the upper cabinets and the usable counter. The surface can remain visually quiet when several appliance fronts and storage doors are already present.
Review the real set-out, joints and corner pieces. A larger tile does not automatically eliminate grout or make every wall easier to maintain. Select the actual product and installation for the substrate and exposure, then compare a sufficiently large sample arrangement.
Practical tip: Check the end pieces across the complete counter run.
14. Give a compact utility sink a simple square grid
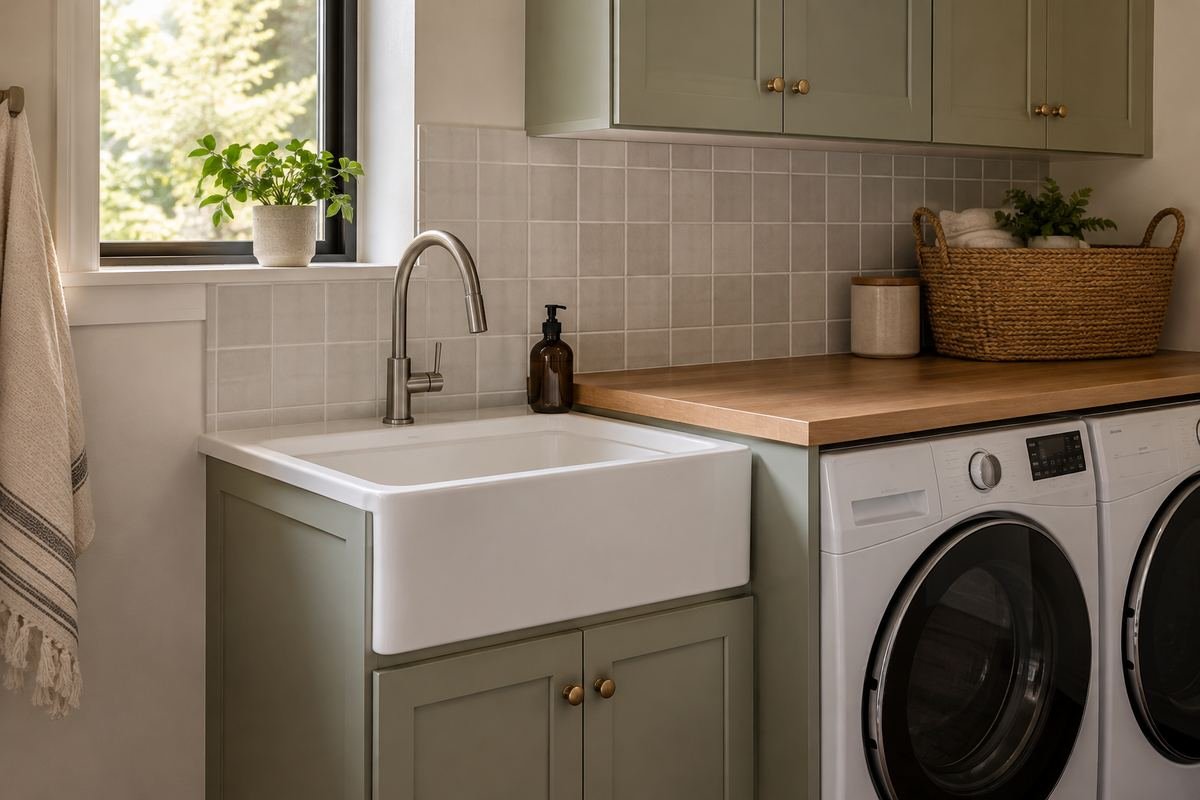
A square grid can give a compact utility-sink wall a clear, readable pattern. Keep its scale related to the small field rather than selecting from a large showroom wall. The repeated divisions can connect a simple sink cabinet with the surrounding trim.
Compare the grid and grout together at the actual edges. Small changes in the set-out can determine whether the side pieces feel deliberate. Review the faucet and upper boundary before choosing a stronger joint contrast that emphasizes every division.
Practical tip: Set out the complete compact field before selecting grout contrast.
15. Use a vertical stack within a narrow sink bay

A vertical stacked layout can give a narrow sink bay a deliberate linear pattern. Keep the divisions related to the cabinet and window, if present. The orientation changes the visual rhythm without requiring an additional border or several contrasting tile colors.
Compare the real tile size with the field width and upper boundary. Very narrow end pieces can become more noticeable in a simple grid. Have the set-out resolved before ordering, including the exact product’s joint and edge requirements.
Practical tip: Review the side pieces as carefully as the central pattern.
16. Let a horizontal stack follow a wide folding surface

A horizontal stacked layout can relate a wide folding surface to the wall above it. Keep the grout quiet if the cabinet fronts already create several strong lines. The arrangement can give the work run a considered rhythm without a decorative motif.
Check the pattern at the counter ends and any upper cabinets. The horizontal lines should remain deliberate across the actual wall conditions. Compare a sample with folded linens on the counter, since the working view can feel different from an empty-room photograph.
Practical tip: Judge the grid with the folding surface in ordinary use.
17. Pair an offset brick layout with a traditional utility sink

An offset rectangular layout can relate to a traditional utility sink and straightforward painted cabinetry. Keep the palette restrained so the staggered joints supply the main pattern. The room can retain a practical character without relying on decorative laundry signs.
Review the actual offset and tile suitability with the installer. Different tile formats have different requirements, so the image should not determine the installation pattern by itself. Compare the exposed edges and corner pieces before choosing stronger grout contrast.
Practical tip: Specify the permitted layout for the exact tile.
18. Contain a herringbone pattern within one deliberate panel

A herringbone panel can give a laundry sink wall a distinct focal area when the surrounding finishes remain simple. Define the panel through a real cabinet or architectural boundary. Keeping the patterned area contained can make the room’s working zones easier to read.
Compare the complete pattern repeat and edge cuts at the proposed size. A small isolated sample will not show how the diagonals meet the perimeter. Resolve the exact product, layout and finished edge together rather than adding a border after the field is chosen.
Practical tip: Draw the entire patterned panel before selecting its boundary.
19. Choose a picket pattern for a carefully bounded wall section

An elongated picket pattern can give a short laundry backsplash a distinctive outline and rhythm. Keep the surrounding cabinet and counter details restrained. The shape should relate to the whole field rather than being chosen only because one loose piece looks unusual.
Review the exposed perimeter and the pattern’s meeting point with the counter. Some edges will require particular cuts or finishing details. Compare the complete set-out with the supplier and installer before deciding how much of the room should receive the pattern.
Practical tip: Resolve the shaped tile’s perimeter before extending the field.
20. Use small round mosaics with quiet cabinet fronts

Small round mosaics can give a modest laundry wall a fine-grained surface pattern. Pair them with quiet cabinet fronts so the repeated circles remain the principal detail. The field can bring character to a practical counter without adding several decorative accessories.
Compare the grout and the mounted sheet arrangement in a larger sample. Sheet boundaries and the many joints affect the finished appearance. Choose the actual product and care routine deliberately rather than assuming every small mosaic behaves the same way.
Practical tip: Inspect a multi-sheet sample with the proposed grout.
21. Add one restrained stripe within a simple sink-wall grid

A single related-color stripe can organize a plain tiled sink wall when it has a deliberate relationship with the room. Compare its position with the window sill or cabinet line. Keep the stripe restrained enough that it supports the wall composition rather than becoming an arbitrary ribbon.
Review the tile sizes and junctions as one set-out. Mixing products can introduce thickness and edge differences that need an appropriate plan. Do not assume two attractive samples can be combined without resolving their actual specifications.
Practical tip: Connect the stripe to a real line in the room.
22. Compare a glossy surface under the actual room lighting

A glossy tile can bring visible reflection to a laundry work wall. Review it beneath the lamps already used at the sink and counter. A controlled reflection may suit the room, while a different angle can produce a distracting highlight.
Test a real sample from the positions used while sorting, washing and folding. A photograph cannot reproduce the exact glare or surface variation. Keep useful lighting and the backsplash finish as connected appearance decisions without assuming gloss automatically improves a darker room.
Practical tip: Judge reflections from the actual working positions.
23. Choose a quieter matte field beside a patterned floor

A quieter matte-looking tile field can give a patterned laundry floor space to remain the main decorative feature. Keep the cabinet and wall relationships simple while comparing the finishes together. The choice is about the visual balance of the complete room.
Read the actual product’s suitability and care instructions rather than inferring performance from sheen. Matte appearance does not automatically establish easy cleaning or stain resistance. Compare the floor and wall samples under the room’s normal light before deciding the final depth.
Practical tip: Choose sheen from appearance and product requirements together.
24. Limit surface relief near a frequently used utility sink

A modest surface texture can give a plain laundry wall character without a bold printed pattern. Compare a restrained relief with the actual sink routine. The useful question is whether the surface and its care requirements fit the way that area will be used.
Inspect a physical sample, including edges and recesses. Do not infer cleaning effort from a distant photograph. Keep heavily articulated decorative surfaces out of the plan unless their actual product requirements and maintenance suit the household’s use.
Practical tip: Handle and inspect the textured sample before choosing it.
25. Use a stone-look surface with restrained veining

A stone-look wall surface can give the laundry counter a broader material pattern than a small tile grid. Keep the veining restrained enough that the sink and cabinetry remain easy to read. Compare the direction and scale across the actual proposed field.
Choose the exact product for the intended application and follow its installation and care requirements. A stone-like appearance does not establish natural stone content or identical performance. Resolve the edges, joints and counter relationship before expecting a visually seamless result.
Practical tip: Review the full pattern and all perimeter details.
26. Take a muted wall color from one detail in the floor

A muted colored backsplash can relate to one existing floor detail without matching every surface in the room. Compare the tile with the actual floor and cabinet fronts together. The connection can make the laundry feel considered while preserving a distinct wall character.
Review several physical samples under the normal light. Digital images can disguise undertone differences and glaze variation. Keep the chosen color quiet enough for the effect you want, rather than adding more accents before the main floor-wall relationship works.
Practical tip: Compare the exact wall sample with the real floor.
27. Keep adjoining wall fields related around a window change

A window can create a taller sink field and a lower neighboring counter band. Use related tile and a deliberate boundary to connect those different heights. The variation should follow the room’s architecture and work zones instead of appearing accidental.
Draw both fields together, including the window sill and the change in height. Have the exposed edges and material junctions specified appropriately. Compare the room from the doorway so the combined arrangement feels coherent in the view used most often.
Practical tip: Review both wall heights in the same elevation.
28. Choose grout as part of the complete cabinet-counter palette

Grout can either quiet the backsplash grid or make its divisions more prominent. Compare it with the cabinet and counter before deciding which effect suits the room. In a small laundry, the repeated joints can have a stronger presence than one tile sample suggests.
Use a proper sample arrangement with the actual proposed grout and tile. Select the exact joint and installation requirements for the products, and follow their care instructions. Color similarity alone does not establish that different grouts are interchangeable.
Practical tip: Make the final comparison with tile, grout, counter and cabinet together.
Frequently Asked Questions
Does every laundry room need a backsplash?
Assess the actual sink, counter use and wall exposure. A utility sink may call for a different wall-surface plan from a room used only for folding. Choose the material and complete installation for those conditions rather than assuming every wall needs the same treatment.
How high should a laundry room backsplash be?
Choose the extent from the sink, faucet, exposure and architectural boundaries. Compare the proposed edge with cabinets and windows. There is no single decorative height that establishes suitable protection in every laundry room.
Can I tile behind a top-loading washer?
A wall finish must preserve full lid movement, required appliance space and service access. Follow the exact appliance and tile-system requirements. A concept photograph does not establish that a particular appliance can be fitted tightly against a wall.
Should the backsplash match the laundry counter?
It can match or coordinate. Compare real samples with the counter, floor and cabinetry in the same view. A restrained relationship can be useful when appliance fronts and several storage elements are already visually prominent.
Is tile alone enough to waterproof a laundry wall?
No design image or tile name establishes the performance of the complete wall assembly. Suitability depends on the exact material, substrate, joints and installation system. Follow the appropriate product requirements and professional specification for the actual conditions.
Are peel-and-stick tiles suitable around a laundry sink?
Check the exact product’s approved surfaces, exposure, preparation and removal instructions. Do not assume every adhesive tile is suitable for splash areas or will remove without damage. Obtain any needed property permission before altering the wall.
Choose the Details That Work in Your Home
Choose laundry room backsplash ideas by defining the wall’s job and boundaries first. Once the sink, counter and appliance access work together, refine the tile scale, finish and grout. A carefully finished modest field can feel more complete than a large patterned surface with unresolved edges.
For related ideas, explore laundry room shelving ideas, small laundry room organization, mudroom locker ideas.
Planning References
Fireclay Tile: laundry backsplash materials and everyday function; Daltile: backsplash roles and countertop relationships. Follow the instructions for the exact products you choose.
Optional digital guide for this topic
If you prefer a structured workbook, explore this related paid guide.