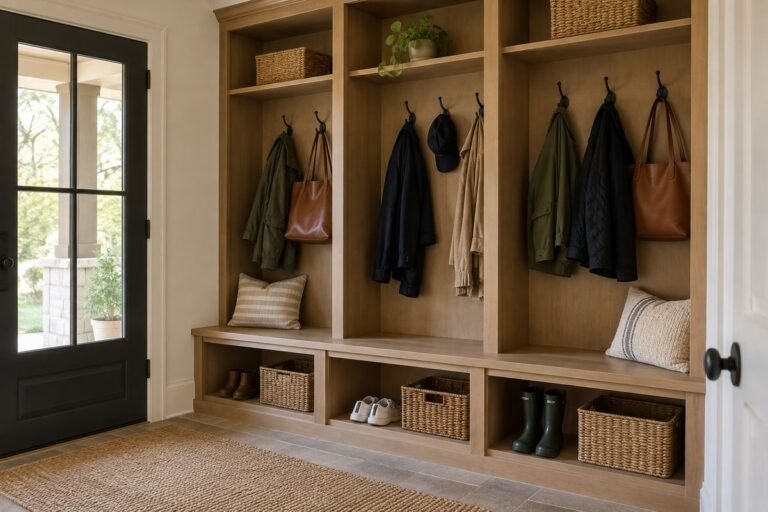
Good entryway shoe cabinet ideas begin with the shoes that actually arrive at the door. A shallow unit can look ideal in a photograph yet struggle with a household’s larger sneakers. A generous cabinet can hold plenty while making the front door or daily route awkward to use.
Choose the opening type, usable interior and location together. Tilt-out compartments, hinged doors and adjustable shelves have different strengths. Their appearance matters, but the best comparison happens with the largest everyday footwear and the cabinet open as well as closed.
These 25 concepts focus on closed shoe cabinetry rather than a general list of racks and baskets. Use them to plan a practical entrance with a clear furniture character. The images are design references; they do not establish exact capacity, installation requirements or suitability as seating.
The images are original AI-generated decor concepts, not installation diagrams or photographs of completed client projects.
Browse These 25 Entryway Shoe Cabinet Ideas
Jump to an idea
- Begin with a shallow tilt-out cabinet
- Choose hinged doors for a familiar shelf view
- Use an upright cabinet on a short wall
- Stretch a lower cabinet along a generous wall
- Pair matching units with a deliberate join
- Fit a cabinet within an existing recess
- Give an open-plan entrance a furniture boundary
- Place a lower unit beneath a suitable window
- Leave room for the entrance door to open
- Use a designed under-stair cabinet bay
- Plan a neat relationship with the baseboard
- Choose a quiet plinth for a built-in character
- Use legs when visible floor makes the piece feel lighter
- Let slatted fronts provide the furniture texture
- Compare woven inserts as a softer door detail
- Use a purpose-designed metal cabinet for a crisp outline
- Blend a painted cabinet with the wall
- Make wood grain the principal decorative feature
- Separate a small arrival drawer from the shoe compartment
- Pair the cabinet with one useful wall mirror
- Place a proper seat beside the storage
- Reserve a taller compartment for boots
- Use adjustable interiors for changing footwear
- Assign distinct cabinet bays to everyday users
- Keep the visible cabinet focused on the current rotation
Test entryway shoe cabinet ideas with the doors open
Measure the available wall, baseboard, door swing and ordinary walking route. Add the cabinet’s full projection, handles and open-door or tilted-compartment footprint. Compare internal usable dimensions with the shoes you intend to keep there. Review the exact furniture instructions, including required wall fastening, before choosing a unit that only appears to fit.
| Main need | Cabinet form to compare | What to test |
|---|---|---|
| A narrow passage | A suitable shallow tilt-out unit | Largest shoe and open-compartment projection |
| Bulkier footwear | A hinged cabinet with usable shelf depth | Door swing and internal dimensions |
| Limited wall width | A narrow upright cabinet | Reach, stability and required anchoring |
| A long entrance wall | A lower wider cabinet | Route clearance along its full length |
| Mixed shoe heights | Purpose-designed adjustable compartments | Permitted configurations and closure |
| Everyday wet arrivals | A separate suitable temporary footwear position | Care instructions before enclosed storage |
Read capacity as a starting estimate
A stated pair count cannot describe every household’s footwear. Compare the actual interior with your largest regularly stored shoes and the way the mechanism closes. Keep enough room to retrieve one pair without rearranging everything else.
Check the exact wall-fastening requirements
IKEA’s current STÄLL and BISSA pages both require fastening those cabinets to the wall. Follow the instructions for the exact product and suitable wall fixing arrangements. An apparently stable photograph, a rental-friendly claim or another owner’s improvised method does not replace the manufacturer’s requirements.
Plan the baseboard relationship before buying
The current IKEA examples use different furniture details to accommodate the wall base. Compare the actual cabinet and your trim rather than assuming every shallow unit sits flush. Resolve the intended installation with the supplier; do not cut furniture, omit required parts or improvise supports from a concept image.
Keep shoe care separate from cabinet styling
Follow the footwear and furniture care instructions. Do not assume a decorative slatted door makes a cabinet a drying appliance, prevents odor or protects against moisture damage. Plan an appropriate temporary position for footwear that is not ready for enclosed storage, keeping the entrance route clear.
1. Begin with a shallow tilt-out cabinet

A shallow tilt-out cabinet can give a narrow entrance a restrained furniture outline. Its closed front keeps the shoes visually contained while leaving a modest projection into the room. Compare the complete mechanism rather than judging the front panel as if it were an ordinary drawer.
Test the largest everyday pair inside the intended compartment. The footwear and divider arrangement must allow the front to close without pressure. Include the tilted opening in the route assessment, and follow the exact cabinet’s wall-fastening requirements before placing it in daily use.
Practical tip: Test closure with the shoes inside.
2. Choose hinged doors for a familiar shelf view

Hinged doors can reveal the cabinet interior in one straightforward view. This can suit a household that prefers choosing from visible pairs on shelves rather than separate tilted bins. Keep the arrangement shallow enough that rear footwear does not become difficult to find.
Include the doors in the footprint when planning the entrance. A cabinet that fits while closed can obstruct the route when open. Compare shelf depth and opening width with actual footwear; a wide outside dimension does not establish a generous usable interior.
Practical tip: Measure the usable shelf and the open door separately.
3. Use an upright cabinet on a short wall

A narrow upright cabinet can suit a short wall where a wider piece will not fit. Its vertical form can leave room for the nearby doorway or other entrance functions. Keep the upper compartments reserved for items the user can reach comfortably.
Review the exact stability and anchoring requirements, especially for a taller unit. Height should not become an excuse to store everyday footwear beyond comfortable reach. Compare the real capacity with the household rotation so the attractive narrow form does not create constant overflow.
Practical tip: Match the upper storage to comfortable access.
4. Stretch a lower cabinet along a generous wall

A lower, wider cabinet can give a long entrance wall a calm horizontal line. It may also provide a useful top for a restrained landing tray. Keep the surface clearly furnished as storage furniture rather than implying that it is a seat.
Assess the full length of the piece against the walking route and nearby doors. A lower height does not reduce its depth or opening requirements. Check whether each section is easy to reach without crouching into an awkward corner or blocking another person’s route.
Practical tip: Review the entire cabinet length as part of the entrance.
5. Pair matching units with a deliberate join

Two coordinated cabinets can serve a wider household rotation while retaining a repeated furniture rhythm. Treat their alignment, top surfaces and gap as a single composition. The arrangement should look planned rather than like a second cabinet added wherever floor space happened to remain.
Follow the installation instructions for each unit and any approved joining arrangement. Do not assume side-by-side placement makes either piece stable. Check that the doors can operate independently and that the combined width leaves enough room for the entrance’s other daily tasks.
Practical tip: Check both units as installed furniture, not a styled pair.
6. Fit a cabinet within an existing recess

An existing recess can give a shoe cabinet a defined home beside the entrance. Its edges help the piece feel integrated without requiring an entire wall of storage. Compare a freestanding unit with the real recess dimensions before assuming a custom-looking result.
Allow for installation, door operation and the manufacturer’s access requirements. A tight-looking fit in a concept image does not establish that hinges, fastening points or ventilation arrangements will work. Resolve those practical details before choosing trim or surrounding decoration that limits access.
Practical tip: Check the recess with the cabinet mechanism open.
7. Give an open-plan entrance a furniture boundary
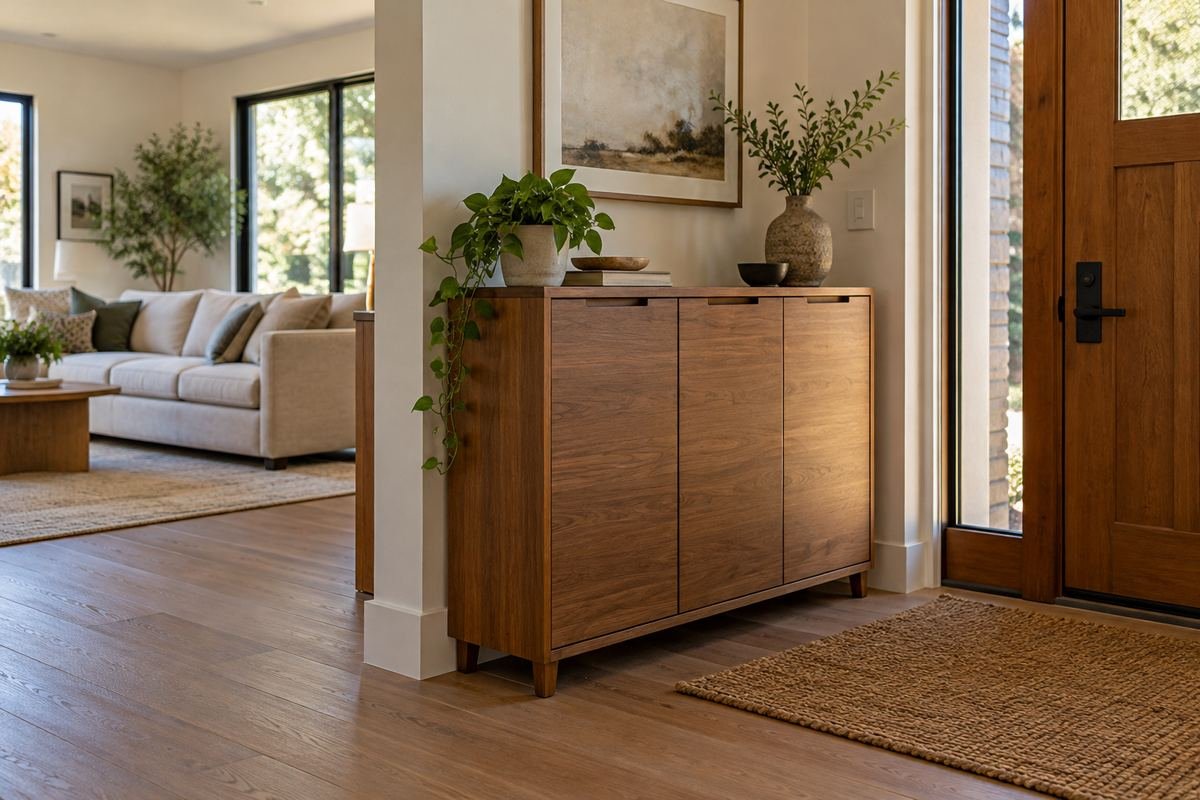
A shoe cabinet against an existing wall can help define an entrance that opens directly into the living area. Repeat a nearby wood or painted finish so the storage belongs to the wider room. Keep its shoe function contained within a clear arrival zone.
Use a location where required wall fastening is possible; do not turn a cabinet that requires anchoring into an unsupported room divider. Compare the living-room view as well as the doorway view. The piece should serve arrivals without becoming a bulky interruption between the two areas.
Practical tip: Check the entrance and living-area viewpoints together.
8. Place a lower unit beneath a suitable window
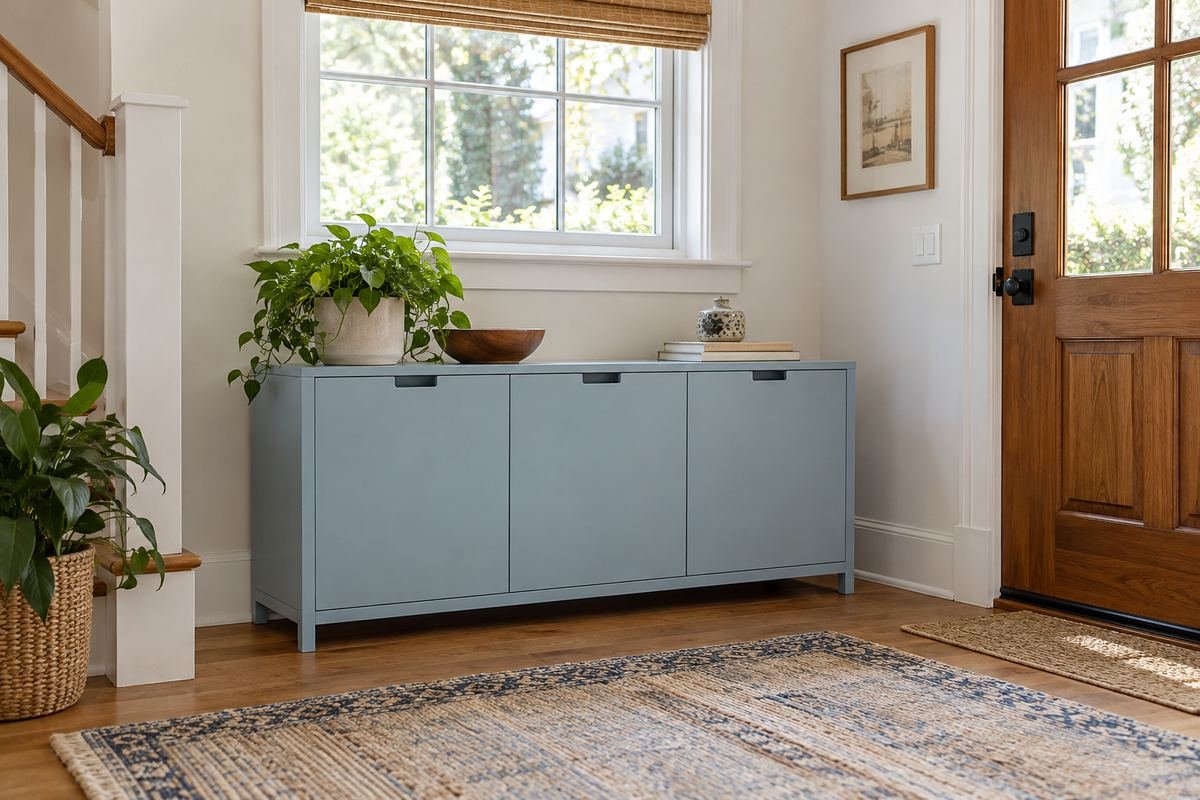
A cabinet beneath a window can use an existing stretch of wall without competing with the opening. Choose a height that respects the sill and the intended window treatment. A restrained top can keep the daylight area visually open.
Check normal window operation, curtain movement and any equipment or building requirements at the location. The cabinet must not block access that needs to remain available. Compare its installed depth with the route rather than assuming the window wall is unused space.
Practical tip: Review the window in its everyday operating position.
9. Leave room for the entrance door to open

A wall beside the entrance door may appear to offer unused storage space. A genuinely suitable shallow cabinet can sometimes work there, but the normal door movement comes first. Review the handle, wall stop and everyday approach as part of the actual geometry.
Do not infer clearance from a closed-door photograph. Check the door at its normal open position and ensure the furniture does not restrict needed access. If the arrangement is awkward, use another wall instead of accepting a cabinet that compromises the entrance each day.
Practical tip: Test the entrance door before selecting the cabinet.
10. Use a designed under-stair cabinet bay
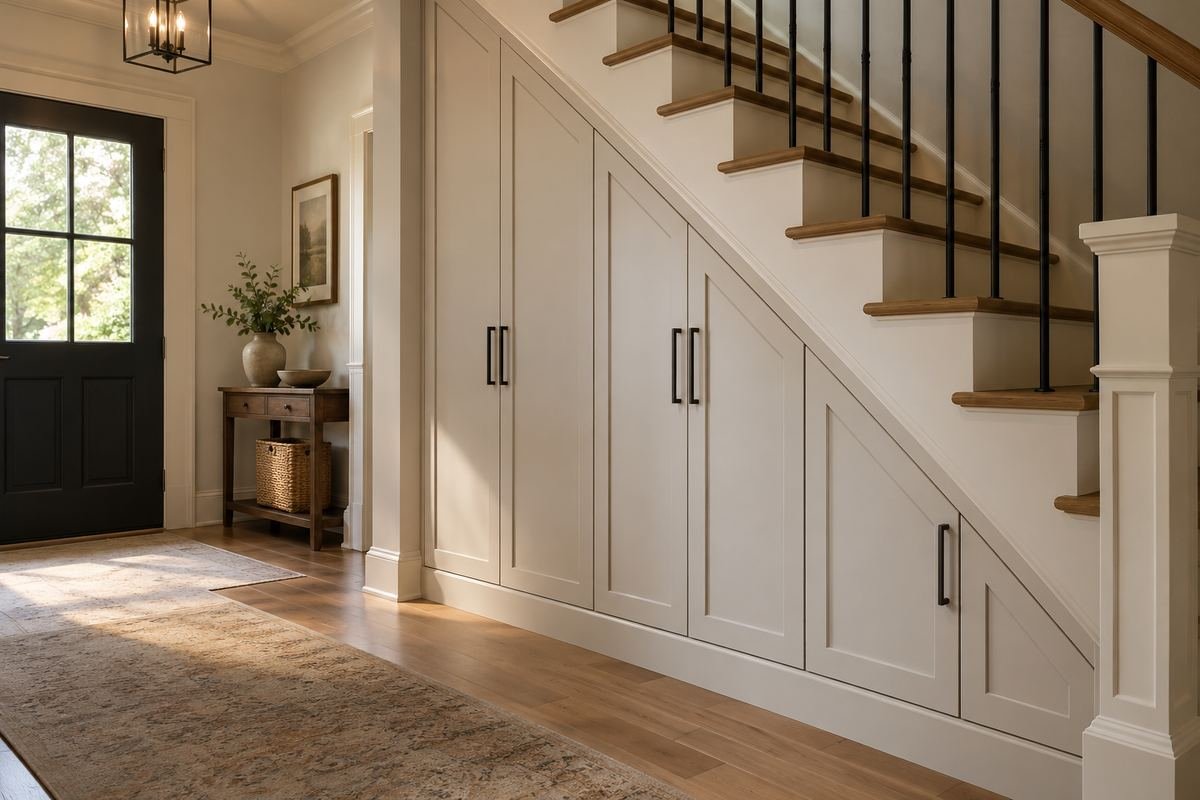
A planned under-stair bay can hold closed shoe storage while following the existing architecture. Keep the visible fronts simple so the irregular upper boundary remains coherent. The lower compartments should relate to footwear and daily access rather than filling every triangular space indiscriminately.
Treat this as a furniture or cabinetry project that needs its own appropriate design. Do not alter stair structure or enclosure from a decorative reference. Confirm usable interiors, permitted installation and access with a qualified supplier before relying on the concept’s apparent capacity.
Practical tip: Resolve the complete cabinetry design before decorative details.
11. Plan a neat relationship with the baseboard

A shallow cabinet often draws attention to the junction between furniture and wall. A product designed to accommodate the baseboard can produce a cleaner-looking relationship when it matches the actual trim. Review this detail early rather than discovering a gap after assembly.
Compare the exact furniture drawing and installation requirements with the wall. Different cabinets use different arrangements, and an image cannot establish compatibility. Do not remove required furniture parts or modify the wall base simply to imitate a close-fitting photograph.
Practical tip: Measure the real trim before committing to the unit.
12. Choose a quiet plinth for a built-in character

A cabinet with a restrained plinth can feel grounded and visually continuous along the wall. This form can suit an entrance where several small legs would add unwanted detail. Keep the door design simple enough that the furniture reads as one clear volume.
Review cleaning and the exact installation arrangement before choosing the appearance. A closed-looking base does not establish that the cabinet is built in or moisture resistant. Keep the furniture requirements separate from the visual effect of a continuous lower edge.
Practical tip: Compare the base detail with the room’s cleaning routine.
13. Use legs when visible floor makes the piece feel lighter

A legged cabinet can reveal part of the floor beneath it and give the entrance a more freestanding furniture character. A modest visual gap can work especially well beside other furniture with related proportions. Keep the shoe storage enclosed above it.
Check actual cleaning access and stability instructions. A visible floor gap may still be too small for the equipment you use. Legs do not remove wall-fastening requirements, and the cabinet should not be chosen for a lighter appearance at the expense of correct installation.
Practical tip: Compare the actual cleaning access beneath the unit.
14. Let slatted fronts provide the furniture texture

Slatted cabinet doors can introduce a repeated texture while keeping the entrance’s palette restrained. They can relate to an existing wood detail without requiring a patterned wall behind the unit. Keep the surrounding accessories simple so the door rhythm remains readable.
Check the exact product construction and cleaning requirements. Slats alone do not establish ventilation performance, moisture tolerance or shoe-care benefits. Compare handle access and the usable interior just as carefully as with a plain cabinet front.
Practical tip: Treat the slats as a design detail, then verify product performance.
15. Compare woven inserts as a softer door detail
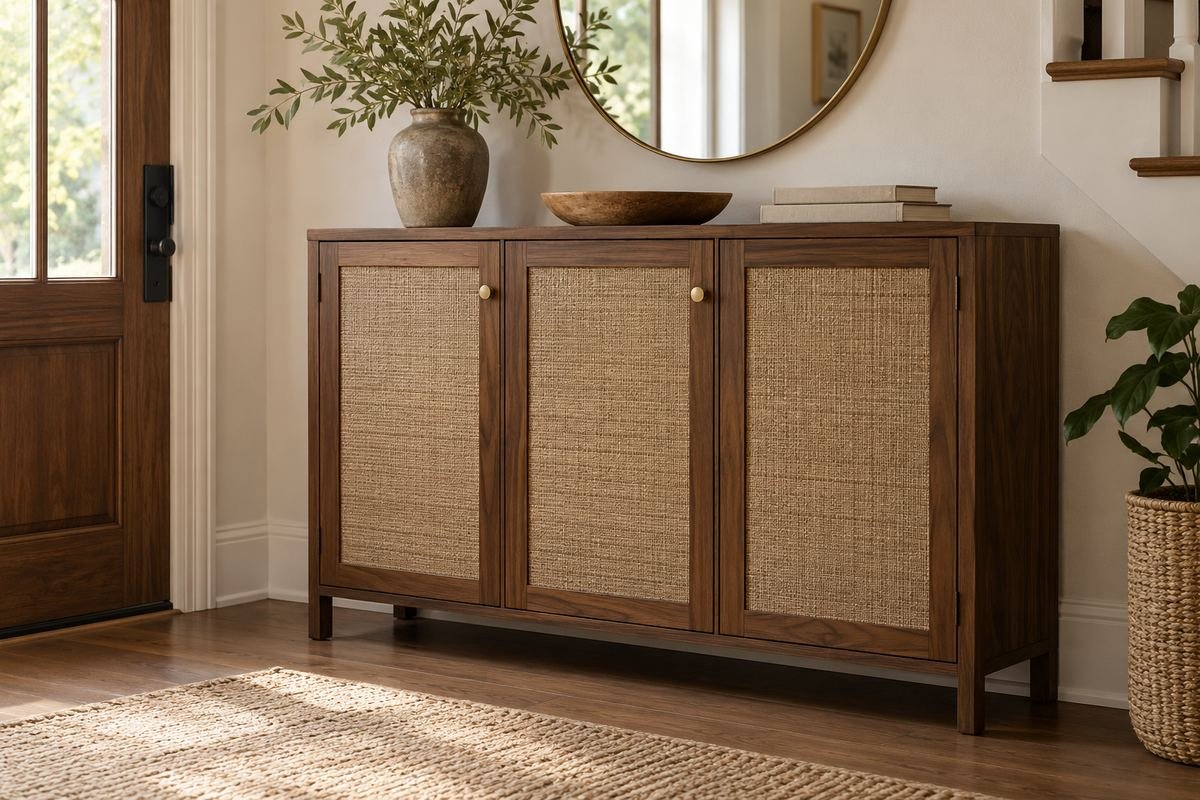
Woven door inserts can soften the appearance of closed shoe storage beside painted walls or plain trim. Use a restrained frame and related natural materials so the feature feels like part of the entrance. Keep the weave legible without adding many competing textures.
Review the exact insert material and care instructions. A decorative weave is not proof of durability around kicking shoes or damp arrivals. Consider how the household will handle and clean the doors, especially where bags or footwear regularly brush against them.
Practical tip: Choose the door detail for the actual arrival routine.
16. Use a purpose-designed metal cabinet for a crisp outline

A metal shoe cabinet can introduce a crisp furniture character in an entrance with simple walls and practical finishes. A restrained perforated front can make the piece visually distinct from ordinary wood casework. Keep its size and color related to the room.
Confirm that the product is intended for the storage task and location. Metal does not automatically mean waterproof, corrosion resistant or suitable for wet footwear. Review shelf construction, edges, care and installation rather than choosing it only for an industrial appearance.
Practical tip: Check the actual specification behind the metal finish.
17. Blend a painted cabinet with the wall

A painted cabinet in a related wall tone can reduce the number of contrasting furniture shapes at the entrance. Keep the door lines and handles readable enough for ordinary use. This can suit a wall where the mirror or architecture already provides the visual emphasis.
Compare real finish samples under the entrance light. Similar digital colors may look different when the surfaces have different sheens or materials. Judge the cabinet as furniture that must be opened and cleaned, not only as a colored block in a photograph.
Practical tip: Compare the wall and cabinet finishes in the actual light.
18. Make wood grain the principal decorative feature

A simple wood-front cabinet can supply the entrance’s main texture without elaborate hardware or wall decoration. Let the grain and furniture proportions carry the composition. Keep the top useful with a small tray rather than covering the surface with several decorative objects.
Compare the wood character with flooring and nearby doors. They do not need to match exactly, but the combination should feel deliberate. Review the actual finish’s care requirements and avoid assuming a wood-like appearance identifies the furniture’s construction or moisture tolerance.
Practical tip: Judge the grain alongside the finishes already in the entrance.
19. Separate a small arrival drawer from the shoe compartment

A purpose-designed cabinet with a separate small drawer can keep keys or other daily items distinct from footwear. This makes the top less dependent on several loose containers. The useful feature is the separation of tasks within one coherent furniture piece.
Check the drawer’s actual size and what it will hold. Do not sacrifice needed shoe space for a shallow compartment that becomes a general dumping spot. Keep the footwear storage and small-item routine clear enough that the household can put each item away without rearranging another category.
Practical tip: Give the upper drawer a specific daily role.
20. Pair the cabinet with one useful wall mirror

A wall mirror above the shoe cabinet can connect the storage with a final check before leaving. Choose its position from the normal standing view rather than centering it automatically in the remaining wall space. Keep the cabinet top clear enough for its practical role.
Review the reflected view and safe mounting requirements for the exact mirror. A large decorative frame can overwhelm a shallow cabinet if the relationship is not considered. Compare the whole grouping from the entrance rather than evaluating the mirror as an isolated purchase.
Practical tip: Position the mirror for the person using it.
21. Place a proper seat beside the storage

A separate seat beside the cabinet can make putting shoes on easier without asking storage furniture to serve an unintended purpose. Choose a seat designed for sitting and give it a clear position in the arrival sequence. The cabinet remains dedicated to footwear.
Check the space with someone seated and the shoe compartment open. These two actions may need room at the same time. Avoid adding a large bench merely to complete a photograph if a smaller suitable seat works better for the household and available route.
Practical tip: Test sitting and opening the cabinet together.
22. Reserve a taller compartment for boots
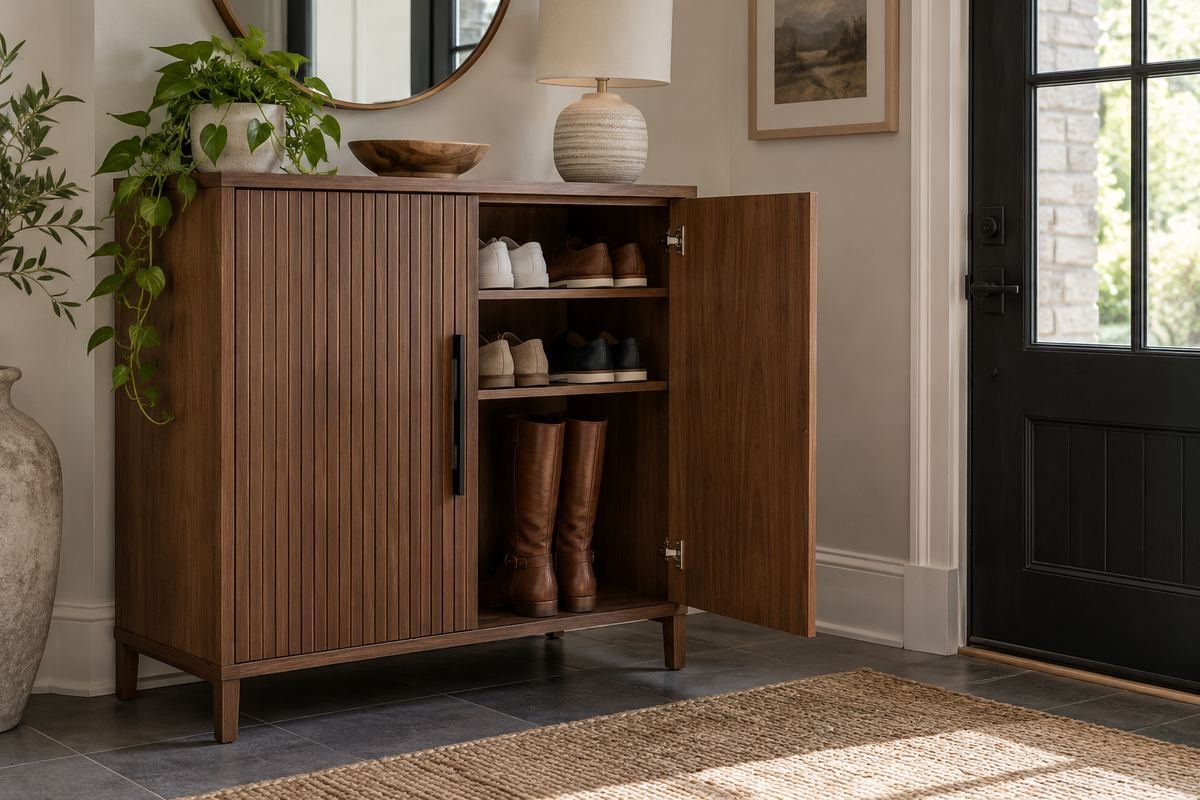
A cabinet intended for mixed footwear can include a taller compartment that respects the shape of the boots being stored. This can keep the main shelf arrangement useful for smaller shoes. Let the real footwear determine the interior rather than forcing it into uniform shelves.
Confirm the permitted cabinet configuration and actual boot dimensions. Avoid folding or compressing footwear against its care instructions simply to meet an advertised pair count. A dedicated compartment only helps when the boots can be put away and removed without awkward handling.
Practical tip: Measure the boots in the position in which they should be stored.
23. Use adjustable interiors for changing footwear

Purpose-designed adjustable shelves or dividers can make a cabinet more adaptable as the household’s footwear changes. Keep the arrangement simple enough to use without frequent rebuilding. A flexible interior is most useful when it serves a clear mix of shoes.
Check which adjustments the exact product permits. Do not assume a divider can be removed or a shelf relocated because another cabinet works that way. Review the closure and support of each compartment after the intended adjustment, following the manufacturer’s instructions.
Practical tip: Verify the permitted configuration before planning capacity.
24. Assign distinct cabinet bays to everyday users

A cabinet with separate sections can make shared storage easier to understand. Give each person or routine a practical bay without relying on visible labels across the furniture front. The exterior can remain calm while the interior follows the household’s daily pattern.
Compare the space allocation with actual footwear rather than dividing every section equally by default. One user’s larger shoes may need more room. Keep the everyday pairs accessible and leave occasional footwear elsewhere if it makes the shared cabinet easier to maintain.
Practical tip: Allocate the bays by real contents and daily use.
25. Keep the visible cabinet focused on the current rotation

A carefully chosen entryway cabinet does not need to contain every pair the household owns. Use its interior for the footwear that belongs in the current arrival routine. This keeps the furniture useful without choosing an oversized unit solely to accommodate occasional items.
Review the contents after an ordinary week. If the same pairs remain untouched while others accumulate outside, revise the allocation before adding more storage. Keep the cabinet’s exterior and top restrained so the finished entrance reflects a working routine rather than a staged one-day arrangement.
Practical tip: Review actual use before expanding the cabinet.
Frequently Asked Questions
What is the best shoe cabinet for a narrow entryway?
Compare a suitably shallow unit with your largest daily shoes, the open mechanism and the walking route. A small closed depth alone does not establish fit. Check the full furniture dimensions and required wall fastening before choosing.
Are tilt-out or hinged shoe cabinets better?
Tilt-out units can offer a shallow closed form, while hinged cabinets may provide a more familiar shelf arrangement. The useful choice depends on footwear dimensions, the mechanism and available opening space. Test the actual product rather than relying on the category name.
How many shoes will an entryway cabinet hold?
Use the manufacturer’s estimate as an initial comparison, then check your actual footwear. Larger sneakers, boots and different compartment arrangements can change usable capacity. A smaller daily rotation that is easy to retrieve can work better than filling every available gap.
Can a shoe cabinet be used as a bench?
Only when the exact furniture is designed and rated for seating. A broad or low cabinet top does not establish that it supports a seated person. Choose a separate suitable seat when you need somewhere to put shoes on.
Does a shoe cabinet need to be attached to the wall?
Follow the exact product instructions. Some designs, including the IKEA examples referenced here, require wall fastening. Confirm the suitable installation for your wall and do not substitute an improvised method because the unit seems stable when closed.
Can wet shoes go straight into a closed cabinet?
Follow the care instructions for both the footwear and furniture. Enclosed storage should not be assumed to dry shoes or tolerate moisture. Plan an appropriate temporary place for footwear that needs attention before returning it to the cabinet.
Choose the Details That Work in Your Home
Choose entryway shoe cabinet ideas that make arriving and leaving easier. Confirm the footwear fit, opening space, installation and everyday capacity first. Then refine the door style, finish and nearby decorative details around a cabinet that already works for the household.
For related ideas, explore shoe storage ideas for small spaces, entryway bench ideas, entryway mirror ideas.
Planning References
IKEA: STÄLL dimensions, wall relationship and fastening requirements; IKEA: BISSA adjustable compartments and product requirements. Follow the instructions for the exact products you choose.
Optional digital guide for this topic
If you prefer a structured workbook, explore this related paid guide.