Useful toothbrush holder ideas give each brush an upright home while leaving the sink easy to use and clean. Start with the brushes actually used at this basin, including their handles and removable heads. Then compare the holder's openings, base and cleaning access before choosing a coordinated finish.
The American Dental Association advises rinsing a brush after use, storing it upright and allowing it to air-dry. A closed container around a damp brush does not improve that routine. The following arrangements focus on storage and bathroom organization; follow the exact brush, charger and holder instructions for their care and placement.
Contents
- 1. Give one daily brush a compact open home
- 2. Use dividers when a shared caddy needs distinct spaces
- 3. Choose two separate cups for independent routines
- 4. Compare an electric brush with the actual compartment
- 5. Give detachable heads suitable individual supports
- 6. Separate storage from the charging decision
- 7. Use a wall bracket with a removable cup
- 8. Compare suction mounting with the specified surface
- 9. Assess an adhesive holder through its complete instructions
- 10. Keep a freestanding option when wall compatibility is uncertain
- 11. Leave faucet movement and hand access clear
- 12. Test the medicine-cabinet door above tall brushes
- 13. Use a shallow ledge only when the whole base fits
- 14. Put the daily group on one modest lift-out tray
- 15. Choose removable parts you can actually clean
- 16. Check where a draining holder sends the water
- 17. Prefer an interior you can inspect without tools
- 18. Compare a spaced rack when several brushes share one station
- 19. Use color to make return positions clear
- 20. Keep wrapped guest spares separate from the used brush holder
- 21. Unpack the travel brush into an open daily position
- 22. Make cleaning and replacement part of the reset
Map the complete holder, brush and removal space
Count current users and measure the widest handle, the tallest stored brush and the space needed to lift it out. Include any divider, wall bracket or tray in the footprint. Check the faucet handles and cabinet door through their full movement. Then inspect how water is removed from the holder and how you can reach its interior for cleaning. Capacity describes a useful arrangement only when the actual brushes fit without a crowded group of touching heads.
Choose an arrangement that fits your situation
- One manual brush and very little counter space: Compare a compact open holder with a fully supported base
- Several people share one basin: Choose distinct positions with brush heads separated
- A wide powered-brush handle does not fit a divider: Measure that exact stored section before choosing another caddy
- A wall mount is being considered: Confirm the complete product, surface and removal instructions
- The holder hides water or residue: Prefer accessible parts and an inspectable base over another decorative layer
1. Give one daily brush a compact open home

A small open holder can be enough for one person's manual brush. Choose a base that sits fully on the counter and an opening that supports the handle upright. Leave a clear grasp around it instead of surrounding it with decorative containers. A single useful cup is easier to assess than a complete accessory set bought before the storage need is known.
2. Use dividers when a shared caddy needs distinct spaces

A divided caddy can organize brushes and toothpaste within one footprint. Check the width and depth of each section rather than relying on the overall size. Joseph Joseph's cited EasyStore example has a 9-by-9-centimeter footprint and removable sections. Those dimensions identify one model; they do not establish that every large brush handle fits its smaller openings.
3. Choose two separate cups for independent routines

Two modest holders can work better than one large caddy when adults use different sides of a shared vanity. Assign a consistent place to each, leaving both sink working areas clear. Compare the combined footprint with the single-caddy alternative. Keep the arrangement easy to lift and wipe rather than adding a separate tray and jar for every person.
4. Compare an electric brush with the actual compartment

A powered brush body can be considerably wider than a manual handle. Measure the real body where it sits in the holder and check that it can be removed comfortably. An organizer marketed for electric brushes still needs a model-specific fit check. Keep charging separate from this storage decision rather than assuming the caddy functions as a charging base.
5. Give detachable heads suitable individual supports

If your brush routine includes removable heads, compare a holder designed for their shape and the maker's storage directions. A deep cup intended for full handles can leave a short head difficult to retrieve. Keep each head identifiable and upright in its intended support. Avoid filling an improvised vessel with loose parts simply to clear the counter.
6. Separate storage from the charging decision
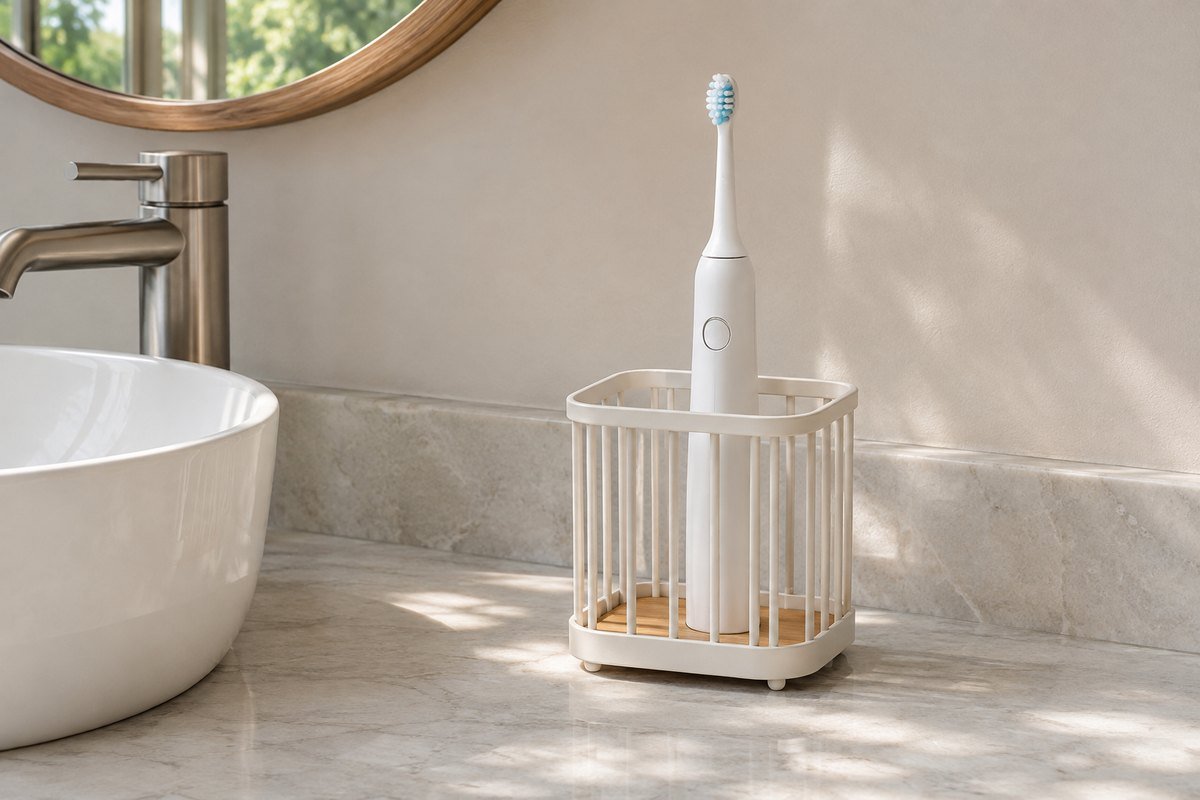
A holder organizes equipment; it does not determine where electrical equipment may be charged. Use the actual manufacturer's placement, charging and water-separation instructions. Keep the storage zone modest and retain suitable charging arrangements elsewhere when required. Do not add an extension lead or relocate a socket to make an accessory arrangement look tidier.
7. Use a wall bracket with a removable cup

A suitable wall-mounted ring can release counter space while a lift-out cup remains easy to clean. Check how the cup is removed and where it will be set down. Match the complete fixing to the wall and the loaded accessory according to its instructions. The bracket should leave the sink and adjacent controls usable without awkward reaching.
8. Compare suction mounting with the specified surface

A suction holder is an option only when the actual surface meets its instructions. IKEA's cited TISKEN requires a smooth flat surface such as glass, mirror or tile, and says not to use wallpaper. Keep the suction contact away from grout or texture. A staged image cannot verify adhesion, so inspect and use the actual product as directed.
9. Assess an adhesive holder through its complete instructions

An adhesive mount has its own compatible surfaces, preparation, curing and removal requirements. Read those before attaching it, including any limits for paint or humid areas. Choose a removable container when that makes cleaning simpler. Treat a renter-friendly description as a starting point for checking the lease and finish, not a promise of damage-free removal.
10. Keep a freestanding option when wall compatibility is uncertain

A counter holder may be the more useful choice when wall construction, finish or permission is unresolved. Select a modest supported footprint and preserve the existing wall. This keeps a storage decision reversible without an improvised attachment. If there is too little counter room, reduce the group or choose another suitable storage location before adding unsupported hardware.
11. Leave faucet movement and hand access clear

Position the holder after operating the tap and washing your hands normally. A cup tucked behind a handle may fit the counter while remaining awkward to use. Include the brush's full height and removal path in the check. Choose a position outside repeated splashes instead of treating every remaining gap beside the faucet as useful storage.
12. Test the medicine-cabinet door above tall brushes

A tall brush can project into a mirror cabinet's opening path even when its holder is low. Open the door through normal use with the full brush in place. Check the handle and your hand as well as the bristles. Move the storage group to a clear position rather than stopping the cabinet door short of its intended opening.
13. Use a shallow ledge only when the whole base fits

A narrow existing shelf can hold a compact cup when its entire base is supported and the loaded height suits the space. Include room for lifting and cleaning. Keep it clear of the mirror and normal body movement. A holder that overhangs a shelf edge needs a different suitable location, even if the color coordinates with the wall.
14. Put the daily group on one modest lift-out tray

A small tray can contain a holder and a closed toothpaste tube while allowing the whole group to move for counter cleaning. Compare the loaded outline rather than just the empty tray. Keep the edges easy to grasp and clean beneath. The tray also needs regular emptying and care; containing drips is different from hiding them.
15. Choose removable parts you can actually clean

A caddy that comes apart can provide access around dividers and its base. Check the exact disassembly sequence and care method before purchase. The cited EasyStore specifies hand washing and drying. That does not authorize a dishwasher cycle or a cleaning chemical for a different holder. Return the correct parts fully dry as their maker requires.
16. Check where a draining holder sends the water

Drain openings need a suitable destination and access for cleaning beneath them. Inspect the actual base, receiver and surrounding surface instead of assuming an open-looking design stays dry by itself. Keep any removable drip receiver reachable. Choose a simpler arrangement if a hidden cavity or permanent puddle makes the daily reset harder.
17. Prefer an interior you can inspect without tools

A smooth accessible interior can be easier to assess than a tall narrow vessel with an unreachable bottom. Look through the opening and compare it with the maker's cleaning method. Decorative grooves or complicated shapes are worthwhile only when they remain maintainable. Keep the daily brush count small enough that the interior can be inspected during ordinary care.
18. Compare a spaced rack when several brushes share one station

An open rack can give several brushes distinct upright positions without placing every handle in one cup. Check the spacing with the actual heads and leave them separated. Choose the required number of positions rather than filling empty ones with backups. The support and drip-management arrangement still need to suit the room and cleaning routine.
19. Use color to make return positions clear

A small difference in cup or handle color can help a shared arrangement remain understandable without a collection of signs. Assign each person the same position and keep brush heads apart. Do not share toothbrushes; the ADA explicitly advises against it. A coordinated display should help people recognize their own item rather than obscure that distinction.
20. Keep wrapped guest spares separate from the used brush holder

Unopened spare brushes need a clear dry place distinct from the open holder used during a stay. A modest separate box can make the difference obvious. Leave room for the guest's brush to stand upright and air-dry after use. Do not close a damp used brush into the spare-supply container simply to make the counter look empty.
21. Unpack the travel brush into an open daily position

A travel case serves a different purpose from everyday storage beside the sink. After arrival, rinse and store the brush according to its care instructions, with upright air-drying rather than leaving a damp head enclosed. Give the empty case a separate appropriate place. A portable open caddy can suit a temporary stay when it remains stable and easy to clean.
22. Make cleaning and replacement part of the reset

Remove the contents, follow the holder's care directions and inspect the base and counter beneath. Rinse brushes after use and return them upright to air-dry. The ADA recommends replacing brushes roughly every three to four months, or sooner when bristles are matted or frayed. Keep the replacement reminder separate from unnecessary countertop stock or claims that a decorative holder sterilizes equipment.
Make a holder fit and care card before buying
Record the number of current users, each brush's widest stored section, the height above the holder and the space needed to lift it free. Add toothpaste only when it needs to share that footprint. For a caddy with three sections, draw the individual openings and assign actual items to them; three sections do not necessarily mean three equal brush positions. Compare these measurements with the complete product information rather than estimating from its photograph.
Add the counter or wall conditions, faucet movement, mirror-door sweep, cleaning method and the route for water beneath the holder. For a wall mount, record the exact compatible surface and mounting instructions. For an electric brush, keep the original charging and placement guidance with this card. Finish by identifying where unused spares belong and how each used brush remains upright and open to air between uses.
A practical next step
Choose a toothbrush holder around the real brush shapes, shared routine and cleaning access. Then coordinate its finish with the room. A small open arrangement with clear return positions can solve the storage problem without adding a permanent group of containers around the sink.
For the surrounding room, bathroom counter organization for the rest of the daily routine. Bathroom decor ideas that connect useful accessories with the room.
The images are original AI-generated design concepts, not photographs of tested products or verified installations.
Sources and care references
- American Dental Association: upright air-drying, rinsing, non-sharing and replacement guidance
- Joseph Joseph: EasyStore matt holder dimensions, removable sections and hand care
- IKEA: TISKEN 803.812.94 surface compatibility, mounting and care
Optional digital guide for this topic
If you prefer a structured workbook, explore this related paid guide.