Good broom closet organization makes the tools easy to remove and equally easy to put away. A cupboard can look orderly with its door open yet fail during an ordinary clean-up: the broom head catches a bucket, the vacuum blocks the mop or a full-width shelf leaves no usable space for a long handle.
Begin with the actual tools. Compare their complete stored shapes, including wide heads, curved hoses and carrying handles. Then open the closet door fully and test the removal path. The goal is a useful arrangement of different shapes rather than the greatest possible number of matching containers.
These 29 ideas focus on household tool storage. They are not chemical-storage, appliance-installation or fixing instructions. Follow the exact requirements for furniture, organizers and tools, and keep cleaning products in their original labeled packaging and appropriate secure storage according to their own instructions.
The images are original AI-generated decor concepts, not installation diagrams or photographs of completed client projects.
Browse These 29 Broom Closet Organization Ideas
Jump to an idea
- Leave one uninterrupted bay for the longest tool
- Choose a purpose-made rail for compatible handles
- Separate wide heads instead of aligning handles tightly
- Use a side wall when the back wall is shallow
- Keep a straightforward rear row in a wider cupboard
- Give two walls different tool-storage jobs
- Keep tools away from the door’s closing edge
- Put upper storage above the tall-tool zone deliberately
- Place a narrow shelf column beside the long bay
- Reserve a lower footprint for a bulky vacuum body
- Give a canister vacuum and its hose related positions
- Store a stick vacuum in its permitted resting position
- Support a flexible hose without forcing it into a small bin
- Divide a drawer for small vacuum attachments
- Give removable tool heads one visible accessory group
- Keep clean replacement mop covers separate from used tools
- Keep a hand brush and dustpan as a recognizable pair
- Use a telescoping handle’s approved storage configuration
- Give a bucket an opening that includes its carrying handle
- Nest empty buckets only when they remain easy to separate
- Give a portable dry-tool caddy a clear parking place
- Give a squeegee a position that respects its wide head
- Protect the shape of a longer duster
- Use a suitable door organizer for light accessories
- Keep the hinge-side corner free of hanging loops
- Compare a compatible designed pull-out interior
- Use a shallow lift-out bin for dry cleaning cloths
- Separate occasional tools from the daily retrieval route
- Leave a clear return position after every tool is back
Plan broom closet organization from the removal path
List the tools used at this location and measure their full stored profiles. Sketch the door, hinges, shelves and clear floor area. Test taking out the largest tool without moving several others. Choose organizer fittings for the actual handle, load and mounting surface, and follow the exact product instructions rather than inferring capacity from an image.
| Tool or problem | Arrangement to compare | Useful check |
|---|---|---|
| Long broom or mop handle | An uninterrupted vertical bay | The complete tool clears shelves and door |
| Several wide tool heads | Separated positions with deliberate head spacing | One tool can be removed independently |
| Bulky vacuum body | A dedicated lower footprint | The full unit passes through the opening |
| Curved hose or attachments | Suitable supported hose position and separate accessory group | The manufacturer’s permitted storage arrangement |
| Bucket or carry caddy | A defined accessible lower opening | Handle movement and removal with nearby tools in place |
| Deep cabinet with hidden contents | A compatible designed pull-out interior | Cabinet fit, hinge movement and loaded extension |
Match the holder to the actual handle
Rubbermaid Commercial Products distinguishes handled-tool organizers from portable caddies. Use that difference to choose a storage role, then read the actual holder’s compatibility, loading and mounting instructions. A generic grip is not automatically suitable for every broom or mop.
Check cabinet compatibility before choosing a pull-out
IKEA’s UTRUSTA cleaning interior illustrates that a pull-out system has specified cabinet compatibility and hinge relationships. Treat it as an example of why the complete system matters. A mechanism shown in a photograph should not be assumed to fit an unrelated existing cupboard.
Separate tool care from closed storage
Follow each tool’s cleaning, drying and storage instructions before putting it away. A closed cupboard, a drip tray or a decorative grille is not a drying system. Keep storage concepts separate from claims about mold prevention, disinfection or appliance performance.
Keep the cupboard’s intended use clear
Use a suitable household storage space, preserving any required building-service access. Do not convert an equipment enclosure into a broom closet without an appropriate plan. Follow furniture fastening requirements, and keep chemical products according to their own labels and secure-storage instructions.
1. Leave one uninterrupted bay for the longest tool

A long broom or mop needs a storage position that does not end at an inconvenient shelf. Reserve a vertical bay for the complete tool before dividing the rest of the cupboard. This gives the interior a useful starting point instead of treating every section as shelf storage.
Compare the actual handle and head together. A tool may need additional movement to come out through the door even when it fits while standing still. Follow its permitted storage method and keep the removal path separate from buckets and accessory containers.
Practical tip: Test the longest complete tool before adding interior divisions.
2. Choose a purpose-made rail for compatible handles

A suitable handled-tool rail can give several tools deliberate positions on one wall. Keep the arrangement focused on tools that actually fit its holders. The rail should simplify retrieval rather than becoming a reason to hang every cleaning accessory in one crowded row.
Read the exact product’s handle compatibility, loading and mounting requirements. A holder’s appearance does not establish that it grips every material or shape. Compare the occupied rail with the door closed as well as open before deciding the final layout.
Practical tip: Match each handle to the actual holder instructions.
3. Separate wide heads instead of aligning handles tightly

Several slim handles can conceal a crowded row of wide broom and mop heads. Give each complete tool enough independent space in the arrangement. The useful spacing comes from the head and removal movement rather than the narrowest part of the handle.
Try removing one tool while the others stay in place. If the heads catch, adjust the permitted holder positions or reduce the number stored there. Avoid forcing a dense symmetrical pattern that only works when the cupboard is being photographed.
Practical tip: Space tools from their widest stored part.
4. Use a side wall when the back wall is shallow
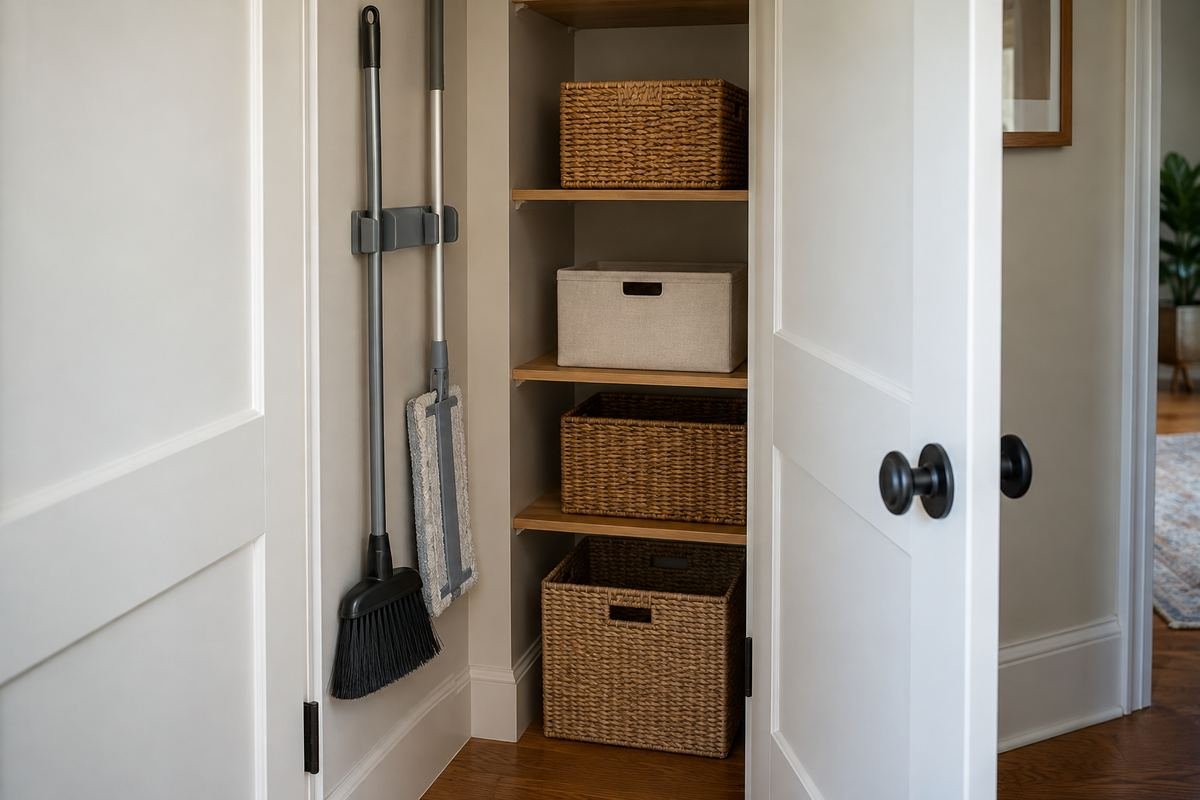
A suitable side wall can give long tools a useful position in a shallow cupboard. The arrangement may leave the main opening clearer than a dense row across the back. Compare the actual head depth and the direction used to lift the tool away.
Review the hinge side, door swing and shelf projections. A narrow-looking empty wall does not establish enough usable space. Follow the organizer’s mounting requirements and test the complete occupied arrangement before adding more hooks beside it.
Practical tip: Check the side wall with the tool and door in normal positions.
5. Keep a straightforward rear row in a wider cupboard

A wider cupboard can support a simple rear row of appropriate tool holders when all items remain visible. Keep the tools in one readable layer. The open center of the cupboard can then serve retrieval instead of holding a second row of loose equipment.
Check whether a bucket or vacuum will later occupy that center space. If so, compare removal with those contents present. The rear row only remains useful when the normal stored items do not hide the tools that are needed most often.
Practical tip: Test the rear row with the complete cupboard contents.
6. Give two walls different tool-storage jobs

In a deeper cupboard, two walls can serve different tool groups when the corner remains accessible. One side might hold long handles while the other supports shorter brushes and accessories. Keep the distinction clear enough that the storage pattern is easy to maintain.
Review the actual corner with both walls occupied. Tool heads and handles should not trap one another where the two groups meet. A fitted interior should follow an appropriate plan, including the required mounting and permitted loads for each organizer.
Practical tip: Resolve the occupied corner before adding a second group.
7. Keep tools away from the door’s closing edge

The edge of an open closet door can hide a collision between a stored handle and the closing movement. Place tools so their complete shapes remain clear of that path. A door that closes easily is part of a useful storage arrangement.
Compare the closet with every ordinary tool returned, including flexible straps or accessory loops. Do not force the door against the contents. If the opening remains awkward, reconsider the holder position or storage location rather than treating resistance as normal.
Practical tip: Test closing movement with the actual stored contents.
8. Put upper storage above the tall-tool zone deliberately

A useful upper shelf can coexist with long-tool storage when its position respects the full handle length. Keep its contents suitable for that reach and the shelf’s permitted loading. The shelf should add a clear role without cutting through the most useful vertical space.
Compare the tallest stored tool and its removal movement below the shelf. A tool can fit upright yet be difficult to lift from its holder. Follow the exact system requirements before choosing the final shelf position or adding containers.
Practical tip: Leave room for removal as well as stored height.
9. Place a narrow shelf column beside the long bay

A narrow column can hold appropriate small accessories beside an uninterrupted tool bay. This gives the cupboard two distinct shapes of storage. Keep the column width related to actual contents so it does not consume the space needed by wider tool heads.
Check the usable openings with containers in place and the tools removed one at a time. The column should make smaller items easier to find without creating a barrier across the long-tool route. Follow the shelf and furniture requirements for the exact system.
Practical tip: Size the accessory column after the long-tool bay works.
10. Reserve a lower footprint for a bulky vacuum body

A bulky vacuum needs a defined lower position rather than a gap left after the shelves are planned. Compare the complete body, handle and any stored attachments. Its footprint can determine how much of the cupboard should remain free of fixed divisions.
Follow the vacuum’s storage instructions and test removing the complete unit through the opening. Keep the position independent of charging or electrical changes. If several tools must be moved first, reconsider whether this is the right location for the machine.
Practical tip: Test the complete vacuum through the real opening.
11. Give a canister vacuum and its hose related positions

A canister body and a flexible hose create a different storage shape from an upright machine. Give them related positions so retrieving one does not pull against the other. Keep the arrangement suited to the actual model’s permitted storage method.
Compare the full hose, wand and body together. Avoid tight bends or improvised supports that conflict with the equipment instructions. Review the door closed with the hose contained and the body ready to remove without disturbing the remaining tools.
Practical tip: Plan the body and hose as one storage task.
12. Store a stick vacuum in its permitted resting position

A stick vacuum can have a dedicated storage position when the cupboard suits the model’s instructions. Keep its shape and permitted support clear in the arrangement. The goal is a reliable place to return the machine, not an improvised charging station.
Check the actual storage stand or support and the complete tool’s depth. This concept does not propose charging in a closed cupboard or changing electrical installations. If the approved arrangement does not fit, choose another suitable storage location.
Practical tip: Follow the model’s permitted storage arrangement.
13. Support a flexible hose without forcing it into a small bin
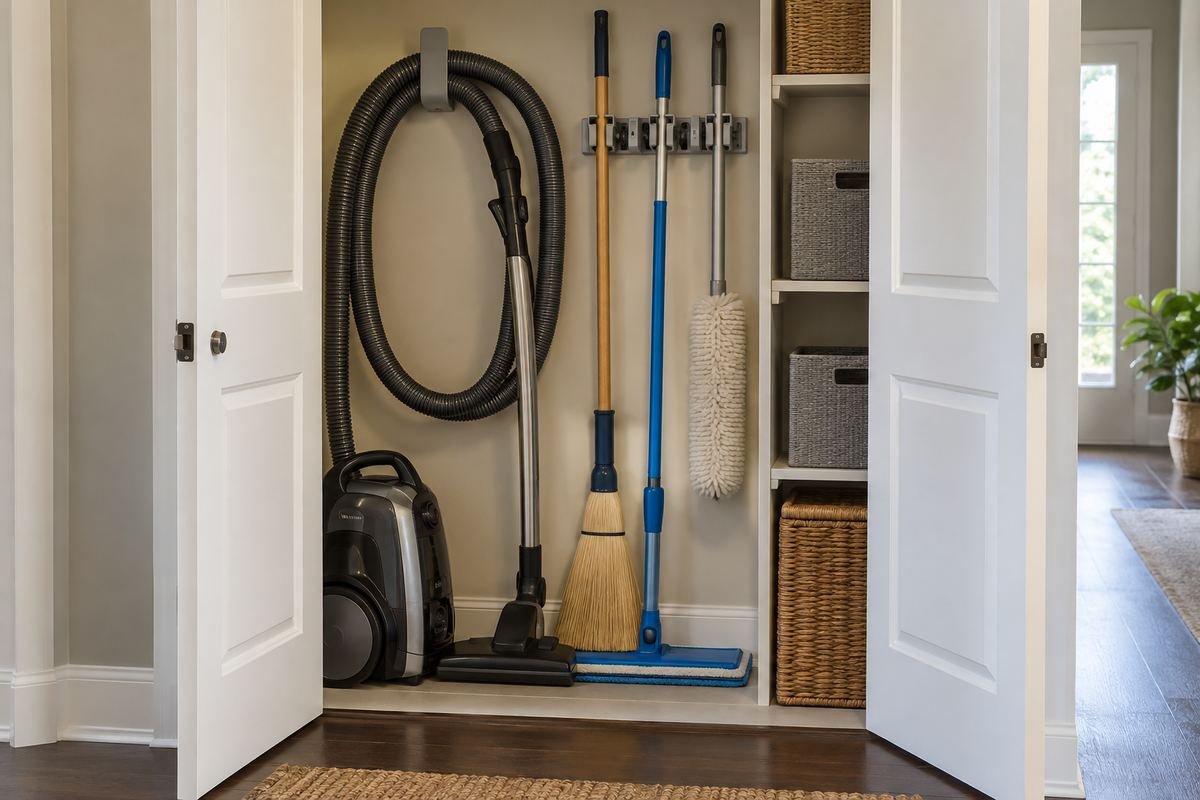
A flexible hose can be easier to retrieve from an appropriate support than from a tightly filled accessory bin. Keep its stored curve related to the equipment’s instructions. The arrangement should make the ends and attachment connection easy to locate.
Compare the hose fully stored with nearby tools and the door. A broad-looking loop in an image does not establish the permitted bend or support for every model. Follow the actual equipment guidance rather than tying it into the smallest available space.
Practical tip: Choose the hose support from the equipment instructions.
14. Divide a drawer for small vacuum attachments
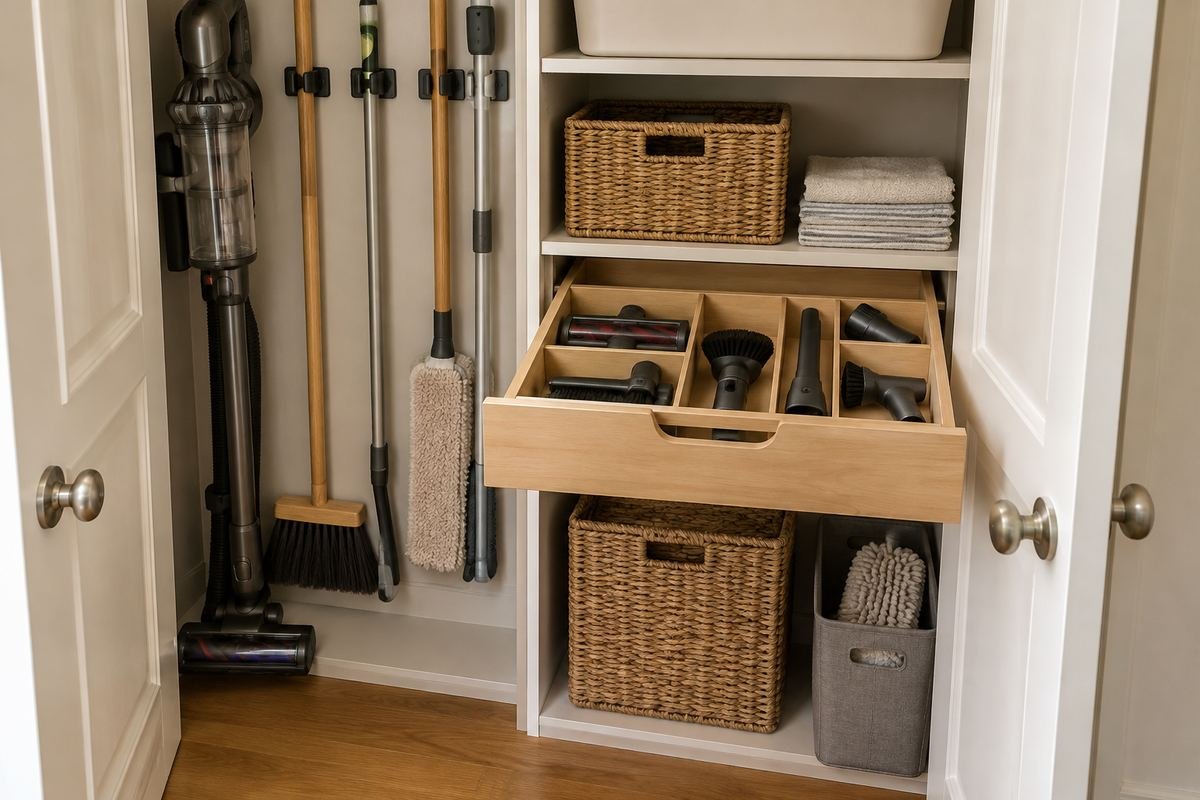
A suitable accessory drawer can keep small vacuum attachments visible without scattering them across several shelves. Give each attachment a simple position that supports its shape. The drawer can serve the machine without requiring every piece to hang from the main wand.
Check the drawer’s usable dimensions and full opening with the closet door in place. Keep the attachments associated with the correct equipment and follow their care instructions. A divided drawer should simplify finding and returning them rather than storing unrelated overflow.
Practical tip: Test the drawer with the closet door fully open.
15. Give removable tool heads one visible accessory group

Removable heads can be kept together in an appropriate open container when their care and storage instructions allow. Keep the group small enough that each piece can be identified. The container’s role is to collect the related components rather than conceal an unmanageable pile.
Return only items ready for ordinary storage under their own care requirements. Compare the container opening with the largest head and leave an easy lifting position. Keep sharp, specialized or unsuitable tools out of a general accessory group.
Practical tip: Group related heads without hiding them beneath several layers.
16. Keep clean replacement mop covers separate from used tools
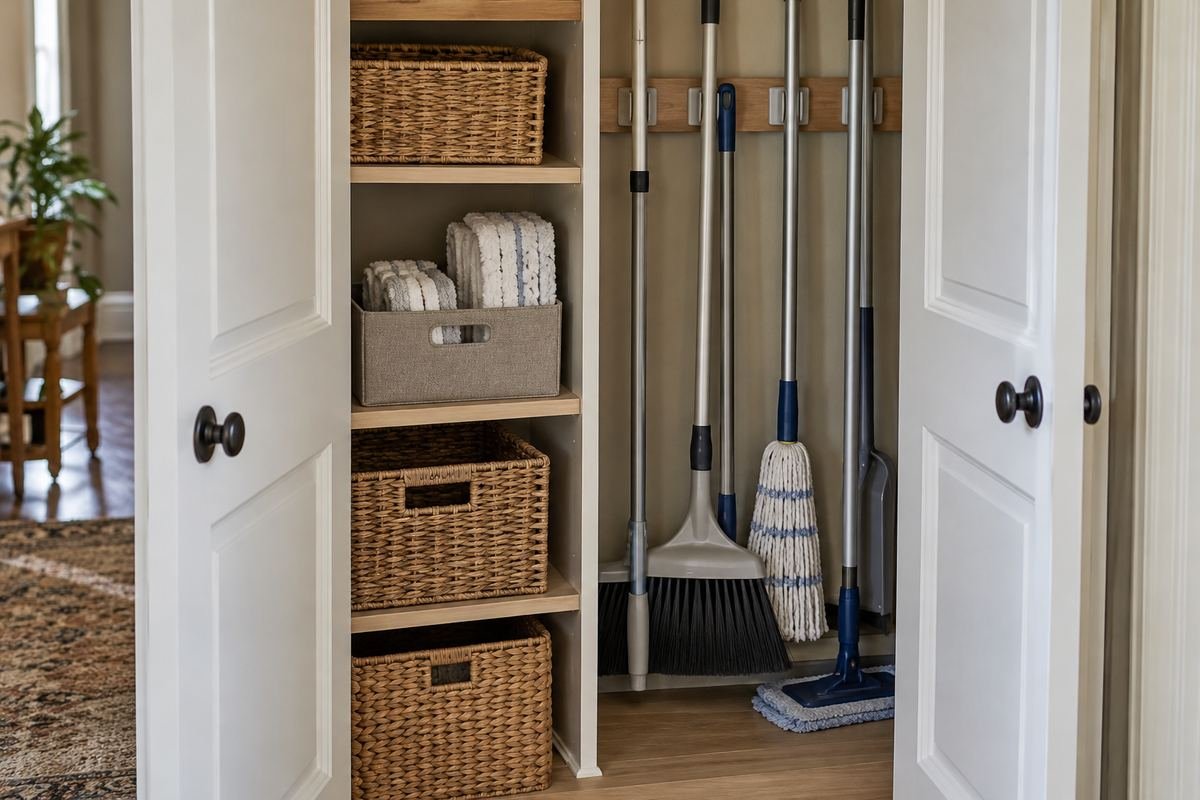
Clean replacement covers can have their own suitable compartment so they remain easy to identify. Keep them separate from tools still awaiting their care routine. A modest accessory group is easier to use than a mixed pile of covers, brushes and unrelated cloths.
Follow the covers’ cleaning, drying and storage instructions. Choose the container from those requirements rather than assuming a sealed decorative box suits every material. Compare the shelf opening with the actual quantity needed between ordinary cleaning cycles.
Practical tip: Store replacement covers according to their own care requirements.
17. Keep a hand brush and dustpan as a recognizable pair

A hand brush and dustpan can share a defined position near the front of the cupboard. Keep the pair easy to lift together or separately as the product allows. Their small size should not make them disappear behind taller equipment.
Review any hanging loop, fitted connection or shelf position with the actual pair. Follow its permitted storage method and the organizer requirements. Choose a position that stays accessible when the broom, bucket and other ordinary contents have been returned.
Practical tip: Keep both parts visible from the open doorway.
18. Use a telescoping handle’s approved storage configuration

An adjustable handle may have a permitted compact storage configuration that changes the cupboard layout. Compare that actual configuration with the available bay before choosing a new organizer. Keep related removable parts together so the tool remains straightforward to assemble for use.
Follow the tool instructions for adjustment and storage. Do not assume every handle should be collapsed, detached or held by the same part. Review the complete tool’s head and grip, since reducing handle length may not reduce the width needed below.
Practical tip: Plan from the tool’s approved stored configuration.
19. Give a bucket an opening that includes its carrying handle

A bucket needs more than a base footprint. Its handle and lifting motion should fit the lower opening too. Reserve a straightforward position where the bucket can come out without catching a shelf lip or a neighboring tool head.
Compare the actual empty bucket with its handle raised for carrying. Keep the contents and storage conditions appropriate to the product instructions. A bucket used as a general overflow bin may become awkward to retrieve just when it is needed for its original task.
Practical tip: Test the bucket with its handle in the carrying position.
20. Nest empty buckets only when they remain easy to separate

Compatible empty buckets may share a storage position when nesting suits their product instructions. Keep the group modest enough that each can be separated without a difficult pull. The arrangement should simplify the cupboard rather than hide several rarely used containers.
Compare the nested height and handles with the actual opening. Store the items ready for ordinary storage under their care requirements, without treating nesting as permission to combine chemical products. If separation is awkward, use distinct openings or retain fewer appropriate containers.
Practical tip: Check retrieval of the individual bucket before choosing nesting.
21. Give a portable dry-tool caddy a clear parking place

A carry caddy can collect a small set of ordinary dry tools used together around the home. Give it a defined opening so the whole group can be lifted out. This is a different job from hanging long handles on a wall rail.
Compare the loaded caddy’s permitted carrying arrangement with the usable shelf and doorway. Keep chemical products according to their own labels and appropriate secure-storage requirements. For this tool-storage concept, a brush, cloth and small dustpan are enough to establish the role.
Practical tip: Test the caddy as a complete removable group.
22. Give a squeegee a position that respects its wide head

A squeegee’s blade can be much wider than its handle. Choose a position that keeps the complete head visible and appropriately supported or suspended as its instructions allow. It should not be pressed into the back of a crowded tool row.
Review the head’s relationship with shelves, door panels and neighboring tools. Follow the tool’s care and storage guidance rather than inferring a permitted support from a concept photograph. Keep removal straightforward so returning it does not require rearranging several other items.
Practical tip: Assess the blade and handle as one stored shape.
23. Protect the shape of a longer duster
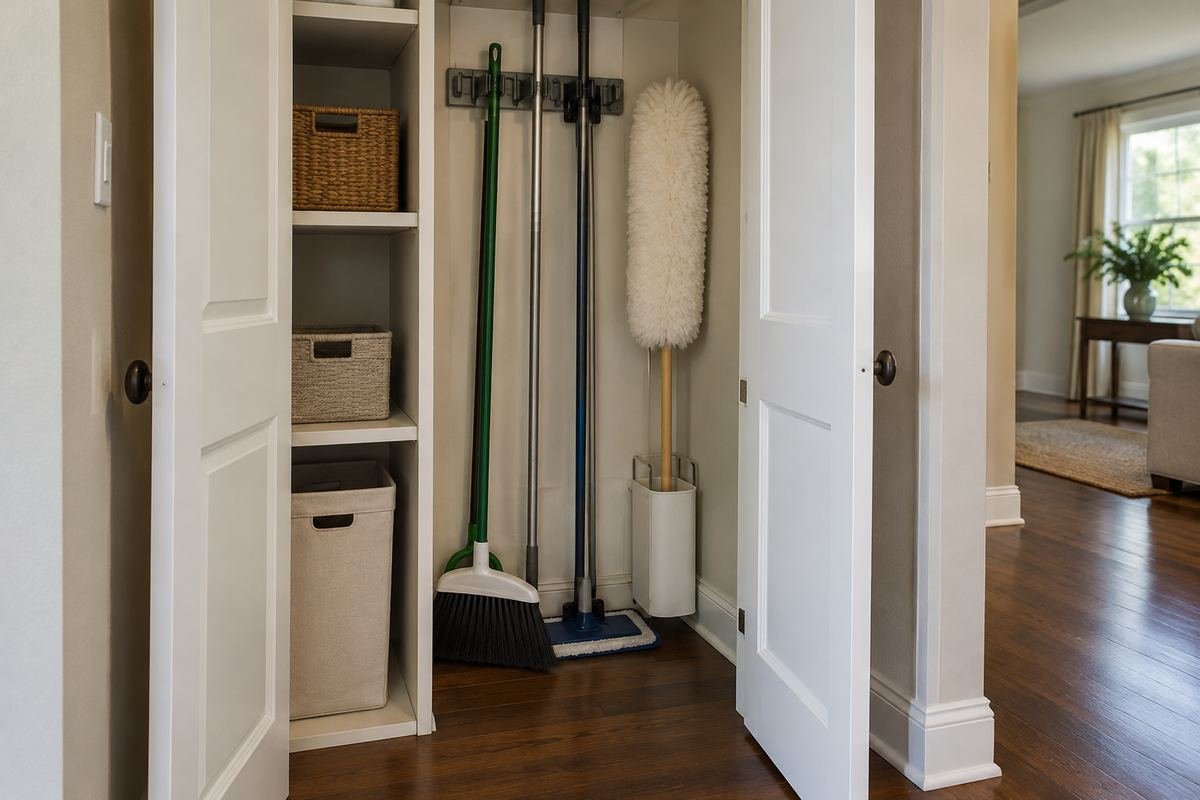
A longer duster may need a different storage space from a broom because its head is soft, broad or flexible. Give it a position suited to its actual care instructions. Keep the head from being compressed by a bucket or other tools.
Compare the full stored shape, including any permitted removable section. A narrow handle holder does not establish that the head has enough room. Review the position with the door closed so the soft part is not quietly bent against the back of the panel.
Practical tip: Leave the duster head space appropriate to its storage instructions.
24. Use a suitable door organizer for light accessories
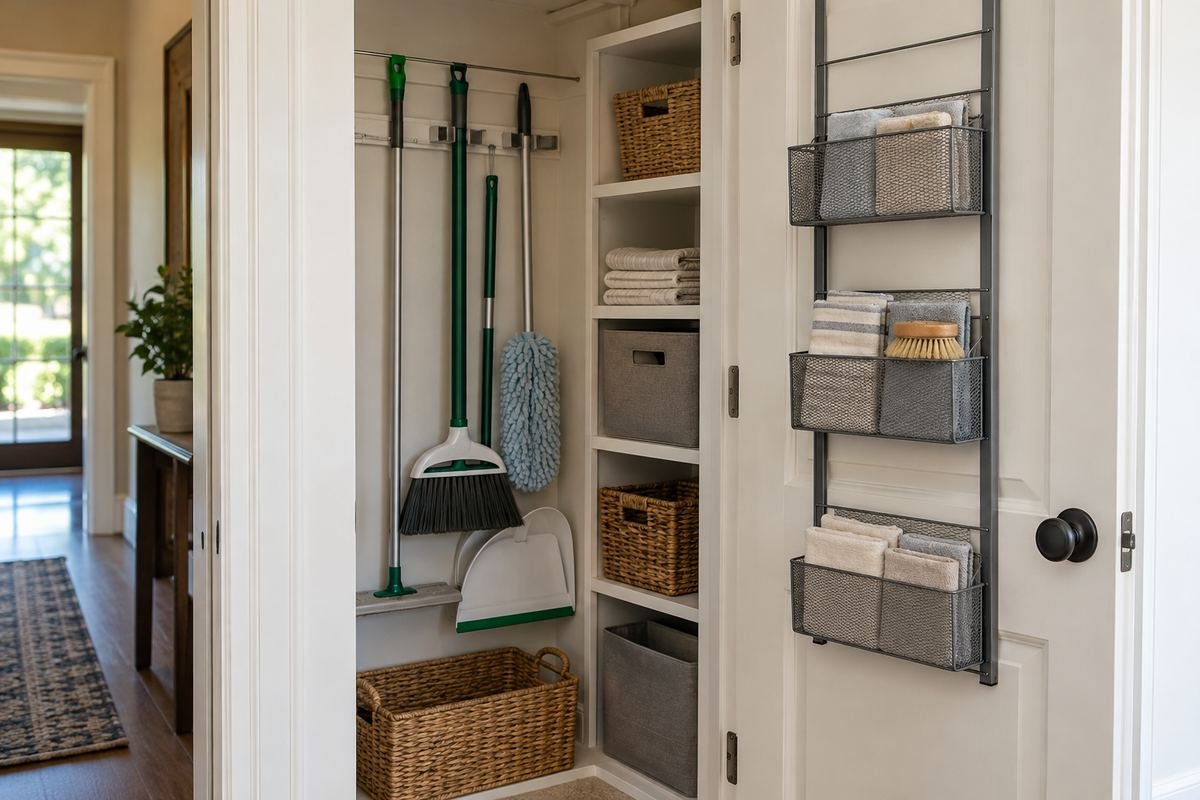
A suitable door organizer can hold a few light dry accessories when the door and interior allow it. Keep the group thin enough that it does not compete with the shelves. The useful gain is an accessible accessory position rather than another deeply filled storage layer.
Follow the organizer’s door compatibility, fixing and loading requirements. Compare the door fully open and closed with contents in place. Even light items can interfere with hinges, frames or shelf fronts when the depth has not been checked.
Practical tip: Test the occupied door against every interior projection.
25. Keep the hinge-side corner free of hanging loops

Loose tool loops and straps can catch near the hinge side when the cupboard is closed. Give them a contained storage position rather than letting them cross that junction. The small detail matters because it affects whether the otherwise orderly cupboard works easily.
Compare the actual opening movement with flexible parts returned normally. Use the permitted storage method for each tool and organizer. If a loop repeatedly reaches the hinge, relocate that item or choose another appropriate position instead of forcing the door closed.
Practical tip: Include flexible loops in the closing-movement check.
26. Compare a compatible designed pull-out interior

A designed pull-out can make a deep cupboard’s contents easier to see when the complete system suits the cabinet. Treat the moving frame, fittings and opening as one arrangement. The idea is useful only when it can operate with the ordinary stored tools.
Confirm the exact cabinet compatibility, hinge relationship, permitted loads and installation requirements. Do not infer fit from the cabinet’s outside dimensions or a similar mechanism online. Review the loaded extension and the standing position needed to retrieve the tools.
Practical tip: Verify the complete pull-out system before planning its contents.
27. Use a shallow lift-out bin for dry cleaning cloths

A shallow lift-out bin can keep a small group of dry cleaning cloths visible on a suitable shelf. Keep the depth related to the actual quantity used. One accessible layer can be easier to maintain than several identical boxes stacked in front of one another.
Follow the cloths’ care and storage guidance and keep them separate from tools awaiting cleaning. Compare the complete bin with the shelf opening and a comfortable lifting movement. The container should help return the cloths without requiring a complicated refolding routine.
Practical tip: Choose a bin that can be removed directly from its shelf.
28. Separate occasional tools from the daily retrieval route

An occasional-use tool can have a distinct suitable position without sitting in front of the broom needed every day. Grouping by frequency can make the cupboard’s ordinary movements clearer. Keep the less-used area appropriate to the tool’s shape and permitted storage conditions.
Review the complete removal path for both groups. Less frequent use does not justify inaccessible or unsuitable storage. If the occasional tool repeatedly blocks daily equipment, choose another appropriate location rather than continually rearranging the cupboard.
Practical tip: Keep the daily tool route clear with occasional items stored.
29. Leave a clear return position after every tool is back

The final test is the cupboard after the tools have been used and returned in an ordinary way. Keep a recognizable place for the bucket and largest machine, with long handles still accessible. A small clear area can make the whole arrangement easier to understand.
Notice which tool regularly ends up leaning across the opening. That is evidence that its assigned position or removal path needs work. Adjust the permitted arrangement before adding more organizers, and keep the storage focused on the equipment actually used there.
Practical tip: Test the complete return routine before buying another organizer.
Frequently Asked Questions
How do I organize a very small broom closet?
Start with the tools regularly used there, then compare their complete shapes and removal paths. An uninterrupted long-tool bay and one accessible accessory group may work better than shelves across every part of the opening. Choose fittings only after that layout works.
Can every broom handle fit a wall grip?
No. Read the exact holder’s permitted handle types, dimensions, loading and mounting requirements. Test compatibility as directed by the manufacturer. A similar-looking grip in a concept image does not establish that it will hold your tool.
Should I store a vacuum in the broom closet?
Only if the space suits its permitted storage conditions and the complete unit can be removed without a difficult rearrangement. Follow the vacuum’s instructions. This guide does not propose charging equipment inside a closed cupboard or altering electrical installations.
Can I put storage on the inside of the door?
Use only a suitable system for the door construction and permitted load, with the required fixings and clearance. Review the door fully open and closed with contents in place. Light accessories can still collide with shelves or hinges.
Can a closed broom closet dry a mop?
Do not treat it as a drying system. Follow the mop’s cleaning, drying and storage instructions before returning it to ordinary storage. A tray may have a defined storage role, but it does not establish ventilation or moisture control.
Does a pull-out organizer fit any tall cabinet?
No. Confirm the complete organizer’s cabinet compatibility, usable dimensions, hinge arrangement, loading and installation requirements. An outside cabinet width or photograph is not enough to establish that a mechanism fits.
Choose the Details That Work in Your Home
Choose broom closet organization from the way each tool is removed and returned. Keep long handles uninterrupted, wide heads separated and the largest equipment accessible. Once those movements work, use a few appropriate accessory compartments to complete the cupboard rather than filling every gap.
For related ideas, explore closet door ideas, laundry room shelving ideas, small linen closet organization.
Planning References
Rubbermaid Commercial Products: handled-tool organizers and caddies; IKEA: UTRUSTA cleaning interior and cabinet compatibility. Follow the instructions for the exact products you choose.
Optional digital guide for this topic
If you prefer a structured workbook, explore this related paid guide.