Good game room ideas start with the activity that will actually happen there. A tabletop group needs a useful surface and occupied-chair space; console play begins with the seats and screen; a pool table needs its full playing area. The most enjoyable room is often the one that chooses a few activities well instead of squeezing in every attraction.
These 23 ideas focus on room layouts, furniture relationships and finishes for adults and shared households. Compare the whole arrangement in use, then add the lighting and personal details that make it belong to your home. Use the worksheet below before buying large equipment or permanent cabinetry.
Contents
- 1. Let the favorite game set the room’s center
- 2. Turn a dining room into a game room between meals
- 3. Separate two play groups with their own approaches
- 4. Use a small two-person table as a complete destination
- 5. Plan a pool table with its complete playing envelope
- 6. Give table football room at the player sides
- 7. Make one arcade cabinet a feature without creating a queue in the doorway
- 8. Build a shared console zone around the actual seats
- 9. Give a PC setup its own working corner
- 10. Let spectators sit outside the active play area
- 11. Control daylight where it meets screens and playing surfaces
- 12. Light the game table for reading the actual pieces
- 13. Treat colored light as an optional layer
- 14. Choose a palette that belongs to the rest of the home
- 15. Frame a small collection with personal meaning
- 16. Choose the floor arrangement around chair movement
- 17. Soften a lively room without promising soundproofing
- 18. Keep refreshments on a separate landing surface
- 19. Leave equipment ventilation visible in the cabinet plan
- 20. Make controllers easy to return without scattering cables
- 21. Limit the visible game library to the room’s role
- 22. Use shared guest-room space with a complete changeover
- 23. Work around basement columns before adding attractions
Compare game room ideas in the occupied state
List the usual players and the one main activity. Mark doors, columns, windows, services and routes, then draw furniture with chairs pulled out and equipment in use. Keep manufacturer requirements with the exact product. The available room, building conditions and household needs decide what is suitable; a styled photograph does not verify those conditions.
Choose a starting layout
- Small room and mostly tabletop play: Try one useful table with enough occupied-chair room before adding a second attraction.
- Shared screen and tabletop room: Give each group its own approach and compare both operating at once.
- Pool or another large game table: Select the equipment and its complete playing requirements before surrounding furniture.
- Guest room used occasionally for games: Compare the fully opened bed and the game furniture’s actual stored position.
1. Let the favorite game set the room’s center

Start with the game people actually gather to play. For a tabletop household, the central table deserves the best usable position; a television can be secondary or absent. Set out the largest usual board, individual player areas and the pieces waiting to enter play. Then compare the table with the occupied chairs. A room planned around a favorite activity feels purposeful even when it contains fewer attractions.
Choose one main activity before deciding what else belongs in the room.
2. Turn a dining room into a game room between meals

A dining table can provide the game-night surface without creating a second furniture group. Check its finish instructions before adding a compatible play mat, and keep a simple place for the mat when meals resume. Separate the temporary game setup from the ordinary table setting. If long games repeatedly occupy the dining surface overnight, address that conflict before buying more decorative accessories.
Write down when the table must return to dining use and plan the pause around that deadline.
3. Separate two play groups with their own approaches

In a longer room, a table group and a screen group can coexist when their approaches remain independent. Put the table where chairs can pull out without entering the television viewing area. Keep the through-route to a side if that suits the actual doors. Do not count the same strip of floor as both a chair position and a permanent walkway when both activities will happen together.
Compare the room with both groups occupied, not only with every chair pushed in.
4. Use a small two-person table as a complete destination

A small table can give two-person games their own place without filling the room with a large dining suite. Compare the real playing surface with the game and the players’ personal areas. A round top can soften a tight corner, but its diameter alone does not describe the rectangular area a board can use. Keep the table useful for the games you own rather than choosing its shape purely for the photograph.
Make a full-size outline of the proposed top before deciding it fits the board.
5. Plan a pool table with its complete playing envelope

A pool table needs more than a space large enough for its frame. Brunswick’s room guide relates the playing area to cue length and the surrounding movement needed for shots. Consult the current guide for the particular table and have the actual room assessed before purchase, including columns and low obstructions. A smaller table can give a better game than a larger one that forces awkward shots.
Keep seating and cabinets outside the playing space established for the chosen table.
6. Give table football room at the player sides

Table football has a compact-looking cabinet, but the rods and the people operating them extend beyond it. Compare the manufacturer’s complete playing-space requirements with the room, including the ends of moving handles. Place waiting seats where spectators do not stand behind active players. A table against a wall may fit as furniture while preventing the actual game from working.
Mark the player positions as well as the cabinet footprint on the room plan.
7. Make one arcade cabinet a feature without creating a queue in the doorway

One arcade cabinet can provide character and a focused activity in an otherwise quiet room. Check its operating and installation requirements, then plan the standing position and the place another person waits. Keep that group away from the main doorway. If the room cannot support several people around a machine, one well-placed cabinet may be more enjoyable than a crowded row.
Compare the open room route while someone is playing and someone else is waiting.
8. Build a shared console zone around the actual seats

For shared console play, begin with the people sitting together and the view from each seat. Compare the real display, game requirements and room lighting before fixing the furniture position. A sofa can keep the setup integrated with the home, while a small side surface holds controllers between sessions. Keep tall decorative objects out of the sightlines instead of placing the television wherever a cabinet happens to fit.
Check both end seats, including reflections, before settling the television position.
9. Give a PC setup its own working corner

A PC corner uses a different sitting position from a sofa-based console setup. Compare the desk, chair adjustments and complete equipment arrangement with the person using them. Leave space for the chair to move and for equipment access, rather than wedging the desk into the last gap. IKEA’s small gaming-room guidance similarly begins with who plays, how they play and what the room can accommodate.
Check the room in both desk-use and chair-parked states.
10. Let spectators sit outside the active play area

People waiting for a turn need a place that belongs to the gathering without obstructing it. A bench or a pair of chairs can sit beyond the active game area, with a useful view and a small landing surface. Avoid squeezing spectators into the gap players need to step back. In a small room, use nearby existing seating instead of assuming another permanent group is necessary.
Include the waiting guest in the layout sketch, not only the current players.
11. Control daylight where it meets screens and playing surfaces

Watch the room during the hours you usually play. A bright window may illuminate a board well but reflect in a screen or make one seat face uncomfortable light. Compare a suitable adjustable window covering before moving the entire arrangement. Keep the control simple enough to use during an ordinary session, and judge samples from the seated positions rather than only standing at the entrance.
Record which seat needs the adjustment and at what time of day.
12. Light the game table for reading the actual pieces

Tabletop play needs light on the useful surface, including the player areas around the central board. Try reading the smallest relevant text from each chair under the intended evening lighting. A shaded or diffused fitting may be easier to live with than exposed bright points reflected in glossy cards. Choose and install lighting for the real table and room; the image does not provide a mounting specification.
Check the tabletop after someone leans forward, when their shadow changes the light.
13. Treat colored light as an optional layer

Colored light can give a screen corner a different evening mood without becoming the room’s only illumination. Keep ordinary room lighting available for finding pieces, walking through and resetting the space. Compare the accent at a modest level against the actual wall color. A gentle back-wall effect often leaves more flexibility than making every surface a competing light source.
Turn the accent off and confirm the room still works for its ordinary tasks.
14. Choose a palette that belongs to the rest of the home

An adult game room can share the same material language as nearby rooms. Pick one main timber tone, a wall color and a limited upholstery group, then let the games bring their own changing colors. An olive-and-wood scheme, a pale neutral room or a deep blue accent can each work when the light and finishes suit the home. There is no requirement for every game room to look dark.
Place the finish samples beside the furniture you will keep before adding a theme.
15. Frame a small collection with personal meaning
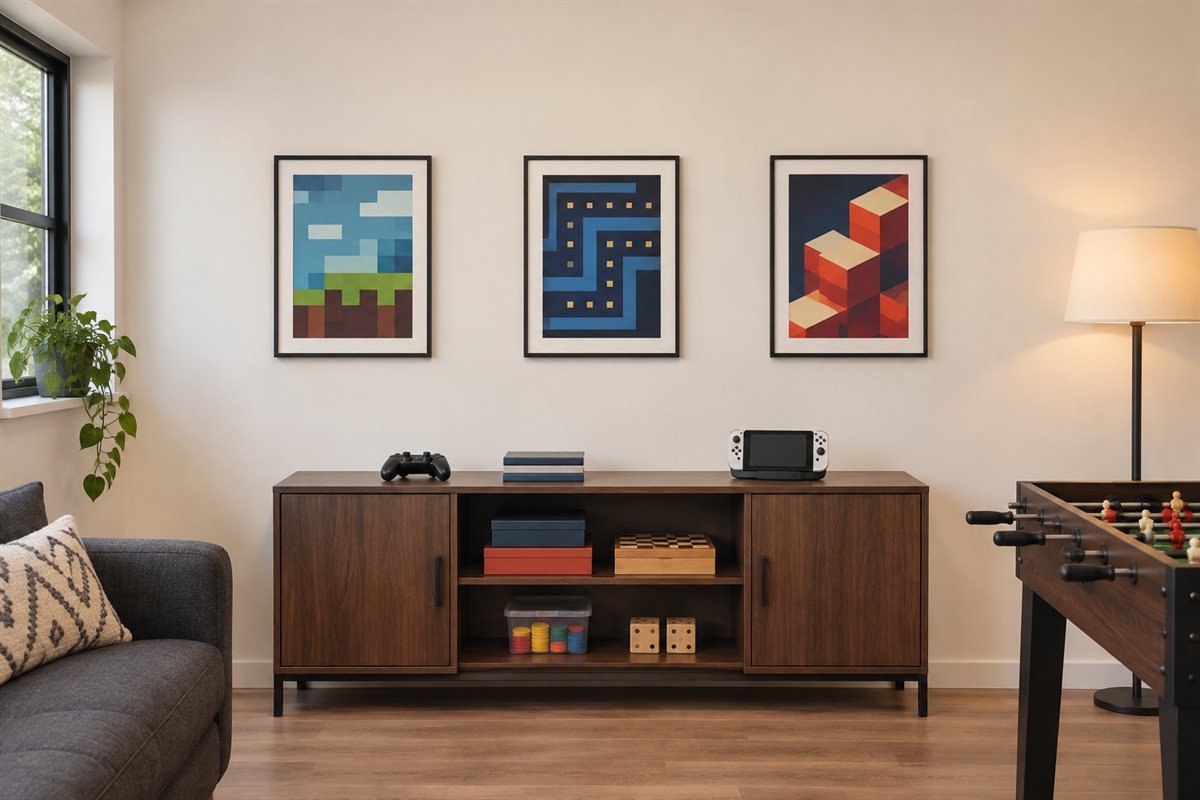
Display a limited collection that means something to the household instead of filling every wall with generic game slogans. Relate the frames to the furniture below and leave clear wall around the group. Use suitable mounting for the objects and wall. Keep an elaborate display away from the position where players need an uninterrupted view or where equipment movement could hit it.
Choose the few pieces you would still enjoy seeing when no game is in progress.
16. Choose the floor arrangement around chair movement

A rug can define a lounge zone, but the table chairs need a surface they can move across in the actual arrangement. Compare the chairs pulled out, transitions between finishes and any caster guidance. If the room’s rug would repeatedly bunch or trap chair legs, a different placement may work better than forcing it under the table. Follow the floor and furniture care instructions for suitable protection.
Try one real chair movement before deciding the final rug position.
17. Soften a lively room without promising soundproofing

Upholstery, curtains and appropriate soft finishes can change the feel of a lively room, but they do not establish sound isolation from the rest of the home. Listen from the neighboring rooms during ordinary play before buying specialist treatments. Adjust the position of the loud activity or agree on its hours if that addresses the real problem. Soundproofing and structural changes require a different assessment.
Identify the actual noise path instead of assuming more fabric solves every sound issue.
18. Keep refreshments on a separate landing surface

Give drinks and snacks their own nearby surface so the main playing area stays available. Place it where people can reach it without stretching over the board or the equipment. A small dry station may be enough; a refrigerator or fitted bar introduces its own requirements. Keep the refreshment route outside the active game zone so someone collecting a drink does not interrupt a shot or a turn.
Walk from each seat to the drinks surface with the chairs in use.
19. Leave equipment ventilation visible in the cabinet plan

Do not close electronics inside a cramped decorative compartment just to simplify the room outline. Follow the instructions for the exact equipment, its vents and the cabinet. Sony’s cited PS5 support page, for example, asks for unobstructed vents and at least 10 cm of free space around each side of that console. Treat that as PS5-specific guidance, not a universal clearance for every device.
Record the equipment model and required space before choosing the media unit.
20. Make controllers easy to return without scattering cables

Choose a return position close to the seats, then plan any charging equipment from its own instructions. Keep controllers easy to identify and separate from drinks. Route leads so they do not cross the ordinary walking or chair path; a decorative cable basket is not evidence that powered equipment has adequate ventilation. Avoid adding more accessories than the regular group actually uses.
Check whether a guest can put the controller away without moving another object.
21. Limit the visible game library to the room’s role

The room does not need to display the entire collection. Keep a useful selection near the playing area and put the reserve where it can still be found. This article focuses on the room arrangement; use the separate board-game storage guide for box orientation, components and shelf fitting. A modest visible collection can leave more space for the actual players than a wall filled edge to edge.
Choose the room’s ordinary selection before deciding the size of its cabinet.
22. Use shared guest-room space with a complete changeover

A spare room can support games between visits if its guest function remains practical. Compare the fully opened bed, the game furniture in its stored position and the route to the door. Use furniture designed for the intended folding or moving task; a small closed footprint says little about the open arrangement. Give the changeover a clear sequence so it does not depend on shifting heavy pieces in a hurry.
Draw the game-night and guest-night layouts separately, with the bed fully open in the latter.
23. Work around basement columns before adding attractions
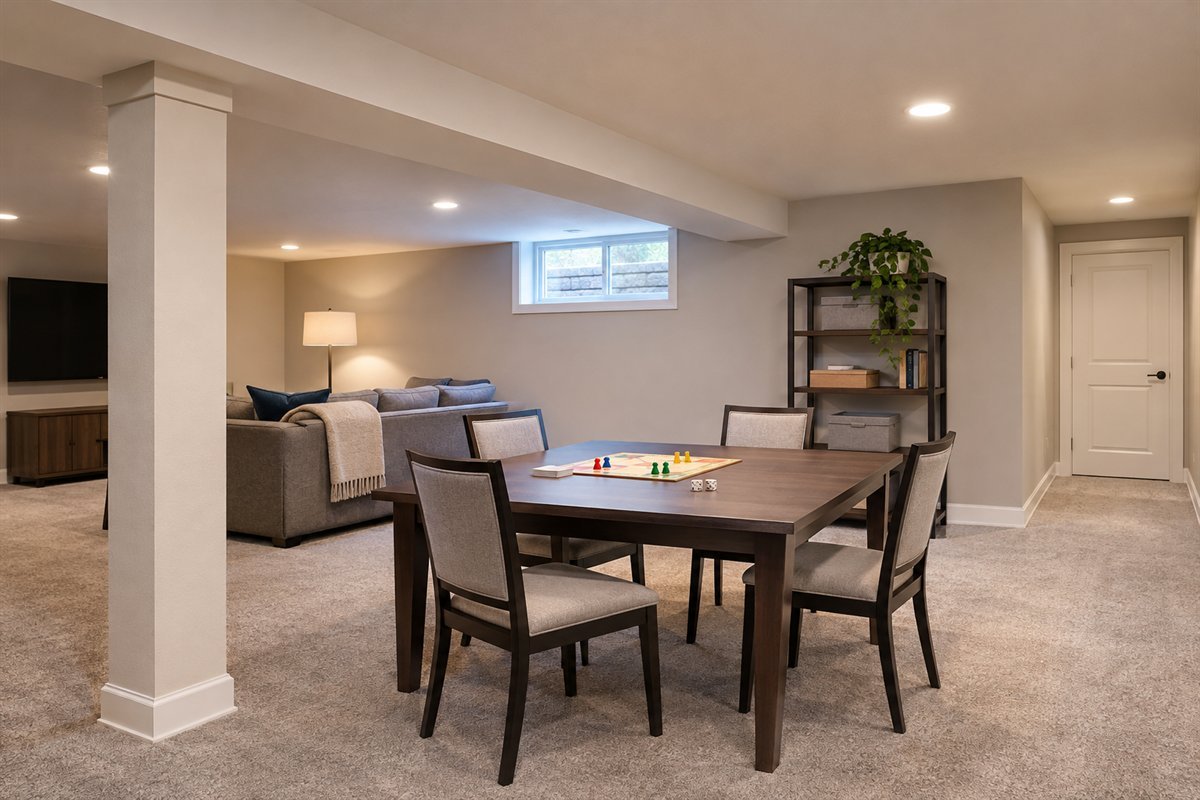
A basement column can divide the room into useful zones when the activities are chosen around it. Put the game that needs the broadest movement in the clear bay and use the more constrained area for compatible seating or storage. Resolve actual room conditions, access and equipment requirements before permanent installation. A concept image cannot establish that a basement is suitable or a column can be moved.
Treat every fixed obstruction as part of the plan from the first sketch.
An occupied-room worksheet you can reuse
Make a simple plan with three different outlines: the furniture itself, the space people use during play, and the ordinary route through the room. These outlines answer different questions. A chair fitting under the table does not show where someone sits, and a pool-table frame fitting between walls does not establish room for a cue stroke. Add door movement, columns and the complete equipment requirements before decorative extras.
For a tabletop comparison, lay out the largest usual game with each player’s cards, tokens and reference material. Measure that complete setup, then compare it with the usable tabletop. Next, include the actual seats and the way someone leaves the table. Keep refreshments on their separate surface. If another room activity must happen simultaneously, add it in the occupied state too.
Record one line for each possible arrangement: main activity; usual player group; equipment model or table size; occupied footprint; neighboring activity; storage position; lighting adjustment; and the step needed to restore the room. Mark any requirement still unknown. Do not treat an unknown equipment or building requirement as spare space.
Finally, compare an ordinary evening rather than a perfect empty room. Where does the late arrival wait? How does a player leave the table? Can someone get a drink without crossing active play? Keep the layout that handles those movements clearly, even if it contains fewer objects.
Three ways to use the same planning method
For a small spare room, compare one tabletop group with a simple wall cabinet. A large second attraction can be omitted entirely. If the bed must return for visitors, sketch its full open arrangement separately and give every moved piece an intended storage position. The useful result is a room that changes roles predictably.
For a long family room, compare a tabletop area at one end with console seating at the other. A route along one side may connect them more clearly than a path through the middle of both activities, depending on the doors. Test the chair backs, sofa approach and equipment access together before deciding the final table size.
For a dedicated recreation room, start with the largest game’s complete operating area. Place waiting seats, storage and refreshments outside it. Ask the equipment supplier to review the actual room where required. A generous-looking image is not a substitute for model-specific guidance, delivery access or a room assessment. These are planning scenarios, not tested floor plans or universal dimensions.
Can a small room be a game room?
Yes, when the chosen activity and its complete use space fit the real room. A small tabletop group or suitable console corner can serve a different need from a pool table. Choose the activity before filling the walls with equipment.
What is the difference between a game room and a gaming room?
The terms overlap. Game room often includes tabletop games, pool and other social activities; gaming room often emphasizes computer or console play. Describe the activities your room supports rather than relying on the label alone.
Should all game rooms have dark walls?
No. Compare the actual daylight, screen reflections and materials. Pale, muted or deeper colors can each suit a room. Keep useful lighting available for reading pieces and moving around.
Can a pool table fit wherever its frame fits?
No. Include the playing area, cue use, people and fixed obstructions. Use the current manufacturer guidance and the exact equipment before committing to a layout.
A practical next step
Choose the activity first, compare the room with people and equipment in use, and keep the everyday route clear. Add a restrained palette, useful light and personal display after the furniture arrangement works.
Fit the board-game collection to its actual boxes and components. Plan a separate pause system for unfinished jigsaws. Compare a separate refreshment station for the entertaining room.
Images are original AI-generated room concepts, not photographs of tested game equipment or verified installations. The worksheet and scenarios are planning tools, not measured floor plans. Follow the exact equipment and furniture instructions.
Sources and care references
- Brunswick: pool-table playing space and cue-length planning
- PlayStation support: PS5-specific ventilation guidance
- IKEA: planning small gaming spaces around the players and equipment
Optional digital guide for this topic
If you prefer a structured workbook, explore this related paid guide.