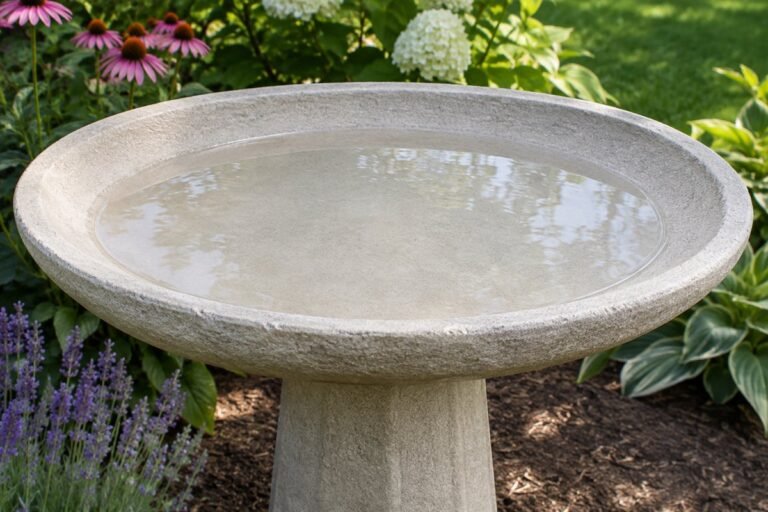
Garden edging ideas should make the boundary easier to understand and maintain. A border that looks tidy from the window can still leave a difficult trimming strip, an awkward gate crossing or a bed that is expensive to enlarge. Choose the edge by the two surfaces it separates and the routine it must support.
These 26 ideas compare materials, profiles and useful details. They are design concepts rather than construction instructions. Have the actual ground, levels, utilities and selected system checked before excavation or installation. A decorative bed edge should not be treated as a retaining wall, drainage system or a guaranteed barrier to every spreading plant.
Contents
- 1. Start with a cut edge when the bed may change
- 2. Draw one broad curve instead of several tight bends
- 3. Lay brick flat for a quiet, regular border
- 4. Make a paver mowing strip fit the actual equipment
- 5. Use flush stone setts for a textured formal line
- 6. Stand brick on edge where hand trimming is acceptable
- 7. Choose fieldstone for an informal planting edge
- 8. Use cut stone where consistent geometry matters
- 9. Keep layered flat stone low and visually settled
- 10. Let a dark metal strip nearly disappear
- 11. Trial weathering steel beside the fixed paving
- 12. Consider aluminum for a restrained pale boundary
- 13. Use flexible composite only within its intended curve
- 14. Keep a low plastic strip discreet and inspectable
- 15. Use timber boards to organize a straight bed
- 16. Try a short log-roll edge for a rustic small border
- 17. Choose purpose-made clay edging for a warm accent
- 18. Use scalloped precast edging as one deliberate motif
- 19. Reserve poured curbing for a settled layout
- 20. Separate gravel from mulch with a clear low line
- 21. Keep an edge around a tree away from the root flare
- 22. Finish the edge cleanly at a gate or crossing
- 23. Give an island bed one mowable perimeter
- 24. Let low planting soften an edge without hiding its job
- 25. Join two materials at one intentional transition
- 26. Use a removable edge while testing a new bed
Compare garden edging ideas by the job at the boundary
Write down what is on each side of the edge: lawn and mulch, gravel and planting, or paving and a bed. Then identify the main task—mowing access, material separation, visual definition or a reversible trial. Compare complete installed systems at their finished level. The most visible profile is not always the most useful maintenance detail.
A quick comparison before choosing a material
- Lawn beside a frequently tended bed: Compare a cut edge with a correctly designed flush mowing strip.
- Gravel beside mulch: Resolve containment, raking and the walking line.
- A bed still being enlarged: Favor a layout and system that can be adjusted.
- A permanent architectural border: Review joints, ends, installation and later repair.
- Established trees or a change in ground level: Resolve the site problem before selecting a decorative edge.
1. Start with a cut edge when the bed may change

A carefully cut lawn edge lets the planting shape do the work without adding another visible material. It is a useful starting point while you are still deciding how large a bed should be. Expect to redefine and trim the line as grass grows. Treat that recurring task as part of the choice rather than describing a material-free edge as maintenance-free.
Try this: Photograph the line from the same doorway through a growing season before making it permanent.
2. Draw one broad curve instead of several tight bends

A long, calm curve often looks more deliberate than a series of little scallops. RHS and Mississippi State guidance both emphasize practical curves that mowing equipment can follow. Lay out the proposed shape before cutting it, then check the route your actual mower would take. A curve that is attractive from upstairs can still leave an awkward pocket at ground level.
Try this: Use a hose to compare two outlines, then remove it before normal garden use.
3. Lay brick flat for a quiet, regular border

A flat brick line can echo brickwork already used on the house or patio. Decide whether its job is primarily visual definition or whether it must also work with the mower. The visible module, finished level and complete installed width all matter. Sample the brick against the existing materials; similar warm colors can still look surprisingly different beside one another.
Try this: Compare several full bricks outdoors rather than choosing from a tiny color photograph.
4. Make a paver mowing strip fit the actual equipment

A flush mowing strip has a different job from a raised decorative curb. Cornell describes this type of edge as a surface the mower can work over, reducing trimming beside the bed. Confirm the width, finished level and equipment clearances in the actual design. A narrow decorative row should not be assumed to provide the same working surface.
Try this: Show the installer your mower model and the intended wheel route before agreeing on the detail.
5. Use flush stone setts for a textured formal line

Small squared stone units can provide texture without making a tall border. Their repeated joints suit a formal outline, but the surface still needs a coherent finished level. Compare actual unit sizes and the cuts needed at bends. If the main attraction is a beautifully regular line, uneven sample thicknesses may create more sorting and fitting work than expected.
Try this: Ask to see a short installed section using the proposed stone and joint treatment.
6. Stand brick on edge where hand trimming is acceptable

Upright brick creates a stronger visible rhythm than brick laid flat. That extra height changes the maintenance relationship with nearby grass. Decide how the lawn side will be trimmed and keep the edge away from a frequently crossed route. Choose the effect because it suits the bed, with a clear plan for maintaining the narrow strip beside it.
Try this: Compare an upright and a flat sample from the ordinary viewing distance.
7. Choose fieldstone for an informal planting edge

Fieldstone works when an irregular outline supports the character of the planting. Choose a limited range of size and color so the edge reads as one decision. Open joints are not a sealed barrier against spreading grass. Leave the stones accessible for checking and weeding, and distinguish this low border from a structure expected to hold a change in ground level.
Try this: Lay out the largest stones first and evaluate the gaps before filling every space.
8. Use cut stone where consistent geometry matters

Cut stone gives the edge a more controlled profile than gathered rocks. It can be useful where a bed follows a straight patio or a rectangular garden room. Compare the full section, not just the face color: the part above ground, the corner treatment and the joint rhythm all affect the result. Coordinate it with existing paving before introducing another pale stone.
Try this: Place a sample beside the patio in both dry and wet conditions.
9. Keep layered flat stone low and visually settled

A low layered stone edge can add a horizontal texture beside soft foliage. Limit the height of a decorative concept and have the real assembly assessed for its purpose. A photograph does not establish stability, and a bed holding back raised soil is a different project. Plan the end of the run as carefully as the long face so it does not finish with an awkward pile.
Try this: Request a corner and end sample as well as a straight section.
10. Let a dark metal strip nearly disappear

Dark metal can emphasize the outline while leaving flowers and leaves as the main subject. Ask how the selected system handles joints, corners and exposed ends. Its small visible profile should not encourage vague decisions about installation depth or fixing. Keep any exposed hardware out of the walking and maintenance line, following the complete product instructions.
Try this: View the proposed top edge from lawn level as well as from the house.
11. Trial weathering steel beside the fixed paving
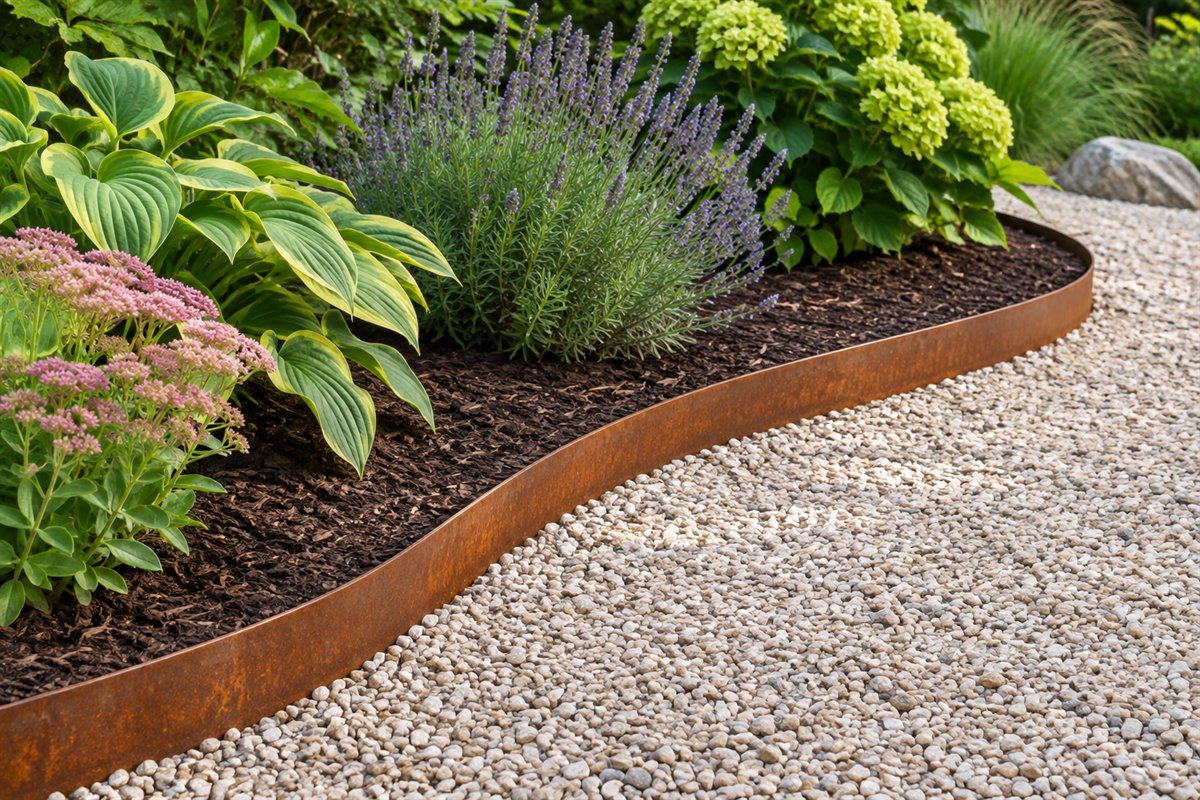
The warm brown appearance of weathering steel can sit comfortably beside gravel and muted planting. Test it against the fixed surfaces before committing to a long run. Ask the actual supplier about the finish, runoff, staining and suitability beside the paving you already own; products and conditions differ. A pleasing color in one garden is not proof of performance in another.
Try this: Include the nearby paving and drainage direction in the supplier discussion.
12. Consider aluminum for a restrained pale boundary

A pale metal line offers a different relationship with the garden than black or warm brown. It may be useful beside cool gray paving when you want a subtle but readable boundary. Compare the actual product profile, allowable bends and corner fittings. Avoid choosing by the word aluminum alone: the full system and finished detail matter more than a material label.
Try this: Compare a sample at the height that will actually remain visible.
13. Use flexible composite only within its intended curve

A flexible composite system may suit a curved bed when its specified bending range matches the plan. Check the manufacturer’s guidance for joints, restraints and ground contact. Do not force a product into a tight radius merely because it can bend in your hands. A full curve sample will reveal whether the line stays visually calm or becomes wavy.
Try this: Compare the proposed curve radius with the product instructions before ordering.
14. Keep a low plastic strip discreet and inspectable

A low plastic edge can be visually quiet when the top and connections are handled well. Ask how the selected system is installed and how seasonal movement is corrected. Check the line during ordinary garden care rather than waiting until a lifted section becomes conspicuous. Ground conditions, climate and product quality make a universal lifespan claim unhelpful.
Try this: Check local installed examples after more than one season if they are available.
15. Use timber boards to organize a straight bed

A simple timber board can make a straight bed feel purposeful. Choose material and fixings intended for the actual exposure and garden use. Think through eventual replacement before planting permanently against every joint. Keep the visible detail simple enough that a repair can be made without redesigning the whole border. Unknown reclaimed timbers are not interchangeable with a specified garden product.
Try this: Keep the product details and a spare matching section with the garden records.
16. Try a short log-roll edge for a rustic small border

Short log sections give a small border a rustic texture that is quite different from a straight board. Use the effect selectively so it does not compete with every plant. Confirm how the complete product is restrained and maintained. Where lawn meets the raised face, plan for trimming; the visible wood does not provide a flush mowing surface.
Try this: Test a short run beside the actual planting before enclosing the whole bed.
17. Choose purpose-made clay edging for a warm accent

Purpose-made clay edging can repeat the warm tone of terracotta pots without lining the bed with fragile improvised pieces. Check that the product suits the local outdoor conditions and intended use. Compare a restrained profile with more ornamental versions, especially in a small garden. Keep the connection between units tidy so the repeated pattern feels intentional.
Try this: Ask about the actual product’s exposure guidance and replacement availability.
18. Use scalloped precast edging as one deliberate motif

A scalloped edge is already a decorative pattern. Let nearby planting and paving stay simpler so the repeated shape has room to work. Examine how full units meet at corners and how the run finishes; an attractive straight sample may end awkwardly at a gate. Choose a product intended for the site and keep it outside the normal foot route.
Try this: Count the visible repeats in a trial length before deciding how much pattern the garden needs.
19. Reserve poured curbing for a settled layout

A poured curb is worth considering when the bed shape is settled and a continuous line is part of the design. Discuss levels, joints, ground conditions and future repairs with the installer. Its permanence is a drawback if you are still enlarging beds or changing access. Compare the full installed proposal with a modular edge that could be adjusted later.
Try this: Resolve the bed shape and crossings before commissioning the permanent run.
20. Separate gravel from mulch with a clear low line

An edge between loose materials can help keep their boundary readable during raking and routine care. Show the designer the actual gravel and mulch depths, how leaves are removed and where the path is crossed. Avoid a detail that catches every rake stroke or leaves a projecting lip in the route. This is material separation, not proof of a drainage solution.
Try this: Compare the sample using the tools you normally use on both sides.
21. Keep an edge around a tree away from the root flare

A garden border should not become an excuse to raise soil or mulch against an established trunk. Cornell advises keeping mulch away from woody plant bases and leaving root flares uncovered. Work around the existing tree conditions rather than forcing a perfect circle through roots. Seek tree-specific advice before digging, changing grade or installing fixings near established roots.
Try this: Assess the tree before deciding where an edge can safely go.
22. Finish the edge cleanly at a gate or crossing

The end of an edge often matters more than its middle. Where people cross, decide how the border terminates and how the two surfaces meet. Keep the useful opening free of decorative projections and exposed stakes. A long run should not dictate an awkward last step at the gate. Work out this junction on the plan before ordering all the straight sections.
Try this: Check the crossing while carrying the item you most often take through the gate.
23. Give an island bed one mowable perimeter

An island bed creates a complete perimeter to maintain. Check the space around its far side and between it and nearby borders, rather than judging only the view from the patio. The shape should work with the mower’s ordinary approach and turns. If it leaves a thin strip of grass that cannot be managed comfortably, reconsider the bed outline before selecting edging.
Try this: Trace one full maintenance circuit around the proposed island.
24. Let low planting soften an edge without hiding its job

Low planting can soften a hard border, but plants are not a substitute for every containment task. Choose locally suitable species by mature spread and the level of care you will provide. Leave enough of the line accessible to inspect and maintain it. A few leaves crossing the edge can be attractive; a route swallowed by growth changes how the garden works.
Try this: Draw the mature planting outline separately from the physical border.
25. Join two materials at one intentional transition

A material change can make sense where the garden task changes, such as moving from a patio-adjacent straight line to a softer lawn curve. Keep the junction deliberate and simple. Confirm how the two systems meet, how each end is restrained and whether the finished heights work together. Several unplanned changes in one small bed usually make the outline harder to read.
Try this: Photograph a full-size junction sample before approving both materials.
26. Use a removable edge while testing a new bed

A reversible edge is useful when the planting plan is still developing. Choose a system suited to temporary use rather than leaving sharp or unsecured pieces in the garden. Record which parts can be reused if the bed expands. After the layout has proved useful, decide whether to keep the same system or replace it with a more permanent detail.
Try this: Schedule a layout review before buying enough edging for every bed.
A measuring sheet for a more useful edging quotation
Sketch the whole run and mark every corner, curve, gate crossing, change of material and deliberate opening. Measure along the proposed line. Keep the curved length separate from straight runs if they use different product sections or fittings. Record the finished relationship with each surface, not just a total number of feet.
For a simple arithmetic example, a rectangular bed with sides of 12 feet and 5 feet has a perimeter of 34 feet: 12 + 5 + 12 + 5. If one 3-foot opening deliberately has no edging, the remaining line is 31 feet. This is a measuring example, not an order quantity. Product lengths, overlaps, corners, cuts, fixing intervals and allowances must come from the actual supplier or installer.
Ask the quotation to identify the exact product, finish, visible profile, corners, end treatment, fixings, ground preparation and any work needed at crossings. Add the intended mowing or trimming method and how a damaged section would be replaced. Compare the same scope between quotations so a low material price is not mistaken for a complete installed price.
Keep a dated photograph of the agreed sample and the product information. After installation, inspect the line during normal garden care and after significant seasonal ground movement. Address loose, lifted or exposed pieces before treating a neat-looking border as finished for good.
Which garden edging is easiest to maintain beside a lawn?
Start with the actual mowing task. A correctly designed flush mowing strip can reduce trimming beside a bed, while a raised decorative edge usually needs a separate care routine. Equipment, finished levels and the complete installation determine whether the detail works in your garden.
Will garden edging stop every weed or spreading root?
No. Joints, overhanging growth and the plant’s way of spreading all matter. Edging is one maintenance tool; it should not be presented as a universal root barrier or a reason to stop checking the bed.
Can a low border hold back a higher garden bed?
Do not assume so. A decorative edge and a structure retaining soil have different jobs. Have the levels, loading, drainage and complete construction assessed before using a border to hold back a change in ground level.
A practical next step
Choose the edge after you know its job, the maintenance routine and whether the planting shape will change. Trial one complete detail, including an end or corner, before repeating it. The best garden edging ideas make the garden clearer without creating a new awkward strip to maintain.
Garden path ideas for planning the route beside the border. White rock landscaping ideas for contained material accents.
Images are original AI-generated garden concepts. They do not document tested installations, verified foundations, certified product performance or measured drainage.
Sources and care references
- RHS: shaping and checking a new lawn edge
- RHS: routine care for cut lawn edges
- Cornell: flush mowing strips and avoiding mulch against woody bases
- Mississippi State Extension: bed outlines, mower access and mature planting space
- K-State Johnson County Extension: edging material and maintenance comparisons
Optional digital guide for this topic
If you prefer a structured workbook, explore this related paid guide.