Useful garden tool storage ideas start with the tools you use, their full shapes and the route between storage and the garden. A wall can look beautifully organized yet still make a rake difficult to remove because its head catches the shovel beside it.
Review the collection before buying hooks. Separate long-handled tools, small hand tools, cutting equipment and accessories, then note which pieces travel together for a normal task. These 26 concepts focus on keeping that collection clear and retrievable. They are finished storage ideas, not structural drawings or instructions for servicing powered equipment.
Contents
- 1. Keep the collection you actually use visible in the plan
- 2. Use a purpose-made rail for long-handled tools
- 3. Compare a stable freestanding tool rack
- 4. Give a small garden a dedicated storage cabinet
- 5. Reserve one garden zone within a shared garage
- 6. Use a shallow drawer for small hand tools
- 7. Build a manageable task caddy
- 8. Use a compatible pegboard system for a modest group
- 9. Give cutting tools their proper protective storage
- 10. Leave room for loppers' complete folded shape
- 11. Keep pruning saws in their intended guarded position
- 12. Separate hose storage from the tool-grip area
- 13. Return gloves only after appropriate drying and care
- 14. Keep a brush near the tool-return position
- 15. Define an incoming area for tools needing attention
- 16. Keep the ready-tool positions consistent
- 17. Give a folding kneeler its own complete footprint
- 18. Contain small ties and markers in a dry case
- 19. Plan a compact kit for balcony gardening
- 20. Park a tool cart outside the main route
- 21. Include the wheelbarrow before filling the floor
- 22. Measure the longest tool against the usable opening
- 23. Compare the widest head with neighboring tools
- 24. Keep substantial items within appropriate support and reach
- 25. Coordinate one finish after resolving the tool layout
- 26. Review the collection at the end of a season
Plan a clean return before a decorative display
UF/IFAS recommends cleaning tools and storing them in a dry location. RHS also distinguishes ordinary soil removal from appropriate cleaning after contaminated plant material. Give returning used equipment a separate temporary position until it is ready for storage, following the actual tool and care-product instructions. Keep cutting tools guarded or closed as their makers direct, choose supports rated for the actual tools and wall, and keep equipment secured appropriately for the household. Fuel, batteries, charging and powered-tool servicing require their own manufacturer guidance; do not treat an ordinary hand-tool rack as a complete solution for them.
Choose an arrangement that fits your situation
- Several long-handled tools: Compare a compatible wall rail or stable floor rack with complete head spacing.
- A few small hand tools: Try a shallow drawer or modest caddy with direct handle access.
- Cutting equipment: Keep the model's intended guards, closed position and secure storage central to the plan.
- A small balcony collection: Choose a compact appropriate kit and dry return location before adding larger furniture.
1. Keep the collection you actually use visible in the plan
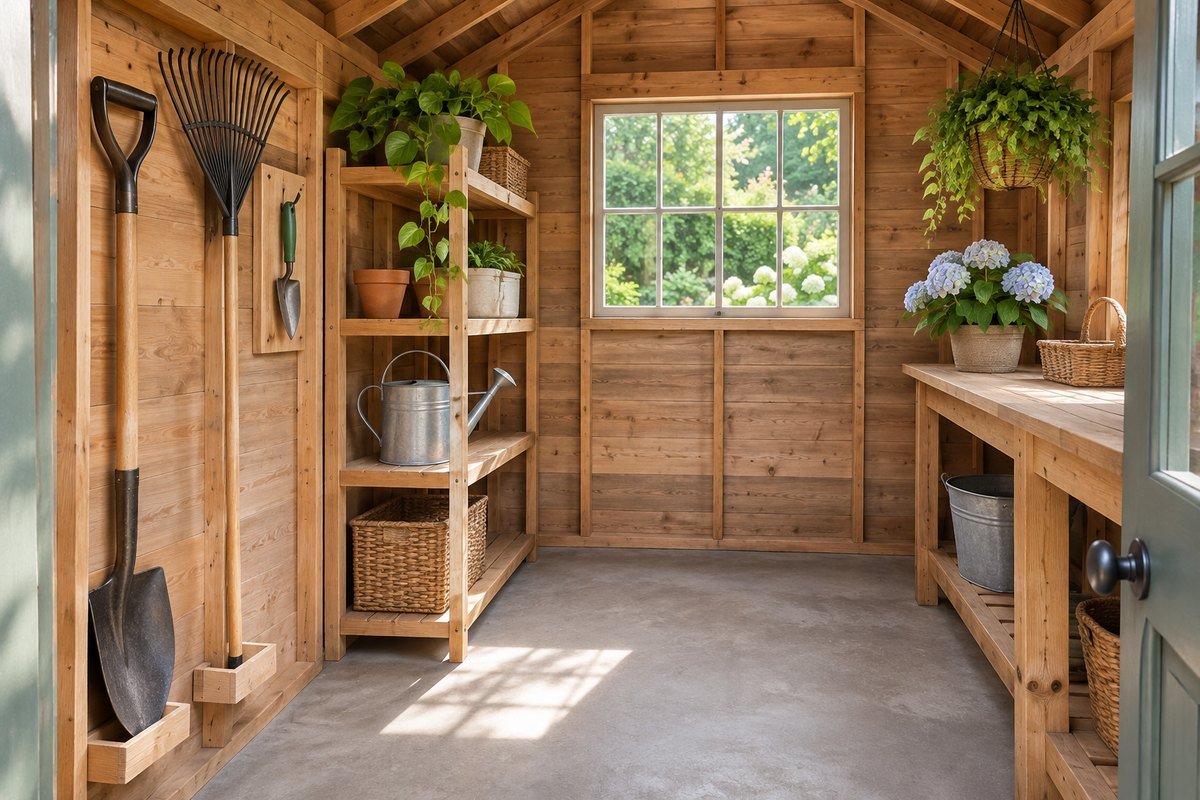
Lay out an inventory by tool type and ordinary gardening task before assigning storage. Identify duplicates, damaged items needing attention and equipment that belongs in a different location. Keep the retained working collection realistic for the garden. This makes the next decision more useful than purchasing a large rack and filling every empty position with objects that rarely leave the shed.
2. Use a purpose-made rail for long-handled tools

A rail can gather long tools along one clear wall when its holders suit their handles and weight. Compare the complete support and fastening instructions with the actual wall. Space the positions around the widest heads, not only the narrow handles. A rake should come out without lifting every tool beside it or swinging its head across the main doorway.
3. Compare a stable freestanding tool rack

A floor-supported rack can serve a collection where a wall-mounted arrangement is unsuitable. Choose a complete product intended for the actual tool shapes and follow its loading and placement instructions. Include the base in the floor plan. The rack should have a defined home outside the route rather than being moved from one doorway to another whenever the garden is used.
4. Give a small garden a dedicated storage cabinet

A suitably specified cabinet can concentrate a modest collection without requiring a full shed. Compare the longest retained tool with the usable interior and door opening. Check its intended exposure, assembly and restraint requirements. A cabinet described as outdoor storage is not automatically appropriate for every site, contents or weather condition, so use its actual instructions when choosing the location.
5. Reserve one garden zone within a shared garage

A defined garden section can keep soil-related equipment from spreading among household storage. Choose a position that preserves vehicle, door and other required access. Keep the zone limited to the retained gardening collection rather than treating the whole garage wall as available. Test retrieving a tool while the room is in its ordinary occupied state, with the usual larger objects in place.
6. Use a shallow drawer for small hand tools

A drawer can keep trowels and other compact tools visible without creating a deep mixed pile. Choose the layout from the actual tool lengths and protective storage requirements. Leave enough room to grasp a handle directly. Keep the drawer's retained group small so returning one tool does not require pressing it beneath several others or moving unrelated accessories first.
7. Build a manageable task caddy

A small caddy can gather the ordinary tools used together for one gardening job. Compare its weight and handle with the real loaded group, and choose an appropriate return position. Keep tools that need a different protective arrangement elsewhere. A useful caddy should make the task simpler to begin rather than become a portable version of the shed's entire mixed collection.
8. Use a compatible pegboard system for a modest group

A pegboard can make a small tool group understandable when the panel, hooks and supports form a suitable system. Follow its rated use and fixing instructions instead of mixing arbitrary accessories. Give each tool a clear removal movement and keep projecting parts out of the approach. Leave some panel space empty if that makes the retained tools easier to see and return.
9. Give cutting tools their proper protective storage

Follow each cutting tool's instructions for closing, locking, guarding and storage. Keep that protective arrangement part of its assigned position rather than removing guards to create a more decorative display. Choose household-appropriate secure access. A drawer or cabinet can look orderly while still containing loose exposed edges, so compare the tool's condition and protection as carefully as the container's finish.
10. Leave room for loppers' complete folded shape

Long-handled cutting tools need storage based on their permitted closed arrangement, including handles, guard and any locking feature. Measure the complete stored shape and follow the manufacturer's support guidance. Do not wedge the tool behind a narrow rake simply because both have long handles. Keep removal straightforward without reaching past exposed edges or forcing neighboring tools apart.
11. Keep pruning saws in their intended guarded position

A pruning saw needs its own protective storage method, which may involve a guard, case or folded blade depending on the product. Follow that model's guidance and give it an identifiable location. Avoid dropping it into a mixed bucket of hand tools. The useful arrangement keeps the protected tool easy to find without making someone search by touch among unrelated metal parts.
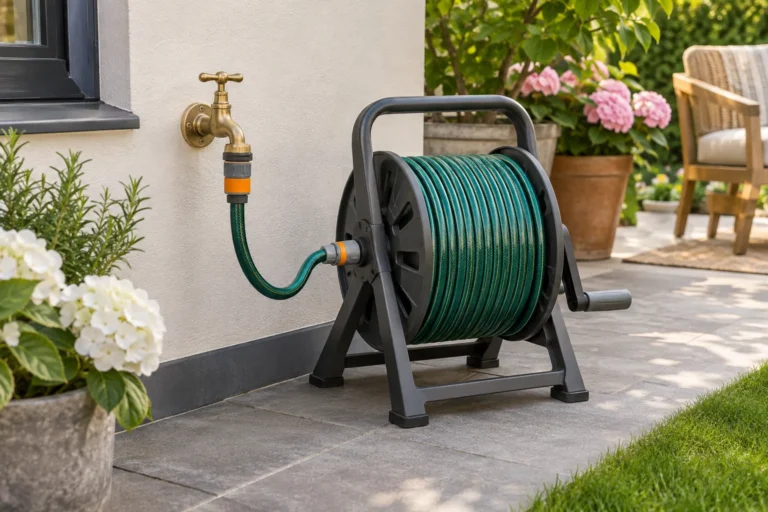
12. Separate hose storage from the tool-grip area

A suitable hose holder or reel can have its own position without looping across the handles needed for other tools. Compare the hose's actual storage guidance and full approach space. Keep the hose from becoming an accidental retaining strap for a shovel or rake. Distinct return positions make it easier to remove one item without unpacking a tangled group first.
13. Return gloves only after appropriate drying and care

Give the gloves used for a familiar task an appropriate care and return routine. Follow their material instructions before placing them in a closed container. A simple dry shelf group can be easier to review than several anonymous bags. Keep pairs together and separate items needing attention so a tidy-looking basket does not hide the only usable pair beneath damaged or damp gloves.
14. Keep a brush near the tool-return position

A suitable brush and cloth can support the ordinary cleaning routine before tools go back into their assigned holders. RHS specifically suggests keeping these near storage as a reminder. Choose a modest separate place for them and follow the tool's actual care requirements. Keep this everyday return step distinct from any additional hygiene measures needed after working with diseased plants.
15. Define an incoming area for tools needing attention

A small temporary return position can keep used tools separate from the ready collection until the appropriate cleaning and drying are complete. Choose a location that contains the ordinary task without blocking the doorway. Keep the group small enough to deal with promptly. If it becomes a permanent pile, revise the return routine instead of simply adding a larger tray.
16. Keep the ready-tool positions consistent

Return tools that are ready for use to the same defined positions after each session. A stable arrangement makes a missing piece easier to notice before the next task begins. Keep the system understandable for everyone sharing the garden. Avoid changing the layout for decorative symmetry whenever a tool is removed; a practical empty position can be useful information rather than wasted wall space.
17. Give a folding kneeler its own complete footprint

If a kneeler or folding garden seat belongs to the retained kit, measure it in the stored position permitted by its instructions. Include the feet and any projecting handles. Keep it from leaning loosely against long tools that must be removed frequently. Choose a stable dedicated position that does not turn a useful accessory into the object repeatedly moved before every gardening session.
18. Contain small ties and markers in a dry case

A divided case can keep a modest supply of garden ties and markers from disappearing beneath tools. Choose compartments around the actual items and keep the case in appropriate dry conditions. Bring out only what the current task needs. Avoid storing every miscellaneous garden object in the same case simply because a spare divider remains empty.
19. Plan a compact kit for balcony gardening

A small container garden may need only a few hand tools and a clear indoor or suitably sheltered return position. Choose storage appropriate to the tools and the actual exposure. Keep it separate from food utensils and household supplies. A restrained portable kit can be more useful than introducing a large outdoor cabinet to a balcony whose main route is already limited.
20. Park a tool cart outside the main route

A purpose-suitable cart can move a small working collection when its complete load and handling instructions suit the garden. Give it a clear parked position and include the wheels and handle in the plan. Keep sharp equipment properly protected and choose the terrain from the product's guidance. A cart is less useful if it blocks the shed entrance whenever it returns.
21. Include the wheelbarrow before filling the floor

A wheelbarrow's handles, wheel and tray can occupy more of the shed than its tray alone suggests. Compare the actual permitted stored position with the space needed to move it in and out. Do not improvise overhead hanging from decorative hooks. Preserve a clear approach before assigning the surrounding floor to containers that make the wheelbarrow difficult to retrieve.
22. Measure the longest tool against the usable opening

Record the tool's full length and the cabinet's real interior, not only their category names. For example, a hypothetical 62-inch tool cannot stand upright in a 60-inch usable bay; it is 2 inches too long before grip or support space is considered. Those are arithmetic example dimensions, not product specifications. Compare another permitted storage orientation or a different compatible cabinet.
23. Compare the widest head with neighboring tools

A broad rake head can require more wall space than several narrow handles. Lay out the actual stored shapes before choosing hook spacing, and follow the holder's permitted arrangement. Test one removal at a time. If neighboring heads collide, reduce the retained group on that rail or change the positions rather than forcing the tools into a tighter decorative rhythm.
24. Keep substantial items within appropriate support and reach

Choose the storage level from the actual item, user's handling needs and shelf or rack rating. Keep the complete lifting movement practical instead of using the highest shelf merely because it is empty. A neat arrangement should not depend on moving a substantial object over other stored equipment. Follow the furniture and tool instructions rather than inferring capacity from a thick-looking shelf.
25. Coordinate one finish after resolving the tool layout

A restrained rail finish, cabinet color or timber detail can connect the storage to the shed and garden. Choose it after support, access and intended exposure are settled. Leave the tools' protective features and useful labels intact. One controlled repeat of color can make an ordinary working collection feel considered without hiding the objects behind decorative covers that complicate retrieval.
26. Review the collection at the end of a season

Check each retained tool's condition, current use and intended storage guidance before the next quiet period. Separate items requiring repair or replacement and update the inventory when the collection changes. Use the exact manufacturer instructions for any powered equipment stored elsewhere. Finish with the ready hand tools returned, the floor clear and a practical first task available for the next gardening session.
A tool-shape and return card
For each retained tool, record the complete stored length, widest head, projecting parts, weight, protective features and permitted support position. Compare these with the rack rating, actual wall or cabinet construction, clear opening and retrieval movement. Add where used tools arrive, the appropriate care reference and their final ready position. Test the longest tool and widest head first, then one ordinary carry-and-return task. This exposes a poor fit before a new rail or cabinet fixes the layout permanently.
A practical next step
Choose garden tool storage ideas around the retained collection, protective requirements and complete retrieval route. Keep used equipment separate until it is ready to return, give broad heads and long handles enough practical space, and match supports to their actual instructions. A clear modest system can make the garden easier to begin using than a shed packed with attractive but awkward storage.
For the surrounding room, keep the garden potting task separate from tool storage. Plan the wider shared garage organization.
The images are original AI-generated design concepts, not photographs of tested products or verified installations.
Sources and care references
- UF/IFAS: dry tool storage and planning a garden storage location
- RHS: cleaning hand tools and keeping a brush near storage
Optional digital guide for this topic
If you prefer a structured workbook, explore this related paid guide.