Useful spice storage starts with finding the jar you need and putting it back without rearranging the kitchen. A display can look beautiful and still fail if the cumin disappears behind tall bottles or a wide jar prevents the drawer from closing.
These spice storage ideas combine drawer, cupboard and portable arrangements with small decisions that make each one work. Start with the containers you own, then choose a layout around your cooking routine. You do not need matching jars or an entirely new pantry.
The images are original AI-generated decor concepts, not installation diagrams or photographs of completed client projects.
Browse These 22 Spice Storage Ideas
Jump to an idea
- Lay jars in shallow drawer rows
- Use cap labels for an upright collection
- Give a wide drawer separate lanes
- Choose an angled insert for an easy front view
- Keep an everyday tray in a cool cupboard
- Divide a deep shelf into removable bins
- Add a low tiered shelf for short bottles
- Try a small turntable in a reachable cupboard
- Use a narrow pull-out only when the opening suits it
- Make a baking-only basket
- Separate oversized refill containers
- Give packets their own upright file
- Arrange a door rack around the shelf positions
- Use an opaque box on an exposed shelf
- Dedicate a shallow wall cabinet
- Group tall grinders apart from short jars
- Create a return spot for meal preparation
- Let mixed original containers share one color story
- Keep a separate small collection for a second prep area
- Use a lower shelf that does not require a stretch
- Make a compact rental arrangement without permanent hardware
- Leave a small growth space and review the layout
Start with a Jar Count and a Real Opening
Empty one storage area onto a dry work surface. Group your current jars into everyday, occasional and unopened refills. Measure the clear opening, the usable base behind the hinges and the height available when the drawer or door is closed. McCormick recommends tightly closed containers kept away from heat, moisture and direct sunlight; that makes the location more important than the rack finish. The layouts below are organizing options, not food shelf-life guarantees.
| Your problem | A useful starting layout | The detail to measure |
|---|---|---|
| You cannot read labels from above | Flat drawer rows or cap labels | Closed drawer height with the tallest jar |
| A deep cupboard hides back rows | Removable shallow bins | Bin depth and clear door opening |
| Several people cook | Small shared everyday tray | Loaded weight and easy return space |
| You buy large refill packages | Separate refill basket | A cool dry shelf large enough for upright packaging |
A Worked Drawer Example
Suppose a drawer has an 18-inch clear width and your jars occupy 2-inch-wide lanes. Nine is the theoretical maximum across, before allowing for dividers and finger room. An eight-jar row may work better in practice. Make a paper template, place your actual jars on it and lift the middle one out. This is a fit example, not a standard jar dimension: measure the widest bottle or cap in your own collection.
Copy This Five-Line Storage Worksheet
Write down: clear opening width; usable depth; closed height; largest container footprint; everyday jar count. Add one note about the route from storage to prep space. If the organizer solves a different problem from that note, postpone the purchase. A narrow bin beside the prep area can be more useful than a large rack in a hot cooking zone.
1. Lay jars in shallow drawer rows
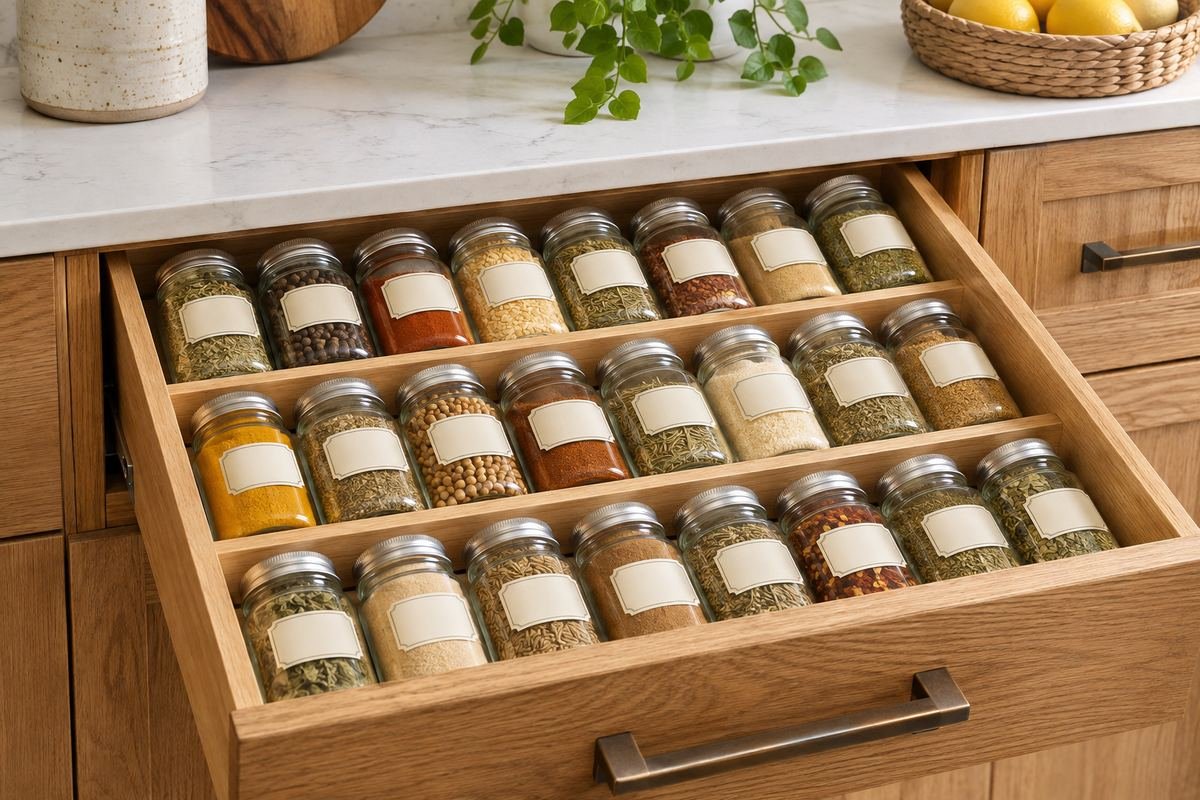
A flat drawer layout brings the full collection into one view. Place jars with their names facing up and leave a narrow gap between rows so fingers can reach the middle bottle. This suits a smaller everyday collection better than a drawer packed edge to edge.
Test the drawer with the tallest cap before adding an insert. A jar that fits on the base may still catch the cabinet above when it is tilted or resting on a rack. Keep refills elsewhere so new purchases do not crowd this working space.
Practical tip: Make one complete row with your own bottles before measuring for an insert.
2. Use cap labels for an upright collection

Upright jars work well when the drawer is deep enough and the caps are visible from above. The label location matters more than having identical bottles. A readable top view lets short jars stay beside taller ones without disappearing.
Group bottles into a few broad cooking categories if an alphabetized system feels fussy. Keep the names consistent with the packaging so another person can return each bottle. Leave a small empty pocket for the jar currently in use.
Practical tip: Close the drawer gently after arranging the tallest container.
3. Give a wide drawer separate lanes

Long dividers create lanes that stop bottles drifting sideways each time the drawer opens. A useful arrangement might separate everyday savory spices, baking flavors and larger containers. The lanes do not have to be equal widths.
Use the widest container to establish the lane, then fill the remaining space with narrower groups. A flexible divider system can adapt when an oversized cinnamon jar replaces a smaller bottle. Avoid making a perfect grid that only fits one particular brand.
Practical tip: Keep one adjustable lane for unusually shaped jars.
4. Choose an angled insert for an easy front view

An angled insert presents jar fronts toward you instead of requiring an overhead read. It can be useful where a drawer is below eye level and the product labels are easier to read at a slant. The arrangement also creates distinct rows.
The insert adds height, so include its tallest loaded point in your fit test. Check how the front and rear jars lift out rather than judging only the neatness of an empty organizer. An adjustable insert still needs to suit the drawer opening.
Practical tip: Use a cardboard wedge to test the viewing angle before buying.
5. Keep an everyday tray in a cool cupboard

A shallow tray creates a small working collection without moving all the spices into new jars. Put the bottles you use most often together and pull the tray out onto a dry preparation surface when you cook.
The tray needs a stable base and enough room to grasp its sides. Keep its loaded weight comfortable; a larger tray can become awkward even if it looks efficient on the shelf. Return it to its cool cupboard after the meal.
Practical tip: Limit the tray to the bottles used during a typical week.
6. Divide a deep shelf into removable bins

Several short bins are often easier to use than a single deep row of bottles. Each bin becomes a category you can bring forward, so a rear bottle does not require unloading the entire cupboard.
Choose bins that clear the hinges and can be lifted without tipping. A shelf may be wider inside than at the opening, which makes a full-width organizer difficult to remove. Use one bin at a time to establish the best depth.
Practical tip: Measure between the open door and hinge before choosing bin width.
7. Add a low tiered shelf for short bottles

A tiered shelf can reveal the back row when short bottles disappear behind taller ones. Place the lowest bottles at the front, then use the raised levels to create a clear view through the cupboard.
Do not assume more tiers mean more useful storage. Tall jars on the highest step can become hard to lift or hit the shelf above. Keep the rear row light and easy to retrieve, with the heaviest containers on a lower stable surface.
Practical tip: Test the rear jar removal motion with the door fully open.
8. Try a small turntable in a reachable cupboard

A turntable can bring a bottle from the back to the front without removing its neighbors. It works best with a modest collection and a cupboard where the circular footprint does not waste essential storage.
Check the loaded turning circle, not only the diameter printed on the package. Bottles with broad shoulders may extend over the rim. Leave enough surrounding room that the tray can rotate without scraping the cupboard or pushing another container aside.
Practical tip: Turn the fully loaded tray once before declaring the arrangement finished.
9. Use a narrow pull-out only when the opening suits it

A slim pull-out can organize a narrow cabinet opening into a series of visible shelves. It is most useful when the rack can come out far enough to reach the rear containers and the bottle heights match the shelf spacing.
Look at the full product specification, mounting requirements and weight limit before choosing hardware. A narrow opening beside an appliance may be warm, so establish a suitable location first. A well-fitted rack in a poor location still solves the wrong problem.
Practical tip: Compare the clear opening with the loaded rack dimensions.
10. Make a baking-only basket

Baking spices and extracts often belong to a different routine from everyday savory cooking. A separate basket lets you bring the group to the mixing area and return everything in one movement.
Keep liquid containers upright and use a wipeable base where needed. The basket should hold the tools and bottles without becoming a general baking drawer in disguise. A small defined collection remains easier to carry and put away.
Practical tip: Store opened and unopened duplicates separately so the working basket stays small.
11. Separate oversized refill containers

Large refill packages can overwhelm a drawer designed for small bottles. Store them together in a dry cupboard, with the packages closed and their original information intact. The working jars then remain easy to see and handle.
Use a simple list inside the cupboard to note what is already available before shopping. This prevents a drawer of tiny jars from hiding a second collection of half-used refills. Do not combine unidentified leftovers merely to make matching containers.
Practical tip: Review refills before adding a spice to the shopping list.
12. Give packets their own upright file

Flat seasoning packets slump behind jars and are easy to forget. A narrow open-topped container can hold them upright with their names visible, much like a small file box. This keeps packet storage from stealing the space needed for bottles.
Choose a divider or a small inner card to prevent a short row falling flat. Keep the packaging intact so instructions and ingredients remain available. The container should be dry and easy to remove for a quick review.
Practical tip: Use the smallest bin that supports the packets without bending them.
13. Arrange a door rack around the shelf positions

A door-mounted rack uses a different plane from the main cupboard shelves. It can help with a small collection when the door, hinges and mounting method are suitable for the loaded organizer.
Close the door slowly with a few test bottles before filling it. The rack can collide with shelf edges or items inside even when it fits the door itself. Follow the organizer and cabinet instructions instead of assuming any thin door can support the same hardware.
Practical tip: Map the shelf edges on paper before selecting the rack positions.
14. Use an opaque box on an exposed shelf

When an open shelf is the only practical location, an opaque lidded box can reduce visual clutter and shield the jars from light. It still needs to sit in a suitable cool, dry position rather than above the cooking zone.
Choose a low box so the bottles remain easy to identify once the lid is removed. A very deep decorative chest encourages hidden layers. The best version opens quickly and holds only one organized level of containers.
Practical tip: Keep the lid easy to lift with one hand while the box stays stable.
15. Dedicate a shallow wall cabinet
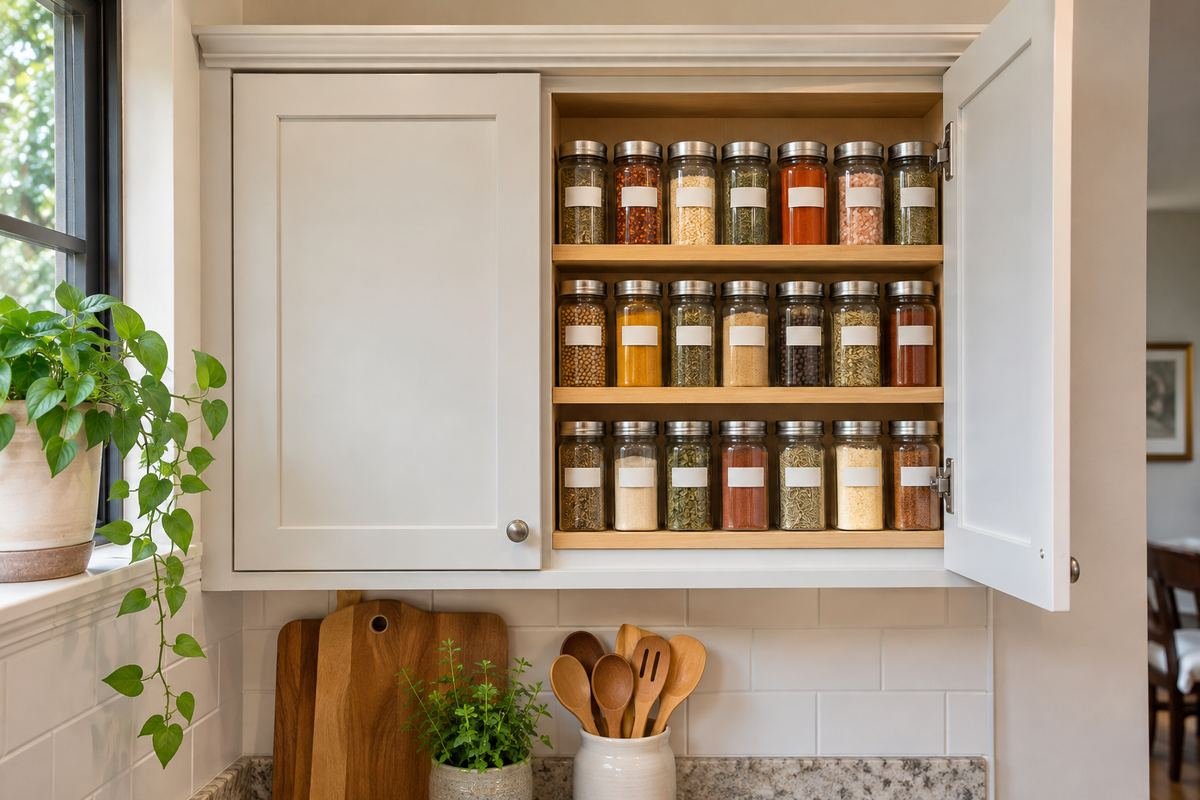
A shallow cabinet can provide a clear view of spices where a deep pantry makes every row difficult to see. A solid door gives the kitchen a quieter appearance while keeping the working collection together.
Choose a cabinet suited to the wall and follow its mounting requirements. Position it where the open door does not interrupt a passage or working counter. Decide on the useful internal shelf depth from the bottle sizes rather than the outside cabinet dimensions.
Practical tip: Check door swing with the kitchen in ordinary use.
16. Group tall grinders apart from short jars

Pepper mills and tall seasoning containers often set the height for an entire shelf. Give them a separate upright space so the smaller jars can use a lower shelf or shallower drawer efficiently.
The tall group should remain easy to grasp without reaching around fragile bottles. A small tray can contain the group while making the shelf easier to wipe. Leave enough height to remove each grinder straight up rather than leaning it between shelves.
Practical tip: Measure the tallest item in its stored position, including the cap.
17. Create a return spot for meal preparation
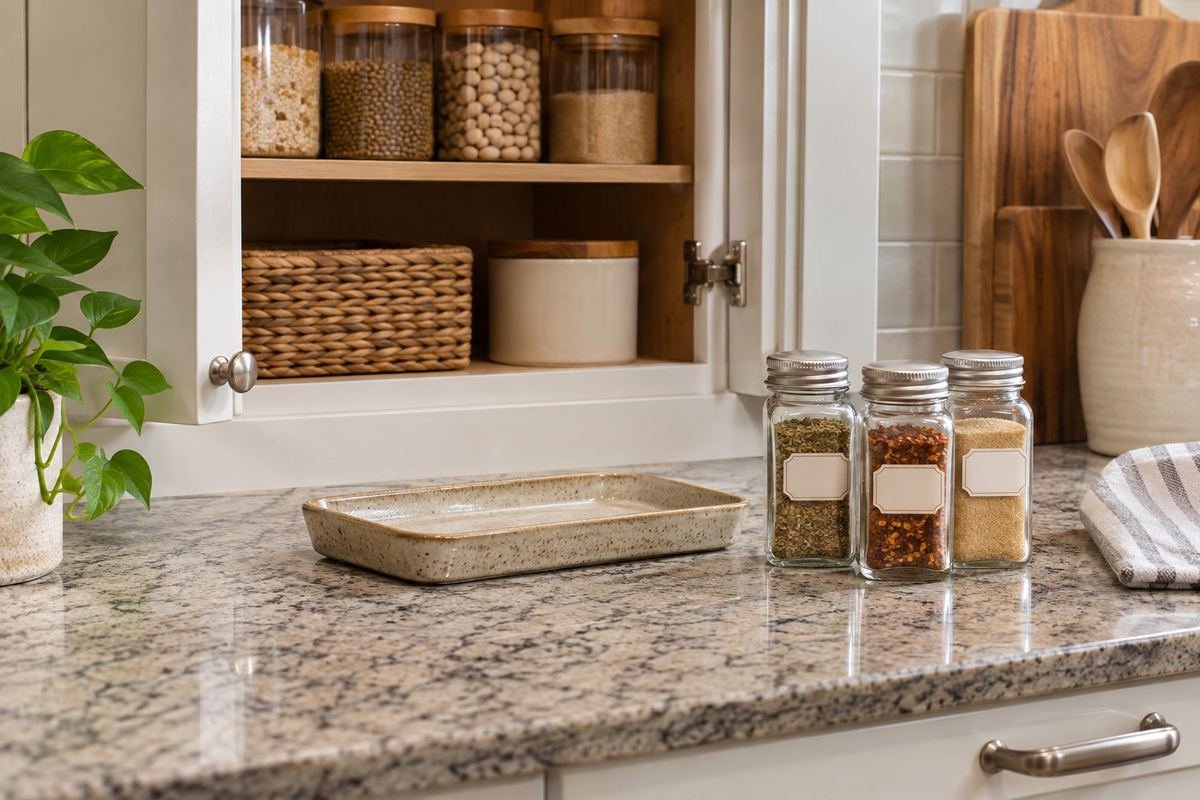
A small empty tray beside the prep area can hold the closed spice jars used during a meal. It becomes a temporary landing place rather than permanent countertop storage. At cleanup, everything returns to its normal location together.
This is especially useful when several people cook or a recipe involves many small containers. The return spot prevents bottles from migrating behind appliances. Keep the tray dry and away from steam, then clear it at the end of cooking.
Practical tip: Start cooking with the tray empty so unfinished put-away work is visible.
18. Let mixed original containers share one color story

Different bottles can look orderly without decanting. Place them in a simple tray or cabinet with a restrained finish, then organize by visibility and use. The shared base provides visual structure while the packaging remains useful.
Avoid covering important information simply to make the fronts uniform. If a bottle needs a top label for drawer use, add only what helps identify it. A working collection can be attractive without turning every grocery purchase into an extra project.
Practical tip: Choose a plain organizer before replacing usable containers.
19. Keep a separate small collection for a second prep area

A baking counter or secondary pantry station may need its own tiny collection. Only duplicate items that genuinely earn their place there; otherwise, carry a tray from the main storage location. This keeps the kitchen from developing several forgotten spice stashes.
Use the same return rule in both areas. If the secondary collection grows beyond its small container, review which jars are actually used there. Consolidating a few seldom-used bottles can free a drawer without changing any furniture.
Practical tip: Define the second collection by a routine rather than by spare shelf space.
20. Use a lower shelf that does not require a stretch

A reachable shelf can make more difference than an elaborate organizer. Place the regular collection where the person who cooks can see and remove it comfortably, then reserve harder-to-reach areas for lightweight occasional items.
Try the removal movement with the cupboard partly occupied and the door open at its usual angle. A shelf that looks convenient while empty may be awkward in real use. Do not rely on climbing furniture to reach the daily collection.
Practical tip: Ask each regular cook to try finding and returning one jar.
21. Make a compact rental arrangement without permanent hardware

A freestanding drawer insert or shelf bin can improve spice storage without drilling. Choose an organizer that is stable on the existing surface and can move with you, rather than attaching a heavy rack to an unknown cabinet door.
Keep the arrangement reversible by using the cabinet dimensions as they are. A few narrow bins may fit better than one large expandable system. Before buying, test the layout with clean empty packaging or a paper footprint.
Practical tip: Choose stable shelf-based storage when the permitted mounting method is unclear.
22. Leave a small growth space and review the layout

An organizer filled to its absolute limit is hard to maintain. Leave a little space for a replacement bottle or a new spice, then use that limit as a prompt to review the collection instead of adding a second hidden row.
After several meals, notice what stayed on the counter and what was difficult to return. Move those few items or change one divider. A useful storage system develops from those small observations, not from keeping the first photograph unchanged.
Practical tip: Review the arrangement after your next grocery restock.
Frequently Asked Questions
Should spices stay in their original jars?
They can. Original containers preserve the product identity and label information without another transfer step. If you decant, keep the product name, relevant label details and date information with the contents. Choose a container suitable for food storage and keep it closed.
Is the space beside the stove a good place for a spice rack?
Convenience alone does not make it suitable. Manufacturer guidance recommends storage away from heat and moisture. A cooler cupboard or drawer near the preparation area is a better starting point than an exposed rack above the range.
How can I organize spices without buying matching jars?
Sort the bottles you already own by height and use frequency. A removable tray, shallow bin or a few dividers can provide structure. Put readable names on the surfaces you see when the drawer or door opens.
Choose the Details That Work in Your Home
Choose one location and one organizing rule first. If you can find a jar, remove it and return it without moving three others, the arrangement is doing useful work. Add matching finishes only after the layout has survived several ordinary meals.
For related ideas, explore kitchen drawer organization, pantry organization, kitchen corner cabinet ideas.
Planning References
McCormick: spice and herb storage FAQs; K-State: spice and herb storage guidance. Follow the instructions for the exact products you choose.
Optional digital guide for this topic
If you prefer a structured workbook, explore this related paid guide.