Kitchen drawer organization ideas work best when they start with the objects you actually reach for. A generous compartment for a favorite ladle can be more useful than a beautiful grid of tiny empty spaces. Sort by the task first, then choose the insert.
Empty one drawer onto a clear surface and separate everyday tools from duplicates, occasional pieces and items that belong elsewhere. Arrange the keepers in their natural positions before buying containers. The aim is to remove the rummaging step from cooking, serving and putting things away.
These layouts cover shallow and deep drawers, flexible inserts and task-specific groups. They are alternatives to combine selectively, rather than 22 purchases to make. Keep sharp tools in a purpose-made system and follow the drawer and organizer manufacturers’ loading and care instructions.
The images are original AI-generated decor concepts, not installation diagrams or photographs of completed client projects.
Test Kitchen Drawer Organization During the Next Recipe
Choose one ordinary cooking task and retrieve its tools in the order used. Next, return them clean and dry and close the drawer gently. For example, a ladle may fit the compartment length while its head catches the cabinet above. Compare the complete objects with interior clearance and leave enough hand space to lift one tool without disturbing a crowded row.
Jump to an idea
- A flatware tray with room to grasp each piece
- Long channels for ladles and spatulas
- Expandable dividers for an awkward width
- Removable small bins for the miscellaneous tools
- A single layer for measuring tools
- A spice drawer with jars lying at an angle
- Purpose-made knife storage in a separate section
- An everyday cooking drawer beside the work zone
- A baking drawer organized by the next step
- Vertical dividers for food-container lids
- Adjustable sections for everyday dishes
- A pot drawer that includes the handles
- Pan lids in a compatible rack
- A serving drawer for occasional entertaining
- One section for wraps and food bags
- A lunch-packing drawer near the containers
- Removable bins for dry snack packets
- A beverage drawer for the daily cups and spoons
- A shallow top tray over a deeper compartment
- An angled section for unusually long utensils
- A narrow drawer with one clear job
- A layout that leaves one flexible compartment
Measure the closed drawer, not the cabinet label
Record usable interior width and depth, plus the lowest clearance above the contents when the drawer closes. For a hypothetical 18×20-inch drawer, a 12×19-inch tray and a 5×19-inch utensil bin use 17 inches of width, leaving 1 inch across the layout. That does not automatically mean a comfortable fit: dividers, the drawer’s curved sides and the opening still matter. If the longest spoon is 14 inches long, a 12-inch compartment is too short even when the overall tray fits. These are example inputs, not standard kitchen dimensions.
| Contents | A useful first option | Check before choosing |
|---|---|---|
| Everyday flatware | One fitted tray | Compartment length and comfortable finger access |
| Long utensils | Long open channels | The largest handle and the drawer closing path |
| Pots or containers | Deep adjustable sections | Loaded weight, handle projection and removal |
| Small mixed tools | A few removable bins | Whether each category is large enough to deserve a bin |
An insert’s listed size may describe a cabinet system
Read the product’s actual measurements and compatibility notes. For example, IKEA’s UPPDATERA tray article 204.914.84 lists a 15-inch frame width separately from its 11½-inch tray width. Those two numbers describe different things. Use the current product page and measure your own drawer; do not infer that every “15-inch” organizer fits every drawer sold under that label.
1. Begin Kitchen Drawer Organization With Reachable Flatware
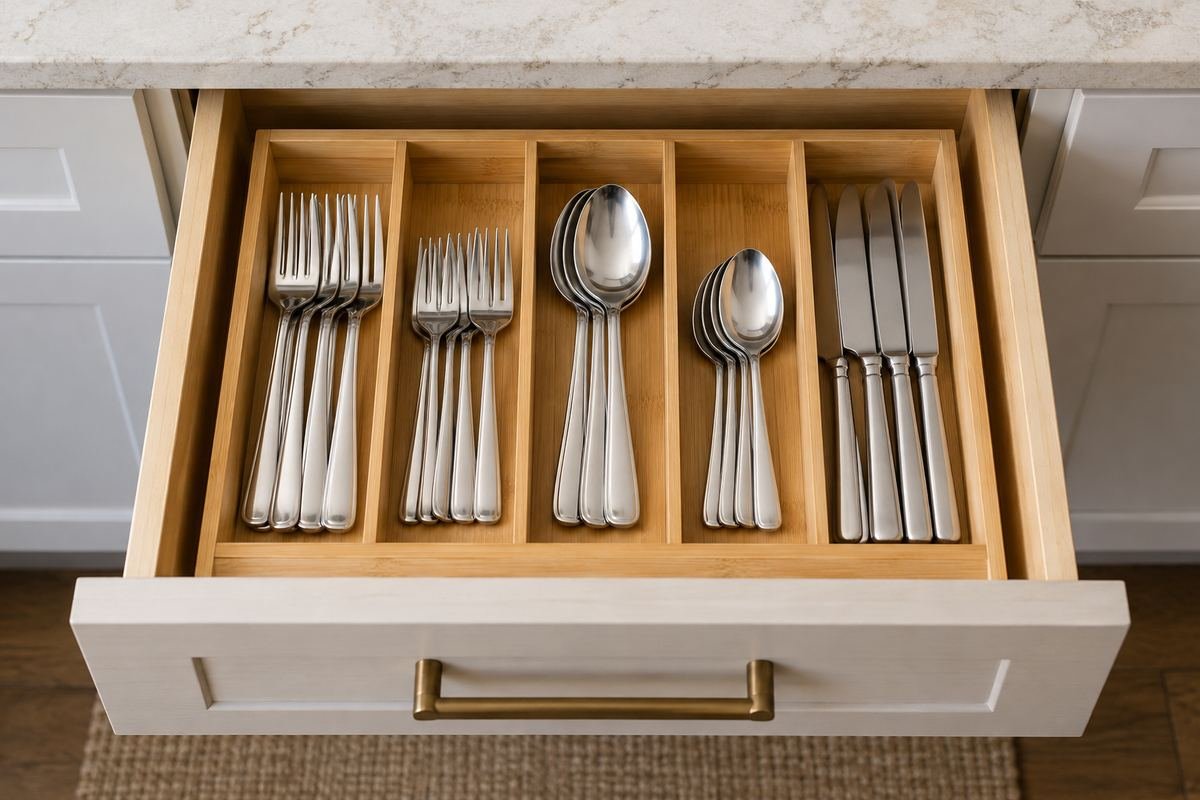
Arrange everyday forks, spoons and table knives in a tray whose channels suit their actual lengths. Keep serving pieces elsewhere when they make the daily compartments overflow.
Before choosing a tray, place a full set in a paper outline and try lifting one piece from the middle. A crowded channel that looks precise from above can still be awkward at breakfast.
Practical tip: Leave a little handling space beside the handles.
2. Long channels for ladles and spatulas
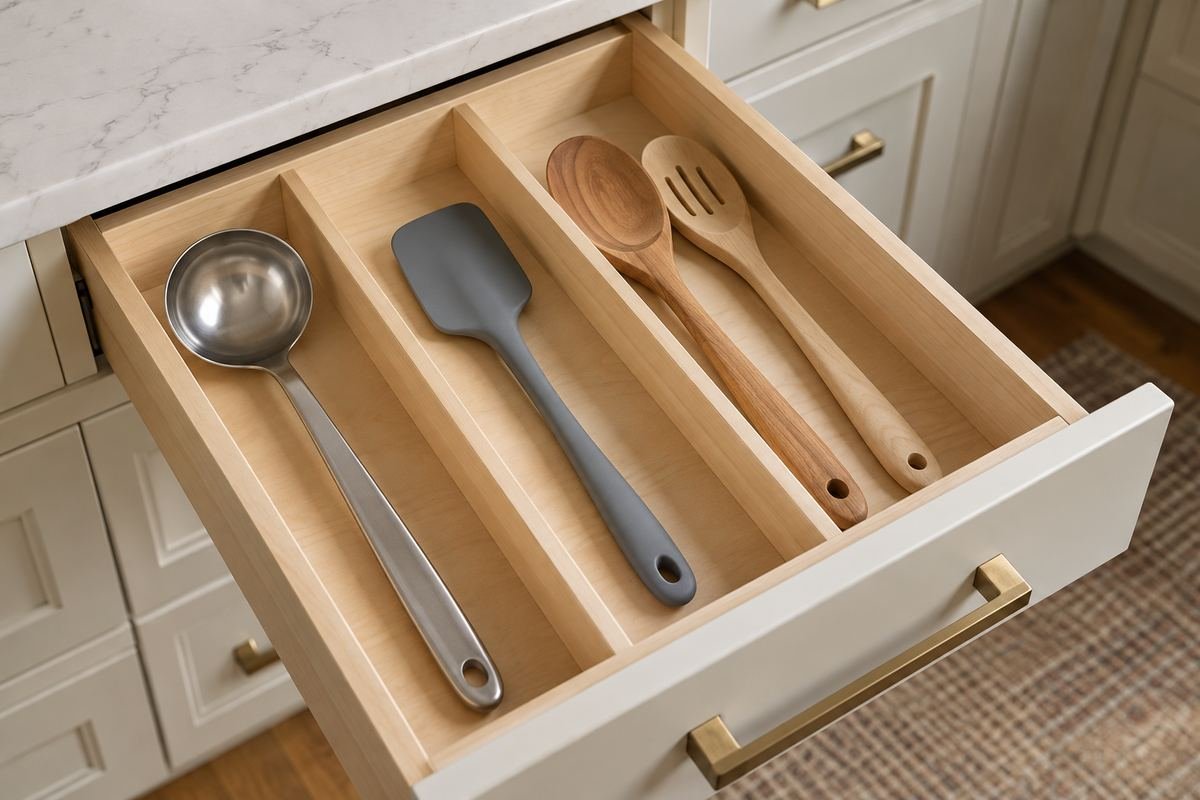
Use fewer, longer compartments for tools with bulky heads or curved handles. Turning the tools in opposite directions can help broad ends share the same channel without tangling.
Measure the longest utensil as well as the width of its head. Check that it stays below the closing path rather than catching on the cabinet above when the drawer moves.
Practical tip: Test the bulkiest ladle before the slim spoons.
3. Expandable dividers for an awkward width

An adjustable divider can separate an otherwise empty drawer without requiring a full insert. Use it to form two generous zones for related tools that tend to drift together.
Check the product’s permitted expansion range and whether its contact points suit the drawer finish. A divider should stay in place through ordinary opening without pressing an unsuitable surface out of shape.
Practical tip: Do not extend a divider beyond its stated range.
4. Removable small bins for the miscellaneous tools
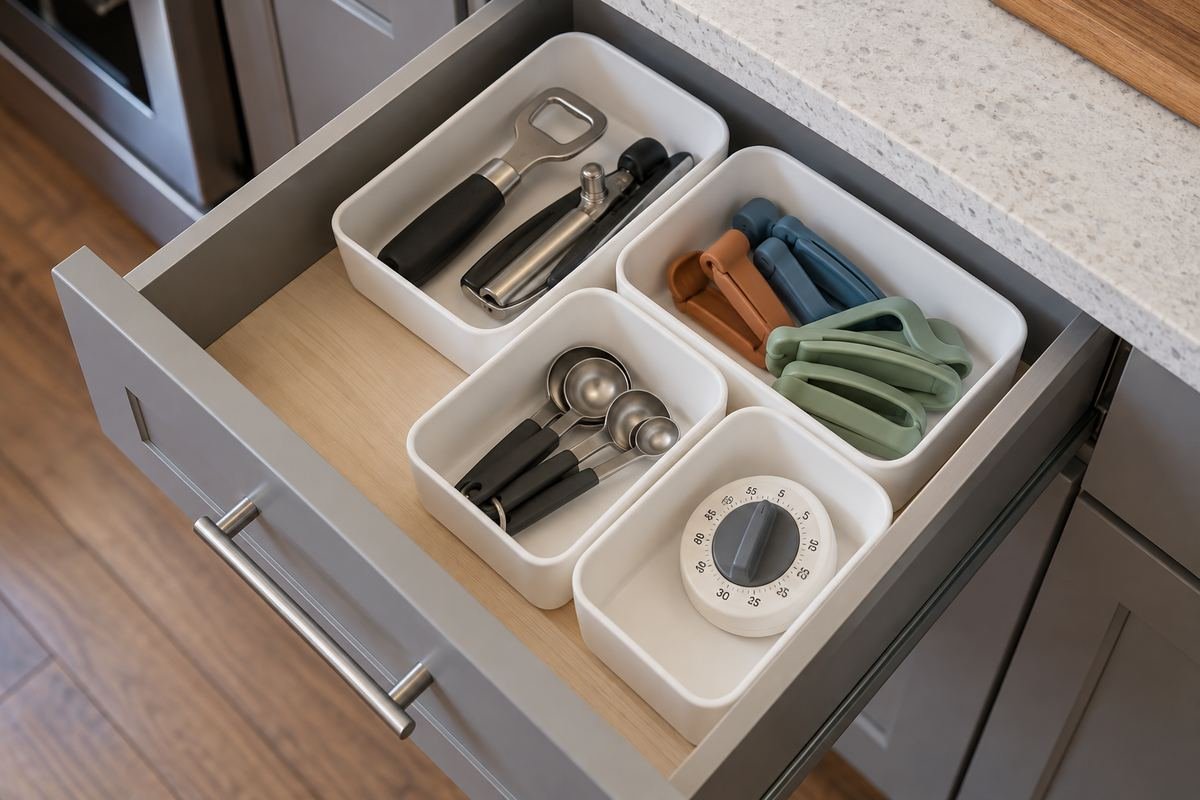
A few open bins can give bottle openers, clips and measuring spoons separate homes. This works especially well when the group changes and a fixed insert would create the wrong compartment sizes.
Keep categories recognizable: one bin for opening tools and another for food-storage clips, for example. If a bin contains several unrelated layers, split the task or remove items rather than adding another container on top.
Practical tip: Choose bins that lift out without wedging.
5. A single layer for measuring tools
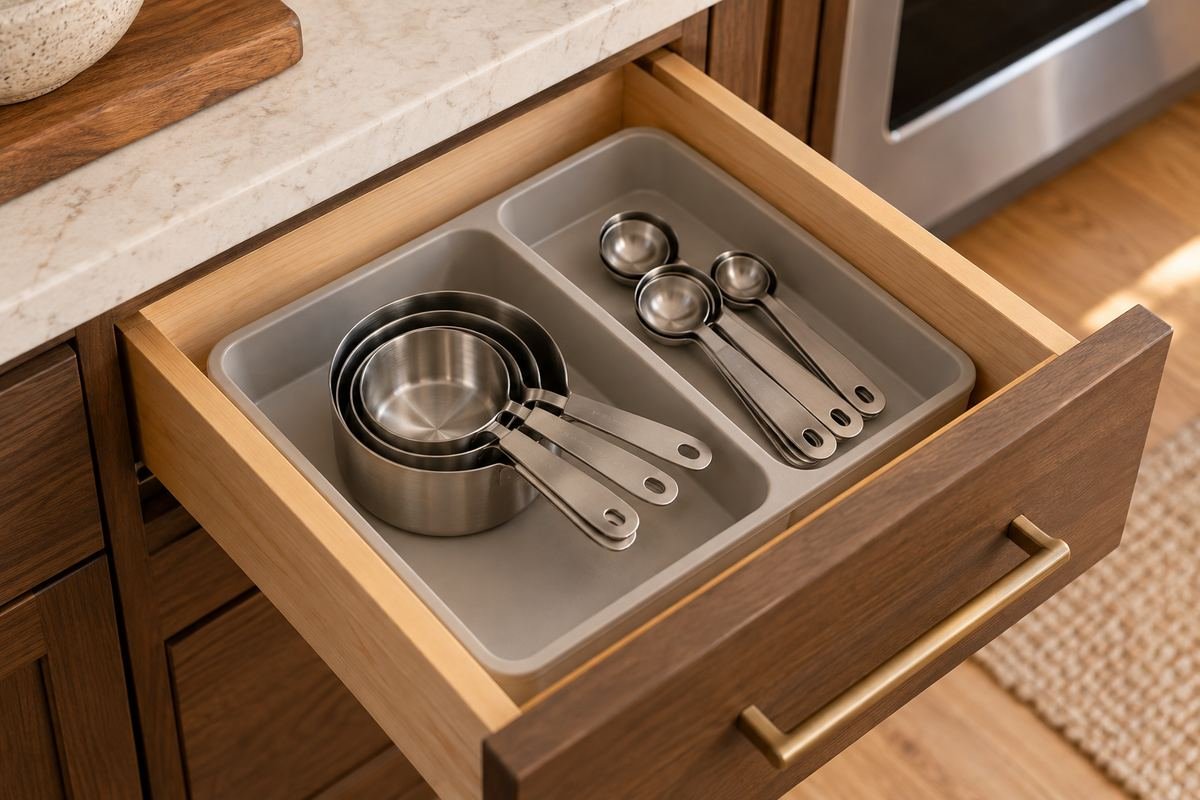
Store measuring cups and spoons where their sizes are easy to identify. Nest items only when the set is designed to nest and the pieces separate without pulling the whole drawer apart.
Put the frequently used sizes toward the front. Check whether the handles or connecting ring need more room than the bowls themselves; the smallest-looking item is not always the shortest.
Practical tip: Keep the complete set in one reachable zone.
6. Fit Spice Kitchen Drawer Organization to Actual Jars
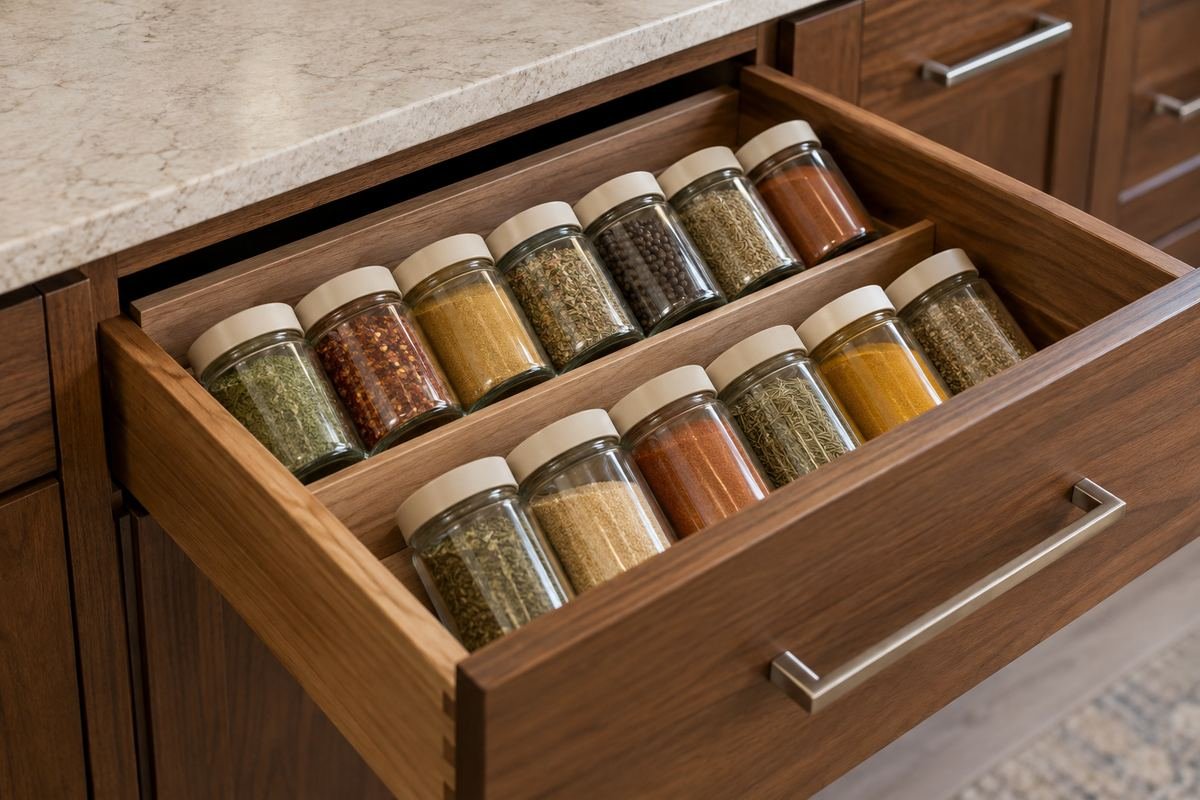
A purpose-made spice insert can turn a shallow drawer into an easy-to-scan row of jars. Choose an arrangement that lets one jar come out without shifting a second row.
Check the jar height against the closed drawer and the insert angle. Keep spices away from unsuitable heat and moisture, and follow the food packaging guidance rather than treating a pretty drawer as a preservation system.
Practical tip: Try the tallest jar before filling the drawer.
7. Purpose-made knife storage in a separate section

A compatible knife insert can keep blades separated from loose utensils. Place it in a suitable drawer that the household can manage appropriately, with handles easy to grasp.
Match the storage system to the actual knives and its installation instructions. Do not leave exposed loose blades inside a general organizer or assume an improvised wooden slot provides suitable protection.
Practical tip: Keep the blade-storage section distinct from mixed tools.
8. An everyday cooking drawer beside the work zone

Group a small selection of frequently used cooking tools near the place where food is prepared. A useful zone might contain the peeler, whisk and spatula used most days.
Walk through an ordinary recipe and notice which drawer you open repeatedly. Keep the arrangement within the existing kitchen layout; moving a tool can solve an access problem without adding cabinetry.
Practical tip: Choose the group from a real routine.
9. A baking drawer organized by the next step

Keep pastry tools, cutters and measuring equipment in separate sections within one baking zone. Grouping by the work makes the drawer easier to use than sorting every item only by material.
Place the tools for the current recipe together and check that flour or crumbs can be cleaned from the organizer. Store supplies dry and remove fragile packaging that cannot tolerate the drawer’s routine handling.
Practical tip: Give small cutters their own lift-out container.
10. Vertical dividers for food-container lids
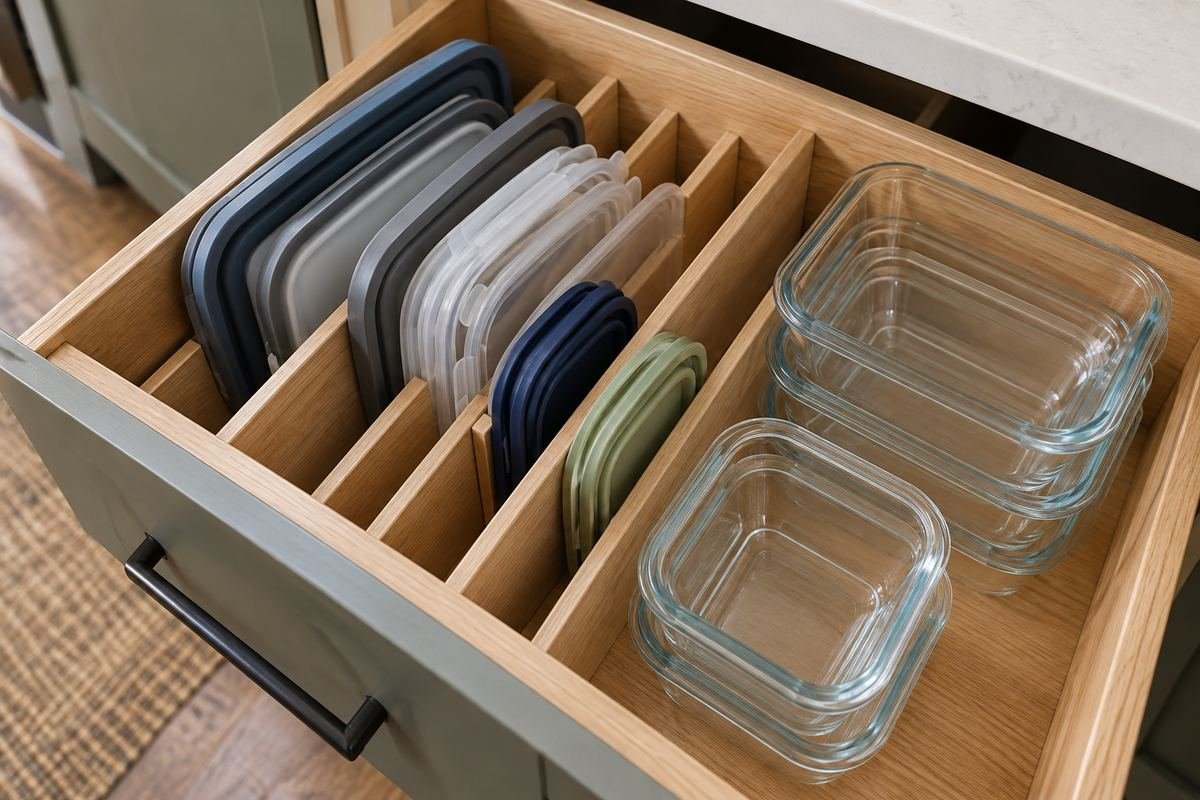
A shallow upright section can keep compatible lids visible rather than buried underneath the containers. Sort by the container family so finding a lid does not become a matching exercise.
Check the highest lid against the drawer clearance and leave room to pinch an edge. Recycle or relocate pieces that no longer belong to a complete useful set according to local options.
Practical tip: Keep the most-used size near the front.
11. Adjustable sections for everyday dishes

A deep drawer can hold daily dishes in purpose-made divided sections. Organizing the stacks by meal routine can make setting the table more direct.
Check the loaded drawer rating and the organizer’s intended use. Keep stacks at a height that is comfortable to lift from and ensure plates cannot slide into one another during ordinary movement.
Practical tip: Use the weight of the full stack in your check.
12. Include Handles in Pot Kitchen Drawer Organization
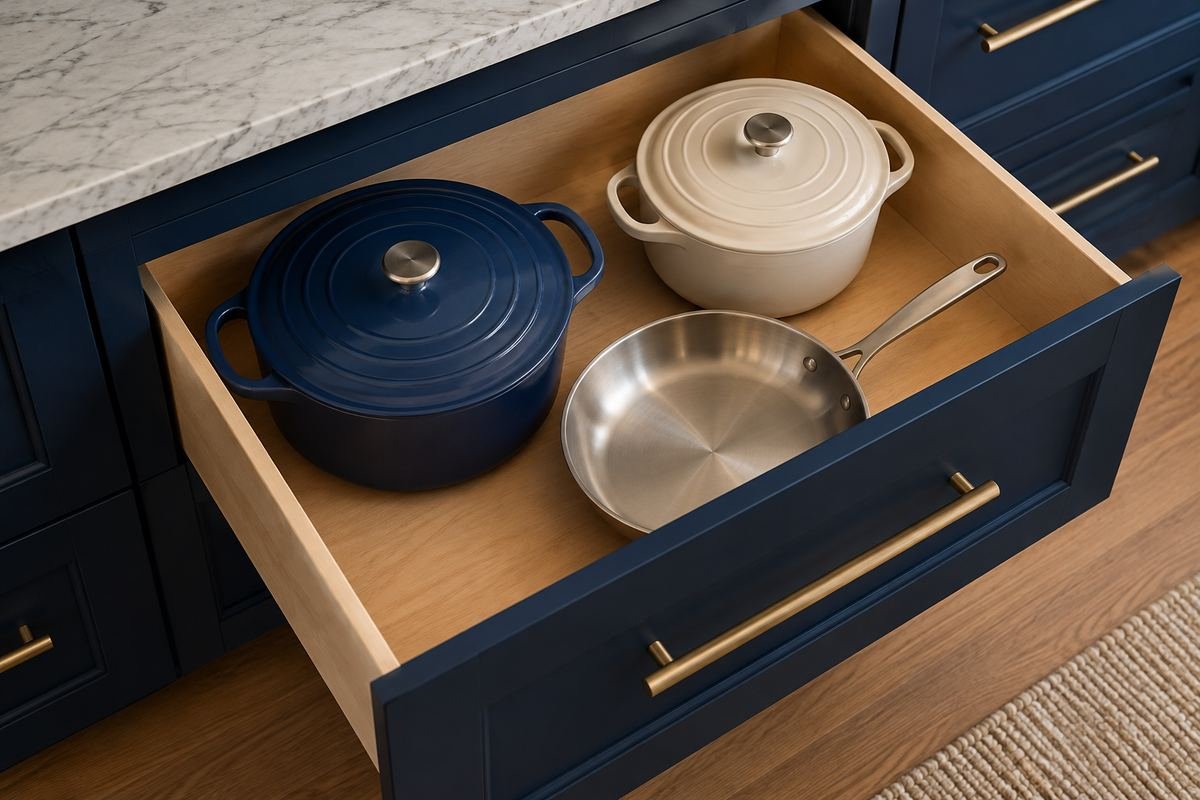
Arrange pots according to their complete footprint, including handles. One large pan may need a long open zone rather than several identical square compartments.
If the cookware is suitable for nesting, use manufacturer-compatible protection where needed. Check the loaded drawer capacity and whether lifting the lowest pot requires moving more pieces than the routine allows.
Practical tip: Measure handle projection as part of the pan.
13. Pan lids in a compatible rack
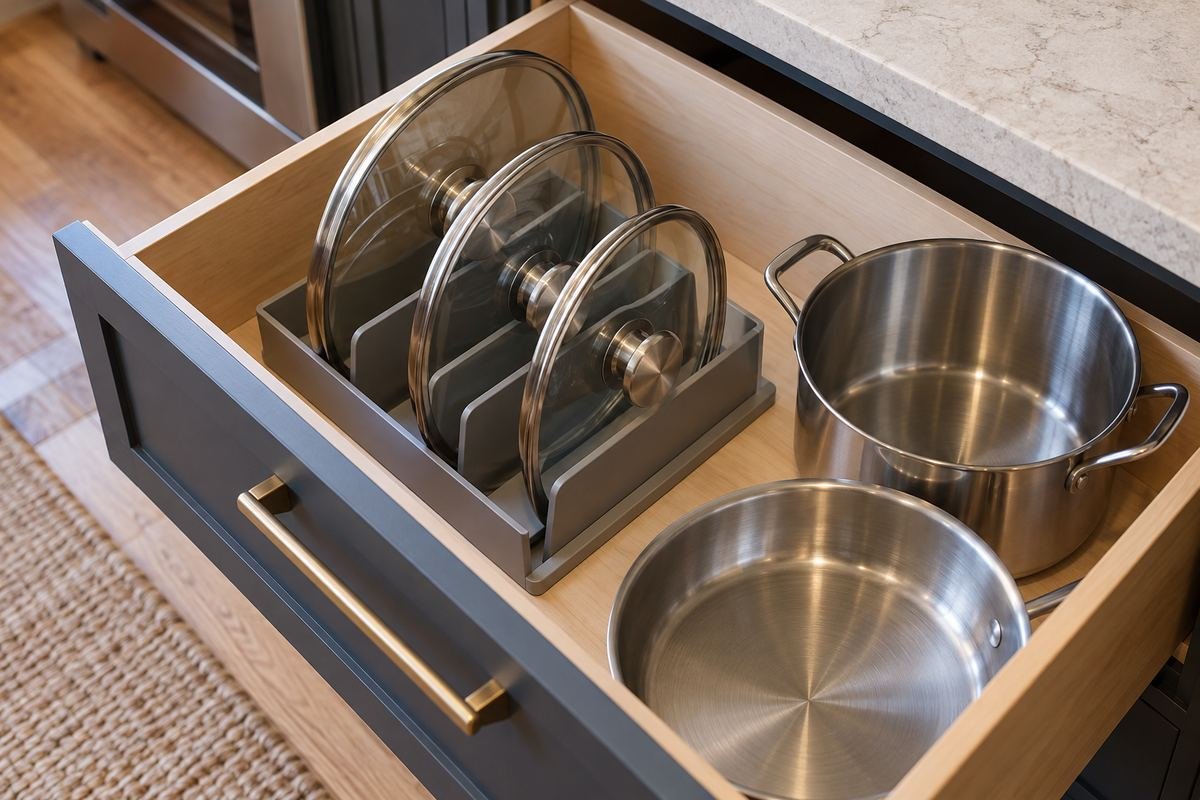
A purpose-made lid rack can stop lids from leaning into the adjacent cookware. Position the rack so handles remain accessible without blocking the drawer’s opening or closing.
Measure each lid with its knob and check the rack spacing against the largest piece. A slot that accommodates a flat lid may not accept a deep domed lid of the same diameter.
Practical tip: Test the domed lid first.
14. A serving drawer for occasional entertaining

Keep the salad servers, special flatware and napkin rings used together in a separate drawer. This protects the everyday cooking space from becoming storage for every occasion.
Use broad sections rather than fragile arrangements that have to be reconstructed after each gathering. Store only the pieces you use and keep any care-sensitive materials according to their instructions.
Practical tip: Leave room to return the whole group after washing.
15. One section for wraps and food bags

Store the rolls and bags used for packing food in a clearly defined drawer zone. Keep the dispensing opening accessible rather than stacking boxes so their lids cannot open.
Check the full roll length and follow the packaging’s safe cutting method. Avoid removing sharp cutter components or attaching improvised blades to a drawer divider for a cleaner appearance.
Practical tip: Measure the longest roll with its packaging.
16. A lunch-packing drawer near the containers
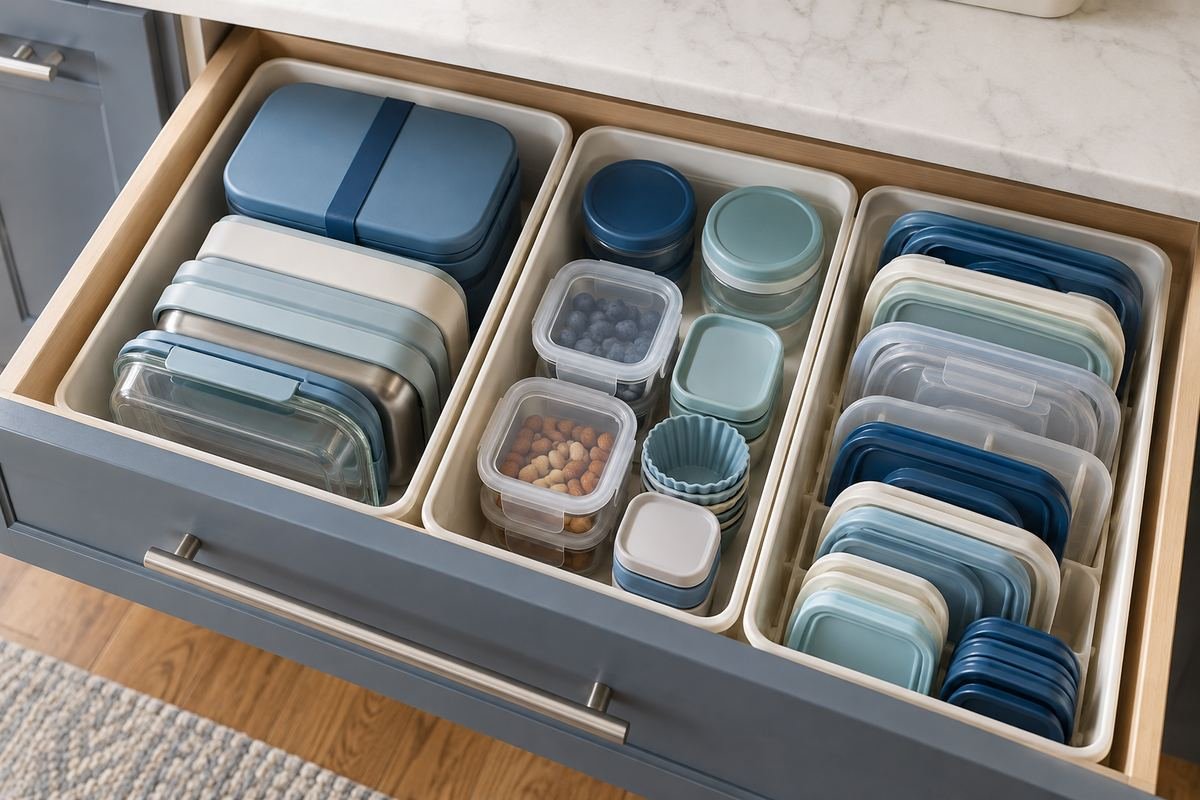
A small lunch zone can hold reusable snack containers, bottle lids and the accessories used on weekday mornings. Keep it separate from spare packaging collected for occasional use.
Use one bin for small compatible lids and another for the containers that actually go out each day. The routine should make it easy to check that the complete set returns after washing and drying.
Practical tip: Keep complete working sets together.
17. Removable bins for dry snack packets

A deep drawer may suit a limited group of unopened dry snacks when the location and packaging instructions allow. Removable bins keep small packets from sliding under larger ones.
Check dates and rotate the stock you already own. Keep original packaging information, and do not use a decorative bin as a substitute for the storage conditions required by the food.
Practical tip: Avoid filling the drawer so tightly that packets disappear.
18. Group Beverage Tools in Kitchen Drawer Organization

Bring together the small accessories used for tea or coffee, such as a scoop, infuser and a few stirrers. A drawer can hold these pieces without covering the counter with separate jars.
Keep the contents dry and check that small tools remain visible. Food ingredients need suitable closed packaging and storage conditions; an open organizer is a tool layout, not an airtight container.
Practical tip: Put the scoop where the daily routine starts.
19. A shallow top tray over a deeper compartment

Some drawer systems offer a compatible sliding tray above a deeper lower area. Use the upper level for light small items and reserve the lower space for larger objects.
Check compatibility with the actual drawer hardware and verify that both levels can be reached comfortably. Do not balance a loose tray on rails or assume a second layer is suitable for every drawer.
Practical tip: Open the top tray fully before assigning the lower space.
20. An angled section for unusually long utensils

A diagonal layout can sometimes accommodate a tool that does not fit straight across a drawer. It works only when the full object stays contained and does not interfere with its neighbors.
Use a paper outline of the actual tool to test the corner-to-corner space. A diagonal divider reduces the useful space on either side, so compare it with simply moving the tool to a better drawer.
Practical tip: Do not force a tool against the drawer sides.
21. A narrow drawer with one clear job
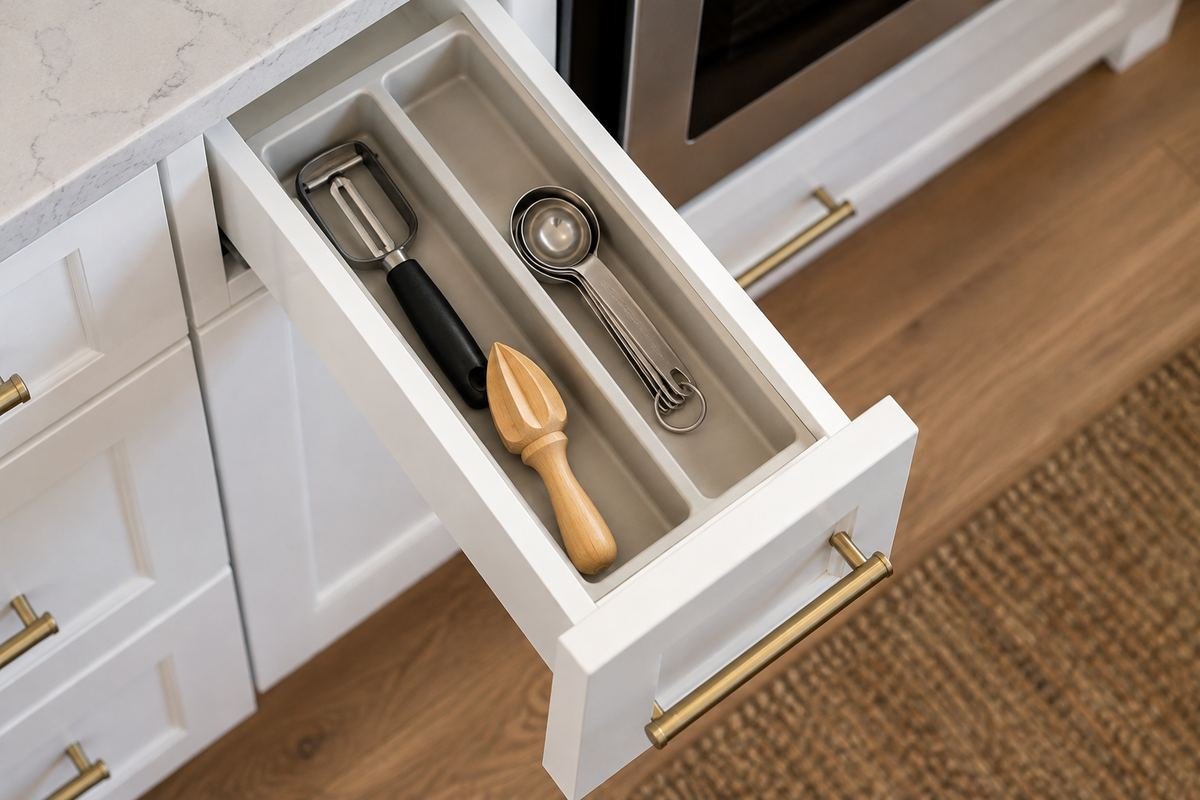
Give a narrow drawer a focused purpose, such as storing small preparation tools or a single flatware set. One long fitted section may be more practical than many short compartments.
Avoid trying to store every category in the narrowest space. If a tool fits only when placed in a precise sequence, choose a different home rather than expecting that sequence to survive everyday use.
Practical tip: A limited category is easier to return neatly.
22. Leave Kitchen Drawer Organization a Flexible Compartment

Leave a small open section for a temporary change in the routine, such as a new serving spoon or a tool being evaluated. This prevents the whole system from depending on a perfect fixed inventory.
Review that section after a week or two. If it fills with unrelated items, give those objects proper homes instead of allowing the flexible space to become another hidden junk drawer.
Practical tip: Keep one category or a short trial in the flexible space.
Frequently Asked Questions
How do I organize a kitchen drawer without buying an insert?
Start by reducing duplicates and grouping the remaining objects by task. Reuse clean, sturdy containers that fit the drawer and can be removed for cleaning. Check for rough edges, moisture damage and movement when the drawer opens. A few roomy compartments can work better than a complete fitted grid.
Are bamboo organizers suitable for every kitchen drawer?
Bamboo organizers vary in construction, dimensions and finish. Read the actual product care instructions rather than assuming they are dishwasher-safe or suitable for standing water. Return tools dry and check whether the organizer can be lifted out to clean the drawer below it.
What should go in the drawer closest to the preparation area?
Choose the tools used for that preparation task, such as a peeler, measuring tools and a few frequently used utensils. Keep knives in their intended protective storage and consider the people who can access the drawer. Rarely used gadgets need not take the most convenient space.
Choose the Details That Work in Your Home
Choose one frustrating drawer and lay out its real contents before buying anything. Give the largest everyday objects enough room, keep small categories easy to see, and try the arrangement during normal cooking before extending it across the kitchen.
For related ideas, explore Kitchen storage ideas, Kitchen counter decor, Small pantry organization.
Planning References
IKEA UPPDATERA: actual dimensions, compatibility and care. Follow the instructions for the exact products you choose.
Optional digital guide for this topic
If you prefer a structured workbook, explore this related paid guide.