The strongest bar cart styling ideas start with the drinks you actually serve and the space needed to prepare them. Keep a modest working selection, give glasses a reachable position and leave a clear part of the top. The cart should support a gathering without becoming a display that has to be dismantled before anyone can use it.
These 25 arrangements include material palettes, compact layouts and alcohol-free serving options. Choose a few that fit your room and cart. Follow the exact furniture's assembly, loading and care instructions, keep breakables and any alcoholic drinks appropriately managed for the household, and use suitable vessels rather than placing food directly on an unsuitable shelf.
Contents
- 1. Leave one clear landing area on the top
- 2. Use one fitting tray for the small serving group
- 3. Limit the display to the glasses used for one gathering
- 4. Keep tall bottles below a clear removal route
- 5. Give the ice bucket its own supported place
- 6. Keep napkins upright in one modest holder
- 7. Keep coasters in a shallow accessible stack
- 8. Put small drink tools in an intended compartment
- 9. Create an alcohol-free sparkling-water setup
- 10. Choose a pitcher and glasses for a simple serving mode
- 11. Use a pair of colors drawn from the room
- 12. Let a black cart frame pale glassware
- 13. Keep a warm metal finish to a few repeated details
- 14. Connect a timber cart with the dining furniture
- 15. Use a quiet outline when the cart already has texture
- 16. Make a small cart serve a narrower menu
- 17. Use the lower shelf for one contained reserve group
- 18. Let a wall picture establish the parked corner
- 19. Check a mirror's reflection from seated positions
- 20. Use the room's lighting instead of a loose cord on the cart
- 21. Keep a tiny decorative accent easy to remove
- 22. Keep handles and wheel movement visually clear
- 23. Protect the finish using its exact care instructions
- 24. Change a small textile accent instead of the whole setup
- 25. Keep a photograph of the working reset
Check the parked footprint before choosing accessories
Measure the cart with its handles, wheels and projecting shelf edges, then test its parked position beside dining chairs and normal walk routes. Compare the useful shelf interior with the bottles, glasses and trays you plan to keep. Include their filled weight when checking the cart's limits. A tray that sits inside a rail can still leave too little room for a hand or a tall bottle to come out.
Choose an arrangement that fits your situation
- The top looks finished but cannot serve a drink: Remove fillers and reserve the actual landing and pouring area
- Tall bottles fit but are hard to remove: Check the complete grip and lift route through the shelf opening
- The room is compact: Limit the drinks menu and test the cart beside pulled-out chairs
- You want an alcohol-free drinks corner: Choose the glasses and appropriately stored drinks actually used
- Styling makes the cart difficult to move: Keep grips and wheels clear and follow its loaded-movement instructions
1. Leave one clear landing area on the top

Begin with the empty glass, bottle and serving movement for an ordinary drink. Keep the space needed for that task free, then add the objects that can stay elsewhere on the cart. A decorative arrangement is easier to maintain when this useful area has an obvious outline. Do not fill it with a temporary ornament simply because an empty patch appears in the photograph.
2. Use one fitting tray for the small serving group

A modest tray can collect a few pieces without spreading them across the entire shelf. Compare its handles and rim with the cart's usable top, and choose a loaded group you can manage. Keep a place for the tray when the cart is reset. A tray organizes objects; it does not override the cart's weight limits or make every furniture finish tolerant of spills.
3. Limit the display to the glasses used for one gathering

Choose the small set needed for the planned drinks and leave the rest in appropriate cupboard storage. Keep rims separated and the front glasses easy to lift. A cart shelf rarely needs the full household glass collection. Fewer glasses also make it easier to check the surface and return everything after washing.
4. Keep tall bottles below a clear removal route

Compare the tallest bottle with the shelf opening and the movement needed to take it out. A bottle may stand beneath the upper shelf but still be awkward to grasp and tilt through a narrow gap. Use the exact cart's loading guidance and keep the group contained. Move an unsuitable bottle to a better storage position rather than packing it behind several glasses.
5. Give the ice bucket its own supported place

An ice bucket adds bulk, handles and filled weight that an empty styling view can conceal. Compare all three with the cart and keep access to the lid and tongs clear. Follow the bucket's use and the cart's surface-care instructions. Bring it out for serving rather than assuming a permanently displayed bucket is useful every day.
6. Keep napkins upright in one modest holder

A small napkin holder gives the paper group a recognizable place and can add a restrained color. Compare its base with the remaining usable shelf. Keep loose corners from catching on handles or the wheels. Choose the quantity needed for ordinary use, leaving the bulk reserve in a dry cupboard.
7. Keep coasters in a shallow accessible stack

A small coaster group can make the drinks corner easier to use without occupying a tall container. Choose coasters appropriate for the surfaces where drinks will be placed and follow their care guidance. Keep the stack reachable independently of the bottles. If a coaster is trapped beneath a vase, it has become part of the display rather than a useful serving item.
8. Put small drink tools in an intended compartment

A suitable tool stand or short divided container can keep a stirrer and bottle opener from disappearing behind other pieces. Keep sharp accessories protected according to their intended storage and avoid loose cutters among glassware. Choose the tools for your actual drinks. A complete decorative tool set need not take space when only one or two pieces are used.
9. Create an alcohol-free sparkling-water setup

A cart can serve a clear nonalcoholic purpose with the glasses and unopened drinks your household enjoys. Keep packaging instructions available and bring refrigerated ingredients out only as appropriate for serving. Use suitable food-contact vessels for anything decanted. The arrangement can look complete without adding bottles that exist only to suggest a conventional home bar.
10. Choose a pitcher and glasses for a simple serving mode

A coordinated pitcher and a few glasses can give the top a clear outline. Check the filled pitcher weight, handle projection and room for pouring before assigning its place. Keep the handle accessible and use the vessel as directed. Store drinks under their required conditions between uses instead of treating the cart as refrigerated storage.
11. Use a pair of colors drawn from the room

Choose a main neutral and one accent already visible in upholstery or art. A blue napkin and related glass can connect the cart with the room without matching every accessory. Compare the group from a normal seated view. If each shelf introduces another strong color, reduce the palette before buying more coordinating pieces.
12. Let a black cart frame pale glassware

A dark frame can make light or clear objects easier to read. Keep the number of shapes modest so the shelf edges remain visible. Check the contrast in the room's actual evening light, when dark bottles and a dark frame may merge. Use the pieces already owned before replacing functional glassware for a matching finish.
13. Keep a warm metal finish to a few repeated details

A warm-toned cart can relate to nearby lighting or picture frames. Repeat that metal selectively in a small useful object, such as a suitable coaster holder. Different products may have different coatings and care needs even when their colors match. Avoid assuming that every brass-colored surface can be polished in the same way.
14. Connect a timber cart with the dining furniture

A wooden cart can feel settled when its tone relates to a nearby table or chairs. Compare the grain and undertones rather than demanding an exact match. Keep suitable protection under serving vessels according to the finish instructions. A useful drinks group can provide the interest while the timber remains clearly visible.
15. Use a quiet outline when the cart already has texture
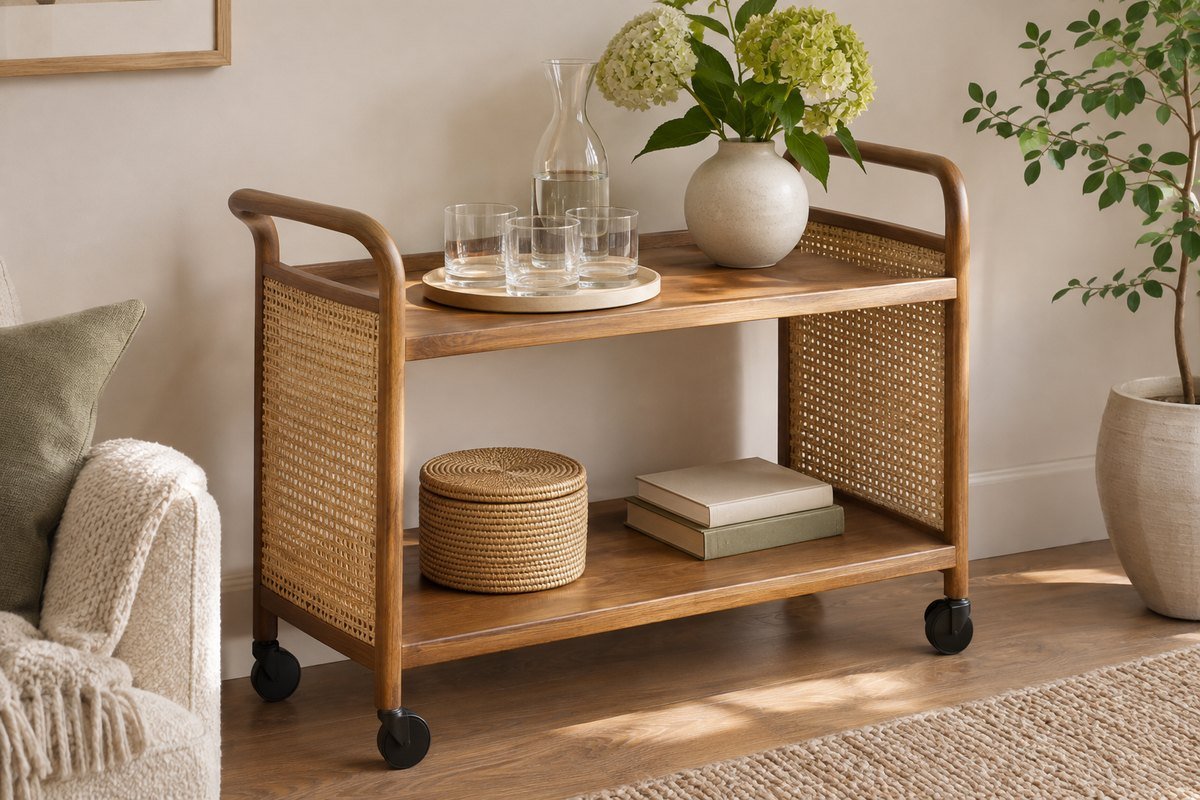
Woven panels, shaped rails or a distinctive frame can provide much of the visual detail. Keep glassware and small accessories simpler so they do not compete with it. Check that the actual shelf surface supports each base appropriately. A textured appearance does not establish outdoor suitability, easy cleaning or a particular material's strength.
16. Make a small cart serve a narrower menu

A compact cart may work better for two or three planned drinks than for a complete household supply. Assign one shelf to the working set and leave another for a limited reserve. Compare the actual shelf opening with each object. Reducing the menu is often more comfortable than replacing every container with a miniature version.
17. Use the lower shelf for one contained reserve group

A low bin or appropriate tray can keep a modest reserve identifiable. Include the container and its contents in the shelf load check and leave a clear removal route. Avoid concealing unrelated household overflow beneath a polished top. The reserve should support the cart's actual serving role and remain easy to inspect.
18. Let a wall picture establish the parked corner

A suitably installed artwork can make a small cart's home position feel deliberate without using shelf space. Compare the picture and cart from the entrance and seated views. Keep the cart independent of the wall display when it moves. Do not balance a heavy frame on its top merely to create a layered photograph.
19. Check a mirror's reflection from seated positions

A mirror near the parked cart can connect the corner with the room, but its reflection matters as much as its frame. Check whether it reflects a comfortable view or doubles an already busy shelf. Use suitable installation for the wall and mirror. Keep the cart clear of the mirror's lower edge and normal movement route.
20. Use the room's lighting instead of a loose cord on the cart

A nearby suitable room light can make the drinks corner comfortable to see. Keep the cart's movement independent of an electrical cable. If any lamp or powered accessory is considered, follow its instructions and the furniture's intended use rather than draping a lead across the serving path. Often the existing ceiling or wall lighting is enough.
21. Keep a tiny decorative accent easy to remove

If you want one purely decorative piece, choose a modest stable object that can move to a predetermined shelf during serving. Keep it separate from the hand space needed for drinks. Avoid long trailing stems or fragile ornaments near the wheels. The arrangement should still feel finished after the decorative object is removed.
22. Keep handles and wheel movement visually clear

Style within the cart's intended outline so a runner or dangling accessory does not hide the grip or catch near the wheels. Check the parked setup from both sides. Follow the product directions for moving it, removing or securing breakables as needed. A tidy photograph cannot establish that a fully loaded cart is suitable to roll across a threshold.
23. Protect the finish using its exact care instructions

Do not select a cleaning product only from the cart's appearance. West Elm's cited Stratum instructions advise prompt spill care and avoiding chemical cleansers, abrasives and furniture polish on that model's lacquered finish. Other finishes can differ. Keep the relevant instructions accessible and choose serving vessels and compatible protection accordingly.
24. Change a small textile accent instead of the whole setup

A different napkin color can acknowledge a gathering while leaving the successful working arrangement intact. Keep the same practical positions for glasses and coasters. Store the unused accent group elsewhere rather than layering several themes together. This makes a change easier to reverse and avoids adding objects that reduce serving space.
25. Keep a photograph of the working reset

After a normal use, return the cleaned and dried objects and notice which positions make sense. Record that useful arrangement for the next reset. Remove pieces that repeatedly have to move without helping the task. A cart that is straightforward to restore is more useful than a complex display that survives only until the first guest reaches for a glass.
Make a shelf-space and loaded-weight record
Draw the usable inside of each shelf, then place paper outlines of the actual tray, glasses and vessels. A hypothetical 24-inch-wide shelf with a 14-inch-wide tray leaves 10 inches across the width before allowing for gaps. That does not establish whether a pitcher fits; its depth, handle and removal movement still matter.
Record weight limits separately for the complete cart and each shelf. For example, IKEA lists the cited NISSAFORS model203.997.77 at 46 pounds total and 15 pounds per shelf. A hypothetical 18-pound group exceeds that shelf limit even though it is below the total. The same page specifies indoor use and says the shelves are not approved for direct food contact. Check the current instructions for your exact cart instead of transferring these figures to another model.
A practical next step
Style the cart around a modest useful serving group, then use color and material to connect it with the room. Keep the top practical, the shelves appropriately loaded and the finish easy to care for. The best-looking arrangement is one that still makes sense after the glasses have been used and put away.
For the surrounding room, plan a sideboard display that remains useful for serving. store the reserve drinking glasses appropriately.
The images are original AI-generated design concepts, not photographs of tested products or verified installations.
Sources and care references
- IKEA: NISSAFORS exact-model measurements, load limits and intended use
- West Elm: Stratum bar cart model-specific care instructions
- Temple and Webster: bar cart placement and glassware considerations
Optional digital guide for this topic
If you prefer a structured workbook, explore this related paid guide.