The best basket wall decor ideas make a group of woven forms feel connected to the room. Start with the wall's usable outline, the furniture below and the depth of each basket. A small considered arrangement can show the weave more clearly than a crowded collection covering every available inch.
These 24 ideas offer alternative compositions and practical ways to choose and maintain them. They are decorative wall displays, not planted hanging baskets or storage installations. Select pieces intended for hanging, follow their maker's guidance and use appropriate hardware for the actual object and wall. The images illustrate arrangements rather than verified mounting details.
Contents
- 1. Let one broad shallow basket be the whole display
- 2. Build a trio around three visibly different sizes
- 3. Use a horizontal row on a long low wall
- 4. Try a narrow vertical group between openings
- 5. Use a gentle diagonal to connect a small group
- 6. Keep a loose cluster inside one calm outer shape
- 7. Use a simple four-piece grid for a quieter structure
- 8. Give a bold central basket restrained companions
- 9. Choose a natural-tone group to emphasize the weave
- 10. Repeat one dark motif without filling every basket
- 11. Draw a muted accent from an existing textile
- 12. Repeat a pattern at different scales
- 13. Mix coarse and fine weaving within a quiet palette
- 14. Connect the group with a nearby timber tone
- 15. Let pale baskets stand out on a muted painted wall
- 16. Place a small group beside an entry mirror
- 17. Keep a dining-wall arrangement outside chair movement
- 18. Keep an office background contained beside the work zone
- 19. Use an alcove's boundary as the display frame
- 20. Leave a useful area of neighboring wall empty
- 21. Choose shallow profiles beside doorways and routes
- 22. Use the intended hanging feature rather than improvised weave holes
- 23. Protect dyed pieces from sustained direct sunlight
- 24. Keep the arrangement easy to remove for care
Plan the front outline and the side projection together
Trace the actual basket outlines onto paper and mark each intended hanging point. Include any rim that extends beyond the nominal diameter. Try the complete group on the floor before putting suitable templates on the wall. Check nearby door swings, chair movement and normal walking routes from the side; a shallow-looking photograph can conceal a basket projecting into usable space.
Choose an arrangement that fits your situation
- A small wall already has a strong neighboring pattern: Try one broad shallow basket with open wall around it
- A long low sideboard needs a clear relationship: Test a restrained horizontal row as one complete outline
- The wall is narrow or beside a door: Check shallow profiles and the full door swing before arranging
- The collection has several bold patterns: Choose one leading piece and quieter companions
- The baskets are dyed or delicate: Choose suitable light and preserve individual care and hanging instructions
1. Let one broad shallow basket be the whole display

A single substantial piece can give a small wall enough texture. Choose a shape with an interesting weave or center and leave its outline clear. Compare it with the furniture below rather than sizing it against the wall alone. This is a useful starting point when several smaller pieces would create a busy scatter beside an already patterned rug or curtain.
2. Build a trio around three visibly different sizes

Try one larger piece with two smaller companions so the arrangement has a clear starting point. Give each rim its own visible gap and compare the group as a whole. Three is an option, not a rule: use fewer pieces if that fits the wall. Avoid buying another basket simply to meet a prescribed decorative number.
3. Use a horizontal row on a long low wall

A row of related baskets can follow the line of a broad sideboard. Plan their centers and the gaps before hanging so the row looks intentional. Check whether the furniture is centered on the wall or on a useful room zone. The basket group can relate to that zone without stretching into the next doorway merely to fill the available length.
4. Try a narrow vertical group between openings

A tall strip of solid wall can suit a small vertical sequence. Keep every basket within that usable section and check the doors in their normal open positions. Compare the group from the route where it will be seen, not only straight on. A compact arrangement is preferable to deep bowls that project beside a shoulder-height passage.
5. Use a gentle diagonal to connect a small group

A diagonal arrangement can introduce movement without a large collection. Keep its overall envelope contained and test the highest and lowest pieces together. Give the group a clear relationship to the console or chair nearby. A diagonal does not need to continue around the corner or over a doorway just because more baskets are available.
6. Keep a loose cluster inside one calm outer shape

An informal cluster can still have a recognizable outline. Try a broad oval envelope with the largest piece slightly off center, then adjust the smaller forms within it. Photograph the floor layout to compare alternatives before hanging. Stop when the group reads clearly from the entrance; endless tiny additions often make the original shape harder to see.
7. Use a simple four-piece grid for a quieter structure

A small grid gives round woven shapes a more ordered setting. Use related outer dimensions and compare the actual handmade forms rather than assuming identical product names mean identical size. Set a shared center line and keep the gaps visually balanced. A slightly irregular handmade edge can remain part of the character without making the entire group look accidental.
8. Give a bold central basket restrained companions

A strong patterned center can lead the arrangement while quieter neighbors provide scale. Begin with the patterned piece and add only what supports its outline. Compare the contrast at a normal room distance: several equally bold centers can compete. Keep the companion baskets distinct from the main rim instead of tucking them behind it where access becomes awkward.
9. Choose a natural-tone group to emphasize the weave

A restrained color range lets changes in fiber thickness and construction become the detail. Compare the undertones with the wood and textiles already in the room. Natural-looking color does not identify a material or production method by itself. Keep the maker's material information with the piece rather than describing every pale basket as the same type of fiber.
10. Repeat one dark motif without filling every basket

A dark ring or simple geometric accent can connect the display with nearby furniture. Limit the strongest contrast to a few pieces so the woven surfaces remain legible. Check the room in its usual evening light as well as daylight. A dark motif that looks clear in a close photograph may disappear against a deeply colored wall.
11. Draw a muted accent from an existing textile

A small woven color accent can echo a cushion or rug without making the whole wall match. Use one leading color and leave quieter pieces beside it. Compare the actual items together because dyed fibers and fabric can read differently in the room's light. Avoid adding several new colors merely because they appear within one patterned basket.
12. Repeat a pattern at different scales
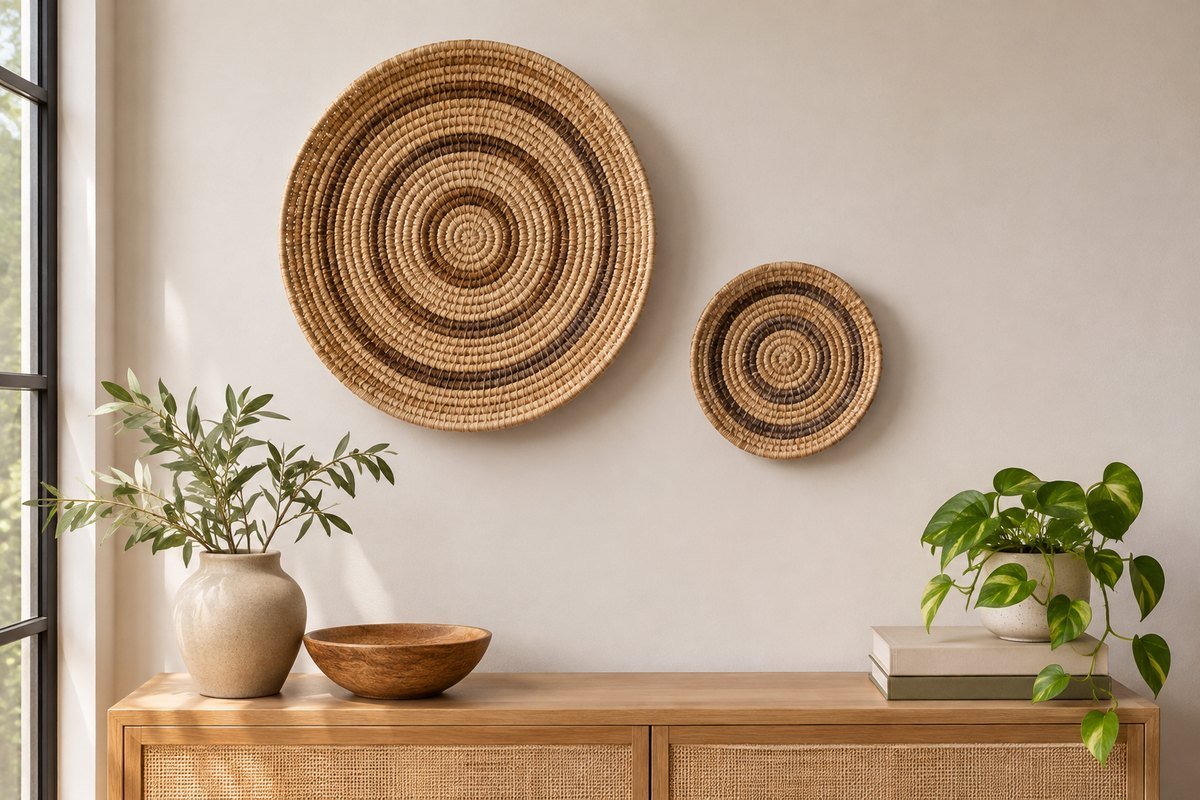
A related motif on a larger and smaller basket can make a pair feel connected. Let the scale change remain obvious rather than trying to create a perfect match from handmade pieces. Compare the complete pair before hanging and leave room around both outlines. Two related pieces may already provide the rhythm that a larger gallery would struggle to keep.
13. Mix coarse and fine weaving within a quiet palette

Different textures can create variety without introducing another strong color. Place the pieces far enough apart that the edge of each construction remains visible. Check the actual depth and condition, especially with secondhand pieces. A visually coarse weave is not necessarily stronger or more suitable for a particular mounting method than a finer one.
14. Connect the group with a nearby timber tone
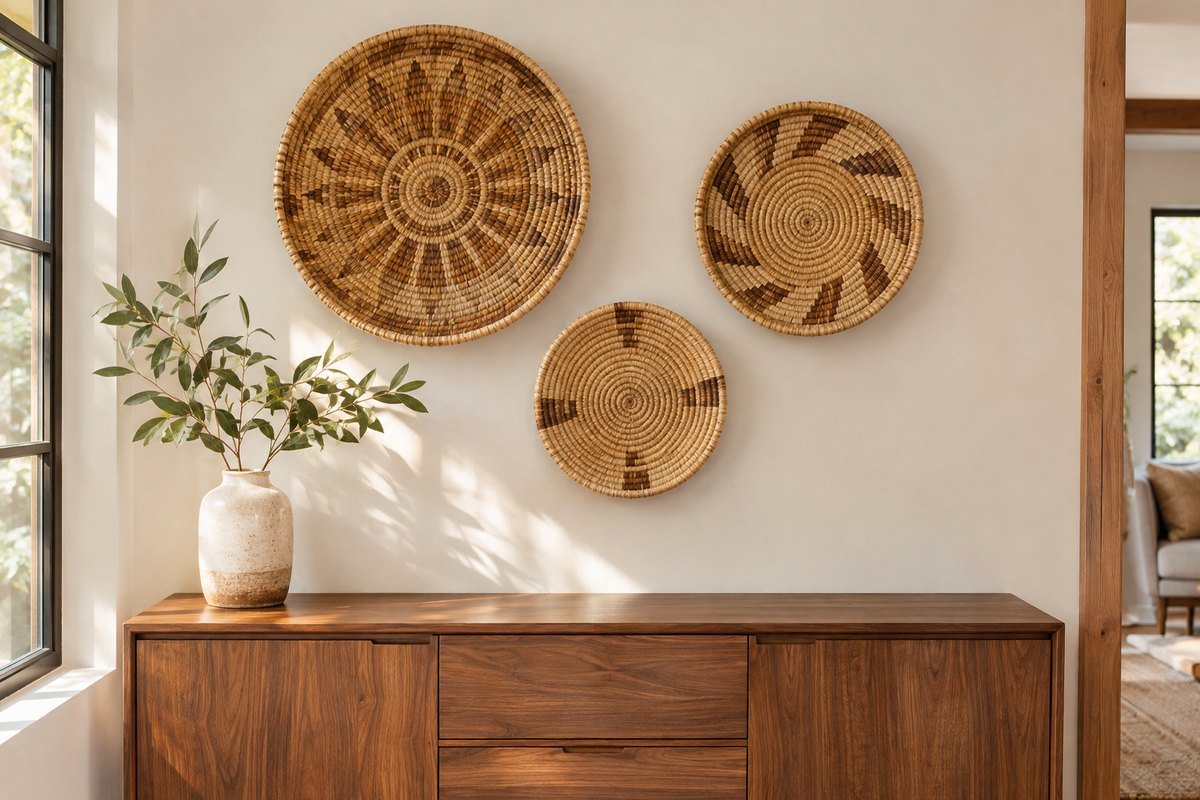
A woven display can relate to a wooden console without matching its color exactly. Compare warmth and contrast from the doorway, then keep the furniture top simple. This allows the wall to provide texture while the cabinet remains useful. Do not add extra woven storage below solely to repeat a material that already has a strong presence above.
15. Let pale baskets stand out on a muted painted wall

A soft background color can make pale fiber shapes easier to read. Test a real sample before committing to a full wall and compare it with the room's existing finishes. If adhesive hardware is considered, follow the exact product's paint-curing and surface restrictions. A successful color combination says nothing about whether a chosen strip is compatible with paint or woven backing.
16. Place a small group beside an entry mirror

A modest side group can balance a mirror without covering the entire entrance wall. Keep the basket rims outside the mirror frame and check the reflection from the door. Retain the console's useful landing area below. Choose the wall zone after testing coats, bags and the door swing so the display does not become another thing to move around on arrival.
17. Keep a dining-wall arrangement outside chair movement

View the basket group with chairs pulled out and people-sized space allowed around them. Shallow pieces can provide texture while the table stays lightly styled. Consider access for dusting and keep natural-fiber decor away from inappropriate heat, steam or food-preparation exposure. A dining wall can be decorative without becoming a storage surface for frequently handled serving objects.
18. Keep an office background contained beside the work zone

A small basket display can add texture to the wall seen from a desk or video-call position. Keep it away from switches, monitor movement and storage access. Compare the group in the view you actually use rather than filling the wall behind every piece of equipment. The display should not require moving a screen each time a basket needs cleaning.
19. Use an alcove's boundary as the display frame

A recessed wall can provide a clear outer edge for a small composition. Measure the usable back surface and check how the side walls affect shadows. Leave comfortable gaps at the alcove edges rather than forcing a basket into a tight corner. Avoid assuming that the recess makes a deep object suitable beside a normal walking route.
20. Leave a useful area of neighboring wall empty

A basket group often reads more clearly when the next wall section is quiet. Compare it with windows, artwork and nearby shelves as one room, not as an isolated blank patch. Keep the display to its strongest pieces. Empty wall can help a repeated round outline feel deliberate instead of making the room look like every accessory needs its own mounting point.
21. Choose shallow profiles beside doorways and routes

Look at every basket from the side before assigning a wall position. A broad rim or deep bowl can project farther than expected and catch clothing or a nearby door. Use pieces suited to the actual space and hanging method. If the projection conflicts with normal movement, change the location or the piece instead of relying on people to remember it.
22. Use the intended hanging feature rather than improvised weave holes

Check the back for the maker's hanging feature and follow its instructions. KAZI's cited guide describes built-in loops on its baskets; that does not establish that every basket has one or that a fragile old handle is suitable. Choose hardware for the wall, piece and loaded condition. Do not attach ordinary picture strips directly to rough woven fibers unless the exact instructions allow that backing.
23. Protect dyed pieces from sustained direct sunlight

Choose the wall after observing sunlight at different times of day. KAZI advises keeping dyed products out of direct sun, and the Burke Museum describes fading of dyes and plant fibers under prolonged exposure. A bright room need not mean a sunlit basket wall. Prefer a position with appropriate indirect light rather than expecting a decorative color to remain unchanged beside a strong sunbeam.
24. Keep the arrangement easy to remove for care

Leave enough space to take each basket down using its intended method. Follow its own care guidance; the Burke Museum's collection-care advice includes gentle dusting with a clean soft artist's brush. Do not transfer a wet-reshaping method from another basket material to a delicate or dyed piece. Keep the maker's details and original layout together so the group is simple to restore.
Make a layout and hanging record before making holes
Number the paper outlines and record each basket's outside dimensions, projection, weight, intended hanging point and product instructions. As an illustrative layout, three baskets measuring 12, 10 and 8 inches across with two 3-inch gaps occupy 36 inches in a straight row. That sum is only a front-view planning example; it does not decide the hanging height, hardware or safe clearance in your room.
Keep the mounting decision separate from the composition. The cited Command picture-strip instructions prohibit paper or soft backing surfaces, wallpaper, valuable or irreplaceable items and use over beds, among other conditions. They are not a general endorsement for applying strips to woven baskets. Choose an appropriate maker-approved support and wall fixing for each actual piece. Preserve maker and material information, particularly for older or delicate baskets, instead of treating a decorative photograph as installation evidence.
A practical next step
Begin with a small clear composition, use the actual basket outlines and check the side view before hanging. Leave space for the weave to show and choose a location that suits the materials. A thoughtful display is one you can enjoy, maintain and return to place without turning the wall into an obstacle.
For the surrounding room, plan the rest of a dining room wall. keep an entryway table practical beneath the display.
The images are original AI-generated design concepts, not photographs of tested products or verified installations.
Sources and care references
- KAZI: intended wall-display loops in its basket-use guide
- KAZI: dyed-product care guidance
- Burke Museum: home basketry care
- Command: picture-hanging strip conditions and limitations
Optional digital guide for this topic
If you prefer a structured workbook, explore this related paid guide.