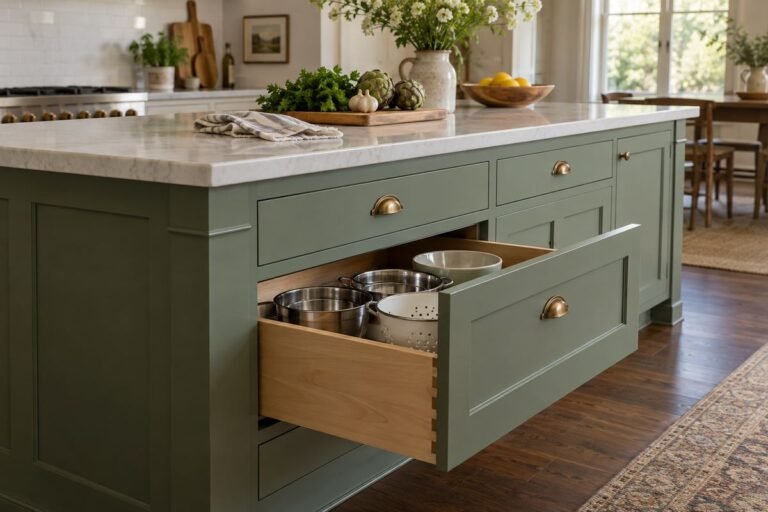
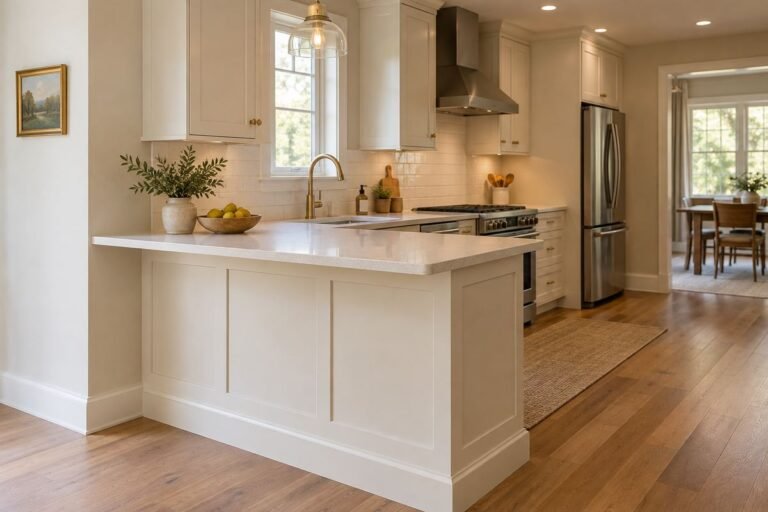
Good kitchen flooring ideas connect the room visually while supporting the way it is used. The floor sits beneath food preparation, washing up, moving stools and everyday traffic. Its appearance matters, but so do cleaning instructions, the complete installation and access to the appliances that stand on it.
Start with the cabinets and surfaces you are keeping. A floor sample that looks appealing on its own may compete with a strongly veined counter or make an existing cabinet color look unexpectedly yellow. Compare a useful group of samples in the kitchen, including several pieces of any printed or naturally variable material.
These 27 concepts range from restrained wood and stone appearances to controlled pattern and practical junction details. Use the images to compare visual relationships, then verify the exact product and floor assembly. A photograph cannot establish a product’s kitchen suitability, water resistance, slip performance or installation method.
The images are original AI-generated decor concepts, not installation diagrams or photographs of completed client projects.
Browse These 27 Kitchen Flooring Ideas
Jump to an idea
- Choose pale oak for a quiet connection
- Use medium brown to ground pale cabinets
- Balance walnut tones with a simple counter
- Continue an approved finish into open dining space
- Keep a restrained plank direction in a galley
- Use herringbone as the main floor pattern
- Compare engineered wood as a complete product
- Consider a restrained wood-look resilient floor
- Evaluate laminate beyond the decorative sample
- Use large limestone-look porcelain pieces
- Choose warm-gray stone-look flooring
- Let a concrete appearance support simple cabinetry
- Keep marble-look veining quieter than the counter
- Connect several colors with terrazzo-look tile
- Try a cream-and-gray checkerboard
- Use a diagonal square layout deliberately
- Make a small geometric repeat the only strong pattern
- Use terracotta tones for a warmer palette
- Give slate-like variation enough visual space
- Let white cabinetry meet a gentle off-white floor
- Choose a darker floor with a realistic cleaning test
- Use a planned transition at the kitchen boundary
- Coordinate grout with the intended floor rhythm
- Review the floor beneath occupied island seating
- Keep a useful mat within the complete floor plan
- Finish doorway and appliance details before ordering
- Keep a documented spare-material plan
Compare kitchen flooring ideas with the working room in view
Record the room dimensions, cabinet footprints, door swings, appliance positions and adjoining floor levels. Include chairs pulled out, the dishwasher open and the route between food storage, preparation and washing up. Ask the flooring professional to assess the substrate, complete floor build-up, transitions and relevant product instructions before ordering. Do not choose an installation allowance or moisture specification from a generic inspiration list.
| Decision | What to compare | Why it matters |
|---|---|---|
| Material and exact product | Approved use, care and installation documents | A material name does not establish performance |
| Color and pattern | Several samples with cabinets and counters | The finished floor covers a much larger area |
| Floor build-up | All layers and adjoining levels | Doors, appliances and transitions must remain usable |
| Daily movement | Chairs, stools and open appliances | The occupied room needs to work |
| Long-term care | Cleaner, furniture protection and spare material | Maintenance should fit the household |
Separate material appearance from product performance
A wood appearance can be supplied by several different materials, and products within one category can have different instructions. Compare the actual technical documents, approved location, substrate requirements and warranty conditions. Daltile’s floor-tile guidance is a starting point for understanding tile choices; it does not make every decorative tile suitable for a kitchen floor. Keep the selected product’s own use information with the order.
Include the dishwasher in the finished-floor calculation
The relevant height is the complete assembly, not just the visible tile or plank. Review the opening, appliance adjustment and removal route with the installer before deciding where a new finish begins and ends. A finished floor that looks continuous is not a successful detail if it leaves an appliance unable to be serviced. Coordinate cabinets, flooring and appliances as one plan.
Choose a care routine you will actually follow
Shaw’s hardwood guidance calls for prompt spill cleanup, grit removal and furniture protection, and advises against wet or steam mops. Its laminate guidance also specifies appropriate cleaning products and methods. These are product-care references rather than permission to use one routine on every floor. Read the instructions for your exact choice before buying a cleaner or assuming a material category is waterproof.
1. Choose pale oak for a quiet connection

A pale oak appearance can connect a kitchen with nearby living space without making the floor the strongest feature. It provides a warm background for simple painted cabinets and restrained counters.
Compare several boards with the cabinet finish and check how their grain repeats across the visible area. Decide whether you want real wood or a wood-look alternative by comparing the complete products and care needs, rather than assuming the photographs represent the same material.
Practical tip: Place multiple samples beside the cabinet toe kick.
2. Use medium brown to ground pale cabinets

A medium-brown floor can give a pale kitchen a more defined base. It can feel settled without relying on a strong checkerboard or dark painted cabinetry.
Check the brown against any visible table, stools and timber trim. The woods do not need to match exactly, but their undertones should look considered together. Avoid choosing from a single unusually attractive plank when the actual product includes much more variation.
Practical tip: Ask to see the expected range of boards.
3. Balance walnut tones with a simple counter

A darker walnut appearance can become the kitchen’s main source of visual depth. Plain counters and restrained cabinet profiles give that richer floor enough space to be appreciated.
Review the sample beneath the existing artificial lights. Strong grain, dark cabinets and a heavily patterned counter can make a compact room feel visually crowded. If the floor is the feature, let at least one other large surface remain quiet.
Practical tip: Compare the floor, cabinet and counter as one sample group.
4. Continue an approved finish into open dining space

One suitable floor through the kitchen and dining area can give an open room a coherent foundation. The table and cooking zone can remain distinct through furniture and lighting instead of a change of material.
Check the product instructions for the complete area, including movement details and the relationship to fixed cabinetry. The visual aim of continuity should be coordinated with the installation rather than used as a reason to omit a required joint or transition.
Practical tip: Draw the entire connected area before ordering.
5. Keep a restrained plank direction in a galley

A simple plank direction can make a galley kitchen feel composed. It gives the floor a clear rhythm beneath two parallel cabinet runs without adding another complicated pattern.
Compare the direction on a scaled plan and with physical samples in the room. Doorways, adjoining rooms, product requirements and the layout of cuts all influence the final decision. A rule about always following the room’s length cannot replace that complete review.
Practical tip: Mark the direction through every visible doorway.
6. Use herringbone as the main floor pattern

A herringbone floor can give a simple kitchen movement and character. It is most legible when the cabinetry and backsplash avoid competing small repeated motifs.
Compare the pattern scale around the island and the remaining visible floor. Review edges, cuts and the actual installation system with the installer. A product intended for another layout should not be assumed suitable for a herringbone arrangement simply because the pieces look similar.
Practical tip: Approve a measured pattern layout with the actual product.
7. Compare engineered wood as a complete product

Engineered wood can be part of a kitchen shortlist when the selected product and installation suit the project. Its real timber surface may appeal when a natural material is a priority.
Ask about the actual construction, approved use, finish, maintenance and repair options for the chosen line. Do not assume every engineered board behaves alike. Include the household’s spill response and the manufacturer’s instructions in the decision rather than treating construction type as a guarantee.
Practical tip: Keep the exact product documentation with the sample.
8. Consider a restrained wood-look resilient floor

A wood-look resilient product can provide a quieter visual background when chosen with a modest grain and a limited color range. Compare its appearance across several pieces rather than judging one small sample.
Confirm the exact product’s approved application, installation and care. Consider edges, transitions and any restrictions around fixed cabinets or heavy items. Marketing terms should be checked against the full instructions, including the conditions attached to water-related performance claims.
Practical tip: View several full-size pieces together before ordering.
9. Evaluate laminate beyond the decorative sample

A laminate option may offer a useful color or pattern for the kitchen, but the actual product requirements belong in the comparison. Appearance alone cannot establish its suitability for the room.
Read the approved-use, installation, water-exposure and care information before narrowing the shortlist. Check how perimeter and appliance details will be handled. Choose a floor whose maintenance instructions fit your routine rather than planning to use a familiar cleaning method that the manufacturer does not recommend.
Practical tip: Compare written instructions alongside the finish samples.
10. Use large limestone-look porcelain pieces

A limestone appearance can give a kitchen a soft mineral background. Larger pieces can make the visible floor feel less busy when the backsplash or counter already provides detail.
Check the actual product’s floor suitability, surface and care, then review the layout with the installer. Large pieces still need a suitable substrate and complete installation plan. The image’s quiet appearance should not be interpreted as permission to omit joints or preparation.
Practical tip: View more than one printed face at full sample scale.
11. Choose warm-gray stone-look flooring
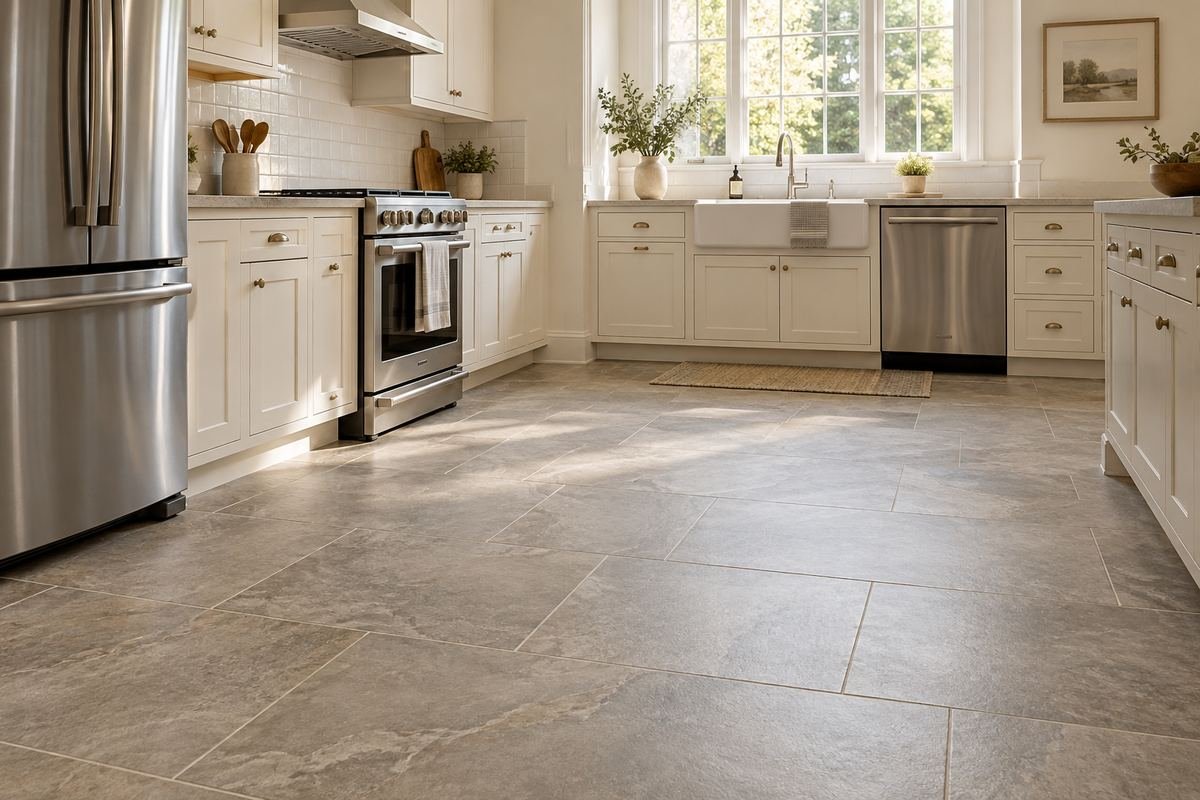
A warm gray floor can connect stainless appliances with warmer cabinets without making either feel isolated. A subtle mineral pattern works well when you want a restrained middle ground.
Place the sample beside both the cabinet and appliance finish. Some grays shift noticeably toward blue or beige under different lighting. Review the full range of printed or natural variation so the installed surface does not look much more active than the sample suggested.
Practical tip: Check samples in daylight and normal evening light.
12. Let a concrete appearance support simple cabinetry
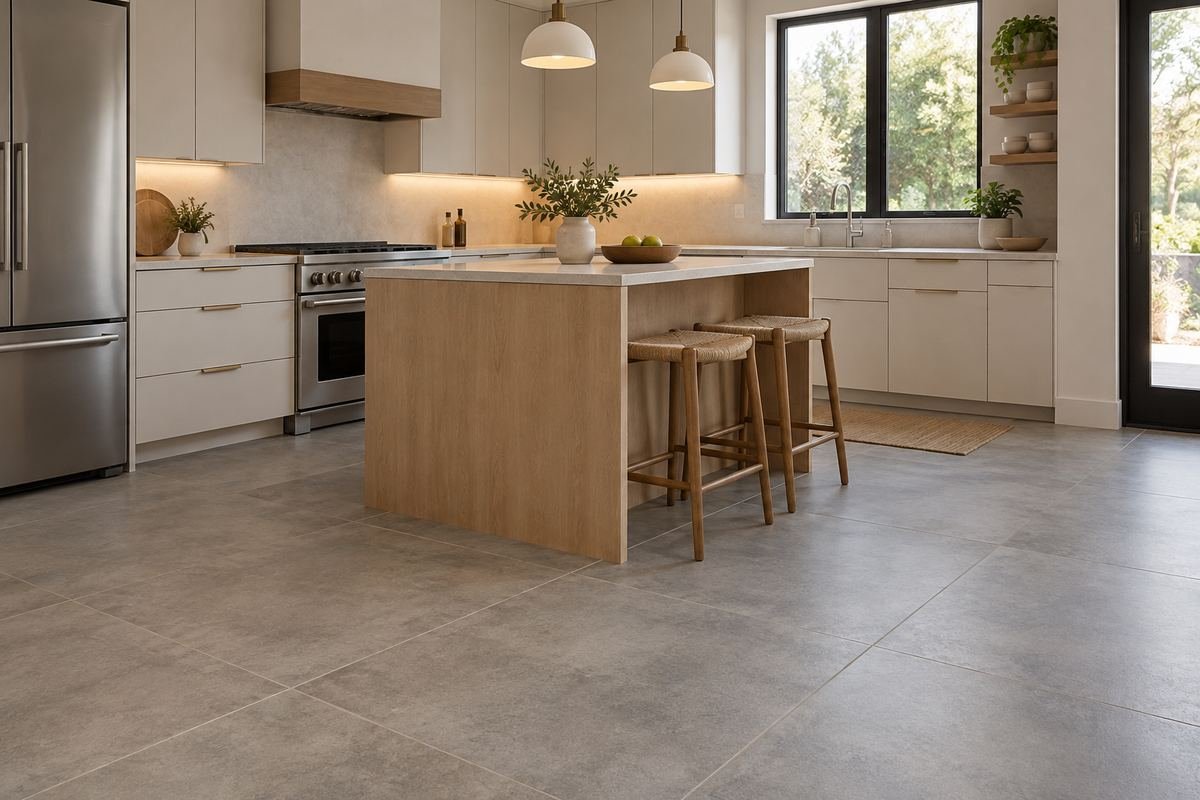
A concrete-look floor can give a kitchen a calm contemporary foundation. It suits simple cabinet fronts and restrained hardware when the aim is a broad, quiet surface.
Decide whether you are considering a concrete-look tile or a different complete floor system. Their substrate, joints, care and repair requirements can differ. Choose from the actual product or specified system rather than using a visual resemblance as evidence of equivalent performance.
Practical tip: Name the material and system clearly in the order.
13. Keep marble-look veining quieter than the counter

A marble appearance can bring movement to a kitchen floor without making the room depend on many decorative objects. A restrained pattern works especially well below a plain counter.
Spread several pieces in the expected orientation and compare them with the backsplash. If the counter is already heavily veined, a quieter floor may make both surfaces easier to appreciate. Verify the actual floor product and its care rather than assuming a stone appearance identifies the material.
Practical tip: Review the floor and counter patterns together.
14. Connect several colors with terrazzo-look tile
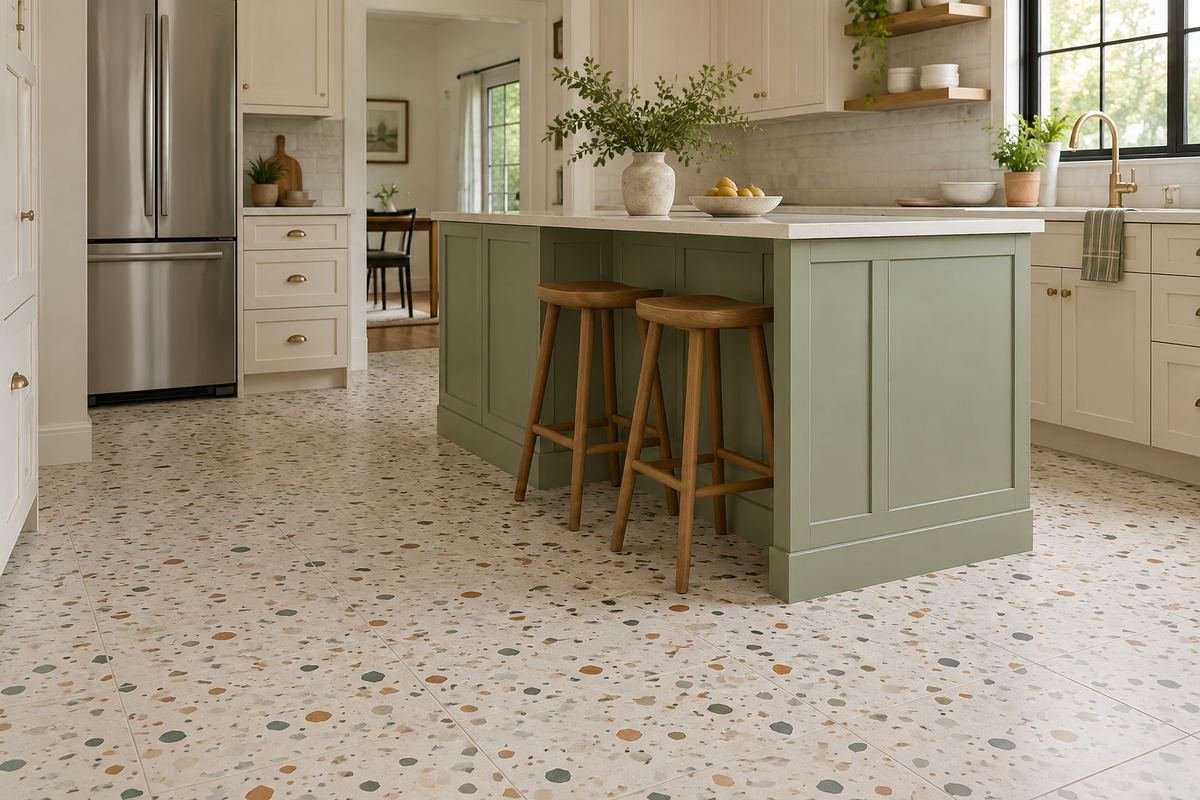
A terrazzo appearance can link a cabinet color, a warm counter and a small accent through one repeated floor field. Smaller restrained chips can feel quieter than a strongly contrasting large aggregate.
Look at several full tiles and identify the colors that will repeat most often. Avoid adding a new cabinet or wall accent for every chip. Verify the exact material and care requirements; a terrazzo appearance may come from different products with different instructions.
Practical tip: Choose one or two chip colors to connect to the room.
15. Try a cream-and-gray checkerboard
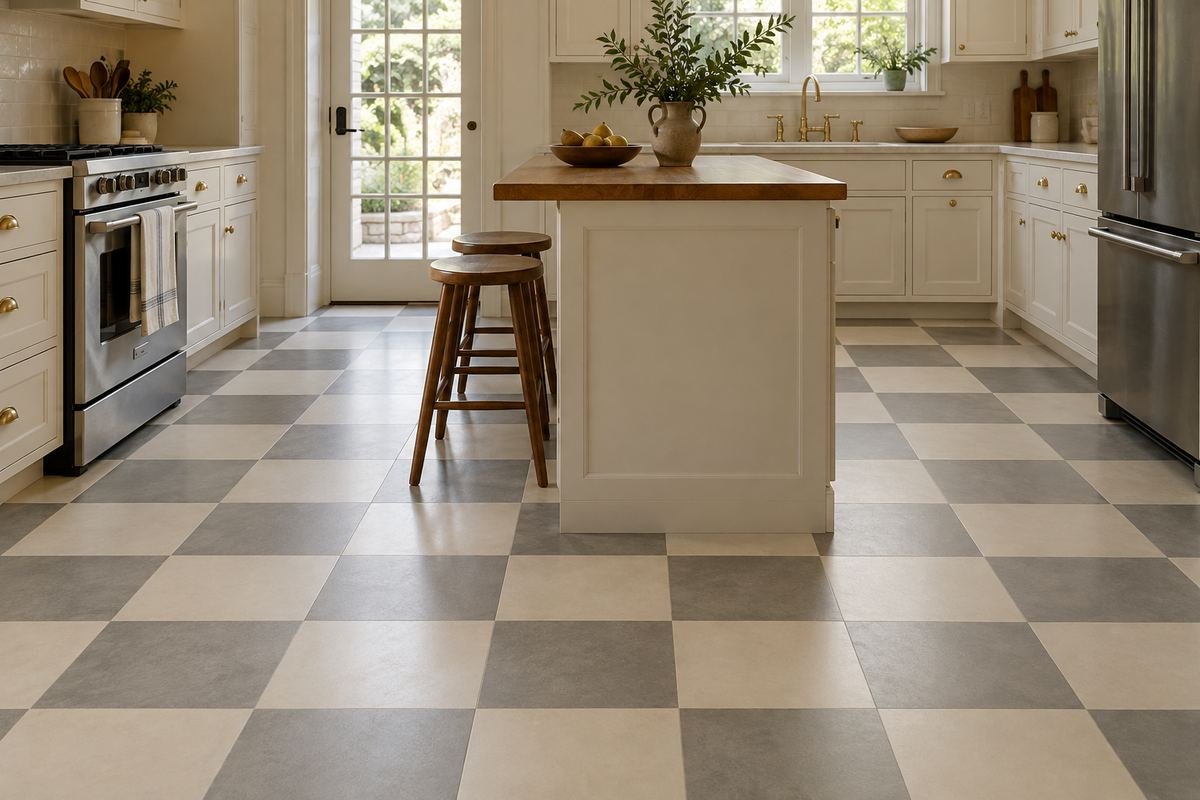
A checkerboard can give a kitchen a clear graphic foundation while remaining softer than a sharp black-and-white pairing. Cream and warm gray can work with restrained painted cabinetry.
Test the square size on a scaled plan with the cabinets and island included. The visible floor should show a readable pattern rather than mostly narrow edge fragments. Use compatible floor products and let the installer resolve the actual setting-out and junctions.
Practical tip: Review the pattern from the main entrance.
16. Use a diagonal square layout deliberately
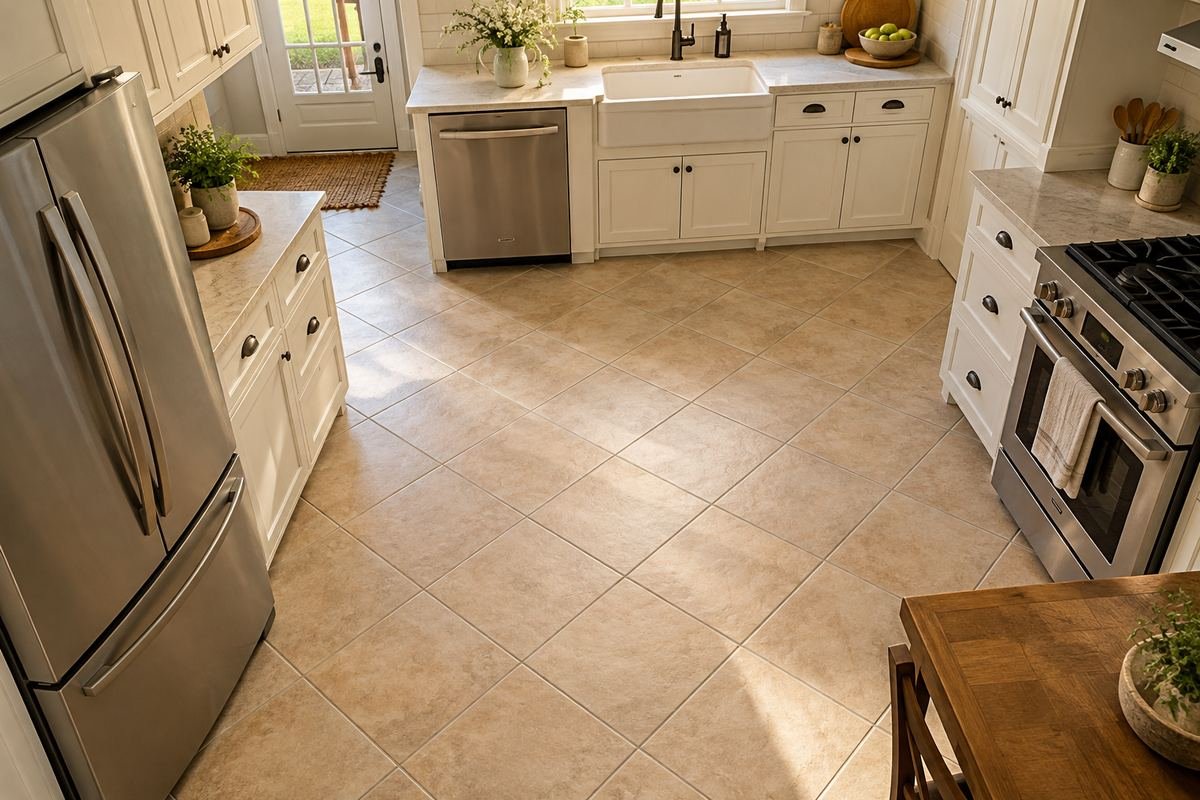
Turning a simple square pattern can give the floor a different relationship to the cabinet grid. It can suit a kitchen where you want modest movement without a highly decorative printed tile.
Compare straight and diagonal layouts on the same measured plan. Doorways and visible edge cuts matter as much as the central field. Discuss the resulting cuts and quantity with the installer rather than assuming the same order will suit either direction.
Practical tip: Compare two complete layouts before choosing the angle.
17. Make a small geometric repeat the only strong pattern
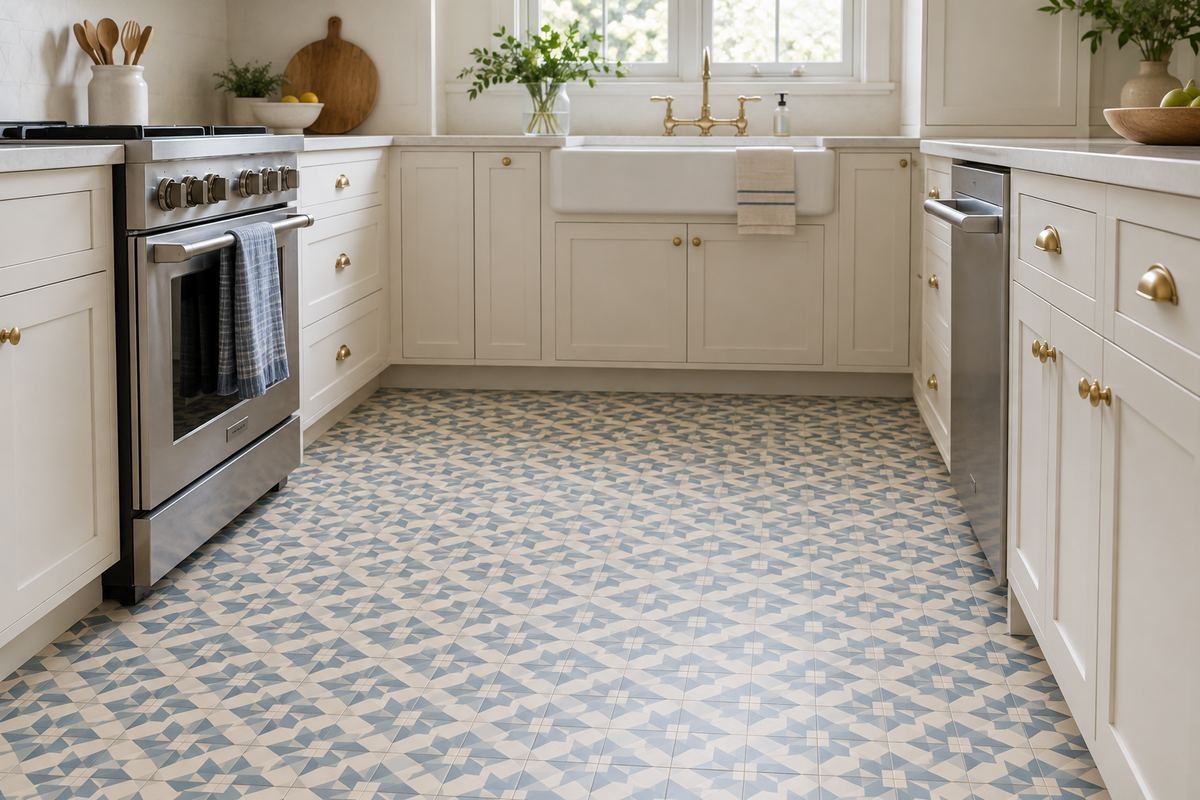
A controlled geometric floor can give a plain kitchen its identity. Keep the cabinets, counter and backsplash comparatively quiet so the repeat remains clear.
Review several connected tiles at the real scale. A pattern that looks delicate on a screen may be visually dense across a narrow aisle. Check where the motif meets the island, doorway and cabinet bases before finalizing the arrangement.
Practical tip: Judge a full repeat from standing height.
18. Use terracotta tones for a warmer palette
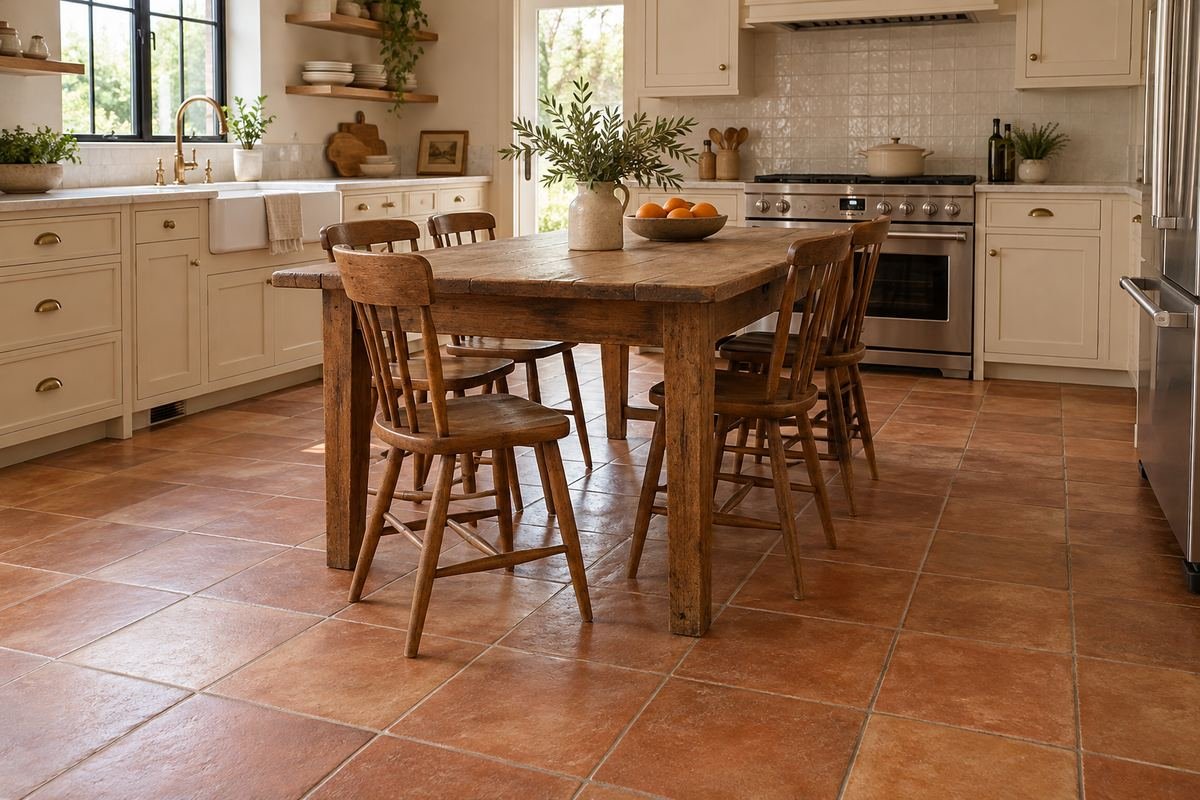
Terracotta tones can bring warmth beneath cream cabinets and simple natural wood. The effect can be supplied by different materials, so begin by deciding whether the color or a particular material is the priority.
Compare the range of tones and the actual surface care. Natural and manufactured products may have different requirements, and a photograph cannot establish sealing or cleaning needs. Keep the surrounding palette restrained while you assess the floor’s full variation.
Practical tip: Review the chosen material’s care before ordering.
19. Give slate-like variation enough visual space

A slate appearance can introduce darker mineral variation without a repeated graphic motif. Simple cabinet fronts and restrained wall finishes allow the floor’s tonal changes to remain the feature.
Compare enough pieces to understand the expected range. Check the actual texture, product suitability and cleaning requirements instead of assuming that a textured appearance guarantees grip or easy care. A very uneven-looking sample may deserve closer practical comparison in a busy kitchen.
Practical tip: Assess the real surface as well as its printed appearance.
20. Let white cabinetry meet a gentle off-white floor

An off-white floor can keep a pale kitchen visually connected while allowing the cabinet fronts to remain distinct. A slight difference in tone may look more deliberate than two whites that nearly match.
Compare samples vertically and horizontally in the room. Reflected light can change their relationship, and a floor sample on a table may not tell the same story. Include the grout or seam appearance in the comparison rather than judging only the center of the piece.
Practical tip: View the samples in their intended positions.
21. Choose a darker floor with a realistic cleaning test
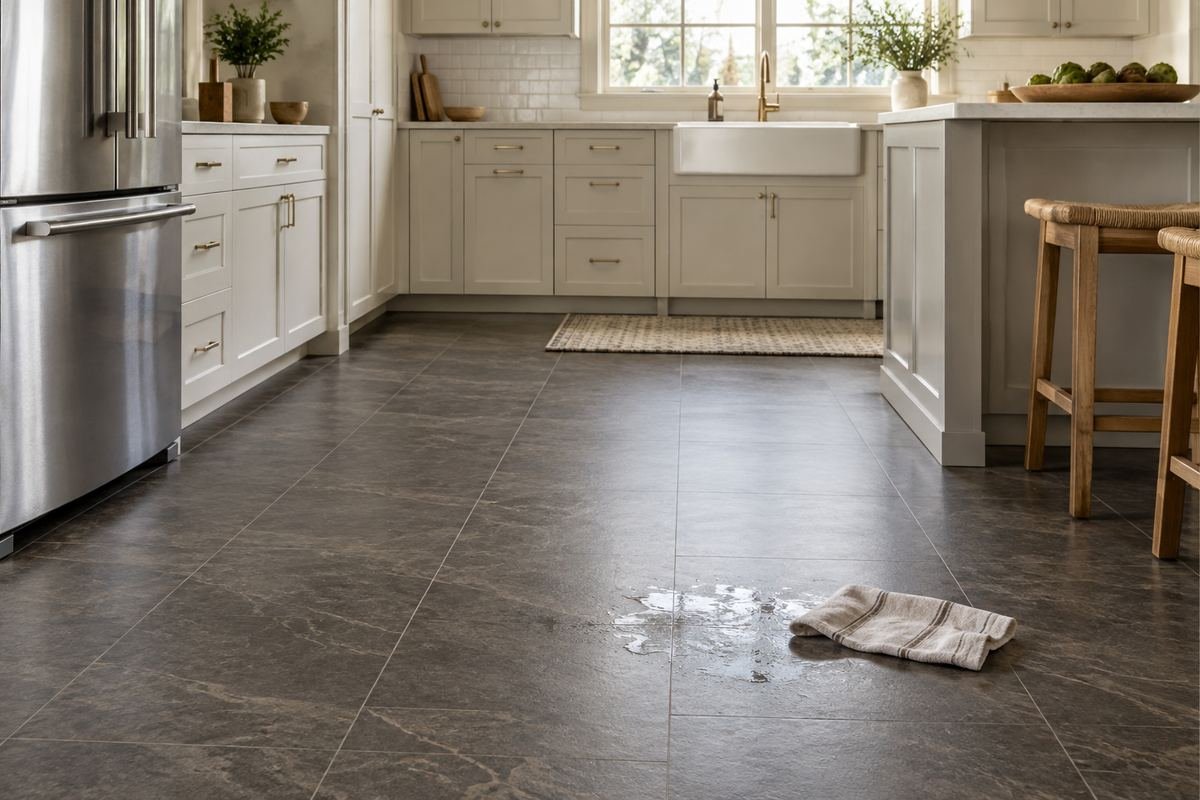
A deeper gray or brown floor can give a light kitchen a defined foundation. It can also make pale crumbs, dust or certain everyday marks easier to see.
Bring samples home and view them under the room’s normal light after ordinary use nearby. Choose a color because you like the complete relationship and can maintain it, rather than assuming darkness hides everything. Compare the surface finish and approved cleaning routine at the same time.
Practical tip: Judge real samples under evening task lighting.
22. Use a planned transition at the kitchen boundary

A considered change of flooring can define the kitchen within an open room. A straight, purposeful boundary often reads more clearly than a decorative edge that follows every cabinet or furniture shape.
Coordinate finished levels, the exact products and any required movement details with the installer. Locate the transition where it belongs to the architecture or a useful room boundary. A visual line should not introduce an awkward step or interfere with everyday movement.
Practical tip: Draw the junction in plan and section.
23. Coordinate grout with the intended floor rhythm

Close grout can let a tiled floor read as a broad field, while stronger contrast makes each piece more apparent. Either approach changes the pattern even when the tile stays the same.
Compare a physical mock-up with the actual tile and a suitable grout option. Review color, joint requirements and care with the installer. Do not use a digitally edited image of nearly invisible joints as a specification for the finished installation.
Practical tip: Approve a small physical tile-and-grout sample.
24. Review the floor beneath occupied island seating

The floor around stools needs to work with feet, chair movement and the route behind the seated person. A beautiful pattern will be interrupted by real seating, so include that ordinary view in the plan.
Test the actual stools and suitable floor protection for the selected floor. Check cleaning access and the area exposed when seats are pulled out. Choose the room’s working arrangement before deciding exactly where a border or floor feature should sit.
Practical tip: Mark the stools in both occupied and tucked-in positions.
25. Keep a useful mat within the complete floor plan
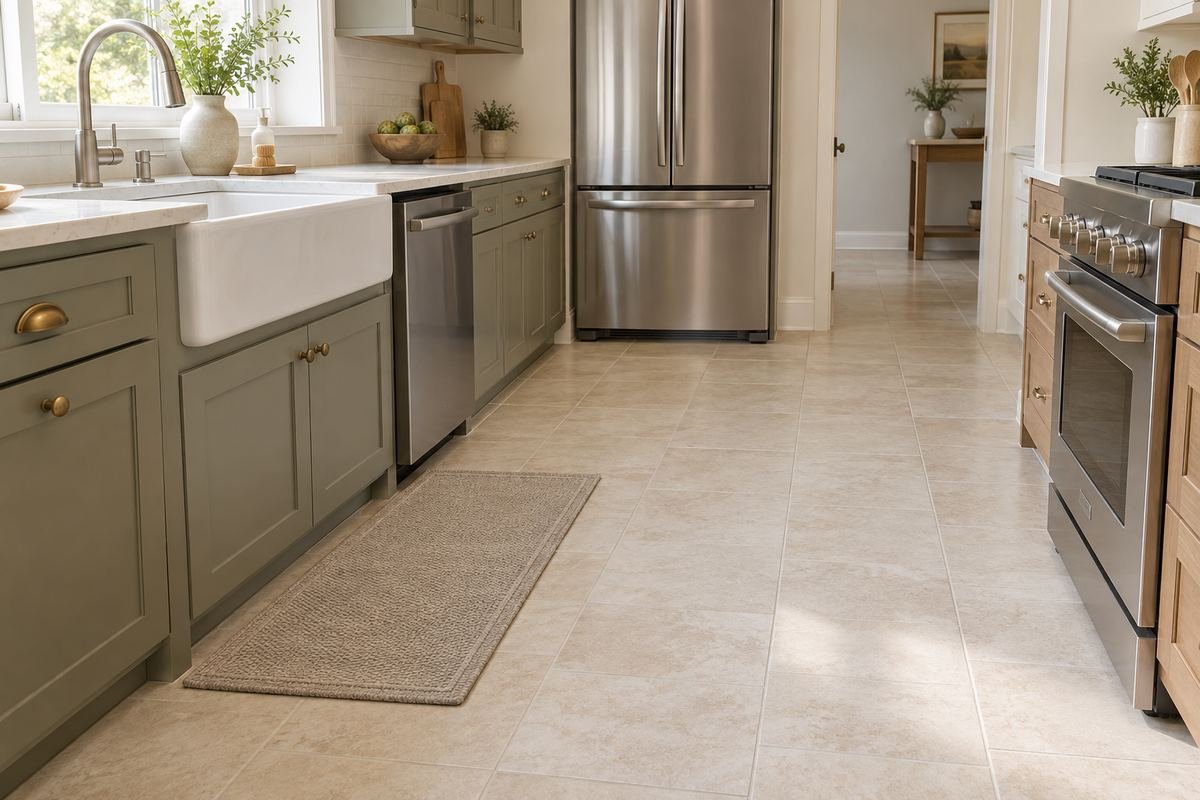
A well-chosen mat at a standing task can add a different feel underfoot without replacing the main floor. Its position should belong to the sink or preparation routine.
Check the mat and backing for compatibility with the selected floor and keep appliance or cabinet movement clear. Assess edges, cleaning and how the mat behaves during normal use. A decorative runner should not become an obstacle in a busy working aisle.
Practical tip: Test doors and the dishwasher with the intended mat in place.
26. Finish doorway and appliance details before ordering
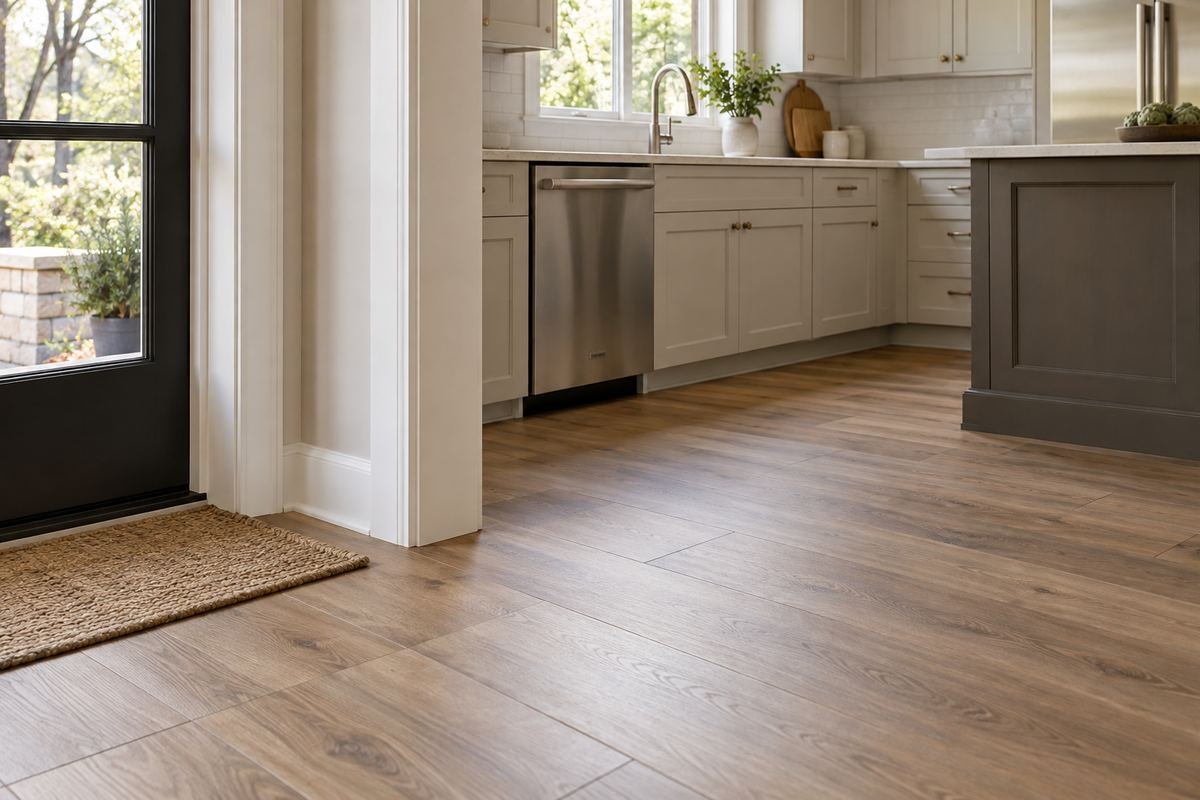
The doorway and appliance edges reveal whether a floor has been planned as part of the kitchen. A simple finish can look more complete when those everyday junctions are resolved.
Review the full floor build-up, door movement, appliance opening and service route with the relevant installer. Decide on the actual edge and transition pieces at this stage. Do not leave them as an improvised choice after the main surface is already installed.
Practical tip: Put each junction and appliance opening on the project checklist.
27. Keep a documented spare-material plan
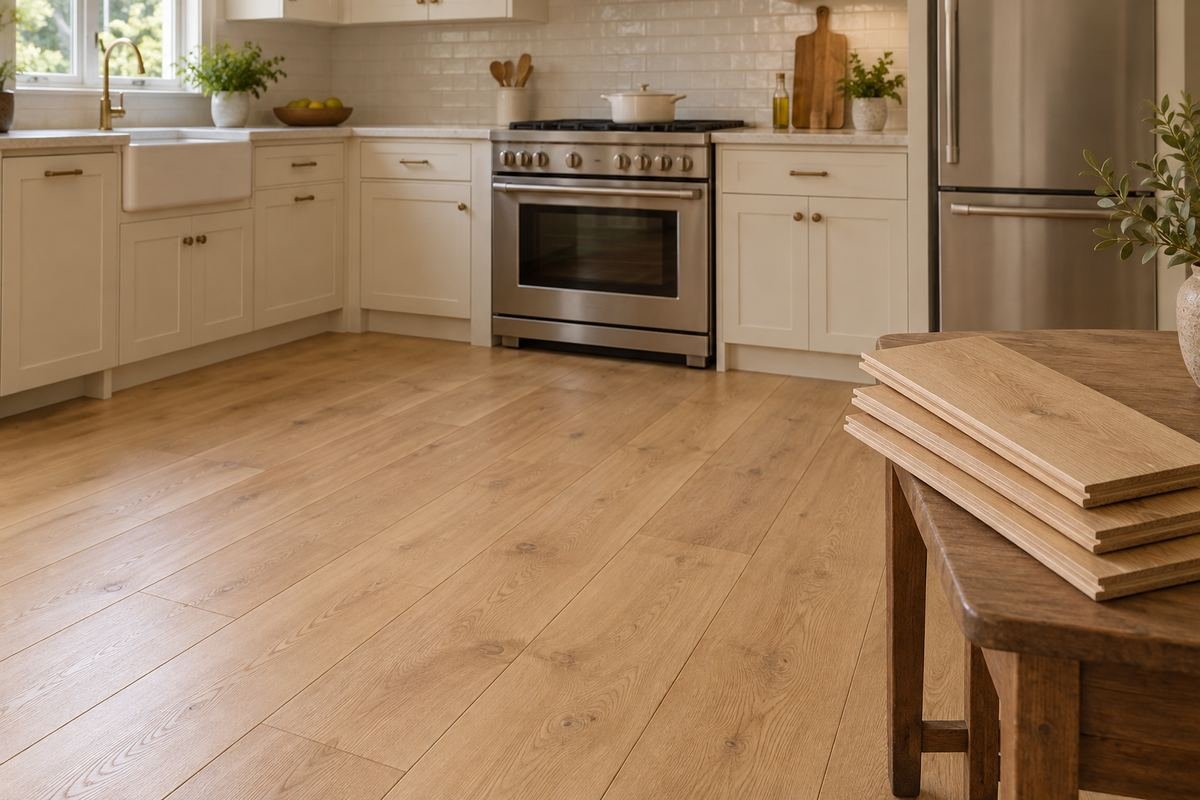
A useful flooring plan continues after the installation. Retaining appropriate spare pieces and product information can make a later repair or matching enquiry more straightforward.
Discuss the quantity and storage conditions with the supplier or installer. Record the product name, finish and batch information, and keep the approved care instructions accessible. The aim is a maintainable room with clear records, rather than a large unplanned pile of leftover material.
Practical tip: Save the product details with the kitchen project records.
Frequently Asked Questions
What is the best kitchen flooring material?
The best choice depends on the actual room, substrate, exposure, maintenance routine and budget. Compare complete products rather than relying on a material name. A useful shortlist includes the installation requirements and care instructions alongside the color samples.
Can wood flooring be used in a kitchen?
Consider the exact product’s approved use and instructions, then assess how the household handles spills and maintenance. Wood should not be treated as immune to water. Coordinate the proposed installation with the flooring professional and follow the selected manufacturer’s requirements.
Is all laminate waterproof?
No blanket claim should be made for the whole category. Read the exact product documentation, including the location, installation and warranty conditions. A water-related marketing description does not remove the need to clean spills or follow the specified details.
Should the kitchen floor match the adjoining room?
A continuous finish can connect rooms, while a considered transition can define the kitchen. Compare levels, product suitability, required movement details and the actual doorway or room boundary before making the visual choice.
Will a dark floor hide dirt?
Different colors reveal different marks. A dark sample may make light crumbs or dust more apparent, while a pale finish may show other everyday marks. View several samples under the kitchen’s normal lighting and choose a care routine you can maintain.
How much extra flooring should I order?
Base the order on a measured layout, cuts, pattern, product instructions and the supplier or installer’s advice. Do not apply one allowance to every kitchen. Discuss useful spare material and record the product and batch details.
Choose the Details That Work in Your Home
Narrow your kitchen flooring ideas to a few complete choices, then test each against the cabinets, counter, light and daily routine. Resolve the floor build-up and appliance access before the final visual decision. A considered floor earns its place through a coherent appearance, suitable product details and care that fits the way your household cooks and lives.
For related ideas, explore kitchen cabinet colors, kitchen countertop ideas, kitchen rug ideas.
Planning References
Shaw Floors: hardwood care and maintenance; Shaw Floors: laminate care and maintenance; Daltile: choosing floor tile. Follow the instructions for the exact products you choose.
Optional digital guide for this topic
If you prefer a structured workbook, explore this related paid guide.