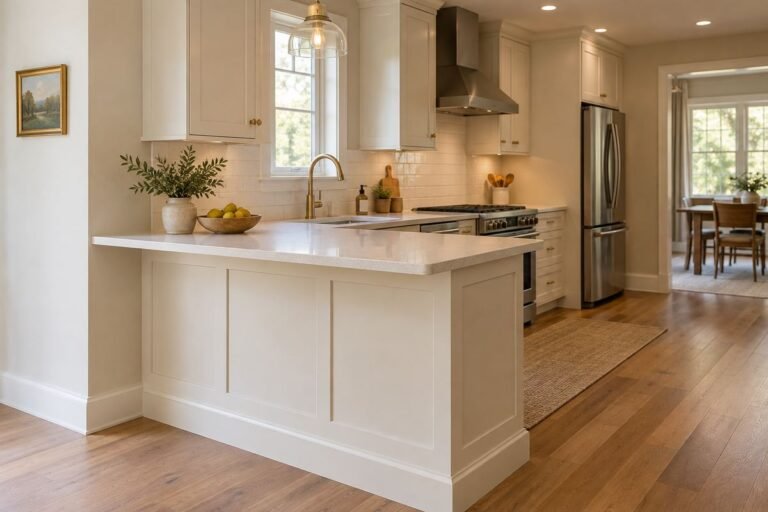
The most useful kitchen island seating ideas begin with the people who will sit there. A quick cup of coffee, a shared meal and a longer conversation place different demands on the seat, counter and space behind it. Choose the routine before choosing the row of stools.
Measure the usable seating portion of the island rather than its total length. End panels, support legs, drawers and appliances can all change where a person can sit comfortably. Include the occupied position and the movement needed to get in and out; a stool tucked neatly under the counter shows only part of the layout.
The 28 concepts below cover seating arrangements, stool forms and useful material pairings. They are visual options for a measured plan, not dimensioned layouts. For the island’s overall footprint and work aisles, use our separate island-sizing guide; this article focuses on what happens at the seating edge.
The images are original AI-generated decor concepts, not installation diagrams or photographs of completed client projects.
Browse These 28 Kitchen Island Seating Ideas
Jump to an idea
- Keep two seats generous on a modest island
- Use one straight row for a clear social edge
- Put a small pair at the island end
- Turn seating onto two adjacent sides
- Consider facing seats at a designed table-like end
- Connect a lower dining section deliberately
- Use a raised ledge only for a clear purpose
- Let a rounded end soften the seating composition
- Choose backless stools for a quiet tucked-in view
- Use low backs to define the seats gently
- Choose supportive backs for longer sitting
- Compare arms with the real counter underside
- Allow a swivel stool its full turning area
- Check an adjustable seat through its usable range
- Bring a woven texture into a quiet palette
- Use upholstery when the care routine fits
- Compare leather-like finishes by the actual material
- Let pale timber lighten a darker island
- Use darker timber as one controlled repeat
- Repeat a slim dark frame sparingly
- Add one muted seat color
- Mix materials within one coherent stool design
- Keep the route behind seated people clear
- Coordinate the seats with the useful light
- Make foot support part of the comfort test
- Leave a clear place to serve a meal
- Resolve drawers and seats together
- Finish with the seat count the room can use
Test kitchen island seating ideas in the occupied position
Record the finished counter height, clear underside, usable knee area, support positions and the actual stool’s width and depth. Add the route behind the seated person and open nearby appliances or drawers. Have the complete kitchen layout and counter support reviewed for the real project and applicable requirements. Do not turn a decorative overhang in an image into a structural or accessibility specification.
| Routine or feature | Measure or test | What to resolve |
|---|---|---|
| Quick coffee | Getting on and off the actual seat | Comfortable access and foot support |
| Longer meals | Seat, back and counter relationship | Support and usable dining space |
| Conversation | The direction each person faces | A layout that suits the group |
| Stool movement | Occupied, pulled-out and turning positions | The route and nearby fittings |
| Materials | Actual samples and care instructions | A finish that suits everyday use |
Counter stool and bar stool are different starting points
Room & Board distinguishes counter and bar table heights and the corresponding stool categories. Use those categories to begin shopping, then compare actual measurements: the counter underside, seat height, cushion compression, arms and footrest all affect the result. A product name alone cannot confirm a comfortable fit beneath your island.
Measure the complete stool, including the widest part
The Home Depot’s measuring guide asks buyers to record seat height and the widest part of a stool, including arms. That is useful because a narrow-looking seat can stand over a much wider base. Add the occupied movement to your measured plan and test an actual example where possible before ordering a full set.
Keep support and usable knee space in the same drawing
A support panel, bracket or leg can change the seating area even when the counter appears deep enough. Ask the designer or fabricator to show the support arrangement with the intended seats in place. NKBA’s current planning-guidelines collection includes dining seating, passageways, clear floor space and accessibility as related planning subjects. Have the complete arrangement reviewed rather than treating one attractive island image as a clearance standard.
Try one seat through a normal routine
If possible, borrow, sample or order one returnable example under the supplier’s actual policy before committing to the set. Sit for the sort of activity you expect: a brief drink or a meal. Check foot support, back comfort, the reach to the counter and the effort of moving the stool. Record what you learn so the final choice is based on use as well as appearance.
1. Keep two seats generous on a modest island

Two well-spaced seats can make a modest island useful without filling every available edge. The arrangement suits a shared coffee or a quick meal while leaving a clear portion of the counter for preparation.
Compare the usable knee area and support positions with both place settings. Avoid adding a third stool simply because its seat fits between the first two. The occupied arrangement should remain comfortable when each person turns or gets up.
Practical tip: Test the arrangement with the actual plates and stools.
2. Use one straight row for a clear social edge

A single row gives the island an understandable dining side while the opposite side remains associated with kitchen work. It can suit a room where conversation happens across the counter.
Review the view and reach from each position rather than judging only the centered photograph. Allow the end users a practical way to enter and leave, and keep the row separate from nearby appliance or drawer movement.
Practical tip: Draw every stool in its occupied position.
3. Put a small pair at the island end

End seating can create a compact conversational zone without lining the full long side of the island. It can suit a room where the main circulation route belongs elsewhere.
Check the actual end width, support and knee area for both people. A projecting countertop at the end is not automatically a dining surface for two. Review the occupied arrangement with the route around the corner before approving the plan.
Practical tip: Include the island’s end supports in the seating drawing.
4. Turn seating onto two adjacent sides
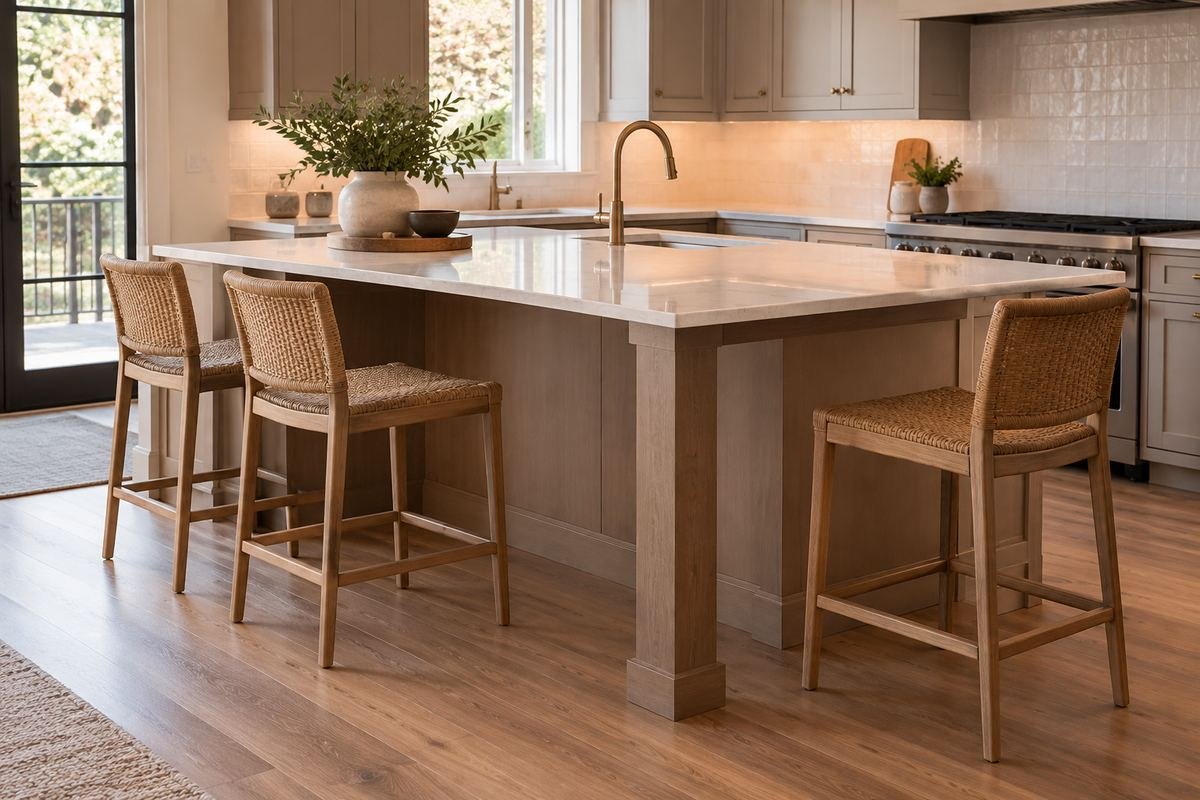
An L-shaped seating arrangement can let people face one another more easily than a long row. It can support conversation while preserving part of the counter for a different task.
Examine the shared corner carefully. The two nearest place settings and knee areas can overlap even when the stools look separated. Keep the number of seats realistic and have the complete layout checked with its counter support.
Practical tip: Test the corner with two occupied positions together.
5. Consider facing seats at a designed table-like end

A table-like island end can give a small group a face-to-face relationship. It is a different experience from sitting in a line and looking toward the working kitchen.
Plan both sides, the support base and the route into each position as one arrangement. Check that the dining extension does not consume the room needed around the main island. A visual furniture connection still needs a complete practical design.
Practical tip: Compare the extension with a separate small table alternative.
6. Connect a lower dining section deliberately

A lower connected table section can offer a different sitting experience from counter-height stools. It can help the island serve more than a quick perch when the room has enough usable area.
Choose the chairs and table dimensions with the actual users, and include the complete support arrangement. Review circulation and the connection to the higher counter. A change of height should have a clear purpose in the room rather than appear as an extra decorative tier.
Practical tip: Test the lower section with the intended dining chairs.
7. Use a raised ledge only for a clear purpose

A raised seating ledge can create a distinct perch when that height suits the household and overall kitchen plan. Its strongest role is a clearly defined sitting edge.
Compare the actual taller stools, approach and cleaning between the levels before choosing it. The added tier can interrupt serving and sightlines, so test whether it improves the routine. Review the ledge and support with the designer rather than assuming a raised edge is a simple add-on.
Practical tip: Compare the routine with a single-level counter before deciding.
8. Let a rounded end soften the seating composition
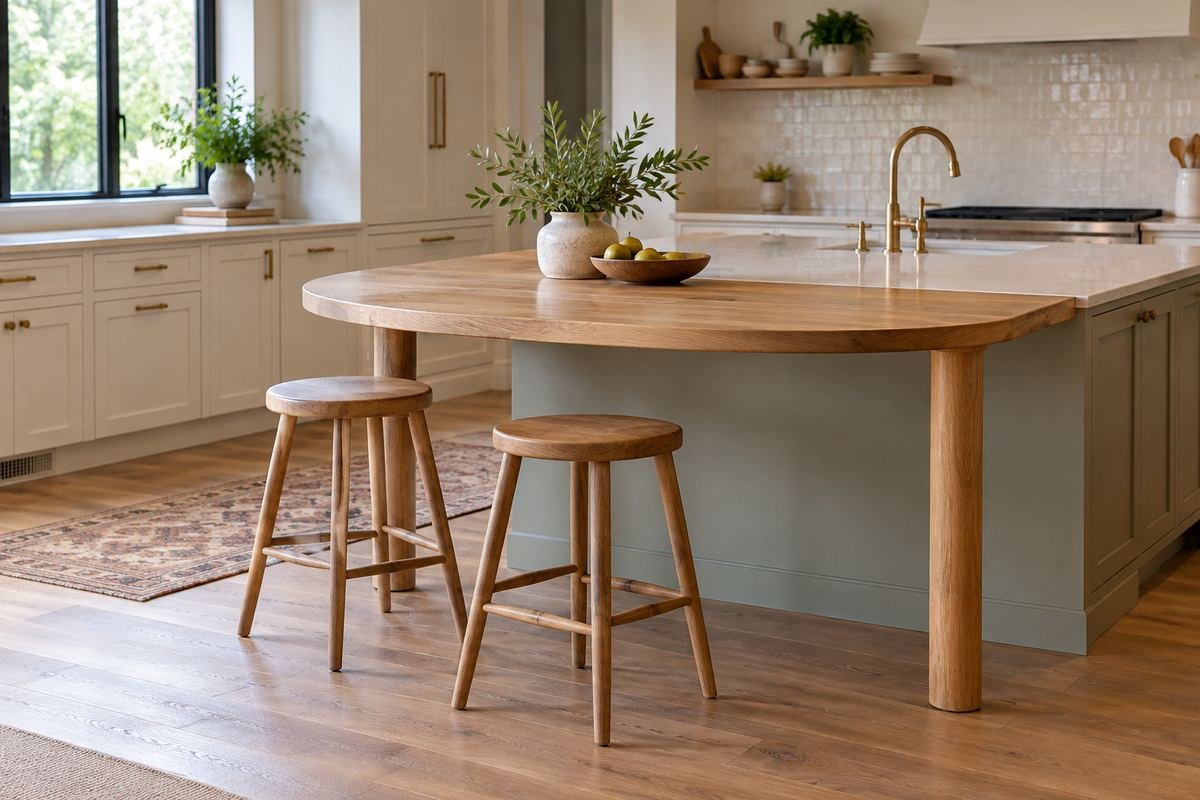
A rounded table-like end can give the seating area a different outline from the cabinet grid. It can make a small conversational grouping feel connected to the rest of the island.
Check usable place settings, knee space and the support position around the curve. The outer shape may be generous while the usable area beneath it is limited. Work from the actual drawing and chairs rather than inferring capacity from the curved outline alone.
Practical tip: Lay out real place settings on the proposed shape.
9. Choose backless stools for a quiet tucked-in view
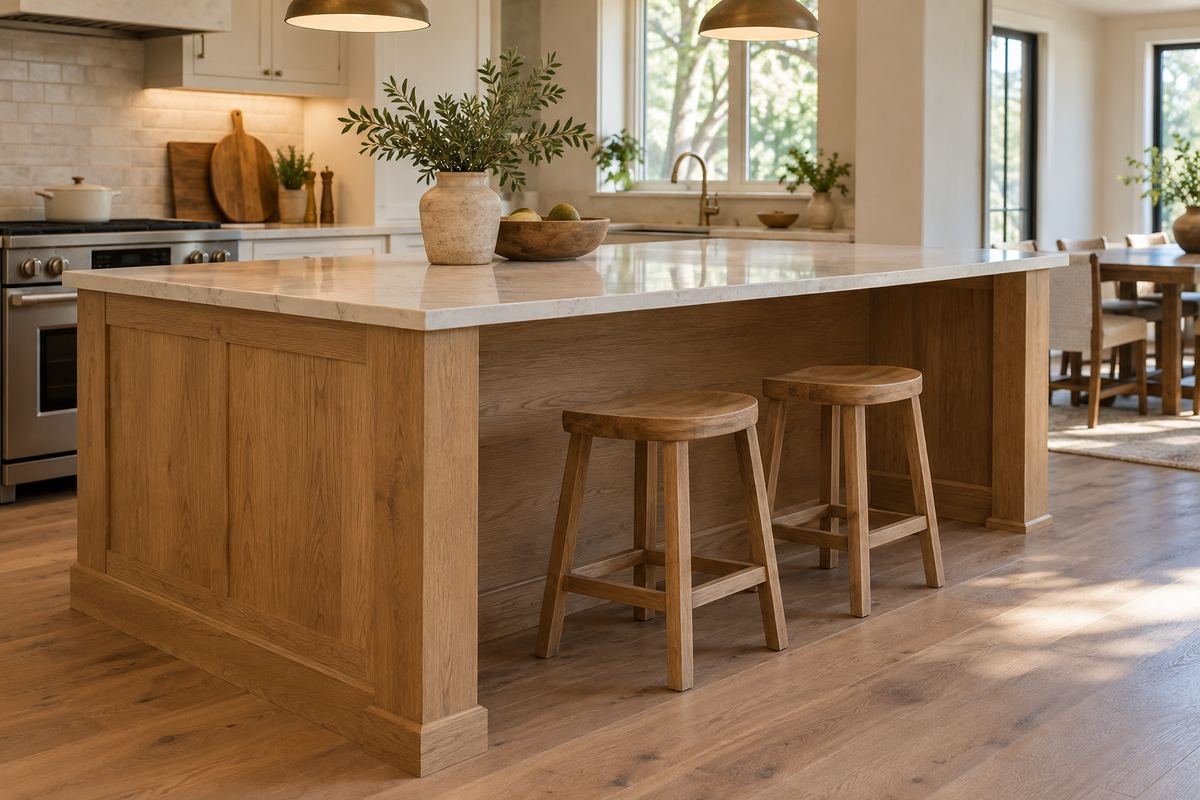
Backless stools can keep the island’s outline visually clear when they are stored beneath an appropriate seating edge. They suit a room where the counter or cabinetry is the main visual feature.
Try the seat for the intended activity before buying a full set. Check foot support, stability and how it is moved. A stool that disappears neatly in a photograph may still be uncomfortable for a longer meal or unsuitable for a particular user.
Practical tip: Assess sitting comfort as well as the tucked-in footprint.
10. Use low backs to define the seats gently

A low back can give each seat a clearer furniture form without creating a tall repeated barrier across the room. It can suit a kitchen seen directly from the living area.
Compare the actual back support and seat depth rather than judging height alone. Check whether the stool can be moved comfortably and whether its widest part affects spacing. The best silhouette still needs to work with the users and counter.
Practical tip: View the group from the adjoining room before ordering.
11. Choose supportive backs for longer sitting

A stool with a more substantial back may suit a place used for meals or extended conversation. It can make the island feel more like a regular sitting destination.
Try the actual seat and consider how its larger form affects the route. Back height alone does not establish comfort; the seat, angle, footrest and counter relationship all contribute. Keep the number of seats realistic for their full dimensions.
Practical tip: Test one example for the length of an ordinary meal.
12. Compare arms with the real counter underside

Armed counter chairs can give the island a more substantial furniture presence. They may suit a room where the seats are intended for regular use and comfort is a priority.
Measure the widest part and check whether the arms can pass beneath the counter or must remain outside it. Include that position in the route drawing. A chair that looks tidy from the front may stand farther into the room than a simpler stool.
Practical tip: Measure the complete chair before assigning the seat count.
13. Allow a swivel stool its full turning area

A swivel stool can change how a person joins a conversation or enters the seat. It can suit an island that connects to more than one part of an open room.
Test the full rotation beside the counter and neighboring stools. Check the actual base footprint and product instructions, including movement and return behavior if provided. Turning seats need their own space; they should not be used to justify an otherwise crowded arrangement.
Practical tip: Include the turning envelope on the measured plan.
14. Check an adjustable seat through its usable range

An adjustable stool can be worth comparing for an unusual counter or a household with different preferences. Its usefulness depends on the actual range and the comfort of the complete seat.
Try the mechanism and foot support in the positions you expect to use. Check the base, instructions and stability for the intended users. A height adjustment cannot correct inadequate knee depth, an obstructing counter support or a crowded route behind the chair.
Practical tip: Test the actual counter relationship at the chosen setting.
15. Bring a woven texture into a quiet palette

A woven seat or back can add texture to an island with plain cabinetry and a simple counter. A limited natural tone can connect with a timber floor without matching every wood surface.
Examine the actual weave, edges, comfort and cleaning instructions. Keep food use and household routines in mind rather than choosing texture only for the photograph. Compare the seat with the counter and footrest as a complete sitting arrangement.
Practical tip: Check the supplier’s care instructions for the exact weave.
16. Use upholstery when the care routine fits

An upholstered seat can give island seating a softer furniture character. It can work well when the island is used for longer meals and the room needs a quieter material beside hard surfaces.
Compare the exact fabric or upholstery sample with its cleaning instructions and intended use. A performance label should not replace the actual care information. Review seams, cushion comfort and the ability to move the chair before selecting a full set.
Practical tip: Test the upholstery sample beside the kitchen finishes.
17. Compare leather-like finishes by the actual material

A smooth leather or leather-look seat can provide a contrasting texture beside painted cabinets. A warm brown tone can connect an island with nearby timber furniture.
Identify the actual material before choosing a cleaning routine or making assumptions about wear. Genuine leather, coated materials and synthetic alternatives have different product instructions. Look at the finish, stitching and care information alongside the seat’s comfort and dimensions.
Practical tip: Record the material name rather than shopping by appearance alone.
18. Let pale timber lighten a darker island
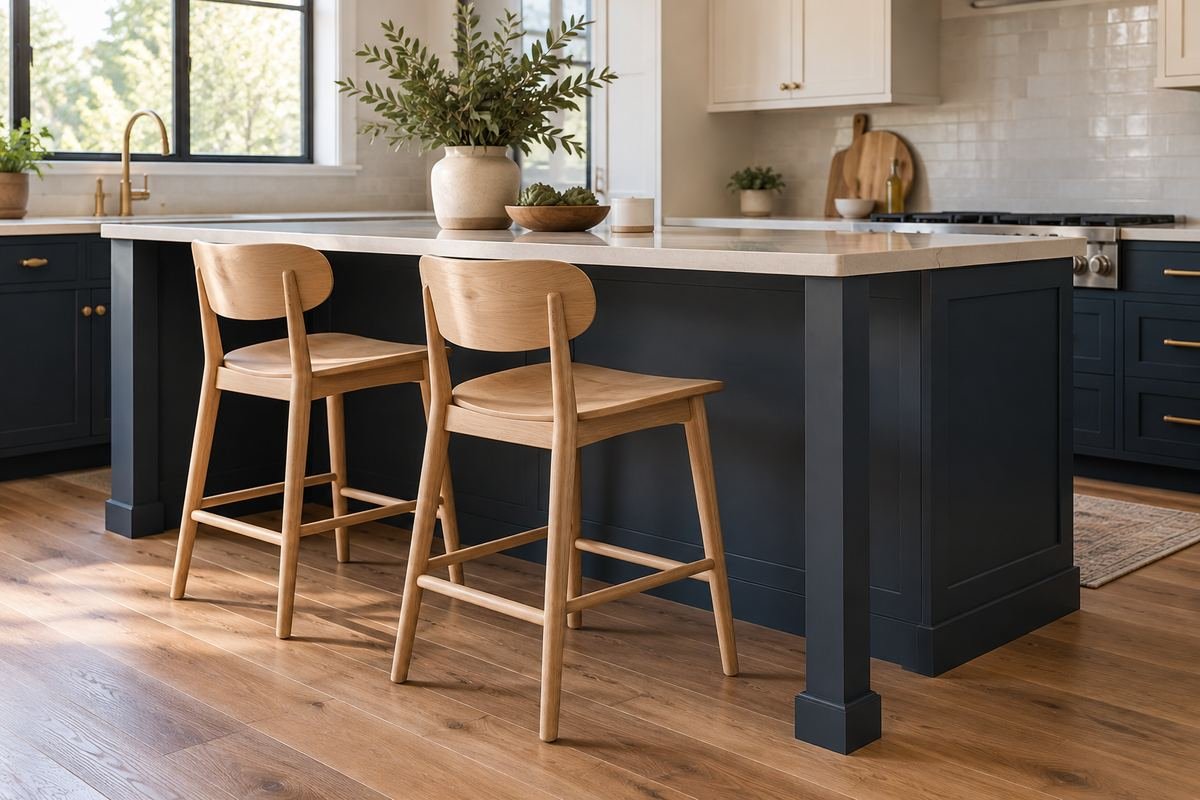
Pale timber stools can give a deep-colored island a clear lighter outline. The contrast can be enough to define the seating area without several added accent colors.
Compare the wood tone with the floor and any adjacent table. Keep the shape restrained if the island panels are already detailed. Choose the actual seat for comfort first, then assess how the repeated group looks from the room’s main entrance.
Practical tip: Review the stools as a group with the island color.
19. Use darker timber as one controlled repeat

Darker timber seating can connect a pale island with another warm furniture element in the room. It can make the seats feel deliberate without changing the cabinets.
Choose one useful relationship, such as a dining table or shelf, instead of trying to match every wood tone exactly. Compare the actual samples in the room’s light. A substantial dark frame also needs enough spacing to remain visually and physically comfortable.
Practical tip: Keep the surrounding accessories restrained while comparing the woods.
20. Repeat a slim dark frame sparingly

A restrained dark metal frame can relate to existing hardware or a simple light fixture. It gives the seating a clear outline while allowing a lighter seat surface to remain the main material.
Check the complete base dimensions and footrest rather than assuming a visually thin frame occupies little floor space. Confirm suitable floor protection for the actual flooring and product. The repeated dark lines should connect the room without making every fitting an identical accent.
Practical tip: Compare the frame footprint with the usable seating area.
21. Add one muted seat color

A muted colored seat can introduce a small accent when the island and surrounding cabinets are neutral. Repeating the same color across a modest group keeps the composition understandable.
Compare the sample with the existing floor, counter and evening light. A stool color seen only in a bright product photograph may look much stronger in your kitchen. Let the seat carry the accent before adding several matching decorative objects to the counter.
Practical tip: View a physical finish sample in the actual room.
22. Mix materials within one coherent stool design

A timber seat on a simple metal frame can connect two existing finishes without making the island seating look mismatched. The repeated design provides unity while the materials add contrast.
Compare the complete seat’s comfort, surface care and proportions. Two attractive materials do not compensate for an awkward footrest or a seat that sits poorly beneath the counter. Keep the combination limited enough that the island remains easy to read from the adjoining room.
Practical tip: Test the assembled stool rather than choosing materials separately.
23. Keep the route behind seated people clear

The space behind a stool belongs to the occupied room, not to the empty photograph. A useful seating layout allows the household’s normal movement while people are actually sitting there.
Map nearby doors, cabinets and passage routes with the actual seats pulled out. Ask the designer to review the relevant clearances and household needs. If the arrangement only works with every stool tucked in, reconsider the seating count or location before buying.
Practical tip: Test circulation with the intended seats in use.
24. Coordinate the seats with the useful light

Seating and lighting should serve the same everyday arrangement. A restrained overhead composition can connect the group visually without requiring a fixture directly above every chair.
Check the view, glare and usable counter light from the sitting position. Have fixture placement and electrical work assessed for the actual room. Keep decorative lighting decisions connected to the occupied seats and working counter rather than treating the centered ceiling view as the whole design.
Practical tip: Review the lighting from the actual seat height.
25. Make foot support part of the comfort test

A footrest is part of the sitting experience at a raised counter. Its position can make the difference between a stool that looks right and one a person wants to use for a meal.
Try the actual seat and footrest with the intended users where possible. Check the relationship to the counter and the ease of getting on and off. Avoid selecting by seat height alone while treating the lower frame as a purely decorative detail.
Practical tip: Include feet and posture in the trial rather than testing the seat briefly.
26. Leave a clear place to serve a meal

Island seating becomes more useful when the counter has room for an ordinary plate and drink without moving a large decoration. A simple serving area can be shared with preparation when the routine is planned.
Set out the actual items you use and compare their reach from the seat. Keep serving pieces separate from active cooking or washing tasks as appropriate to the layout. Choose a modest decorative piece that can be moved easily if the counter serves several purposes.
Practical tip: Test a normal place setting before adding counter decor.
27. Resolve drawers and seats together

A drawer or cabinet on the seating side can look useful until a stool prevents it from opening. The storage and seating should be reviewed in the same plan.
Check handles, open fronts and the actual position of the occupied chair. Decide whether access is needed while people are sitting or only at other times. Relocate a seat or revise the storage arrangement if everyday use becomes a repeated furniture-moving task.
Practical tip: Test the most frequently used drawer with the stools in place.
28. Finish with the seat count the room can use

The final arrangement may need fewer stools than the first inspiration photograph. A clear, comfortable pair can serve the household better than a crowded group included only to fill the counter.
Repeat the occupied test after choosing the actual products and place settings. Review conversation, serving, circulation and the approach to each seat together. Keep the positions that support the room’s real routine, then let the remaining counter stay useful and visually calm.
Practical tip: Make the final count a result of the use test.
Frequently Asked Questions
How many stools should I place at an island?
Start with the usable seating length, supports, actual stool dimensions and occupied movement. Test the arrangement with place settings and people where possible. The total island length alone does not establish a comfortable seat count.
Should island stools have backs?
A back may be useful for longer sitting, while a backless form can create a quieter view when tucked in. Compare comfort, movement and the actual users. Appearance and a small footprint do not guarantee that a seat will suit the intended routine.
Can a swivel stool save space?
It may change how a person gets into the seat, but its turning envelope also needs room. Test the actual product beside the counter, adjacent stools and nearby cabinetry. A swivel mechanism does not remove the need for circulation space.
Can I put seating around an island corner?
Compare both people’s knee space, place settings and access at the corner. Two seats on different edges can compete for the same area. Review the measured layout and support arrangement before assigning both positions.
Can a lower table section be connected to an island?
It can be a useful design option when the complete arrangement suits the household and room. Plan its actual height, support, chairs and circulation with the designer. Do not assume that a lower surface alone makes a space accessible.
How can I make island seating look calmer?
Choose a limited set of materials and a realistic number of seats. Let the stools relate to one existing finish rather than matching every surface. Keep everyday place settings and the occupied layout in the final review.
Choose the Details That Work in Your Home
Choose kitchen island seating ideas by deciding who sits there, for how long and how the room works around them. Test the actual stool at the actual counter, then refine the materials and color. A smaller well-considered group can provide more useful seating than a crowded row that looks complete only while every stool is pushed in.
For related ideas, explore kitchen island sizing checks, kitchen pendant lighting, kitchen island decor ideas.
Planning References
Room & Board: counter and bar table height categories; The Home Depot: how to measure stools; NKBA: current kitchen and bath planning-guidelines collection. Follow the instructions for the exact products you choose.
Optional digital guide for this topic
If you prefer a structured workbook, explore this related paid guide.