Potting shed ideas should solve the whole room: how supplies arrive, where work happens, what stays dry and how everything leaves again. A pleasant window and a handsome workbench help, but the doorway, floor route and storage conditions determine whether the space is useful during an ordinary gardening session.
These 24 concepts cover planning and organizing a modest garden workspace. They are not shed construction plans or a promise that an unheated building can raise or overwinter every plant. Confirm siting, permissions, product requirements and the intended structure before buying or changing it.
Contents
- 1. Connect the shed to the route used for garden work
- 2. Give a narrow shed one clear working side
- 3. Choose the doorway around the largest ordinary item
- 4. Put the main preparation area in useful daylight
- 5. Separate a glazed growing bay from dry storage
- 6. Use an opaque wall for the main inventory
- 7. Keep a continuous floor route through the room
- 8. Keep long-handled tools in one suitable rack
- 9. Give small hand tools a visible return position
- 10. Keep heavy retained supplies reachable and low
- 11. Reserve a dry ready-pot section
- 12. Put returning used items near the entrance
- 13. Leave a proper drying destination after cleaning
- 14. Provide a parking place for the watering equipment
- 15. Use shelf spacing that fits the retained objects
- 16. Give seed packets a temporary planning position
- 17. Keep regulated garden products in their correct storage
- 18. Park the garden cart outside the working position
- 19. Leave windows and opening hardware reachable
- 20. Plan ventilation as part of the actual building
- 21. Leave access to inspect walls and floor edges
- 22. Add a small dry place for notes and planning
- 23. Connect the exterior to the garden with one restrained finish
- 24. Review the whole shed at the seasonal changeover
Plan potting shed ideas around the whole building
UF/IFAS recommends deciding how a shed will be used, checking applicable permits and homeowner rules, and reviewing the actual storage inventory before choosing its size and location. Draw the approach, doors, working position and retained supplies together. For individual bench details, use the linked potting-bench guide; this article focuses on the complete enclosure and its routes.
Choose a room priority before adding storage
- A narrow building: Keep one useful working side and a clear route.
- Regular cart use: Compare the full doorway and turning space.
- A glazed growing bay: Plan plant conditions separately from dry storage.
- Many returning used pots: Provide a distinct incoming and care destination.
- Seasonal supplies: Review product conditions and quantities before filling shelves.
1. Connect the shed to the route used for garden work

A useful potting shed begins outside the door. Compare the route from the beds, supply storage and water source with the way you actually carry pots. An attractive remote corner can become inconvenient if every task starts with a difficult journey. Keep the chosen route practical through the seasons, and resolve the siting and permission requirements before selecting a structure.
Try this: Carry an empty pot along the proposed approach before fixing the location.
2. Give a narrow shed one clear working side

In a narrow room, a single main working side can leave the remaining width useful for movement. Measure the complete working position, including the person, carried containers and projecting handles. Filling both walls may reduce the usable room more than expected. Choose the inventory that fits the actual plan rather than buying a shed to store an unreviewed collection.
Try this: Mock up the occupied working area, not just the furniture footprint.
3. Choose the doorway around the largest ordinary item

Compare the actual door opening with the largest item regularly carried in and out. Include handles, turning space and the position used to close the doors afterward. Wider-looking doors in a photograph do not establish a usable fit. Keep storage out of the opening and select a complete structure appropriate to the site and intended use.
Try this: Measure the cart or container at its widest point before comparing doors.
4. Put the main preparation area in useful daylight

A window-side preparation area can make labels, tools and the potting task easier to see. Observe glare, seasonal sun and the actual work position rather than assuming that every glazed wall is helpful. Keep the window accessible for opening and care. Daylight for a person is also different from the controlled conditions needed to raise particular plants.
Try this: Compare the work surface at the times you usually use the garden.
5. Separate a glazed growing bay from dry storage
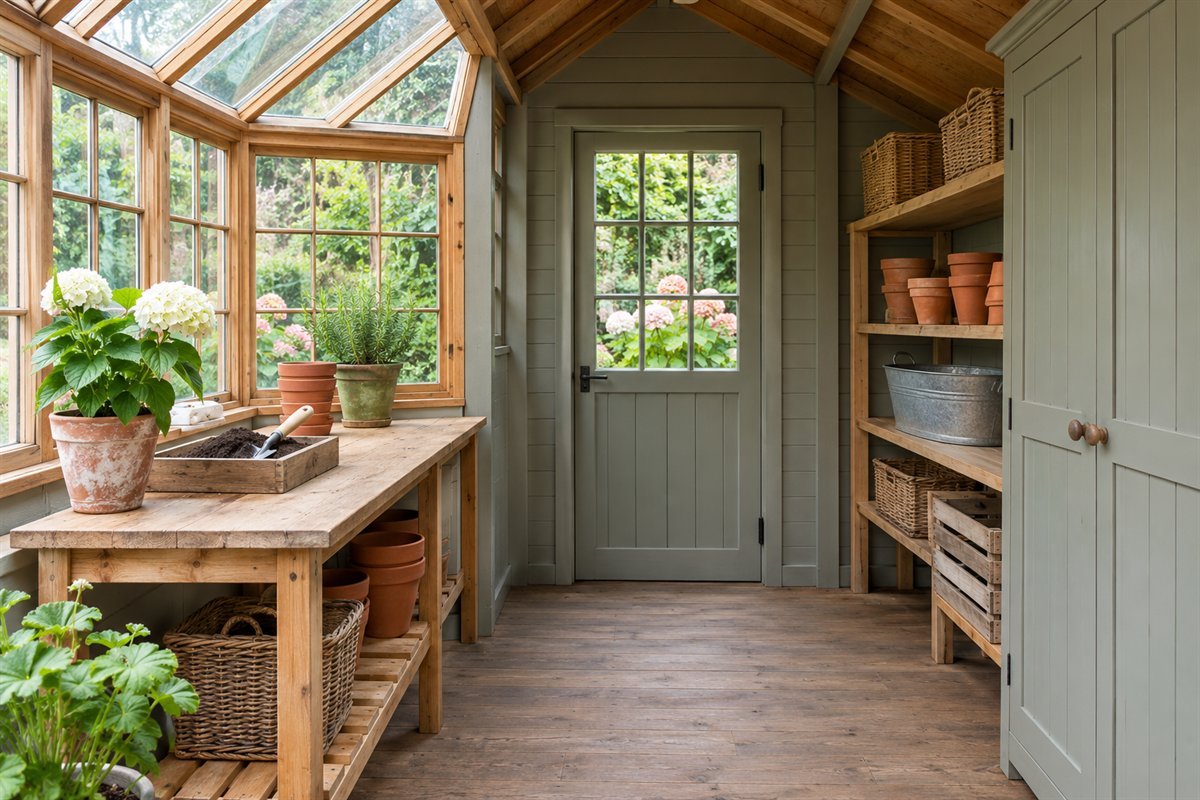
A potting-shed and greenhouse combination needs two distinct plans: one for the work and supplies, another for the plants. Assess light, temperature, ventilation and care for the actual growing bay. Do not assume that adding glass turns an ordinary storage building into a suitable year-round growing space. Keep supplies with different storage requirements out of that bay.
Try this: List the plant conditions separately from the storage inventory.
6. Use an opaque wall for the main inventory

A solid wall can hold the storage focus while the glazed area remains useful for light and access. Group the inventory by the way it leaves the room: potting supplies, ordinary tools and seasonal equipment. Leave space to see and remove one item. Check the shelving instructions and suitability rather than treating any attractive wall as ready for loaded brackets.
Try this: Assign the wall from a measured inventory before adding shelves.
7. Keep a continuous floor route through the room

The floor route needs to work while a task is in progress, not only when the shed is tidy. Include a person turning with a container and the position of open storage doors. Keep loose bags, trailing equipment and temporary pots out of the route. If a session always occupies the passage, reduce the retained group or reconsider the arrangement.
Try this: Walk the room with a typical carried item before filling the shelves.
8. Keep long-handled tools in one suitable rack

A defined rack prevents long handles from occupying several unrelated corners. Choose a suitable system for the actual tools and household, with removal that does not disturb the rest of the collection. UF/IFAS recommends cleaning tools and storing them dry. Keep this group separate from the immediate potting surface so retrieving a rake does not interrupt a small planting task.
Try this: Remove each regular tool once with the complete group in place.
9. Give small hand tools a visible return position

A few frequently used hand tools can have a clearly recognizable return position near the exit. Keep the group small enough to review and appropriate for the household. Compare its storage with the tools’ care requirements rather than putting everything in a wet bucket. A visible empty space can also make a missing regular tool easier to notice.
Try this: Keep the ordinary task set separate from rarely used equipment.
10. Keep heavy retained supplies reachable and low

Place heavier supplies where handling is realistic for the person using them and the support is appropriate. Avoid a layout that requires lifting a heavy bag over the worktop to reach something else. Keep product identity and storage instructions with the contents. Review quantities before planning storage; a smaller useful reserve may serve the garden better than a large difficult-to-move stockpile.
Try this: Plan the complete lift and return route before assigning the shelf.
11. Reserve a dry ready-pot section

Ready pots should have a clear destination after their appropriate cleaning and drying. Group the sizes the garden actually uses and keep each small group removable. Leave extra room for irregular shapes instead of forcing them into tall nested stacks. The main benefit is knowing which containers are ready without sorting the whole collection at the start of every task.
Try this: Keep a small usable reserve and review duplicate sizes.
12. Put returning used items near the entrance

An incoming position near the door makes the next care step visible. Keep returning tools and pots apart from the ready collection until they have been dealt with appropriately. Minnesota Extension explains that soil and debris can carry plant pathogens. A tidy stack alone does not establish readiness, so connect this position to a cleaning routine rather than letting it become permanent overflow.
Try this: Keep the incoming group small enough to clear through an ordinary session.
13. Leave a proper drying destination after cleaning

Plan where cleaned items can dry according to their materials and the relevant gardening guidance. Spacing can make the group easier to inspect than immediately nesting damp pots. Choose a suitable stable destination that does not block the door or contaminate the ready area. Drying is a stage in the routine, not a substitute for the correct cleaning process.
Try this: Decide where the wet group goes before starting cleanup.
14. Provide a parking place for the watering equipment

Watering equipment often has a larger footprint than its base suggests. Include the handle, spout and the way a hose is retrieved. Give the group a clear return position outside the walking route and away from supplies that must stay dry. Plan the actual water access separately; a decorative sink or hose in an image is not an installed service.
Try this: Check the full carried shape against the doorway and storage gap.
15. Use shelf spacing that fits the retained objects

Different objects need different gaps, and a row of identical compartments can waste useful space. Compare the retained pot and tray sizes before selecting adjustable or purpose-made shelving. Keep the exact support, assembly and use instructions central. Open space between groups makes retrieval easier and gives you room to inspect the structure and stored items.
Try this: Measure the tallest useful item in each storage group.
16. Give seed packets a temporary planning position

The shed can be a place to plan a sowing task without becoming permanent seed storage. Bring out the needed packets and return them to conditions appropriate to the seeds. Minnesota Extension recommends cool, airtight storage for leftover packets. Record what was used before returning the case, and do not assume an unconditioned shed stays cool and dry enough throughout the year.
Try this: Write the seed-storage return destination on the task list.
17. Keep regulated garden products in their correct storage

Match any fertilizer, pesticide or cleaning-product storage to its actual label and household requirements. Keep products identified and in their required containers; decorative matching jars can remove essential information. Do not combine all products merely because they are used in the garden. If the shed cannot provide the specified conditions and access control, choose an appropriate separate storage location.
Try this: Review the labels before assigning a cabinet or shelf.
18. Park the garden cart outside the working position

A cart can make moving supplies easier but still needs a useful destination between trips. Compare the complete parked shape with the working position and door movement. Keep its bay clear enough that the cart can leave without unpacking several pots first. If it occupies the central route, reassess whether it belongs inside the shed at all.
Try this: Check the cart in both its parked and moving positions.
19. Leave windows and opening hardware reachable
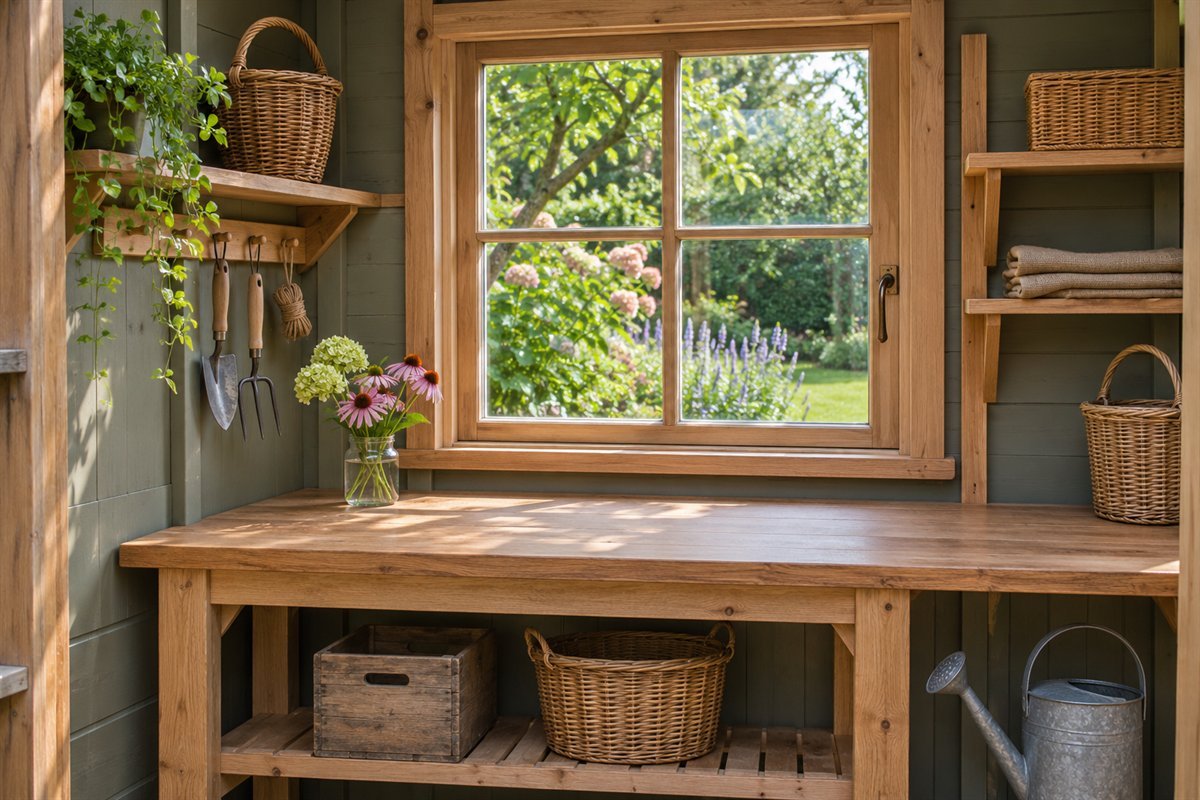
A storage plan should preserve access to the windows and their normal operation. Keep tall pots and shelves from occupying the opening sweep or concealing a damaged edge. Include cleaning and inspection access in the layout. A window that can be seen but cannot be reached is less useful than it appears in an empty-room photograph.
Try this: Test the intended opening with the proposed storage in position.
20. Plan ventilation as part of the actual building

Ventilation needs depend on the structure, use, climate and any plants or products present. Compare the actual building guidance and seek appropriate advice for changes. Keep intended openings usable rather than filling every wall with storage. An open door in a photograph does not prove adequate ventilation for chemical use, powered equipment or a growing environment.
Try this: List the intended uses before deciding what ventilation the building needs.
21. Leave access to inspect walls and floor edges

A narrow inspection gap can be more useful than another row of pots pressed against a wall. Keep building edges and vulnerable areas accessible for the care recommended by the maker. Investigate moisture or damage rather than covering it with an organizer. The appropriate gap depends on the actual structure and storage, not a universal dimension from a design image.
Try this: Identify the areas that would be difficult to inspect after storage is loaded.
22. Add a small dry place for notes and planning

A compact planning position can hold the notebook without taking over the active potting surface. Keep it separate from wet supplies and loose growing medium. Use it to record plant identities, tasks and quantities that actually need replacing. A small useful ledge may be enough; avoid turning a constrained shed into a sitting room that no longer serves the garden work.
Try this: Keep the planning group limited to what is used during the weekly review.
23. Connect the exterior to the garden with one restrained finish

One exterior color or material connection can relate the shed to the house, fence or planted borders. Choose a complete suitable structure and follow the specified finish care. Keep planting far enough away for ordinary building access and upkeep. Decoration works best after the door, route and storage plan have been resolved, so the attractive view remains easy to maintain.
Try this: Compare the finish with the existing garden materials before adding accessories.
24. Review the whole shed at the seasonal changeover

A seasonal review keeps the layout connected to the work ahead. Return finished tasks, inspect retained containers and deal with supplies according to their instructions. Count what is genuinely needed before adding another box. Potting shed ideas remain useful when the building can change from spring preparation to later garden care without rebuilding the whole storage system.
Try this: Record the one recurring obstruction and correct it before expanding the inventory.
A whole-shed planning card before choosing a building
Write the main jobs the room must support. For example, a gardener might prepare a few containers, collect hand tools before weeding and return empty pots after a seasonal display. This is a planning example, not a tested floor plan. List the actual objects that travel through each job, including the person and the cart where relevant.
Draw the approach and opening first. Record the usable doorway rather than only the building width, then include the position of open doors and the turning space for a carried object. Add the work area and its occupied footprint. Leave the continuous route visible before assigning storage to the remaining walls.
Divide the inventory by condition: ready containers, used incoming items, supplies that require dry storage and anything needing a different labeled environment. Minnesota Extension explains that remaining soil and debris can carry plant pathogens. Keep the care step explicit and follow appropriate material and product instructions; this guide does not prescribe a disinfectant mixture.
Treat any plant-growing use as a separate brief. Record the named plants, light, temperature, air movement and care they require. A bright glazed shed is not automatically a suitable seed-starting room. The Minnesota seed-starting reference discusses controlled growing conditions and the limitations of relying on a windowsill. An unheated storage room should not be assumed frost-free.
Check the actual structure, permissions and services before purchase or alteration. Resolve foundation, drainage, glazing, electrical or water work through the appropriate supplier and professional guidance. These images do not provide load ratings or installation details. Keep the maker’s use and care information with the plan.
Finally, keep one review line for each season: what moves in, what must leave, what needs cleaning and which route repeatedly becomes crowded. Reduce unused inventory before adding another shelf. The most useful room plan is one that still works with the ordinary job in progress.
How big should a potting shed be?
Choose its usable interior from the actual jobs, retained inventory, doorway and occupied work area. An outside dimension alone does not show whether a cart or a person carrying pots can move comfortably.
Can a potting shed double as a greenhouse?
Only when the actual structure and conditions suit the intended plants. Assess the growing environment separately from the storage plan; glazing alone does not establish the required temperature, light or ventilation.
Should seeds and all garden products stay in the shed?
Only where their actual storage instructions and conditions can be met. Bring task supplies out as needed and give items that need another environment a proper return destination.
A practical next step
Choose potting shed ideas from the approach, the occupied room and the care routine. Keep routes usable, separate storage conditions and reserve decoration for a workspace that remains practical through the seasons.
Garden potting bench ideas for selecting the working furniture. Succulent garden ideas with plant-specific seasonal planning.
Images are original AI-generated layout concepts. They are not construction plans, measured installations or evidence of structural capacity, frost protection or suitable growing conditions.
Sources and care references
- UF/IFAS: garden storage, shed planning and dry tool care
- University of Minnesota Extension: cleaning tools and containers
- University of Minnesota Extension: seed storage and actual growing conditions
Optional digital guide for this topic
If you prefer a structured workbook, explore this related paid guide.