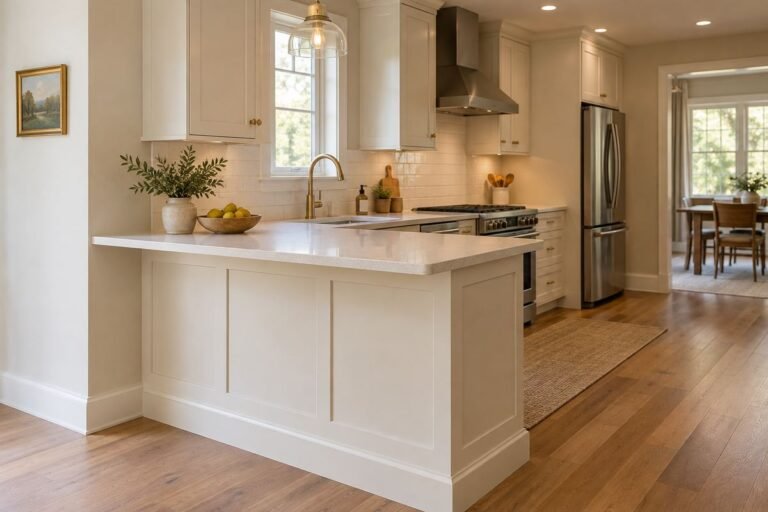
The best range hood ideas give the cooking wall a clear focal point without losing sight of the appliance underneath. A quiet cabinet front, a curved plaster-look cover and a metal chimney can all work, but they make very different demands on the surrounding room.
Begin with the actual hood or insert, cooking appliance and ventilation plan. Then design the decorative exterior around the approved requirements. Choosing a cover first can leave too little room for equipment, awkward access to filters or a duct route that never suited the house.
These 29 concepts focus on appearance, proportion and integration. Compare each one with a measured front elevation of your kitchen, the view from adjacent rooms and the way you clean and cook. The images show design concepts, not installation dimensions or proof of ventilation performance.
The images are original AI-generated decor concepts, not installation diagrams or photographs of completed client projects.
Browse These 29 Range Hood Ideas
Jump to an idea
- Use a simple painted box for a quiet focal point
- Soften the silhouette with a tapered cover
- Try a softly curved plaster-look front
- Let a stainless steel chimney remain visible
- Use a black canopy as a deliberate anchor
- Match the hood to the upper cabinet color
- Repeat the island color on the cooking wall
- Choose an off-white hood beside warmer wood
- Keep a cabinet-front hood visually discreet
- Retain a slim under-cabinet form
- Give a traditional hood restrained molding
- Use a narrow metal accent band
- Balance a metal hood with warm cabinets
- Make copper the one rich metal statement
- Choose a rounded metal canopy
- Use a crisp geometric canopy for a modern wall
- Carry one quiet wall color around the hood
- Let a veined backsplash remain the focal point
- Frame patterned tile with a quiet hood
- Use vertical tile to contrast a broad canopy
- Align the hood with a cabinet datum
- Finish the top cleanly at the ceiling
- Use negative space beside a feature hood
- Center the hood within an asymmetrical room
- Let a compact kitchen keep a modest silhouette
- Choose a softer color instead of stark contrast
- Coordinate visible seams with the hood shape
- Keep controls and filter access part of the design
- Connect the hood to the whole room with one repeated detail
Choose range hood ideas around the actual equipment
Before commissioning an enclosure, record the exact appliance and hood models, required positioning, proposed duct route, support, controls, filter removal and service access. Have the ventilation and enclosure reviewed by the appropriate qualified installer and fabricator. Use the current instructions for those exact products and applicable local requirements; a decorative drawing cannot establish clearances, airflow or structural support.
| Design decision | Useful drawing or sample | Question to resolve |
|---|---|---|
| Exposed metal | Finish sample beside handles and appliances | Will fingerprints, reflections and seams suit the room? |
| Concealed insert | Section through the proposed enclosure | Can the approved equipment fit and be serviced? |
| Plaster-look cover | Full-size color and texture sample | Is the specified surface suitable and cleanable here? |
| Cabinet integration | Front elevation with every door and crown line | Do the hood and adjacent cabinets form a coherent composition? |
| Ventilation route | Installer-reviewed plan through the actual house | Where does the air go and what does this installation require? |
A decorative chimney and an outdoor exhaust connection are different things
Broan-NuTone distinguishes a ducted hood, which sends air outdoors, from a recirculating model, which filters air and returns it to the room. Its FAQs also make duct length and installation requirements specific to the system. Verify what the existing kitchen actually has before treating a tall cover as evidence of outdoor exhaust.
Use a real insert specification before drawing a custom surround
Zephyr’s Vortex installation guide illustrates how a particular insert is coordinated with its custom hood and liner. That document is for named models, not a universal enclosure recipe. For your design, obtain the current manual for the exact equipment and give it to the people responsible for the surround, support and installation.
Investigate the route before an expensive cosmetic change
The Building America Solution Center’s kitchen exhaust retrofit guide considers the hood, duct route and installation together. That is a useful order for renovation planning: first establish the existing conditions and feasible exhaust arrangement, then refine the visible cover. A new finish cannot resolve a disconnected or unsuitable exhaust route.
Review the cooking wall from three positions
Look straight at the elevation, from the main kitchen entrance and from the nearest seating area. A large hood can feel balanced from the front but dominate an open room from the side. Put the proposed outline on a drawing or reversible paper mockup and compare it with cabinet doors, ceiling details and lighting before ordering.
1. Use a simple painted box for a quiet focal point
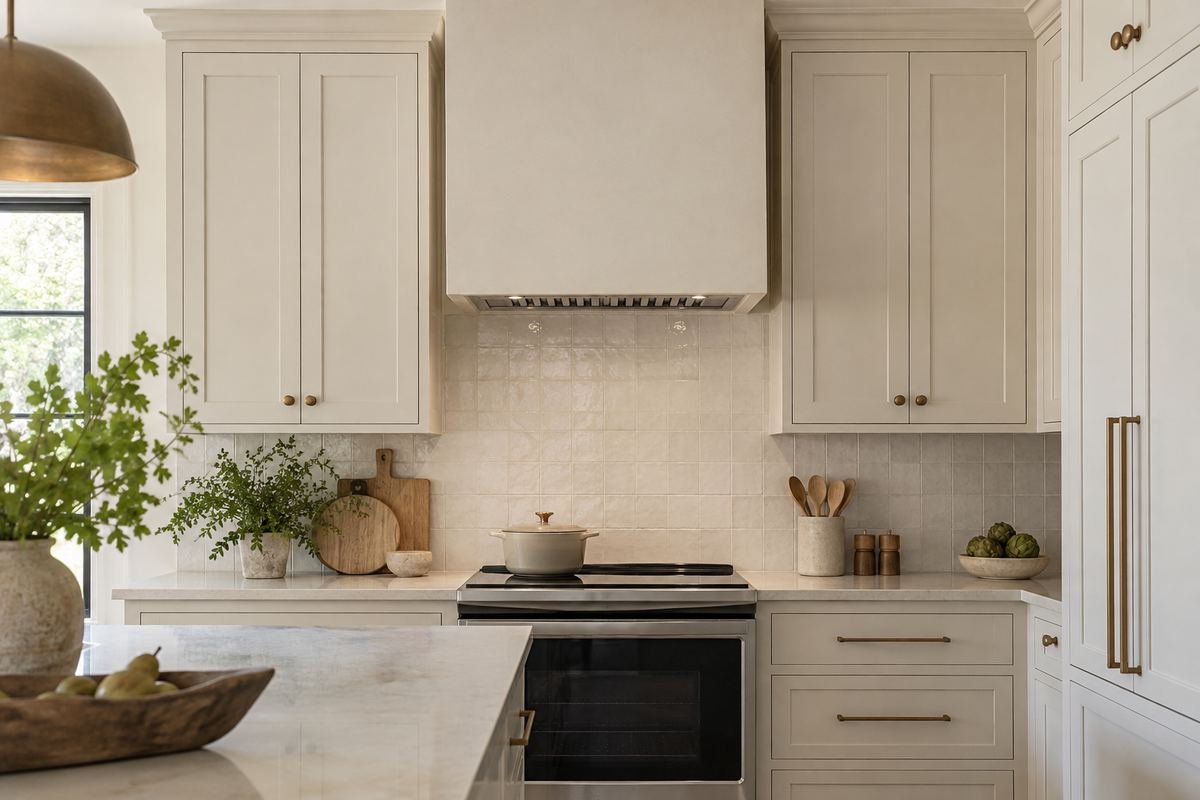
A straight-sided painted surround gives the cooking wall a clear center without adding much ornament. It works especially well when cabinet profiles or the backsplash already provide texture. The broad front can repeat the wall color or sit one shade away from it.
Compare the box depth from the side as well as the front. A deep enclosure may look heavy from the dining area even when it appears balanced in elevation. Keep its approved equipment access in the drawing before simplifying the exterior.
Practical tip: Review the side view before approving the front.
2. Soften the silhouette with a tapered cover

A cover that narrows toward the ceiling can feel lighter than a full rectangular mass. Its sloped sides introduce a different shape between rows of square doors. This is useful when you want the hood to stand out through form rather than a strong color.
Draw the taper around the selected equipment and duct arrangement instead of squeezing the appliance into a favorite outline. Compare the upper width with the ceiling junction so the silhouette looks intentional at both ends.
Practical tip: Test the entire outline, including the top.
3. Try a softly curved plaster-look front

A curved front can bring softness to a kitchen filled with flat doors and long counters. Keep the curve readable and the rest of the cooking wall relatively restrained. A subtle texture lets daylight describe the form without making it look deliberately distressed.
Specify a complete finish system appropriate for the enclosure and its use, with a sample you can examine and clean according to its instructions. A plaster-like appearance does not tell you what the surface is made of or how it should be maintained.
Practical tip: Approve a real finish sample, not only a color swatch.
4. Let a stainless steel chimney remain visible

An exposed stainless chimney acknowledges the appliance as part of the kitchen. It can connect naturally with a stainless range or oven while leaving cabinet fronts simpler. Choose a shape with a clear relationship between the lower canopy and the vertical cover.
Check the actual finish beside nearby appliances; stainless surfaces can differ in tone and reflection. Include seams and cleaning instructions in the comparison rather than assuming every silver finish will read as a perfect match.
Practical tip: Compare metal samples under your evening lighting.
5. Use a black canopy as a deliberate anchor

A black hood can anchor a pale cooking wall and echo a dark window frame or cabinet handle. It works best when the contrast feels purposeful rather than like the only dark object in the room. Keep the surrounding backsplash legible so the shape remains clear.
Compare the sheen before committing. A matte black front and glossy black hardware may relate without matching, but their differences become more noticeable in direct light. Decide which surface should attract the eye.
Practical tip: Repeat the dark tone once elsewhere in the room.
6. Match the hood to the upper cabinet color

Painting an approved surround in the upper cabinet color can make several elements read as one composition. This is useful in a smaller room or a kitchen visible from the living area. The hood still has presence, but the color no longer interrupts the run.
Compare the finish on the actual enclosure material with the cabinet sample. Different substrates and sheen levels can make the same nominal color appear different. Check the result in daylight and under the hood light.
Practical tip: Review both samples on a vertical surface.
7. Repeat the island color on the cooking wall

A colored hood can connect an island with the perimeter kitchen without painting every cabinet. This gives the room two related focal points and can help a contrasting island feel integrated. Choose a tone that remains attractive in the kitchen’s changing light.
Look across the complete room before adding more matching accessories. The island and hood may provide enough repetition on their own. Let the counter, floor and backsplash support that connection without turning the palette into a rigid set.
Practical tip: View the two colored surfaces together from the entrance.
8. Choose an off-white hood beside warmer wood
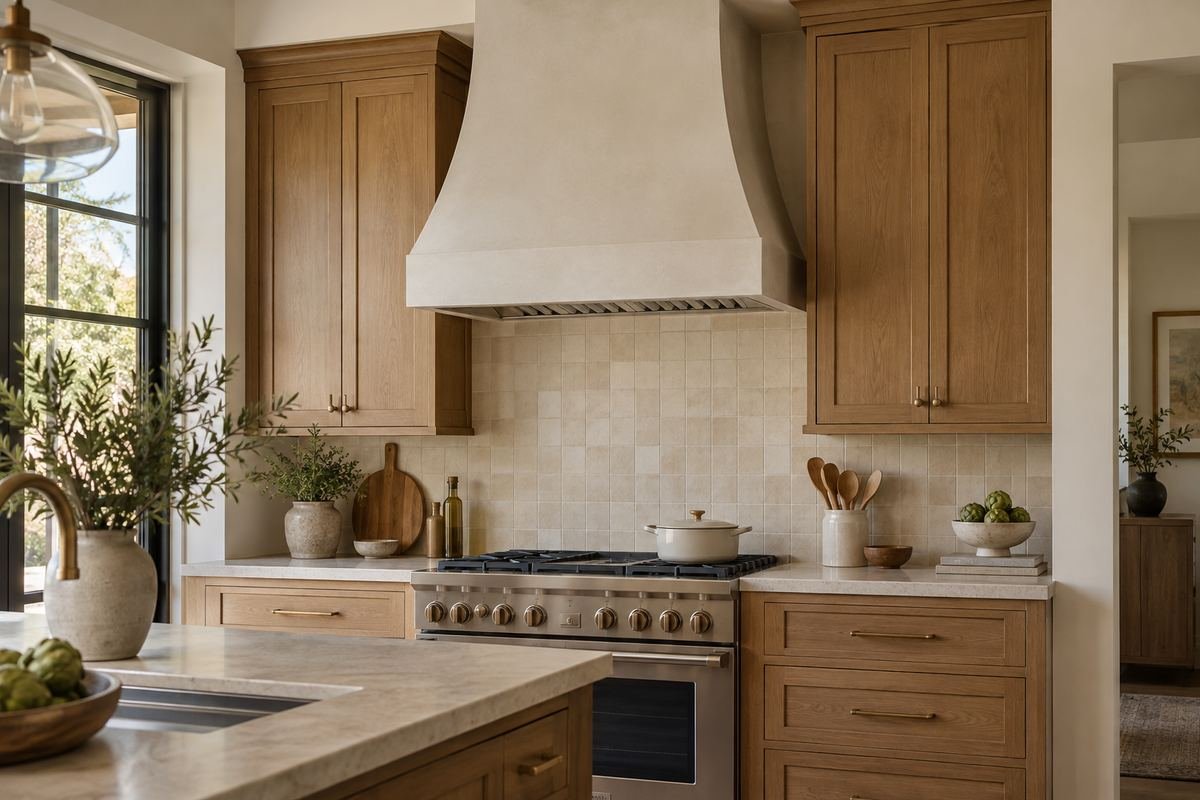
A pale hood can give wood cabinetry a visual pause. Instead of trying to reproduce the wood grain across the cover, use a quiet off-white that relates to the counter or wall. This lets the timber remain the strongest natural material.
Compare the undertone carefully: a bright cool white can feel disconnected beside honey or reddish wood. Use larger samples with the actual backsplash, and allow the chosen white to remain distinct rather than forcing an approximate match to every pale surface.
Practical tip: Place the white sample directly beside the wood sample.
9. Keep a cabinet-front hood visually discreet

A hood designed into a cabinet enclosure can let the door rhythm lead the wall. This approach suits a kitchen where you prefer storage lines and materials to take priority over a visible canopy. The approved insert remains part of the working assembly.
Confirm which panels are fixed, which open and how the equipment is reached. A convincing cabinet elevation is only part of the design; control access, filter removal and service requirements still need to be practical after everything is installed.
Practical tip: Label fixed panels and access panels on the drawing.
10. Retain a slim under-cabinet form

A modest under-cabinet hood can be a deliberate design choice when the existing kitchen suits it. A restrained appliance avoids the expense and visual weight of a custom surround. Coordinate it with the cabinets and cooking appliance instead of apologizing for its simplicity.
Use the exact model and installation requirements to establish fit. Check the view of the controls and underside from the doorway, since these are often more visible than a straight-on product photograph suggests.
Practical tip: Choose the appliance finish with the visible underside in mind.
11. Give a traditional hood restrained molding

A simple framed profile can connect a hood with traditional cabinet doors. A few deliberate lines often work better than multiple stacked details, especially beside a patterned backsplash. Let one part of the hood establish the style and keep the rest calm.
Review the molding at the actual size and distance from the entrance. Fine details can disappear across the room, while heavy ones can dominate. Have all material placement and assembly details checked for the specific cooking and ventilation equipment.
Practical tip: Use a full-size profile sample if possible.
12. Use a narrow metal accent band
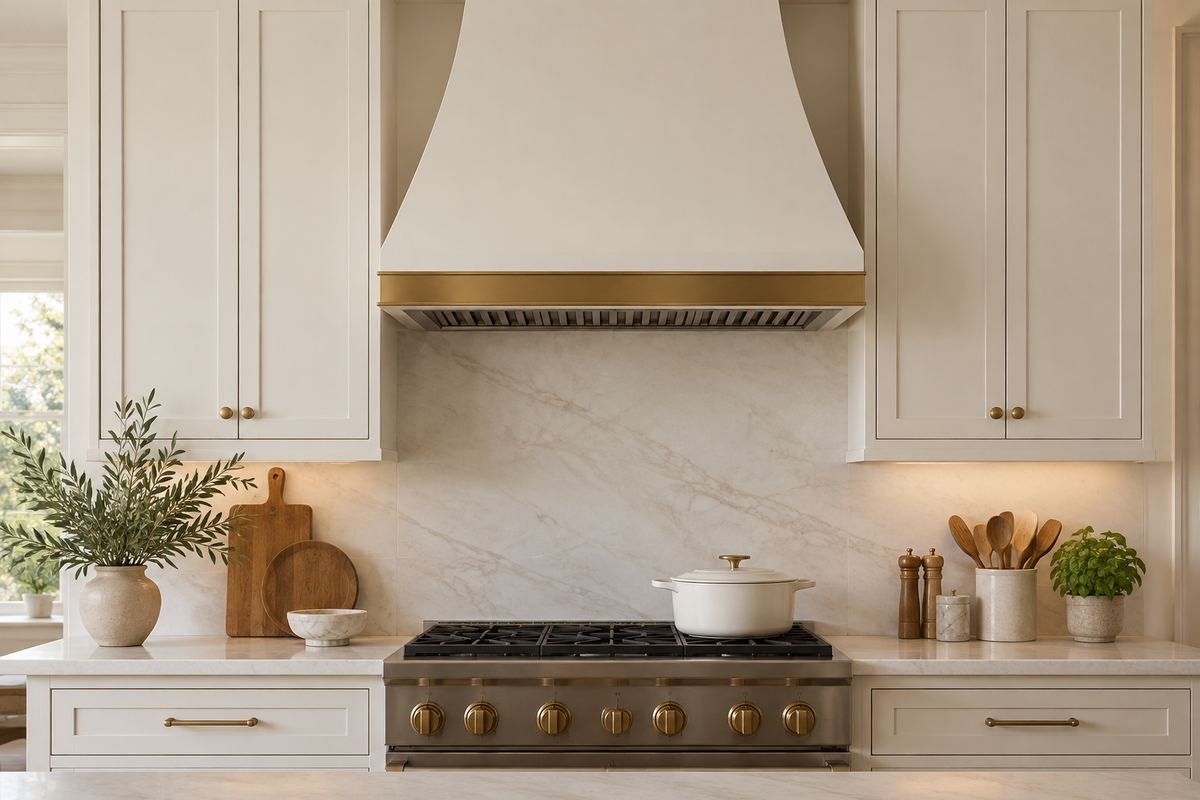
One narrow metal accent can define the lower edge of a plain hood and relate it to cabinet hardware. A restrained band works when the shape is already strong and the room needs only a small connection between its finishes.
Choose an appropriate fabricated detail as part of the approved enclosure, not an improvised adhesive strip. Compare the metal tone, edge treatment and cleaning requirements with the rest of the hood before deciding on its width.
Practical tip: Let the band support the form rather than divide it repeatedly.
13. Balance a metal hood with warm cabinets

A visible metal hood does not require an entirely industrial kitchen. Warm wood cabinetry, a quiet wall surface and a few restrained details can soften its presence. The contrast works because the materials have different roles rather than competing textures.
Check how much reflection the metal introduces across a broad front. A brushed finish may create a different mood from a highly polished one. Review a sample in the actual room instead of choosing only from an evenly lit product image.
Practical tip: Compare the metal against the cabinet grain, not in isolation.
14. Make copper the one rich metal statement

A copper hood can bring warmth and a strong material identity to the cooking wall. Keep nearby patterns and competing metallic surfaces restrained so the hood feels considered. It can work with pale cabinets or deeper wood tones, depending on the room’s light.
Ask the fabricator how the specific finish changes and should be cleaned. A living finish and a coated finish can behave differently, and an inspiration image cannot predict the appearance after years of use. Choose with that future variation in mind.
Practical tip: Clarify the finish and care expectations before ordering.
15. Choose a rounded metal canopy

A rounded metal form introduces a softer outline without relying on a textured exterior. It can complement curved cabinet corners or a round dining table elsewhere in the room. Keep the vertical cover simple so the curve remains the main gesture.
Review the canopy’s projection and profile from more than one direction. A curved front can have considerable depth. Resolve the selected product and installation before coordinating the neighboring cabinets around its visible outline.
Practical tip: Draw the side profile beside the cabinet depth.
16. Use a crisp geometric canopy for a modern wall

A clean angular canopy can reinforce a kitchen built around flat fronts and long horizontal lines. Its geometry gives the cooking area structure without introducing a contrasting material palette. Let the cabinet reveals and hood edges look deliberate together.
Avoid judging proportion from a wide-angle photo alone. Compare a measured front elevation with the exact canopy shape, then look at the room from its normal entrance. Small alignment differences can become conspicuous in a minimal composition.
Practical tip: Check the main horizontal lines on one drawing.
17. Carry one quiet wall color around the hood

Using a closely related wall and hood color can make a large cover feel less dominant. This is helpful when the kitchen adjoins a living space and you want the eye to move through the room. The silhouette stays visible through light and shadow.
Do not assume the wall paint and enclosure finish should be the same product. Specify appropriate systems for each surface, then coordinate their color and sheen with physical samples. The visual match should follow the practical material choice.
Practical tip: Compare coordinated finishes rather than prescribing one coating everywhere.
18. Let a veined backsplash remain the focal point

A plain hood can give a veined backsplash room to carry the composition. Use a restrained color and simple form so the stone pattern does not compete with complicated trim. Review the slab layout and hood silhouette together before either is finalized.
Decide where the backsplash stops at the sides and top of the cooking area. A narrow leftover strip can look accidental even when both materials are attractive. Put seams, edges and the hood outline on the same elevation.
Practical tip: Approve the backsplash layout with the hood shown in place.
19. Frame patterned tile with a quiet hood

Patterned tile can be the character of the cooking wall while a solid hood gives it a visual boundary. Choose a hood color from the quieter part of the tile palette. This connects the pieces without reproducing every color elsewhere in the room.
Lay out the pattern around the actual hood and cabinet edges. Cut fragments at the sides can affect the result as much as the central motif. Compare the tile sample and hood finish under both daylight and the kitchen’s fixed lighting.
Practical tip: Check pattern termination before choosing grout and trim.
20. Use vertical tile to contrast a broad canopy

A broad hood and vertical backsplash layout can create a useful balance of directions. The hood gives the wall a strong horizontal edge, while the tile draws the eye upward. Keep the grout contrast moderate if you want the combination to remain calm.
Compare the tile module with the visible spaces beside the hood. Very thin leftover cuts can undermine a simple design. Work out the actual layout rather than relying on a photograph that does not show the corners.
Practical tip: Draw the tile cuts beside the canopy.
21. Align the hood with a cabinet datum

The hood does not have to share every cabinet line, but one intentional alignment can make the wall feel settled. Its top, shoulder or lower front detail may relate to a neighboring cabinet feature. Choose the line that suits the approved hood position.
Do not move the equipment outside its requirements merely to achieve an attractive elevation. Establish the permitted installation first, then use cabinet design and decorative proportions to create the visual connection.
Practical tip: Choose an alignment after the equipment position is resolved.
22. Finish the top cleanly at the ceiling

A hood that meets the ceiling needs a deliberate junction. A plain transition can suit a modern kitchen, while a restrained cornice may relate to existing cabinetry. Decide which element should lead so the ceiling does not become a collection of competing profiles.
Include any sloped or uneven conditions in the measured drawing. An attractive front elevation can hide a difficult junction at the back or side. Coordinate the final cover with the actual room and equipment before fabrication.
Practical tip: Document the real ceiling condition before making the cover.
23. Use negative space beside a feature hood

A little visible wall beside a hood can help its silhouette stand apart from the cabinets. This can feel lighter than filling every upper-wall inch. It works when the kitchen has enough useful storage elsewhere and the visible proportions are considered.
Measure the actual gaps rather than treating any leftover space as intentional breathing room. Resolve adjacent doors, surface finishes and required equipment clearances with the designer. The wall should look complete when viewed from the side as well as the front.
Practical tip: Put both side gaps on the elevation.
24. Center the hood within an asymmetrical room

The room may be asymmetrical while the cooking group remains locally balanced. Center the hood on the cooking appliance, then treat a window, tall cabinet or doorway as part of the wider composition. The wall does not need forced matching pieces everywhere.
Use the main view to test whether one side feels visually heavier. A quieter backsplash or simpler hood can help when the surrounding architecture is busy. Avoid adding decorative shelves only to imitate symmetry that the room does not have.
Practical tip: Balance the cooking group before decorating the whole wall.
25. Let a compact kitchen keep a modest silhouette
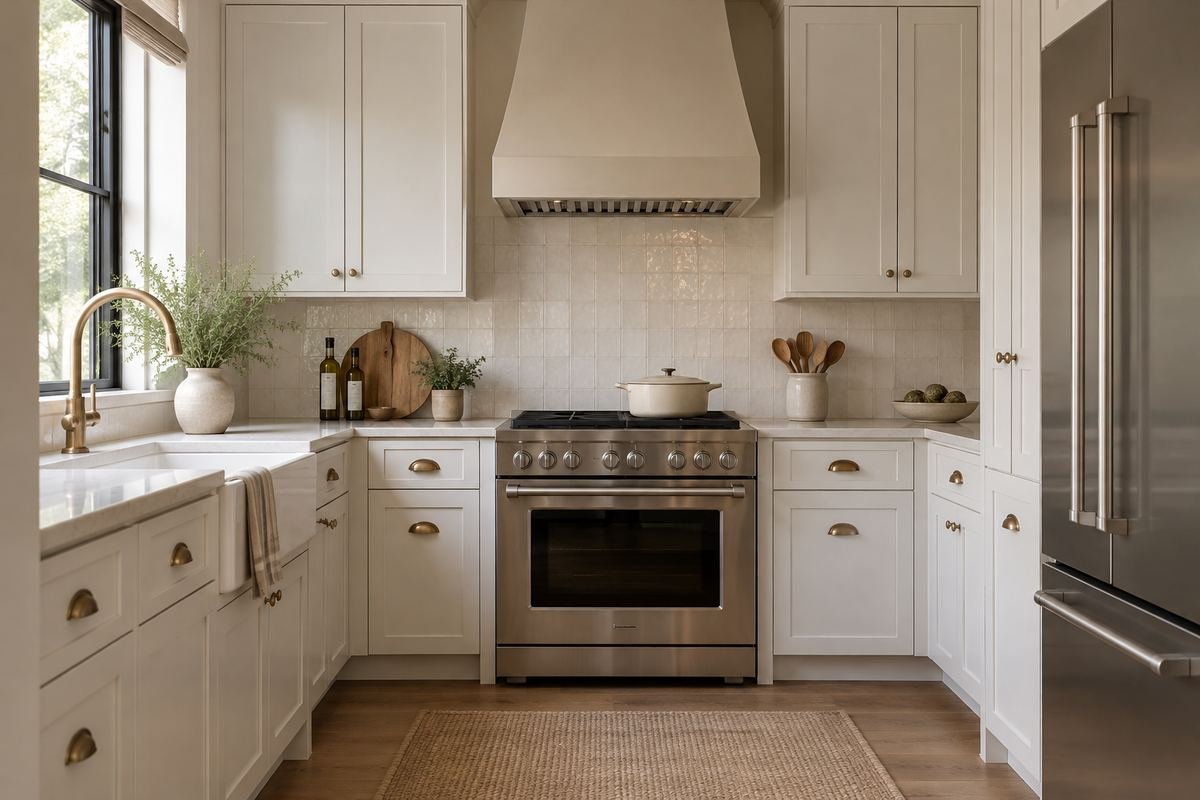
A compact kitchen often benefits from a hood that has a clear shape without excessive decorative bulk. A restrained exposed appliance or simple enclosure can give the cooking area identity while leaving the cabinets and usable counter in focus.
Compare the visible cover with the selected equipment requirements. A small-looking hood is not automatically suitable for a small room, and a compact exterior does not establish adequate performance. Let the actual appliance and installation determine the functional starting point.
Practical tip: Reduce unnecessary ornament after confirming the equipment fit.
26. Choose a softer color instead of stark contrast

A muted clay, gray-green or dusty blue hood can introduce color without making the cooking wall sharply graphic. Pick one tone that works with the fixed counter and floor, then let the cabinetry remain simple. A subtle color often reveals its character through changing light.
Compare a larger sample vertically at the intended location. A pale color can shift beside a bright backsplash or under warm lamps. Make the decision with the room’s existing finishes present, not from a digital palette alone.
Practical tip: Review the color at breakfast and after dark.
27. Coordinate visible seams with the hood shape

On a fabricated metal hood, seams and joints are part of the appearance. A deliberate center seam or evenly placed panel divisions can support the form; an accidental-looking break can distract from it. Ask to see these details rather than assuming the finished surface will be seamless.
Review the manufacturer or fabricator’s actual construction and maintenance information. Do not request changes that compromise the appliance or approved assembly just to remove a visible joint. Work with the available finish and construction options.
Practical tip: Include seams in the approved shop drawing.
28. Keep controls and filter access part of the design

A beautiful surround should remain practical during ordinary use. Choose a concept that lets the intended users reach and understand the controls and allows the filters to be removed as instructed. These everyday details matter more than a perfectly blank underside in a photograph.
Review the actual product demonstration or manual with the finished enclosure shown. Identify the service route before adding trim or cabinetry that would obstruct it. Keep the final equipment information somewhere the household can find it later.
Practical tip: Confirm the maintenance sequence before approving the surround.
29. Connect the hood to the whole room with one repeated detail

A single repeated detail can tie the hood into an open kitchen: a curve echoed by a dining chair, a metal tone related to handles or a color shared with the island. The connection should be noticeable without making every object match.
Finish by checking the room with normal countertop items in place. An empty styled kitchen can hide how visually busy the final composition will feel. Keep the strongest hood detail and remove accessories that compete for the same attention.
Practical tip: Make one clear connection and stop before the room feels overmatched.
Frequently Asked Questions
Should a range hood match the cabinets?
Matching can make the cooking wall feel quieter, while contrast gives the hood more visual emphasis. Compare a sample with both the cabinets and backsplash. The equipment, installation requirements and service access need to work whichever appearance you choose.
Can I hide a range hood inside a cabinet?
An appropriate insert or built-in model may be designed for an approved enclosure. Have the cabinet and hood planned together using the exact current product instructions. Do not conceal an arbitrary hood or block required openings, controls or filter access.
Does a tall decorative chimney mean the hood vents outdoors?
No. Confirm the actual equipment and exhaust route. A decorative cover can hide different arrangements, and recirculating equipment returns filtered air to the room. Ask the installer to document what the system does.
How high should a hood be installed?
Use the requirements for the exact hood and cooking appliance, with review for the project and local rules. Do not copy the distance from a photograph or use a single dimension as a universal answer.
Can I add wood trim to a hood surround?
Only include combustible materials where the approved design and applicable requirements permit them. Have the exact assembly reviewed before ordering or installing trim. A wood detail in a concept image does not establish that it is suitable beside your appliance.
What should I check before approving a custom hood?
Confirm the actual insert, complete dimensions, support, required positioning, venting arrangement, service access and cleaning instructions. Then review finish samples, seams, cabinet alignment and the view from nearby rooms. Keep the approved product information with the final drawing.
Choose the Details That Work in Your Home
Narrow your range hood ideas by choosing how much visual emphasis the cooking wall should have. Resolve the actual equipment and ventilation first, then compare form, color, cabinet lines and backsplash termination. A successful hood looks intentional from across the room and remains practical when it is time to cook, clean or service it.
For related ideas, explore kitchen backsplash ideas, kitchen cabinet colors, kitchen cabinet hardware pairings.
Planning References
Broan-NuTone: range hood FAQs; Zephyr: Vortex model-specific use, care and installation guide; Building America Solution Center: kitchen exhaust retrofit duct guide. Follow the instructions for the exact products you choose.
Optional digital guide for this topic
If you prefer a structured workbook, explore this related paid guide.