A useful sewing room follows the project through several different tasks. Cutting fabric, guiding it through the machine, pressing a seam and putting the pieces away ask for different surfaces and movements. Begin with the work you actually make rather than a wall filled with attractive supplies.
These ideas cover dedicated rooms and smaller shared spaces. They are planning concepts, not machine operating instructions or a universal furniture specification. Keep the exact requirements for the machine, iron, furniture and tools available while choosing a layout, and secure sharp tools and small parts appropriately for your household.
Contents
- 1. Start with a clear route between the main tasks
- 2. Give cutting a surface that fits the actual fabric
- 3. Compare an L-shaped arrangement for two related tasks
- 4. Use parallel work areas in a longer room
- 5. Keep a small single-wall station focused
- 6. Test the chair and work surface together
- 7. Consider a purpose-designed flush machine position
- 8. Support the larger project beside the machine
- 9. Give a second machine its own usable place
- 10. Place task lighting where the work needs it
- 11. Manage window light without losing the room's brightness
- 12. Reserve a clear pedal and leg area
- 13. Plan cables before adding a rolling supply unit
- 14. Give pressing a deliberate separate position
- 15. Store pressing accessories as one small group
- 16. Keep folded fabric groups small enough to retrieve
- 17. Keep material identity with the fabric
- 18. Use a shallow thread drawer for a modest collection
- 19. Separate bobbins by the machine they belong to
- 20. Give compatible machine accessories fitted compartments
- 21. File patterns as complete project information
- 22. Give the cutting mat a product-suitable return place
- 23. Keep measuring tools supported and easy to compare
- 24. Put cutting tools away securely between sessions
- 25. Give one active project a complete return box
- 26. Include a fitting view when garments are the focus
- 27. Finish with a small useful reference board
Map one real project before buying furniture
Mark where you choose materials, cut, sew, press, check the result and store unfinished work. New Mexico State University's sewing-center guidance treats the relationship between work areas as an early planning decision. Compare the movements in your own room rather than copying a fixed table height. OSHA's sewing-station guidance emphasizes fitting the chair, work surface and pedal arrangement to the person and task. Use those fit questions when testing furniture; the images cannot establish an ergonomic setup or suitable installation.
Choose an arrangement that fits your situation
- Small repairs and occasional sewing: Compare one suitable machine station with a simple setup and put-away routine.
- Garment making: Include full pattern layout, pressing and a usable fitting view.
- Larger quilts: Review the real fabric support around the machine and the full cutting surface.
- Shared room: Plan secure tool storage, one active project destination and the room's other use.
1. Start with a clear route between the main tasks

Draw the route from fabric storage to cutting, stitching and pressing on a simple room plan. Notice where you would carry a large piece or turn with a project in your hands. Keep the ordinary walking route separate from a temporary pile of supplies. A layout earns its space when the next step is easy to reach without clearing another activity first.
2. Give cutting a surface that fits the actual fabric

A separate cutting table can keep the sewing machine available while you prepare pieces. Compare its usable top with the fabric width and pattern layout you normally use. Check whether the whole task fits without repeatedly dragging material over the edge. Choose the surface and height for your work and suitable tools, rather than treating a standard dining table size as an automatic answer.
3. Compare an L-shaped arrangement for two related tasks

An L-shaped layout can connect the machine with a secondary work surface while leaving the center of the room available. Give each side a defined role so supplies do not spread across both. Check the inner corner and the chair's movement with the furniture occupied. A continuous worktop is useful only if its depth and support suit the equipment and leave the task comfortable to approach.
4. Use parallel work areas in a longer room

Two parallel surfaces can separate machine work from cutting or project preparation in a rectangular room. Compare the actual passage with drawers open and the chair in its ordinary position. Leave enough practical movement for the projects you carry. Avoid judging the gap from an empty-room photograph; a chair, basket or open cabinet can change how the room works once sewing begins.
5. Keep a small single-wall station focused

A single-wall arrangement can suit a modest sewing corner when each retained item has a clear role. Give the machine a suitable stable surface and keep supplies from crowding the fabric movement. Use a separate temporary cutting location if the room cannot hold both tasks well. A compact station does not need to imitate every feature of a large studio to make ordinary projects straightforward.
6. Test the chair and work surface together

Bring the chair, machine and intended task into the same comparison before deciding the furniture. Check whether you can sit close enough, reach the work and use the pedal without the cabinet pressing into your legs. Adjustable features can help refine the fit. A chair selected only for its upholstery may look coordinated yet leave the actual sewing position awkward.
7. Consider a purpose-designed flush machine position

A sewing cabinet with an appropriate insert can create a continuous working relationship around a compatible machine. Confirm the exact machine and cabinet combination, including the supported position and any lifting mechanism. Do not assume that a similar opening fits every model. Compare how the fabric moves across the complete surface and follow the furniture and machine instructions for setting up and changing the position.
8. Support the larger project beside the machine

A quilt or long garment can need more supporting area than a small repair. Compare the surface beside and behind the machine with the work you actually guide through it. Keep the project from becoming a pile across the chair or floor. Use compatible supports intended for the task rather than stacking makeshift furniture at nearly matching heights around the machine.
9. Give a second machine its own usable place

If you regularly use a serger or another machine, compare whether it deserves a separate supported position. Include its actual thread path, accessories and operating space. Keep the arrangement simple enough that switching tasks does not require balancing one machine elsewhere. If the second machine is used only occasionally, suitable storage and a deliberate setup routine may be more useful than a permanently crowded worktop.
10. Place task lighting where the work needs it

Compare a suitable task light at the actual sewing and cutting positions, especially for evening use. Check whether the machine or your normal working position creates a shadow over the detail being followed. Keep the lamp stable and its cable clear of moving fabric. Judge the result with the room's usual general lighting rather than selecting a lamp from its decorative appearance alone.
11. Manage window light without losing the room's brightness
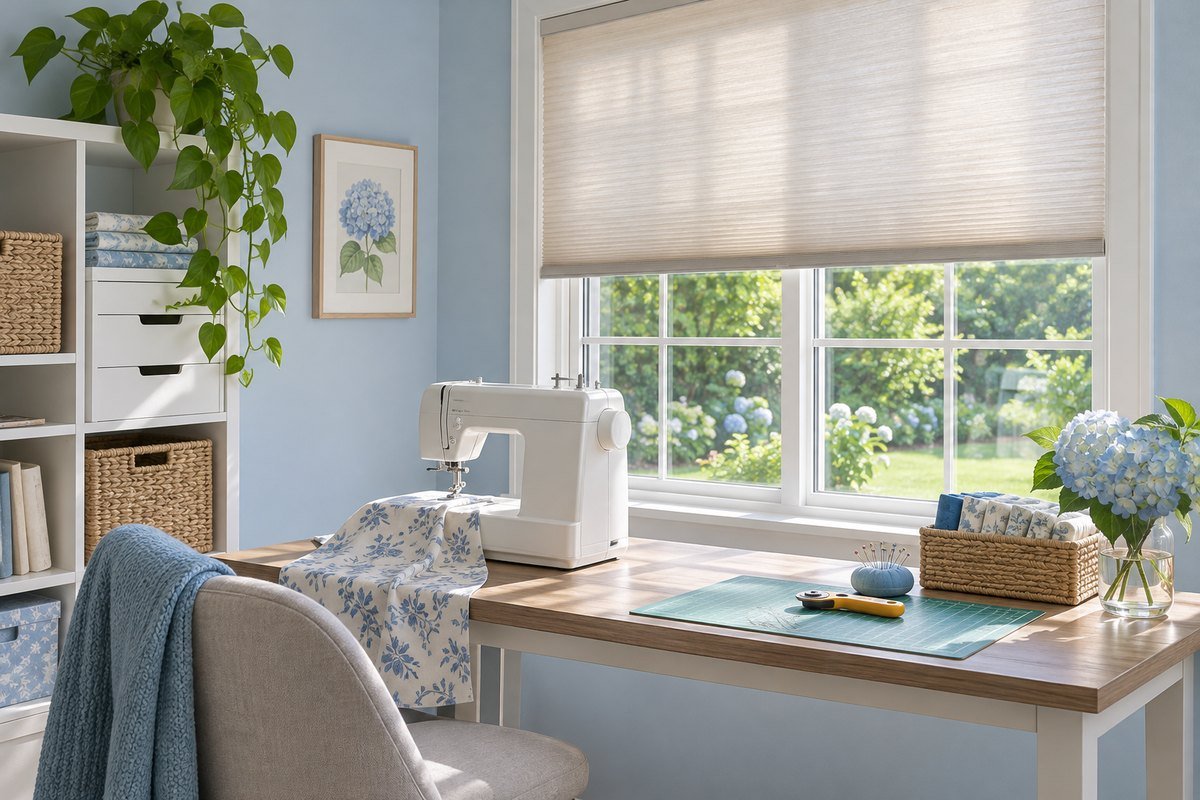
A window can make the room pleasant while still creating glare or strong contrast at certain times. Test the real sewing position when you normally work. A suitable adjustable shade can help control the light while the task lamp supplies detail after dark. Keep window operation and any household safety requirements in view rather than surrounding the opening with storage to reproduce a bright photograph.
12. Reserve a clear pedal and leg area

The space under the machine is part of the workstation, not spare storage. Check the pedal position with the chair and table together, following the machine instructions. Keep bins and loose supplies out of that movement area. If you repeatedly push a basket away before sitting down, move its assigned storage place rather than accepting the obstruction as part of the sewing routine.
13. Plan cables before adding a rolling supply unit

A cart or movable table changes the way cables and walking routes interact. Draw the connected equipment and the cart's parked position on the same plan. Follow the electrical equipment guidance and keep plugs accessible. Do not run a lead across the route merely because the cabinet looks better on the other wall; choose a suitable arrangement for both the room and the equipment.
14. Give pressing a deliberate separate position

A pressing area needs a suitable surface, appropriate iron use and a clear routine for cooling and storage. Compare its location with the seams you press during a project so the machine does not become the holding place for a hot tool. Follow the exact iron and board instructions. Keep the pressing setup separate from fabric piles and from the household's normal walking route.
15. Store pressing accessories as one small group

Keep the pressing cloth and task-specific accessories together in a suitable nearby drawer or container. Choose the retained group from the sewing you actually do, and return items only when their condition permits the proposed storage. A defined place makes it easier to clear the pressing surface between sessions. Avoid filling that drawer with unrelated tools simply because there is room around the accessories.
16. Keep folded fabric groups small enough to retrieve

Arrange retained fabric so one useful piece can be selected without lifting a heavy tower. Compare the folded depth with the actual shelf or drawer and leave room for the return movement. A small readable group is often easier to maintain than a perfectly compressed display. Follow the material's storage requirements, and choose the organization around your projects before refining the color arrangement.
17. Keep material identity with the fabric

A beautiful fabric collection is less useful when you cannot identify what each piece is or how much remains. Keep the information needed for the project and care with the retained material in a suitable way. Use a simple record that you can update after cutting. Do not depend on color alone to distinguish fabrics that have different uses, handling or washing requirements.
18. Use a shallow thread drawer for a modest collection

A drawer can keep thread choices visible without turning the whole wall into a display. Compare the compartment height with the actual spools and preserve any information needed for the machine and project. Keep the collection limited to retained useful stock. If you add divisions, check that the drawer still opens and closes without catching spools or forcing them into an unsuitable storage position.
19. Separate bobbins by the machine they belong to

Similar-looking bobbins are not automatically interchangeable. Keep the types used by each machine in distinct appropriate cases and retain the model information needed to choose correctly. Compare the case with the actual bobbin shape and closure. A small organized group near the workstation can simplify selection without mixing old accessories into a decorative jar where their identity becomes difficult to recover.
20. Give compatible machine accessories fitted compartments

Presser feet and other small accessories need an understandable home that preserves their identity. Use the machine manufacturer's compatibility information and an appropriate case rather than treating a matching-looking piece as equivalent. Keep the frequently used group easy to select while occasional accessories remain separate. Check the loaded case before buying it so useful parts do not disappear beneath a mixed layer of small metal objects.
21. File patterns as complete project information

Keep each retained pattern and the information needed to use it together. Choose a file or envelope from the full piece sizes and the way you retrieve them. Avoid compressing irregular pieces into a tiny decorative box. Group patterns in a way that matches your sewing habits, and separate active work from the longer-term reference collection so the current instructions are easy to find.
22. Give the cutting mat a product-suitable return place

A cutting mat needs a storage method suited to the exact product and its dimensions. Check the manufacturer's guidance before hanging, rolling or bending it to fit an available gap. A broad flat drawer or supported shelf may be worth comparing where the product allows it. The goal is a simple return movement that does not require unloading fabric or shifting the machine after every cutting session.
23. Keep measuring tools supported and easy to compare

Long rulers and smaller gauges have different storage shapes from soft tape measures. Give each retained group a suitable compartment that allows direct removal without tangling or bending. Keep the work surface clear enough to lay a ruler down during use. Choose the arrangement from actual tool sizes and the product's care needs instead of buying one narrow container for everything used in measuring.
24. Put cutting tools away securely between sessions

Choose appropriate secure storage for scissors, rotary cutters and other sharp tools, following their instructions. Keep that storage convenient enough to use every time, especially in a room shared with children or pets. A decorative open cup is not automatically a suitable destination. Review the complete closure and household access rather than assuming a tidy-looking drawer provides the level of security needed.
25. Give one active project a complete return box

A project box can hold the related pieces, instructions and suitable supplies between sessions. Choose it from the actual work rather than from a set of matching empty containers. Keep sharp tools in their appropriate secure storage, and avoid compressing work that needs a different arrangement. A defined active-project limit can make restarting easier while keeping the main cutting and sewing surfaces available.
26. Include a fitting view when garments are the focus

A garment-making room can benefit from an appropriate full-length mirror and enough usable space to review a piece. Check the mirror's complete mounting or support instructions and its relationship with the door and furniture. Keep the fitting area available instead of treating it as spare fabric storage. If the room is shared, choose a location that works with privacy and ordinary household use as well.
27. Finish with a small useful reference board

A restrained board can hold the current color direction or a few project references without becoming another storage wall. Keep the display related to the work in progress and remove material when the project changes. Leave the actual instructions accessible in their proper place. A clear board, an empty return space and a short end-of-session reset can help the room stay ready for the next ordinary sewing task.
A one-project sewing-room movement worksheet
Choose one typical project and list its steps in order. For each step, record the surface used, the equipment footprint, the materials carried and the place where unfinished work will wait. Add the chair, pedal, open drawers and pressing position to the room plan. Test the route with the actual retained supplies before ordering more storage. Note the repeated interruption, such as moving a box to cut or shifting a machine to press, and change that obstacle first.
A practical next step
Choose sewing room ideas by following a real project through the space. Give each main task a suitable position, fit the workstation to the person and keep retained supplies understandable. Once those movements work, a restrained palette and a few well-chosen containers can make the room feel both personal and ready to use.
For the surrounding room, plan material-specific craft storage. Organize useful wall storage beside the work area.
The images are original AI-generated design concepts, not photographs of tested products or verified installations.
Sources and care references
- OSHA: sewing station design and workstation fit
- New Mexico State University: planning a sewing or hobby center
Optional digital guide for this topic
If you prefer a structured workbook, explore this related paid guide.