Cutting board storage should make a clean, dry board easy to find and return. A narrow slot may suit a thin preparation board but fail with a thick butcher block, a long handle or the space needed to lift it out.
The ideas below cover permanent storage and a separate drying destination. They also show how useful wood grain can become part of the kitchen without turning every working board into a decorative object.
The images are original AI-generated decor concepts, not installation diagrams or photographs of completed client projects.
Browse These 23 Cutting Board Storage
Jump to an idea
- Use a freestanding upright board file
- Dedicate a narrow base-cabinet bay
- Give a thick butcher block its own low shelf
- Separate boards with fixed cabinet dividers
- Use an adjustable divider for a changing collection
- Make a shallow drawer a home for small boards
- Use a deep drawer with upright sections
- Keep board storage beside the main prep area
- Create a separate ventilated drying position
- Display one dry board against a restrained backsplash
- Layer two serving boards with clear edges
- Use a dedicated tall bay for handled boards
- Choose a suitable hook for a light serving board
- Separate everyday prep boards from entertaining pieces
- Give flexible mats a supported file
- Keep a round board in a stable cradle
- Use a kitchen island end cabinet
- Choose a pull-out board organizer for deep storage
- Use a shelf basket for a small light collection
- Leave one shelf position for an oversized board
- Keep board storage clear of cleaning products
- Make a rental-friendly board station
- Finish with a clear board return position
Separate Drying from Long-Term Cutting Board Storage
Measure each board’s full height, width and thickness, including handles and feet. Check the cabinet opening as well as the inside dimensions. John Boos advises thoroughly drying wooden boards and air-drying them upright in a dry, ventilated area. Treat the following as storage layouts for clean boards, with care instructions from your board maker controlling washing, conditioning and drying.
| Board type or problem | Possible position | Detail to establish |
|---|---|---|
| Thin everyday boards | Separated upright file | Slot width and support |
| Heavy thick block | Dedicated low shelf | Supported load and controlled lifting |
| Long handled serving board | Tall cabinet bay or suitable hook | Full handle length and mounting suitability |
| Board still drying | Stable ventilated drying position | Air space and drainage away from stored items |
A Simple Slot-Width Example
Three boards measuring 1, 1.5 and 2 inches thick occupy 4.5 inches before adding separators and hand space. A 5-inch opening therefore does not automatically provide a useful three-board rack. Make a full-size paper footprint, include the organizer sides and test lifting the middle board. These measurements demonstrate the method; they are not standard board or cabinet sizes.
A Board Storage Worksheet to Copy
For each board, note its full outline, thickness, weight, care instructions and how often you use it. Next, write its drying destination and its dry storage destination as two separate entries. Finally, count the items you must move to retrieve it. If a heavy board needs to be lifted over other dishes, change that position before buying a decorative rack.
1. Use a freestanding upright board file
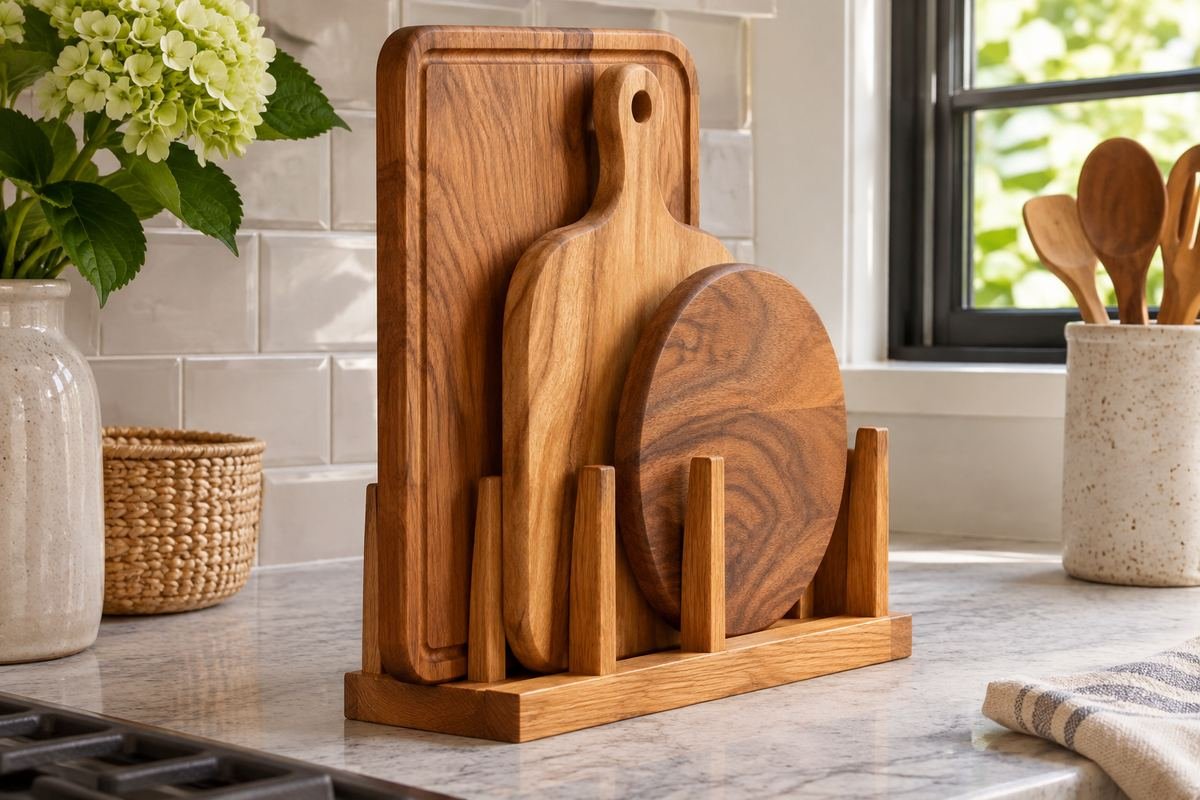
A short upright file keeps a few boards visible without a flat pile. Separate slots make the middle board easier to remove, especially when the collection includes several similar rectangles.
Choose a stable base and openings wide enough for the thickest piece. Keep the boards fully dry before returning them and leave room above the rack for lifting. A narrow rack is useful only if it stays steady when partly empty.
Practical tip: Try removing the largest board with the neighboring slots occupied.
2. Dedicate a narrow base-cabinet bay
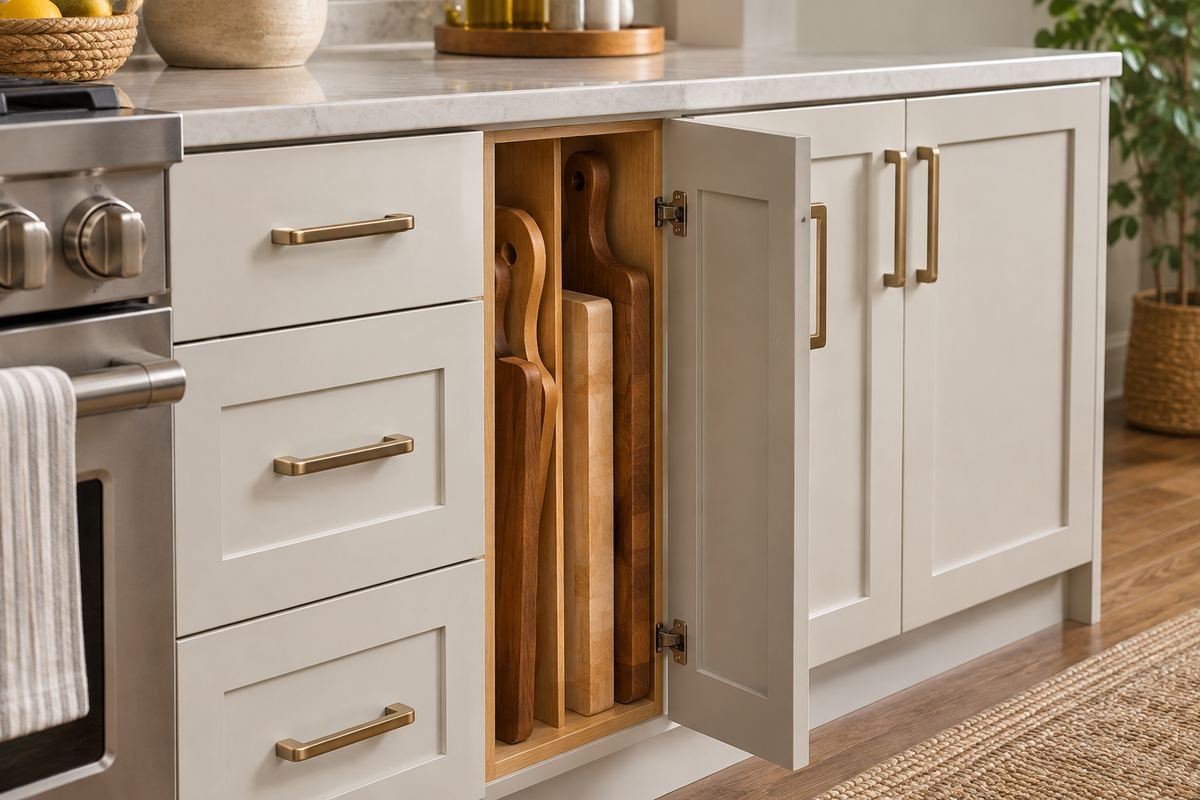
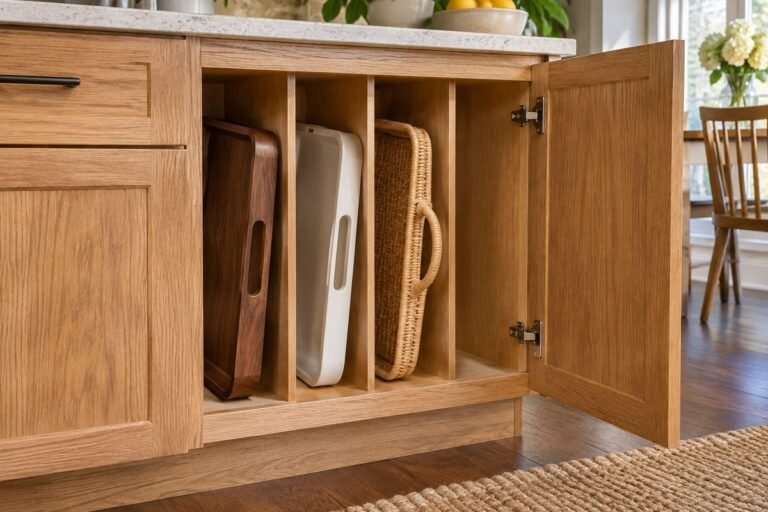
A narrow cupboard bay can hold upright boards where broad shelves waste space. The height and door opening determine whether long boards can lift out without tilting into the next cabinet.
Allow for the organizer itself and for your hand around the top edge. The stored boards should remain behind the door’s closing plane. Use the space for dry boards rather than making it the destination immediately after washing.
Practical tip: Measure from the base to the nearest shelf above.
3. Give a thick butcher block its own low shelf

A heavy thick board needs a secure support surface and a manageable lifting position. Its own low shelf can be more useful than a high display slot that requires lifting the weight over other items.
Confirm the shelf capacity and include any feet or raised edges in the fit check. Keep both the route to the counter and the handholds clear. A decorative arrangement should not make an already heavy board harder to handle.
Practical tip: Store the block where you can grip it with both hands.
4. Separate boards with fixed cabinet dividers
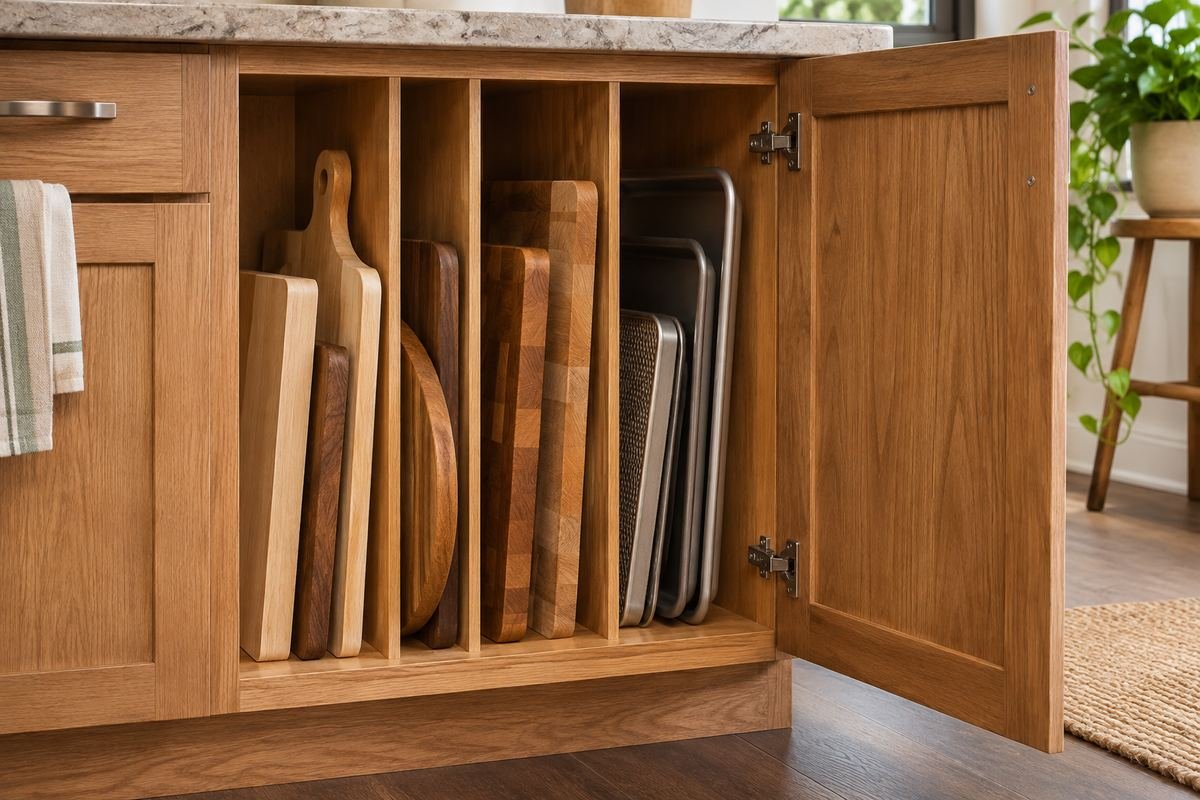
Cabinet dividers can keep boards upright beside trays without letting them slide into a broad pile. Different slot widths can suit thin prep boards and thicker serving pieces.
Use supports that are suitable for the cabinet and the intended load. Avoid squeezing the board between dividers so tightly that it scrapes or cannot lift easily. A wider final bay is helpful for an unusual piece.
Practical tip: Size the slots from the widest board profile, including feet.
5. Use an adjustable divider for a changing collection

An adjustable rack can accommodate boards of different thicknesses without replacing the organizer. It is useful when one thick board needs more room than several thin ones.
The dividers should lock securely according to the product instructions and support the board’s height. Do a loaded test before relying on the arrangement. If a tall board tips the rack, a wider or lower storage position is the better choice.
Practical tip: Keep a little finger space beside the thickest board.
6. Make a shallow drawer a home for small boards
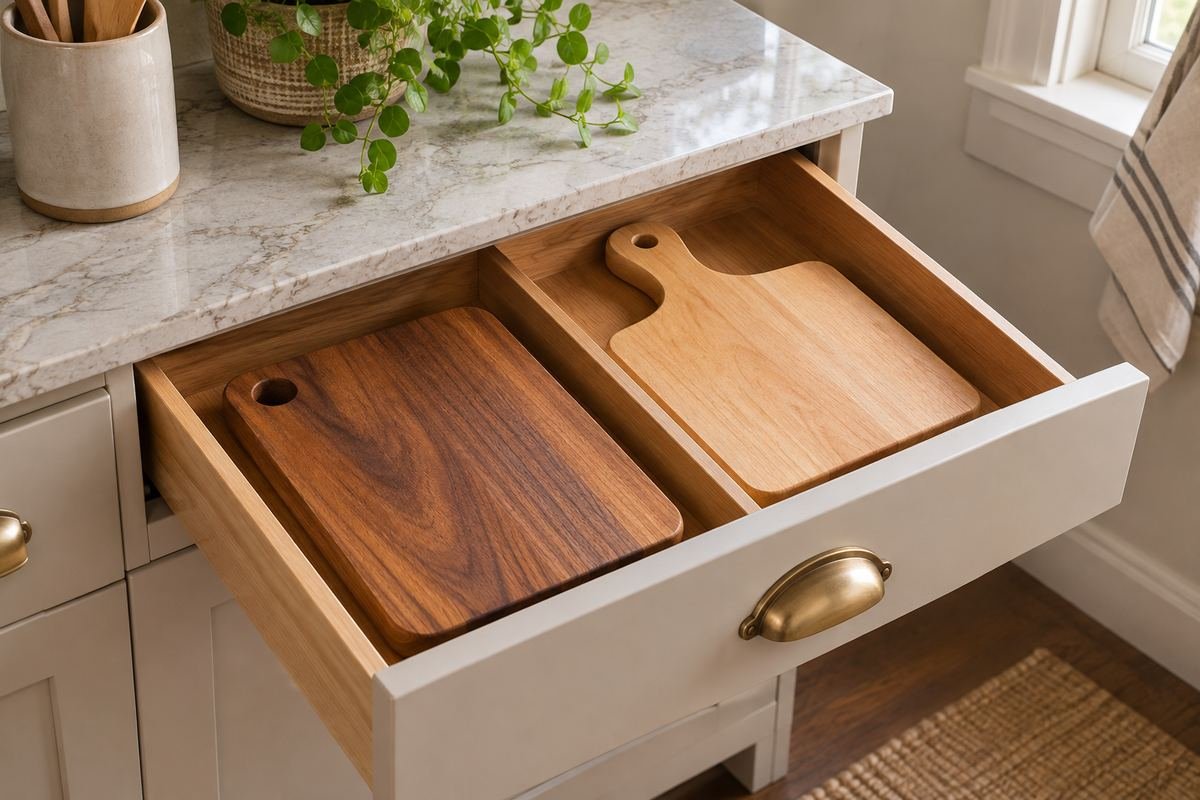
Small everyday boards may fit flat in a shallow drawer without using an entire tall cabinet bay. Give each a defined position so one does not disappear under utensils or a larger board.
Check closed height when boards have feet or curved handles. Keeping the group small makes it easier to wipe the drawer and return each piece. Reserve another space for large boards instead of forcing all sizes into the same drawer.
Practical tip: Place the most-used small board nearest the drawer front.
7. Use a deep drawer with upright sections
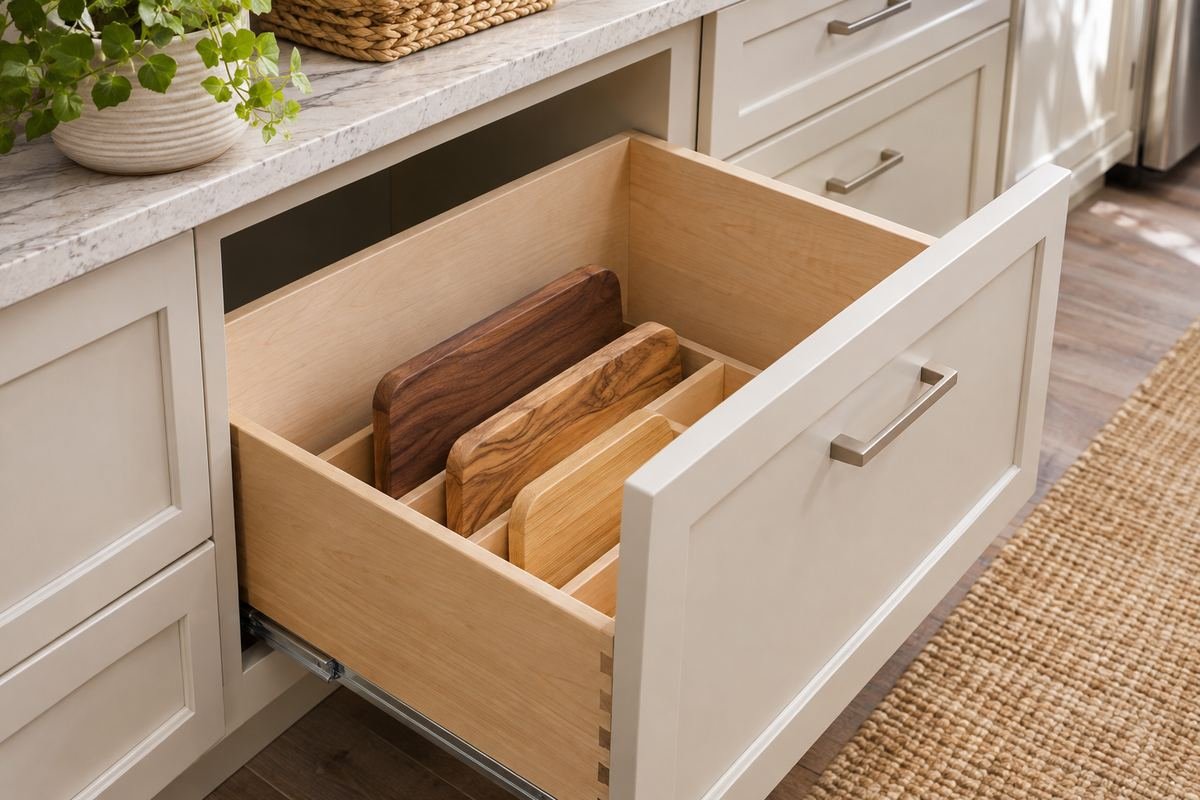
A deep drawer can present board edges from above while bringing the entire group forward. Dividers help prevent a tall board leaning into other items when the drawer moves.
Confirm that the drawer and internal supports suit the loaded weight and height. Test the closing path with the tallest handle. The organizer should not depend on every slot being filled to keep the boards stable.
Practical tip: Open and close the loaded drawer gently during the fit test.
8. Keep board storage beside the main prep area
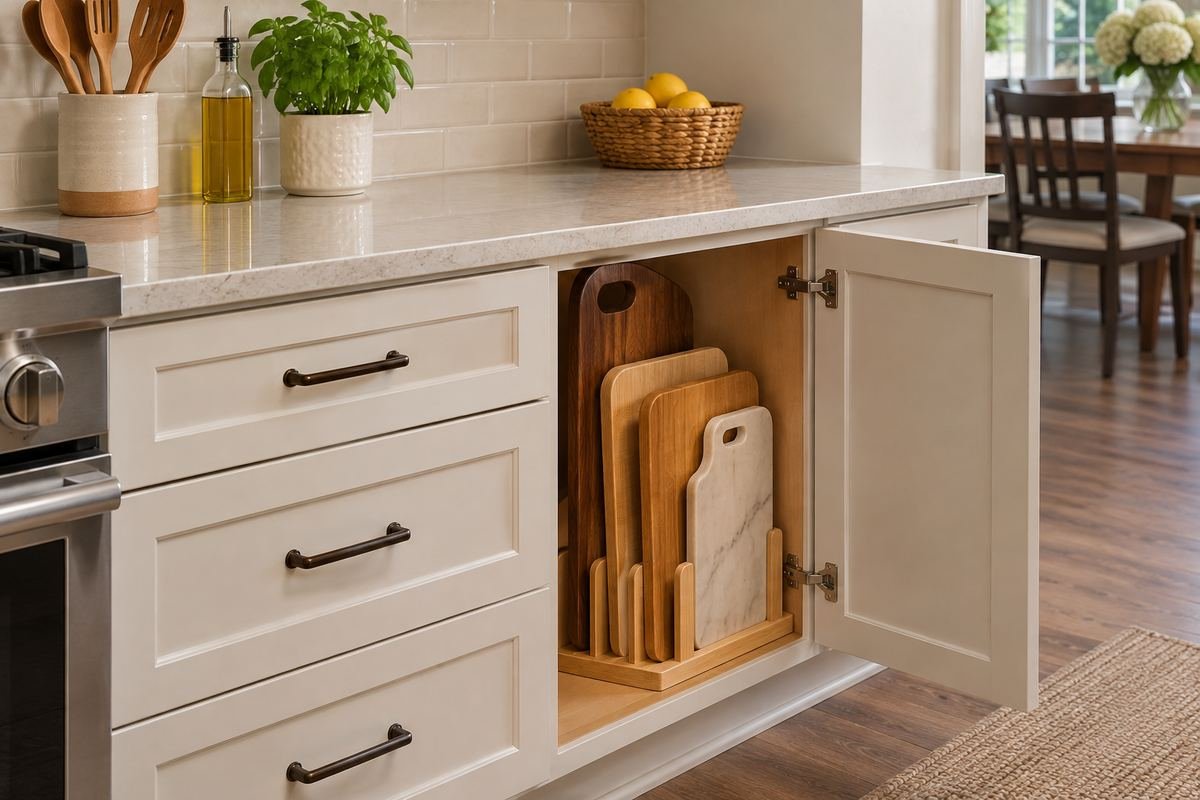
A small storage position near the preparation counter can reduce the distance a heavy board travels. It also makes it more likely that the board returns to its proper place after drying.
Choose the location from the movement you make during cooking, not simply the nearest empty gap. Keep the storage out of splash and steam areas. A dry cupboard on the other side of the prep counter may work better than a tight slot by the sink.
Practical tip: Walk the board’s route before deciding where the rack belongs.
9. Create a separate ventilated drying position

Drying and storage can occupy different places. A stable upright drying position allows air around a wooden board before it returns to a cupboard, following the maker’s care instructions.
Choose a position where water can be managed without soaking another board, the cabinet or a wall. Do not hide a damp board among stored pieces simply because the rack has an empty slot. Return it once the appropriate drying process is complete.
Practical tip: Keep the drying spot clear of already dry stored boards.
10. Display one dry board against a restrained backsplash

One attractive board can bring warmth to a plain kitchen counter. Keep the display deliberate and leave useful work surface around it instead of building several overlapping layers.
Use a stable support so it does not slide or lean against delicate items. Choose a dry location, then move the board when the counter is needed for food preparation. A serving board that is rarely used may suit this role better than the daily workhorse.
Practical tip: Keep the board removable without shifting a vase or appliance.
11. Layer two serving boards with clear edges
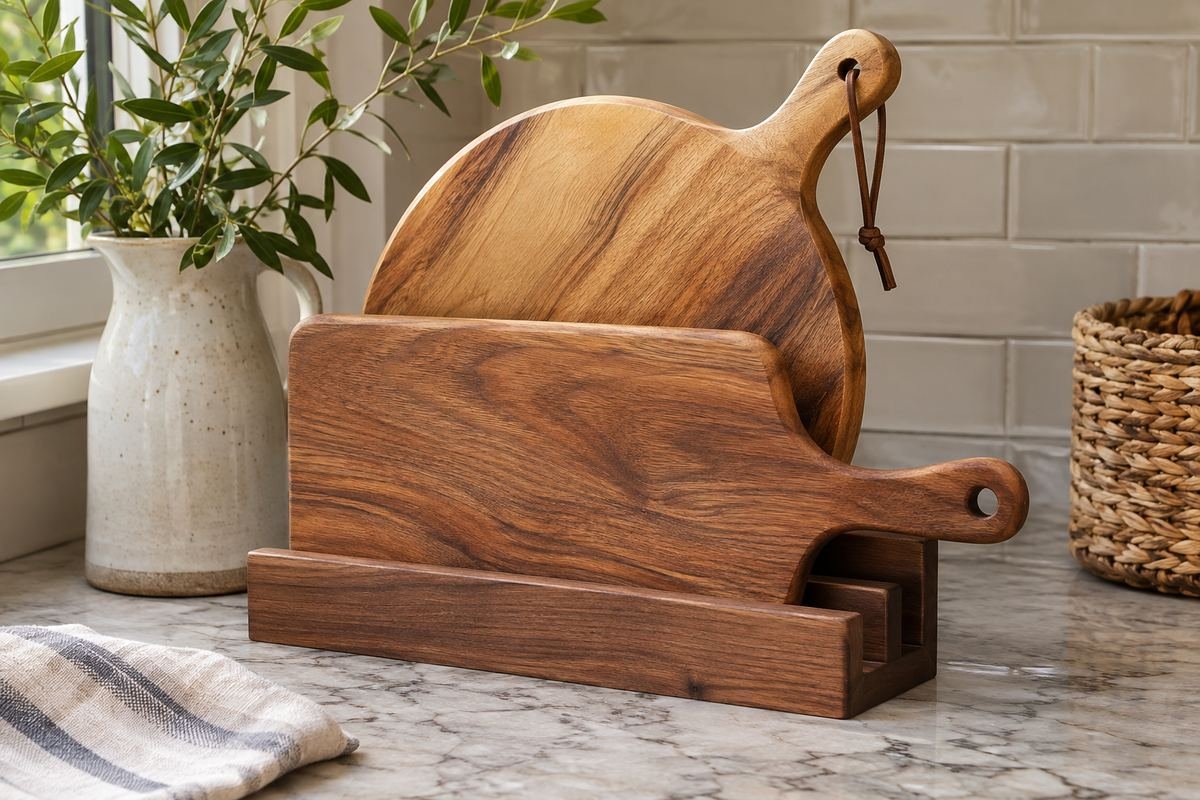
Two dry serving boards can create an attractive display when their outlines differ. A rounded board in front of a rectangle gives the arrangement depth without requiring a large collection.
Make both pieces independently accessible and keep them stable. Do not use the display as a place for boards that are still drying. If the counter is small, let one board occupy the display and store the second elsewhere.
Practical tip: Stop at a small group that leaves the preparation area useful.
12. Use a dedicated tall bay for handled boards

A long handle changes the storage height even when the usable board is modest. A tall narrow bay can hold that outline without bending the board or forcing it diagonally against other items.
Measure the complete length and the space needed to lift the handle out. Keep the opening wide enough for your grip. Do not choose a tight slot that requires pulling the board by a weak decorative detail.
Practical tip: Include the handle in every storage measurement.
13. Choose a suitable hook for a light serving board

A light serving board with a manufacturer-suitable hanging opening can become part of a small wall display. It is a useful option where counter space is limited and the board is easy to remove.
Confirm that the board, hook and wall mounting are suitable for the load. Keep the display away from cooking splatter and avoid hanging a heavy chopping block by an unknown handle. The opening should sit securely rather than balance on the hook tip.
Practical tip: Use the actual board and mounting instructions to establish suitability.
14. Separate everyday prep boards from entertaining pieces
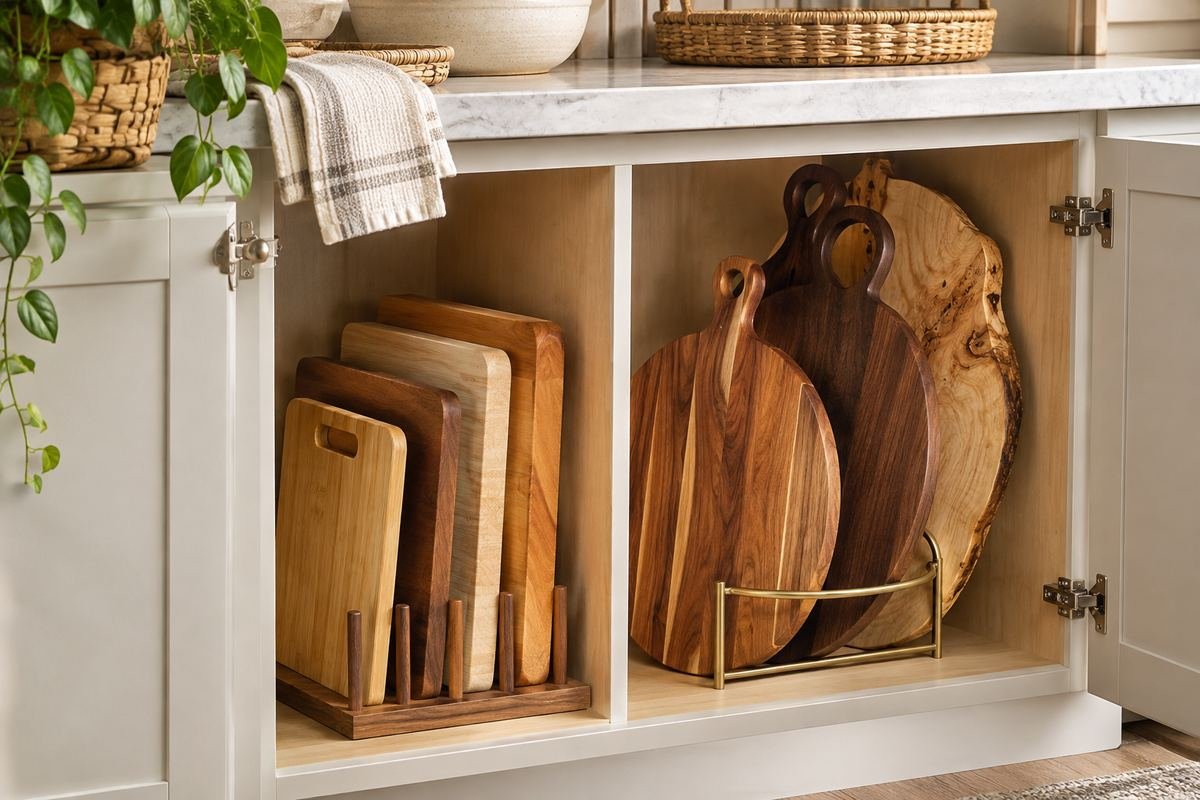
Different boards often belong to different routines. Keep the daily preparation boards in the easiest position, while larger serving boards occupy a suitable occasional-use bay.
This helps a decorative collection avoid crowding the working space. Use the same simple grouping when returning clean boards, so another person can maintain the arrangement. The distinction is practical use, not which wood finish looks best together.
Practical tip: Give the everyday group the shortest retrieval route.
15. Give flexible mats a supported file
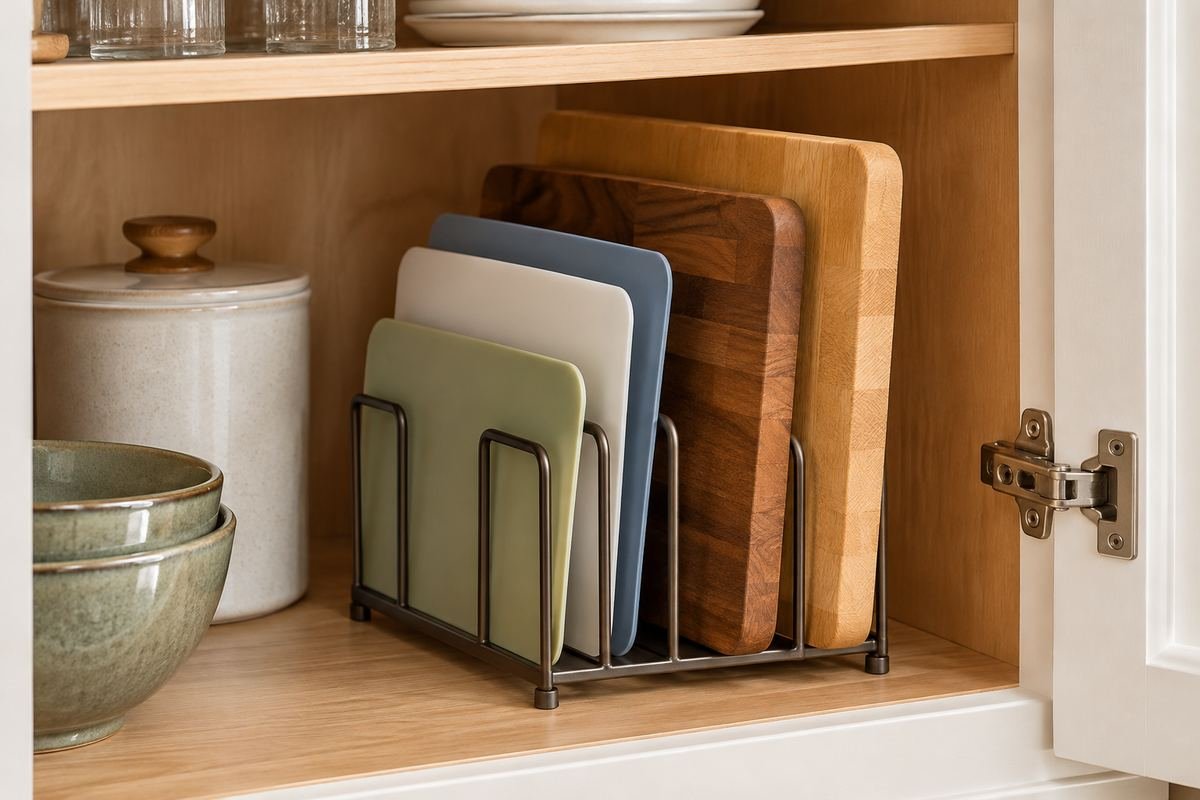
Thin flexible cutting mats can slump behind rigid boards. A narrow supportive file keeps their edges together and makes them easier to identify without bending them into a cramped compartment.
Follow the care and storage advice for the particular material. Keep them dry and avoid forcing them around a sharp divider. If the mats have a permitted flat-storage method, a shallow drawer may suit them better than an upright rack.
Practical tip: Choose the organizer around the material, not just the board outline.
16. Keep a round board in a stable cradle

A round board has no long flat edge to lean on. A suitable cradle or broad slot can support its lower edge and stop it rolling against other kitchen items.
Check the full diameter and thickness against the rack, then test the arrangement with adjacent pieces removed. The board should stay stable without relying on a second board to prop it up. A heavy round board may need a different lower location.
Practical tip: Test the round board alone before filling the neighboring slots.
17. Use a kitchen island end cabinet
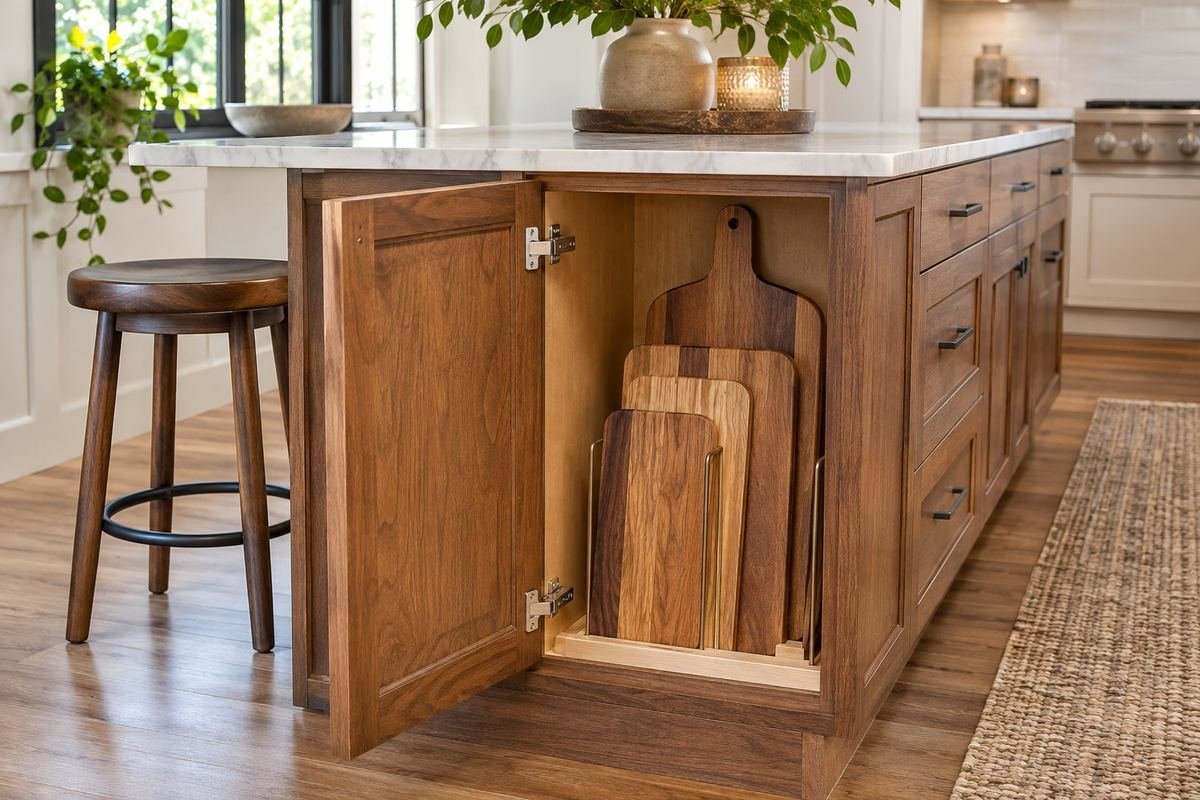
An island-end cupboard can put boards close to a large work surface. A few upright compartments can hold the working collection while preserving the rest of the island storage for other tasks.
Check whether an open door blocks stools or a passage around the island. The storage should work with the room occupied, not only while every chair is tucked away. Keep long handles within the cabinet when it closes.
Practical tip: Test access with the nearest stool pulled into normal use.
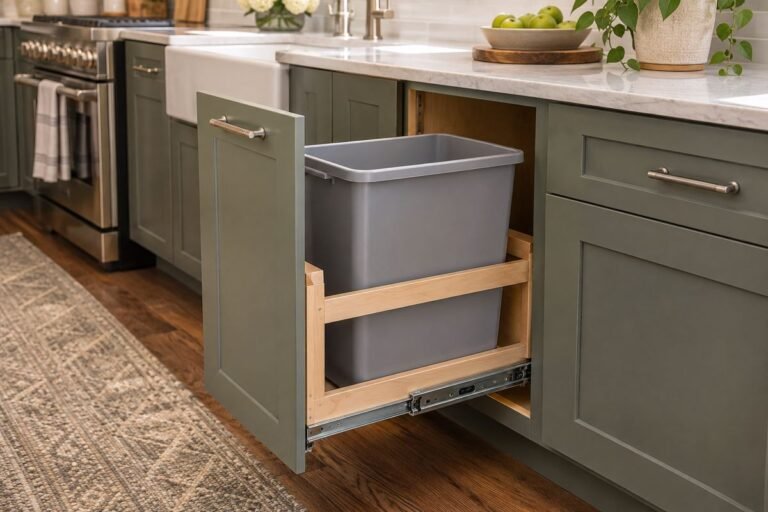
18. Choose a pull-out board organizer for deep storage

A suitable pull-out organizer brings boards forward when a deep cabinet makes the rear difficult to reach. The useful benefit is access, especially for pieces that otherwise need to tilt around a face frame.
Follow the exact organizer’s installation and load instructions. Check the complete travel path and the clearance for tall handles. A small fixed rack may be simpler when the cabinet is already shallow and easy to reach.
Practical tip: Make sure the board can lift after the organizer is fully extended.
19. Use a shelf basket for a small light collection

A structured basket can hold a few small dry boards when its base and sides support them without leaning. It can suit an occasional serving collection that is carried to a table together.
Keep the loaded weight manageable and avoid placing a heavy block in a decorative basket. The basket needs to clear the cabinet opening and provide a stable return position. Choose function before the weave or color.
Practical tip: Lift the loaded basket once before making it the permanent solution.
20. Leave one shelf position for an oversized board

An unusually large board can disrupt every standard rack. Giving it a dedicated supported shelf may use the cabinet more effectively than buying a large organizer for one outlier.
Measure its full outline and the route through the door. Store it flat only where the maker’s guidance and the furniture support allow it. Keep the space above clear enough that retrieving the board does not require unloading a pile of dishes.
Practical tip: Trace the large board’s outline before re-spacing the shelves.
21. Keep board storage clear of cleaning products
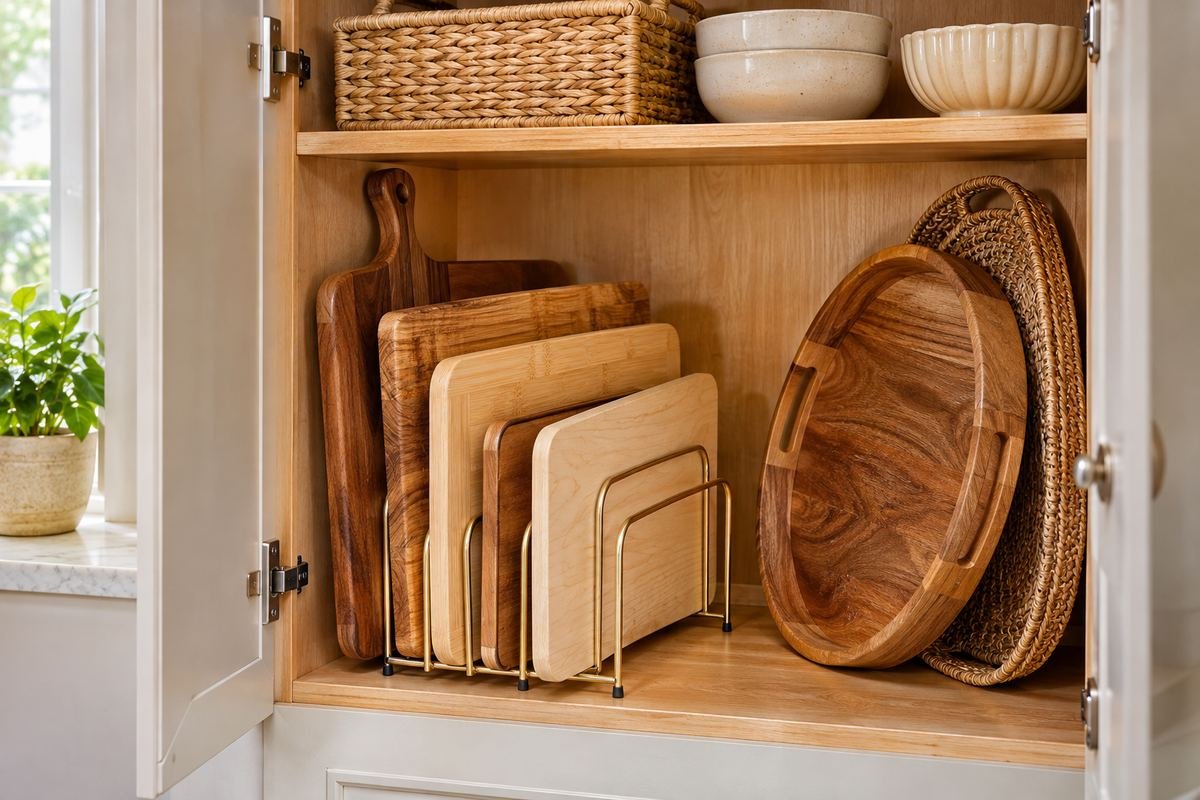
Boards used for food preparation need their own suitable clean storage location. A convenient gap among household cleaning bottles is not a useful substitute for a dedicated kitchen area.
Choose a dry organizer in a food-preparation cupboard or drawer, then give cleaning supplies their own appropriate labeled storage. This keeps the return routine clear and avoids a mixed-use cabinet that becomes difficult to maintain.
Practical tip: Review what shares the board compartment before adding a rack.
22. Make a rental-friendly board station
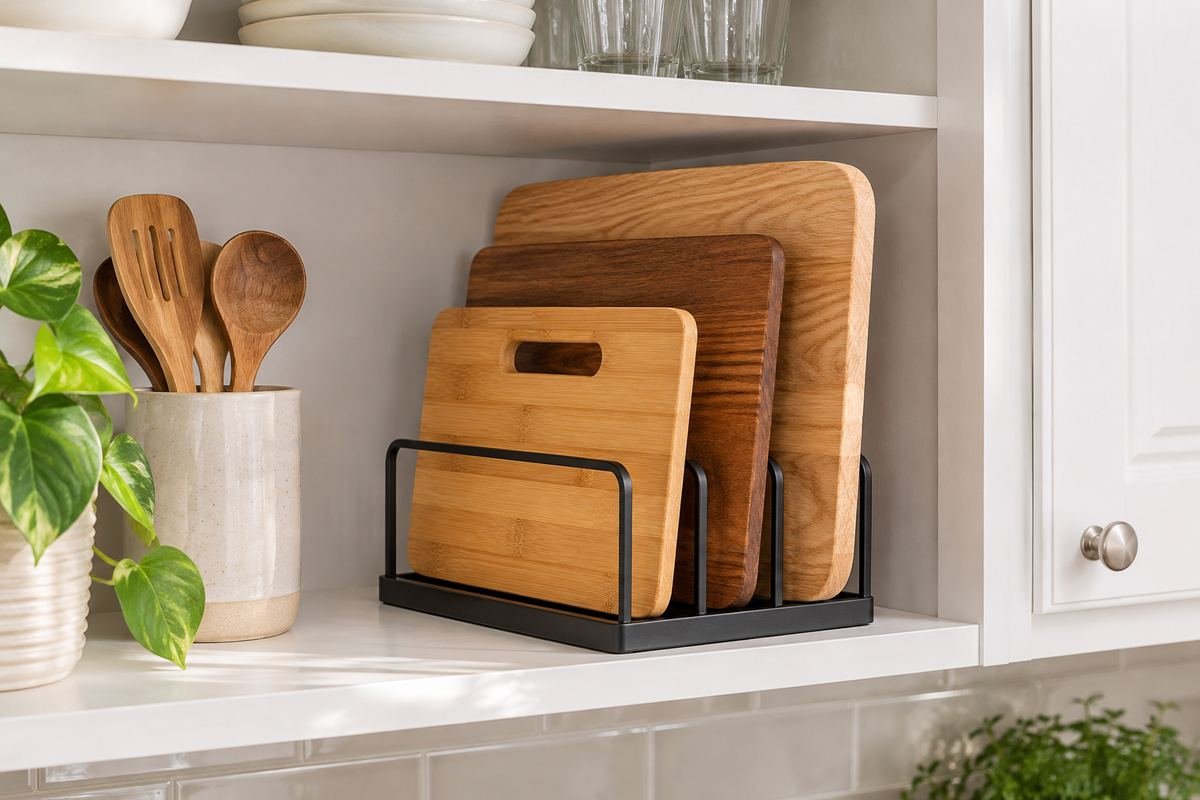
A stable freestanding rack can organize boards without permanent hardware. Choose a modest footprint that works on an existing shelf or counter and can move with the kitchen arrangement.
Test the loaded rack with the door or drawer fully closed. Avoid makeshift heavy door attachments when the permitted mounting method is uncertain. A small reversible change should still provide proper support for the boards.
Practical tip: Use a full-size paper footprint to preserve counter working space.
23. Finish with a clear board return position

An obvious empty slot helps keep the arrangement useful after a meal. It shows where the clean dry board returns instead of letting it drift into a new counter pile.
Review the layout after ordinary cooking and cleanup. If one board is always left out, change its position or give it a wider slot. Cutting board storage should follow the collection you use, not force the collection to match a staged photograph.
Practical tip: Keep one working slot easy to identify when the board is in use.
Frequently Asked Questions
Can I put a wooden cutting board away while it is damp?
Give it an appropriate drying position first. John Boos recommends thorough drying and upright air drying for its wood boards. A closed crowded slot is a storage destination for a dry board, not a replacement for drying it according to the maker’s instructions.
Can a cutting board be stored upright?
Yes, when the board and organizer allow stable upright storage without bowing, falling or pressure on a weak handle. Check the board maker’s care advice. A heavy board may be easier to handle in its own supported low location.
How do I store a board without drilling?
A stable freestanding rack, a suitable existing divider or a dedicated shelf may work. Check the complete loaded dimensions and weight. Avoid attaching an improvised heavy holder to an unknown cabinet door.
Choose the Details That Work in Your Home
Choose a stable dry storage position and an easy drying route before arranging a display. Cutting board storage feels successful when the board you need comes out cleanly, the largest piece stays supported and the counter still has room for preparing food.
For related ideas, explore kitchen drawer organization, kitchen counter decor, kitchen island storage.
Planning References
John Boos: complete guide to wood cutting board care; John Boos: care and maintenance resources. Follow the instructions for the exact products you choose.
Optional digital guide for this topic
If you prefer a structured workbook, explore this related paid guide.