The most useful refrigerator organization ideas make it easy to see what is available, take out one item and return it without rearranging the shelf. Start with the food your household regularly buys, then give the different groups a clear place. A fridge does not need a complete set of matching bins to become easier to use.
These 26 ideas cover food grouping, shelf access and the small decisions that make a layout last through an ordinary shopping week. Choose the suggestions that solve an actual problem in your appliance. The illustrations show possible arrangements; they do not demonstrate a measured temperature or prove a food's storage life.
Contents
- 1. Give ready-to-eat food one easy-to-see shelf area
- 2. Use shallow containers to keep leftovers visible
- 3. Create a small use-first position
- 4. Contain raw-meat packages in their own lower tray
- 5. Keep eggs in their original carton on an interior shelf
- 6. Reserve upright interior space for milk containers
- 7. Let crisper drawers keep their intended job
- 8. Keep delicate packaged fruit in a single visible layer
- 9. Pull small jars forward in one narrow bin
- 10. Compare a refrigerator-compatible turntable for awkward depth
- 11. Make one tall-bottle bay
- 12. Group suitable door condiments by use
- 13. Build a compact breakfast group
- 14. Give sandwich ingredients a clear preparation group
- 15. Separate grab-and-go portions from bulk packages
- 16. Use personal bins in a shared fridge
- 17. Keep cooked meal components together but separately covered
- 18. Distinguish the open working supply from the reserve
- 19. Use partial-width bins instead of covering an entire shelf
- 20. Adjust a shelf around the regular container height
- 21. Compare container footprints before replacing the collection
- 22. Test a bin with the refrigerator door at its normal opening
- 23. Put frequent small items in a comfortable front position
- 24. Label the location without hiding the package information
- 25. Leave a visible limit for the weekly reserve
- 26. Make each small group removable for cleaning
Set the food-storage rules before buying organizers
The FDA advises a refrigerator temperature of 40°F or below, checked with an appliance thermometer, and enough space for cold air to circulate. Follow the refrigerator manual for vents, shelf positions and accessory compatibility. Keep foods covered as appropriate, separate raw animal foods from ready-to-eat foods and follow the food's storage guidance. Illinois Extension places contained raw meat on the bottom shelf to avoid drips onto other foods and recommends using the appliance's drawers as intended. Keep the organization project short enough that perishables remain appropriately chilled. An attractive container or a tidy shelf cannot establish that food is safe.
Choose an arrangement that fits your situation
- Items disappear behind jars: Try a narrow pull-forward group or compatible rotating organizer
- Several people share the fridge: Agree on small personal areas while preserving food separation
- Tall containers do not fit upright: Review permitted shelf positions and the complete removal route
- A shelf changes through the week: Keep a partial-width organizer and an adaptable open area
- The fridge becomes overcrowded: Review the reserve and purchase quantities before adding more bins
1. Give ready-to-eat food one easy-to-see shelf area

Start with the food most often taken straight from the fridge: a covered dip, a yogurt tub or a prepared lunch. Gather suitable items in one visible area above raw-food storage. Leave a direct route to the back. This gives the household a useful first place to look instead of opening every drawer before deciding what is available.
2. Use shallow containers to keep leftovers visible

A tall container can conceal several smaller portions behind it. Compare a few shallow, lidded containers that suit the food and its cooling and storage instructions. Keep the contents and date information visible from the front. Avoid a stack that must be dismantled for the bottom portion; two short, accessible groups can work better than one impressive tower.
3. Create a small use-first position

Give an appropriate front section to food already identified for prompt use under its actual storage guidance. Keep the group small enough to review at a glance. Move newer purchases behind suitable older stock rather than burying the older package. The position is a reminder to check dates and instructions; it is not permission to keep questionable food.
4. Contain raw-meat packages in their own lower tray

A removable tray can define the raw-food area and catch leaks from packages. Keep raw meat separate from ready-to-eat foods and follow the placement guidance for the foods actually stored. Choose a tray that can be removed without tilting it over another group. Its contents still need appropriate packaging, temperature and handling.
5. Keep eggs in their original carton on an interior shelf

The FDA recommends retaining the carton and storing eggs in the refrigerator itself rather than the door. Make a stable shelf position for the carton and keep its information available. Measure the height needed to open it before placing another shelf directly above. A decorative loose-egg dispenser is unnecessary when the carton already provides a clear, practical package.
6. Reserve upright interior space for milk containers

Make room for the container you actually purchase, including its cap and handle. Illinois Extension includes milk among ready-to-eat foods on interior shelving; its door guidance instead favors suitable condiments. Use the available shelf configuration to keep the milk upright and easy to lift. Do not buy a decanting bottle merely to make the shelf look uniform.
7. Let crisper drawers keep their intended job

Read the appliance instructions before filling its drawers with extra organizers. Group produce according to its own storage requirements and the drawer's intended use. A small removable divider may help separate purchases, but it should not jam the drawer or cover its controls. Start with the supplied compartment rather than assuming another layer of boxes will improve it.
8. Keep delicate packaged fruit in a single visible layer

A shallow position can make small packages easier to inspect than a deep pile. Retain packaging and handling directions appropriate to the purchase. Give each package enough room to slide out without crushing its neighbor. If the group needs stacking just to fit, reduce the reserve or find another suitable location rather than forcing it into the same tray.
9. Pull small jars forward in one narrow bin

A narrow pull-forward bin can gather jars that otherwise disappear behind larger containers. Choose a short group with visible contents and enough room to grasp the bin. Compare its loaded weight with the shelf and accessory limits. The practical test is whether the back jar comes out easily without lifting several others first.
10. Compare a refrigerator-compatible turntable for awkward depth

A rotating organizer can bring a rear jar forward when ordinary rows are difficult to reach. Check the complete movement, mounting method and space needed with the door open. IKEA's cited SNURRAD is one example designed to pull out and revolve; that does not make every pantry turntable suitable for every refrigerator shelf.
11. Make one tall-bottle bay

Keep a defined upright bay for regularly used tall bottles instead of scattering them through several shelves. Compare the tallest closure with the usable opening, then adjust only the shelf parts the manual permits. Leaving a sensible gap can be more useful than adding a horizontal bottle rack that does not match the containers.
12. Group suitable door condiments by use

Where the package guidance allows door storage, keep frequently used condiments together and the less-used group separate. Put shorter containers where they remain visible rather than hiding them behind a tall bottle. Review the door's loaded depth with the main shelves. A full-looking door bin is not a reason to place every type of food there.
13. Build a compact breakfast group

Gather the refrigerated items used for a regular breakfast into one appropriate area: perhaps yogurt and a covered spread. Keep quantities modest so the group is easy to inspect. Leave foods requiring different storage elsewhere. A functional breakfast group should reduce searching without becoming a large permanent tray that dictates the rest of the refrigerator.
14. Give sandwich ingredients a clear preparation group

A dedicated group can help when lunches are assembled regularly. Keep the relevant ingredients covered or in their appropriate packaging, with the front labels readable. Choose a bin that holds the current working supply rather than a full reserve of every possible filling. Return individual items promptly instead of leaving a large chilled collection on the counter.
15. Separate grab-and-go portions from bulk packages

Single portions can have one accessible position while the larger reserve keeps its own space. This prevents a small snack from disappearing behind a large tub and makes the remaining quantity easier to assess. Retain important package information. Avoid transferring foods into anonymous containers when the instructions or ingredients need to remain identifiable.
16. Use personal bins in a shared fridge

A small assigned area can clarify ownership where several people share the appliance. Agree on the location and the space available before buying containers. Keep food-storage requirements ahead of personal boundaries, and do not mix raw and ready-to-eat foods merely because they belong to the same person. A neutral marker can identify a group without covering the food's information.
17. Keep cooked meal components together but separately covered

Place compatible components of one planned meal beside each other in their own suitable containers. A shallow grouping can make the planned meal obvious without combining foods prematurely or hiding dates. Keep the portions relevant to the household's plan. When the meal changes, release the space instead of leaving a permanent category that no longer serves a purpose.
18. Distinguish the open working supply from the reserve

When the same product is bought repeatedly, keep the opened package easy to identify and the unopened reserve behind or beside it. Preserve each package's directions and date information. This arrangement makes duplicate opening less likely. It also reveals when the reserve is taking more room than the household realistically needs.
19. Use partial-width bins instead of covering an entire shelf

One narrow organizer can leave an adaptable open area beside it for a larger covered dish. Compare the actual mix of packages before dividing every shelf into equal rectangles. Keep the open area purposeful rather than treating it as wasted space. Flexibility is useful when a shopping week's contents do not match a fixed set of bins.
20. Adjust a shelf around the regular container height
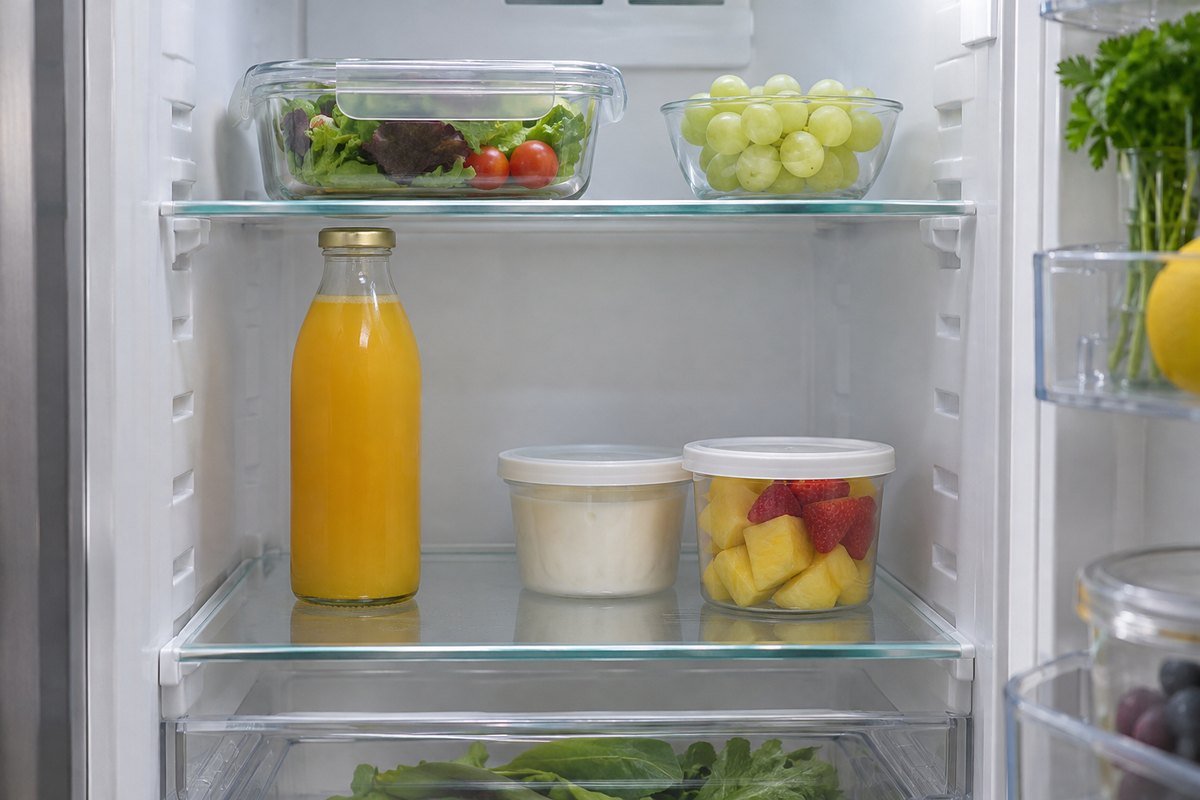
Use the manual's permitted shelf positions to accommodate the containers used most often. Check the space above lids and the route past the door before committing to a new height. Keep shelf parts correctly seated. A modest adjustment can remove the need to lay a tall package on its side or keep moving an entire shelf's contents.
21. Compare container footprints before replacing the collection

Lay out clean empty examples outside the refrigerator and compare the shelf space they would occupy. A few compatible rectangular containers may organize one working group, while round containers remain useful elsewhere. Replace only what creates a genuine access problem. This avoids buying a complete new set for a small mismatch in one compartment.
22. Test a bin with the refrigerator door at its normal opening

A bin that fits a bare shelf may still catch on the door storage or fail to pull forward in the installed kitchen. Test its complete removal route with the door at the angle normally available. Include the handle and loaded outline. Choose a smaller organizer when access depends on opening the door farther than the room permits.
23. Put frequent small items in a comfortable front position

Choose the reachable position from the people who use the fridge. A front tray may suit a short, frequently used group better than a high rear shelf. Keep heavier containers fully supported and easy to grasp. The goal is a simple retrieval movement, not filling every elevated gap with an extra basket.
24. Label the location without hiding the package information

A small category marker on the bin or shelf edge can explain where an item returns. Keep the food's own ingredients, instructions and dates visible. Choose markers compatible with the surfaces and cleaning method. If the household already recognizes the arrangement, skip the extra labels rather than adding a decorative naming system that needs constant maintenance.
25. Leave a visible limit for the weekly reserve

Give a frequently repeated purchase a defined amount of space and review what remains before shopping. Keep room for ordinary changes rather than packing the compartment to its edge. If a reserve repeatedly spills into other zones, compare the purchase quantity with actual use. More organizers cannot solve a collection that routinely exceeds the available suitable storage.
26. Make each small group removable for cleaning

Choose an arrangement that can be lifted out in manageable parts while food remains appropriately chilled. Follow the appliance and accessory care instructions, wipe spills promptly and return the group to its defined position. Keep unnecessary liners and decorative inserts out when they complicate the routine. A simple reset is what lets the organization survive beyond the first photograph.
Make a fridge zone map before ordering bins
Draw the actual shelves, door bins and supplied drawers. Record the usable width, depth, height and removal route for the one area causing trouble. List its regular contents, required storage conditions and current package sizes. Then assign a purpose: ready-to-eat group, contained raw-food area, suitable condiments or produce drawer. As a planning example, a household might keep a small lunch group on an accessible interior shelf and a separate raw-food tray below; the appliance and food guidance determine the final positions. Trial the layout with existing suitable containers first. Add an organizer only when it improves retrieval, visibility or cleaning.
A practical next step
Begin with the one fridge area that causes the most searching. Give it a clear purpose, preserve appropriate food-storage conditions and test the retrieval movement with the containers already available. Keep the change when it makes an ordinary week easier, then improve the next area.
For the surrounding room, plan fruit storage around the produce you buy. organize the pantry alongside your refrigerator.
The images are original AI-generated design concepts, not photographs of tested products or verified installations.
Sources and care references
- FDA: refrigerator temperatures, circulation and food handling
- FDA: safe food storage and keeping eggs in the original carton
- Illinois Extension: refrigerator placement and storage separation
- IKEA SNURRAD: an example of a refrigerator-specific rotating organizer
Optional digital guide for this topic
If you prefer a structured workbook, explore this related paid guide.