Privacy fence ideas are most useful when you compare the complete boundary: the panel surface, repeated posts, corners, gate and the ground it follows. Start with the part of the property you are entitled to change and the actual views you want to address. Then shortlist a complete fence system that fits the site.
These 26 concepts focus on garden boundaries rather than freestanding patio screens. They compare materials, elevations and everyday access. A solid-looking image cannot establish a real fence’s privacy at every angle, structural performance, permitted height or suitability for containing children or animals. Resolve those requirements for the actual project.
Contents
- 1. Use a straight vertical-board run as the starting comparison
- 2. Let horizontal boards connect several garden bays
- 3. Compare a board-on-board arrangement from both sides
- 4. Frame warm timber with a quiet dark outline
- 5. Consider a vertical composite appearance as a complete system
- 6. Use horizontal composite-looking panels with restrained surroundings
- 7. Compare a simple white vinyl-style boundary
- 8. Use a warm gray finish beside pale paving
- 9. Give green foliage a charcoal backdrop
- 10. Relate natural timber to an existing brick building
- 11. Use a framed upper opening only where partial screening suits
- 12. Keep a mixed-width rhythm consistent over the whole run
- 13. Make the post rhythm deliberate
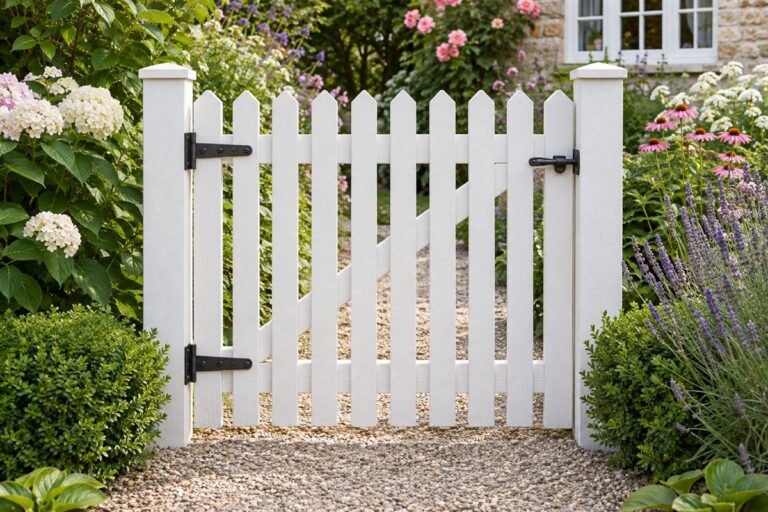
- 14. Keep the top line quiet when the garden is already detailed
- 15. Resolve the corner as part of both fence runs
- 16. Keep a matching gate within the fence elevation
- 17. Use a different gate finish to clarify the entrance
- 18. Consider stepped bays on a sloping boundary
- 19. Compare a raking line where the chosen system allows it
- 20. Plan a clear transition between more open and more enclosed edges
- 21. Keep planting in front of the fence as a separate layer
- 22. Leave the lower edge available for inspection and care
- 23. Read the full boundary from an indoor window
- 24. Protect the useful width of a side-yard route
- 25. Keep room for occupied chairs beside the boundary
- 26. Finish a long run with a limited material palette
Define the boundary before choosing its appearance
Have the boundary location and applicable property and local requirements confirmed before specifying a fence. Record the ground profile, relevant views, access points and exposure for the actual site assessment. If the project involves digging in the United States, contact 811 and follow the state process, required waiting time and confirmation of utility responses before digging. This guide provides design comparisons, not a post, footing or installation specification.
Match the comparison to the boundary question
- A long visible run: Compare several complete bays, post rhythm and the top line.
- Close neighboring views: Inspect actual panel coverage at the relevant positions and angles.
- A slope or changing ground: Compare surveyed elevations with the fence system’s supported configurations.
- A gate is required: Include its complete assembly, approach and operating space.
- Material care is a concern: Compare named products, physical samples and current care instructions.
1. Use a straight vertical-board run as the starting comparison

A straight-topped vertical-board fence gives a long boundary a regular rhythm. Compare a complete bay, including its posts and lower edge, with the house and garden. A small timber offcut cannot show how the full boundary will read.
Decide whether the posts should be visible as a repeated feature or less prominent within the run. Keep the actual board arrangement with that choice: a solid-looking front in a photograph is not a specification for gap behavior, movement or support.
2. Let horizontal boards connect several garden bays

Horizontal lines can connect a long fence with the edges of paving or a low garden building. Draw enough bays to see the repeated joints rather than choosing from one cropped panel. Keep the board direction consistent through the intended run.
Where screening matters, inspect the real joint or overlap rather than selecting any open slatted fence that has the right horizontal look. Board span, fixing and support belong to the chosen complete system, so retain its configuration when comparing appearances.
3. Compare a board-on-board arrangement from both sides

A board-on-board appearance introduces a layered rhythm instead of a single flat field. Ask to see the actual panel from the front, rear and an oblique angle. The alternating pieces should make sense as a complete design rather than a decorative sketch.
Record where screening is needed before relying on that arrangement. Different products use different spacing, overlaps and frames. A two-sided sample helps you discuss the relevant views without assuming every staggered-board fence gives the same result.
4. Frame warm timber with a quiet dark outline

Dark posts and rails can give warm board infill a clear outline. Compare a whole bay beside the actual paving and window frames. The frame is a strong visual element when it repeats many times around a garden.
Choose the frame and infill as a compatible fence system. Keep real connectors, finishes and maintenance information in the discussion with the supplier. The contrast should clarify the boundary rather than create an unrelated black grid around every garden feature.
5. Consider a vertical composite appearance as a complete system

A vertical composite fence can offer a more uniform-looking boundary than varied timber grain. Compare actual samples and a full completed panel. Include posts, top rails and lower details in the material review rather than assuming the pickets are the entire purchase.
The Trex fencing page provides one example of a vertical interlocking design alongside different horizontal systems. Use that as a reminder to compare named products and their current instructions. The material category alone does not establish the construction or care of another fence.
6. Use horizontal composite-looking panels with restrained surroundings

A horizontal composite appearance can create a different scale from narrow wood slats. Compare its board depth and joints with the paving modules. A simple garden surface can let the fence pattern remain understandable across several bays.
Read the selected product information for color variation and weathering. Do not order separate components solely because their color names sound alike. Keep a physical approved sample and identify the complete system in the project brief.
7. Compare a simple white vinyl-style boundary

A white fence can form a bright outline around a garden with darker foliage. Look at its relationship with the home’s trim before selecting the shade. A plain top and simple post caps can keep the repeated details relatively quiet.
Confirm the real material and cleaning instructions rather than choosing from a white silhouette alone. Include the complete post-and-panel system and its exposure requirements. Avoid using a photograph to judge whether a particular product will stay the same color over time.
8. Use a warm gray finish beside pale paving

Warm gray can provide a quieter comparison when paving and walls already contain several colors. Hold the real finish sample outdoors beside those surfaces. Look at it in shade as well as direct light before extending it along a long boundary.
For a coated timber fence, identify the actual wood condition and appropriate finish system. Keep its care directions with the sample. A gray illustration demonstrates a palette option rather than proving a coating is suitable for an existing surface.
9. Give green foliage a charcoal backdrop

A charcoal boundary can make lighter leaves and flowers visually distinct. Compare it from the house because the fence may occupy a large part of that view. Keep the planting arrangement readable without adding bright pots to every bay.
Look at a larger sample before choosing a very dark finish. Its relationship with the paving and building matters when the garden is empty of summer flowers too. Keep the real material and maintenance plan separate from the color choice.
10. Relate natural timber to an existing brick building

Warm timber can sit beside brick without attempting an exact color match. Compare the wood with the brick’s larger field and mortar rather than selecting one unusually dark brick as the reference. A quiet cap detail can leave the two textures clear.
Consider the view at the junction with the building. Have that actual connection resolved for the site rather than copying a joint from an illustration. Keep any required access and the condition of the existing masonry part of the brief.
11. Use a framed upper opening only where partial screening suits

A solid lower field with a more open upper section can give a boundary a different balance of enclosure and light. Compare the actual view through the upper pattern. It may suit some garden edges while leaving a particular neighboring view exposed.
Choose a complete panel designed with that configuration. Adding a topper changes more than the appearance, including the final height and supporting arrangement. Resolve those requirements through the selected system and the applicable local review.
12. Keep a mixed-width rhythm consistent over the whole run

Alternating wide and narrow boards can make a long fence more detailed without adding another color. Draw the repeat through several bays. Check how the pattern finishes at posts, corners and the final narrow portion of the boundary.
Compare a full panel at the normal viewing distance. Tiny alternating lines may look very different from the kitchen window than they do in a close photograph. Choose the pattern because you enjoy the complete elevation, not simply because it looks unusual in a sample.
13. Make the post rhythm deliberate

Visible posts divide a boundary into a sequence of framed bays. They can give a long garden edge an understandable structure, particularly where the panels are plain. Compare their finish and apparent width with the chosen infill.
Keep bay dimensions tied to the actual system and site assessment. An attractive repeating drawing is not a reason to alter a manufacturer’s required spans. Use the elevation to communicate the look, then obtain the complete layout and quantities for the chosen fence.
14. Keep the top line quiet when the garden is already detailed

A straight cap can give a planted garden a calm upper boundary. Compare it with the rooflines and visible neighboring structures. The simplest top may work well where trees, flowers and garden furniture already introduce many shapes.
Check that the chosen cap is part of the real fence arrangement. Its appearance does not establish how water is managed or how the boards are fixed. Avoid adding several unrelated decorative caps solely to make each bay different.
15. Resolve the corner as part of both fence runs

At a garden corner, two fences become one visible composition. Compare the board direction, top line and post detail from the approach. A detail that works in a straight run may need a different component where the boundary turns.
Mark both sides of the corner on the project drawing and have the actual junction specified for the chosen system. Leave enough space to reach the corner for upkeep. Avoid hiding an unresolved edge behind a large plant at the planning stage.
16. Keep a matching gate within the fence elevation

A matching gate can let a long boundary read as a continuous material group. Compare its outline, frame and hardware with the adjoining panels. The gate still needs a clearly identified opening and a practical approach from both sides.
Ask for the gate as a compatible complete assembly with the appropriate support and operating clearance. Match the visual rhythm without assuming the fence panel itself can be converted into a gate. Keep actual access needs in the specification.
17. Use a different gate finish to clarify the entrance

A restrained contrasting gate can make the entrance easier to recognize along a plain boundary. Repeat a related tone from the house or paving rather than introducing several new colors. Keep the neighboring fence simple enough for the opening to be clear.
View the composition with the gate open as well as shut when discussing the actual plan. Support, swing, latching and access remain separate from the contrast. The illustration suggests a color relationship, not a verified gate mechanism.
18. Consider stepped bays on a sloping boundary

Stepped fence bays can make changes in ground level part of the visible rhythm. Compare the overall top line before choosing details for one panel. The shape should respond to a surveyed slope and the appropriate system rather than a photograph alone.
Discuss the lower edge and any resulting openings with the installer. A fence should not be used to retain soil unless it is specifically designed for that role. Keep drainage, ground conditions and the actual support design in the site assessment.
19. Compare a raking line where the chosen system allows it

A fence that follows a slope can create a different silhouette from stepped bays. Compare both options in the same surveyed elevation. Include the visible board arrangement and the relationship with the lower edge.
Do not assume any fixed panel can be tilted to achieve that appearance. Obtain the selected system’s permitted configuration and site-specific details. Keep access and the ground condition in the discussion before treating a smooth line as the preferred solution.
20. Plan a clear transition between more open and more enclosed edges

Some gardens need different boundary treatments at different locations. Draw the point where the more enclosed run changes rather than allowing two unrelated fences to meet by accident. A consistent material or post finish can connect them.
Resolve the actual location, height and visibility requirements with the relevant property and local authorities. This concept is about the visual transition, not a universal permitted height or an approved arrangement near a road or entrance.
21. Keep planting in front of the fence as a separate layer

A garden bed can soften a solid boundary while leaving the fence pattern visible above it. Choose plants for the real site and allow for their mature spread. The planting should not be used to disguise unfinished edges or inaccessible components.
Keep the bed and fence maintenance needs together in the plan. Plant support and attachment need their own assessment if climbers are proposed later. A flower border in front of a fence is a different choice from loading the fence with planters or climbing growth.
22. Leave the lower edge available for inspection and care

A visible strip along the fence can make its lower edge easier to inspect than a fully crowded planting line. Compare a suitable ground finish with the adjoining lawn or path. Keep the actual drainage and ground levels in the site design.
Choose the strip through the garden’s real conditions and maintenance routine. Loose stone is not a universal moisture solution, and it must not obstruct a path or service access. The useful aim is a boundary you can reach and look after.
23. Read the full boundary from an indoor window

A fence may be the main background seen from the kitchen or living room. Compare its whole visible run from that position before selecting a busy pattern. The view should still work when outdoor furniture is stored and the garden is quieter.
Use the actual window position in the visual brief. A long horizontal line and repeated framed bays can look quite different through the same opening. Keep the preferred indoor view alongside the garden-side elevation rather than choosing from close-ups alone.
24. Protect the useful width of a side-yard route

A solid fence can define a narrow passage without turning it into a display corridor. Compare the complete installed footprint, including posts and any projecting details, with the route to the gate. Keep planting and stored objects out of the working passage.
Measure the actual equipment and everyday movement that use this route. A visually slender fence does not establish a useful clear width. If access is the main problem, simplify adjacent objects before decorating the boundary with shelves or hanging pots.
25. Keep room for occupied chairs beside the boundary

When dining sits near a fence, include the chairs pulled out in the actual layout. A simple fence field can make a pleasant background without requiring the table to be pushed against it. Use the whole occupied arrangement in the plan.
Check the route from the house and the access needed for fence care. A decorative planting band or projecting post can use more space than its front elevation suggests. Choose the dining position for daily use before adding another layer to the boundary.
26. Finish a long run with a limited material palette

A consistent fence material can connect several garden areas even when their uses differ. Let a path, lawn and small seating area meet the same quiet boundary. The fence does not need a new panel style behind each activity.
Review the completed elevation and remove changes that have no clear purpose. Keep a record of the actual system and finish for future care or compatible replacement. A coherent boundary is easier to brief when its essential choices fit on one clear schedule.
An original fence-run schedule for comparing complete proposals
Make one record for each actual boundary run. Give it a simple name such as house-side, rear or garden return, and keep the verified location with the survey or project documents. Record its measured length and ground profile, the direction from which it is seen, any gates and the places that need access. This turns a collection of attractive panel pictures into a brief for a real discussion.
For each run, describe the visual objective in one sentence. For example: a quiet rear boundary seen from the living room, with a matching garden gate and a top line that responds to a surveyed gentle slope. Then identify what is still unresolved. The description helps compare designs; it does not establish boundary ownership, a lawful height or a structural solution.
Keep a separate line for the actual system proposed. Record the manufacturer, panel configuration, post and rail details, finish sample and gate assembly. Ask the supplier or installer for the complete layout and quantities rather than dividing the run by a panel width and treating the result as an order. Corners, ends, intermediate posts and gate openings all belong in that layout.
Compare quotations against the same brief. Check what each proposal includes for assessment, preparation, removal where applicable, the complete fence and gate, installation, finishing, disposal and aftercare. A lower panel price alone cannot tell you which complete project costs less. Leave unknowns visible so they can be resolved before a commitment.
For a hypothetical rear garden, proposal A might use stepped timber bays and a separate matching gate, while proposal B uses a compatible raking system. Compare both with the same surveyed ground profile, access needs and desired view. If one leaves an unresolved lower opening or unsuitable gate approach, ask for that issue to be addressed before choosing by silhouette. This example is an original comparison exercise, not a surveyed property or approved construction detail.
Finish the schedule with the approved sample, completed drawing reference, care information and questions still requiring an answer. Keep photographs of the installed boundary and the exact finish record for later maintenance. A useful final brief should explain both what you are choosing and what the qualified site assessment still needs to establish.
Check actual panel openness rather than its style name
Jacksons’ slatted-fence guide distinguishes offset or overlapping boards, smaller gaps and angled louvres. It notes that the view through louvres changes close up or from the side. The useful lesson is to inspect the real configuration at the viewpoints that matter. The guide’s UK height discussion is not a US height rule.
Keep visual screening separate from acoustic, wind, security and containment requirements. Neither a style name nor an AI-generated picture establishes those performances. Compare the actual complete system and obtain the appropriate site-specific assessment instead of adding boards or increasing height independently.
Keep material appearance and product care together
A brown composite-looking illustration cannot identify a particular Trex product. Trex’s current fencing page distinguishes vertical and horizontal designs and describes color variation and weathering in its own products. Compare the exact product, sample and current care information instead of assigning the same behavior to every composite fence.
Apply the same approach to timber, coated metal and vinyl. Confirm the material beneath the finish, the complete assembly and the care it actually needs. Choose the level of upkeep you can manage, while retaining a suitable existing fence when a supported repair answers the project better than replacement.
Do horizontal privacy fences always block every view?
No. Actual gaps, overlaps, joints and viewing angles matter. Inspect a full panel in the selected configuration from the positions relevant to your garden rather than relying on board direction alone.
What is the cheapest privacy fence?
There is no universal answer without a site and complete quotation. Compare the same scope, including posts, gates, ground conditions, installation, finishing and care, rather than ranking panel prices alone.
Can a new privacy fence solve an upstairs overlooking problem?
A garden-level barrier may leave an elevated view open. Describe the actual viewpoint in the brief and assess it within the applicable location and height requirements before choosing a fence.
Can these fence ideas be used as a pool barrier or guard?
These concepts establish no pool-barrier, guard or containment compliance. Those functions require their own appropriate design, product selection, installation and applicable review.
Should I choose stepped or raking fence panels on a slope?
Compare both with the surveyed ground and the actual system’s supported configurations. Resolve the top line, lower edge, access and support design with the site assessment rather than tilting a fixed panel to copy an image.
A practical next step
Choose one boundary run, compare its complete elevation and resolve its real access, ground and system requirements. Keep the selected materials and gate arrangement on a clear schedule so the final fence belongs to the garden and remains practical to look after.
Compare patio privacy screens when the requirement is a local seating screen. Plan a garden gate through its opening, approach and daily use. Keep a side yard useful as a route beside the boundary.
Images are original AI-generated garden-boundary concepts, not photographs of installed projects, product replicas, measured plans or verified structural and compliance details. The fence-run schedule and hypothetical comparison are original planning aids.
Sources and care references
- Jacksons Fencing: panel configurations and viewing-angle differences
- Trex: named composite fence systems, color variation and care context
- Common Ground Alliance: the US 811 process before digging
Optional digital guide for this topic
If you prefer a structured workbook, explore this related paid guide.