Landscaping Ideas
Getting the sloped yard right makes the biggest difference in how the space actually feels day to day. A well-planned sloped yard balances function and style, and even small tweaks to your sloped yard can transform the whole area.
If your backyard slopes and you’ve spent years treating that as a problem to eventually fix, it might be time to flip the thinking entirely. A grade isn’t wasted space — it’s the one thing a flat yard can never offer: built-in dimension, natural drainage, and the chance to create distinct zones just by following the land instead of forcing it flat.
By the end of this article, you’ll have 10 real ways to turn a sloped yard into a landscape that actually works with the incline, not against it.
Table of Contents
- 1. Terrace the Slope Into Flat Planting Levels
- 2. Build Tiered Zones With Steel Edging
- 3. Step Concrete Terraces Down to a Water Channel
- 4. Span the Incline With a Covered Patio
- 5. Hold the Grade With Tight Concrete Bands
- 6. Replace Stairs With a Gentle Ramp
- 7. Build a Timber Retaining Wall Terrace
- 8. Anchor Terraces With Large Boulders
- 9. Turn a Sloped Side Yard Into a Connector Path
- 10. Match Plant Choices to Each Terrace’s Microclimate
- Effort & Cost Snapshot
1. Terrace the Slope Into Flat Planting Levels for Your Sloped Yard
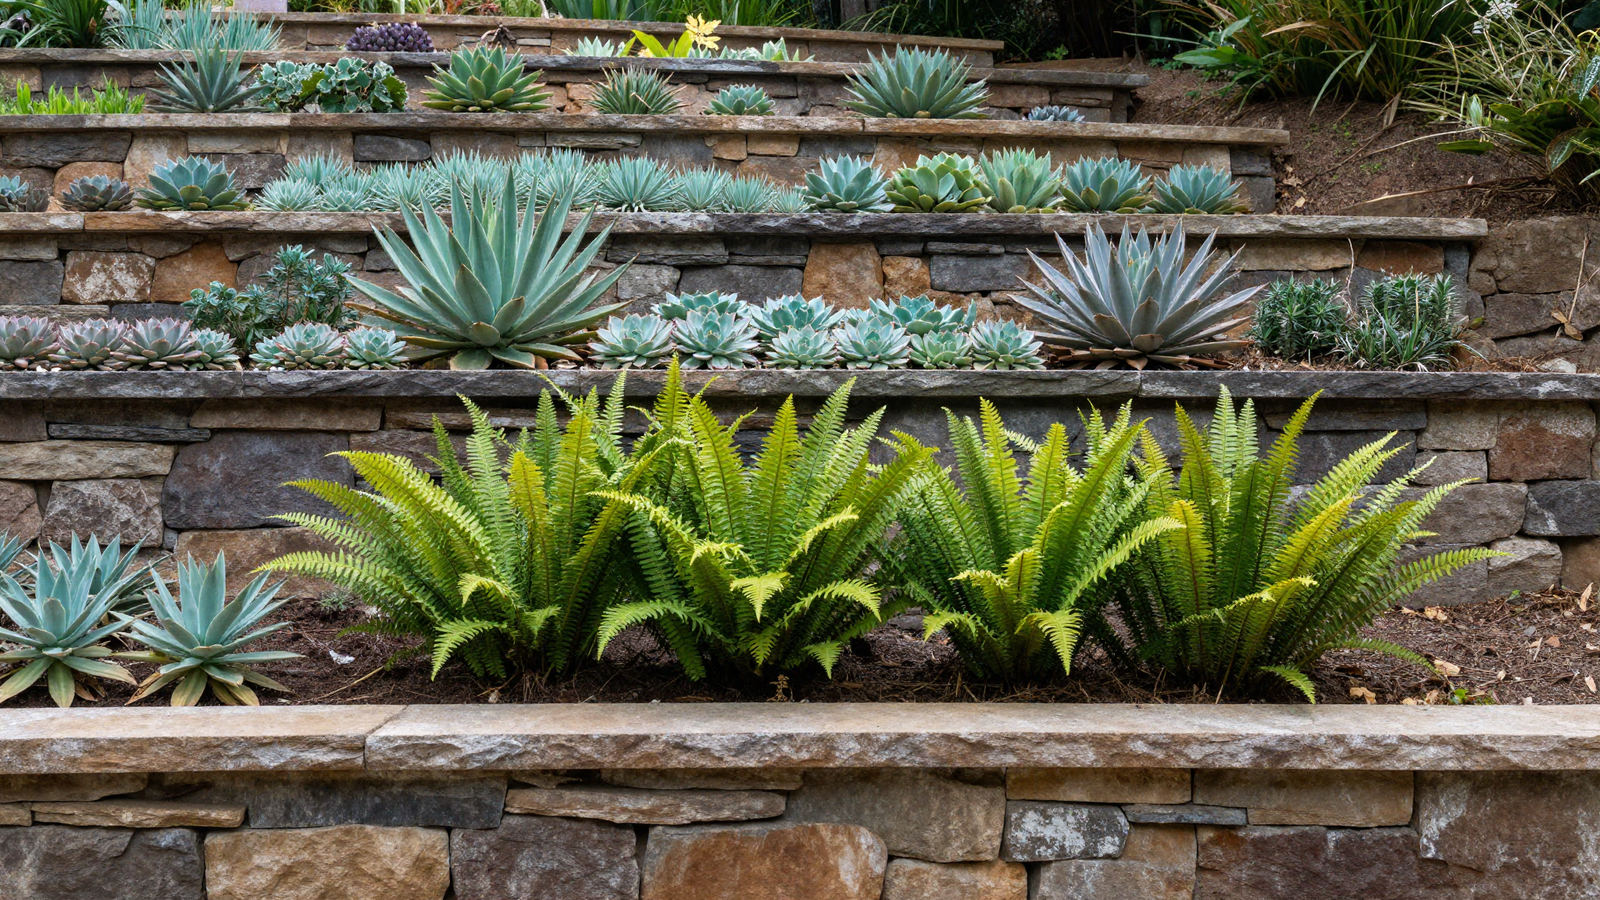
Breaking a slope into a series of flat, stone-walled levels solves erosion and usability at the same time, since each terrace holds soil in place while giving you an actual flat surface to plant or sit on. Every level becomes its own microclimate, which opens up plant choices a single sloped bed never could.
💡 Smart tip: Build terraces starting from the bottom of the slope and working upward — building top-down leads to unstable walls with poor drainage.
⚠️ Mistake to avoid: Skipping proper drainage behind each retaining wall; trapped water pressure is the most common cause of terrace wall failure.
2. Build Tiered Zones With Steel Edging for Your Sloped Yard
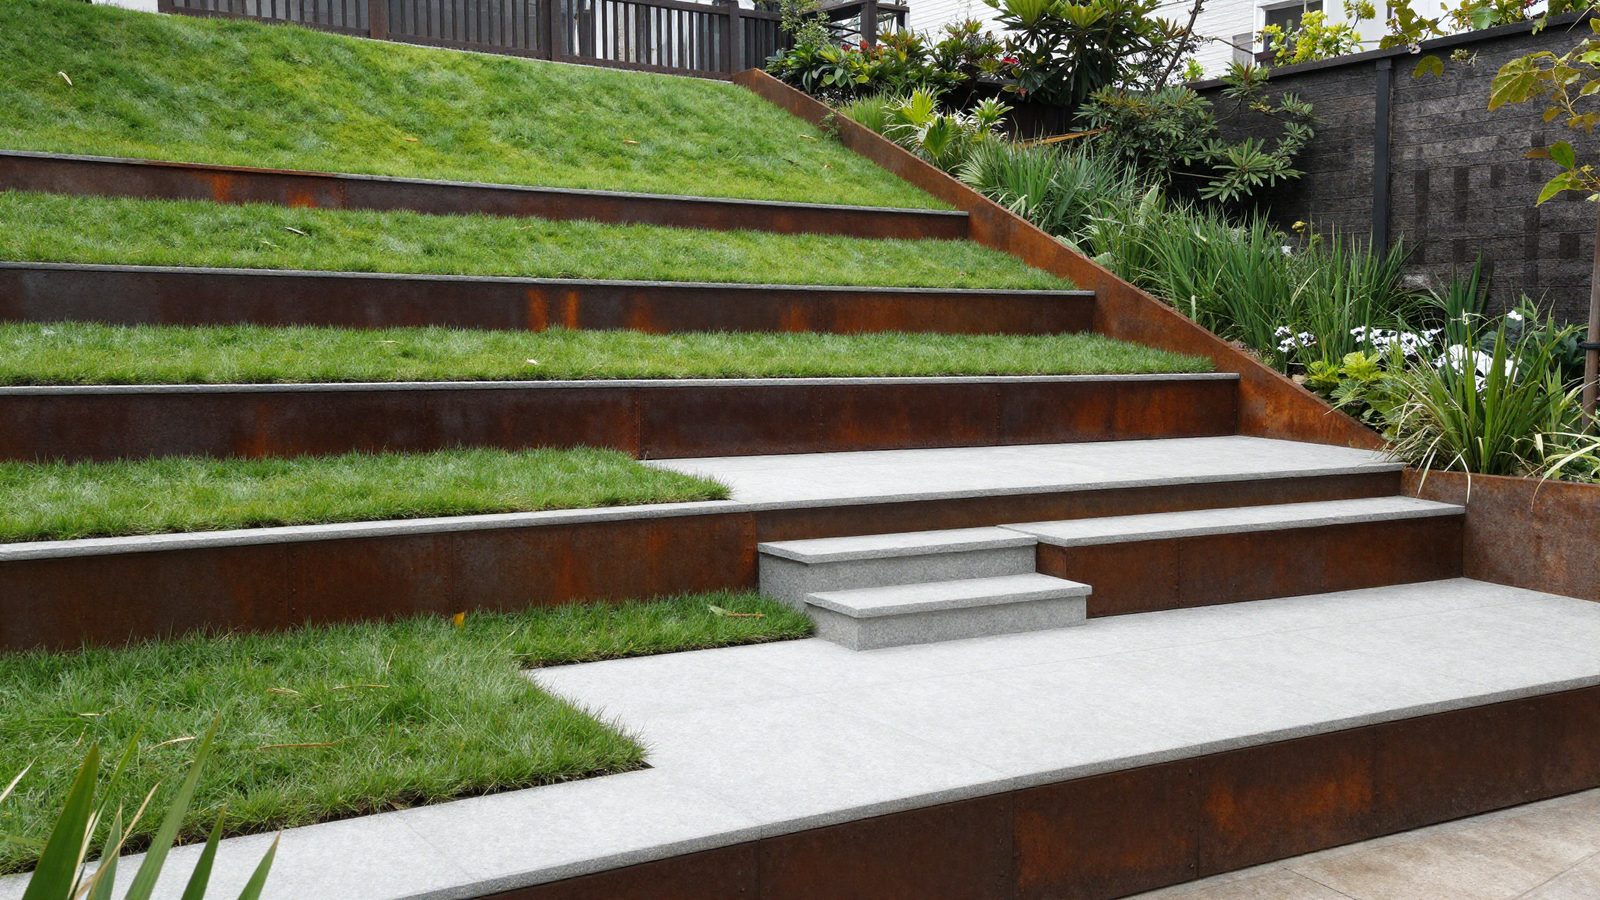
Steel edging gives each tier of a sloped yard a crisp, defined line, turning a loose slope into clear horizontal layers — tiered lawn, split patio, built-in seating steps — that guide movement through the space. Over time, corten steel develops a natural rust patina that blends into the stone and soil around it rather than standing out.
💡 Smart tip: Keep the planting inside each tier loose and informal even though the structure itself is precise; the contrast keeps the yard from feeling too rigid.
⚠️ Mistake to avoid: Making every tier the same height and width; slight variation between levels reads as more intentional than uniform stacking.
3. Step Concrete Terraces Down to a Water Channel for Your Sloped Yard
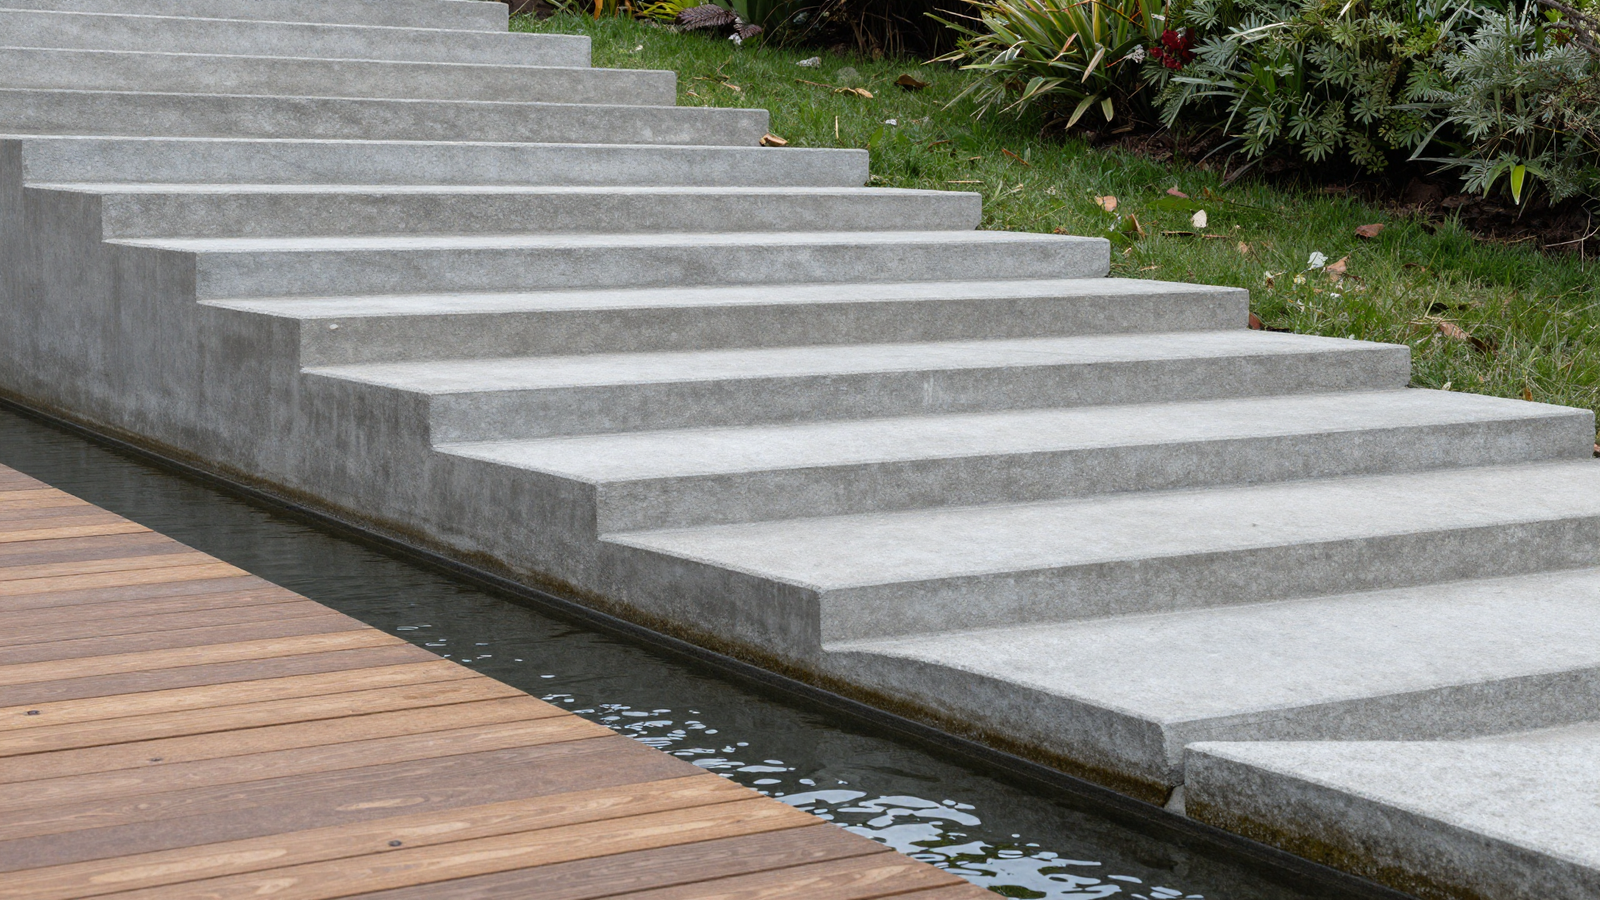
On a steeper drop, poured concrete terraces turn the full height of the slope into usable platforms for seating and circulation. A narrow water channel along the lower edge adds reflection and a cooling effect to the hardscape, while timber decking at the base softens the transition into a proper seating zone.
💡 Smart tip: Layer Japanese maples or similar graceful trees along the tiers to add depth without blocking the view toward the top of the slope.
⚠️ Mistake to avoid: Treating this as a DIY weekend project; steep concrete terracing at this scale typically needs a structural engineer and licensed contractor.
Loving These Ideas? Get the Step-by-Step Guide
Grab the full 5-day eBook and turn these ideas into a finished room.



4. Span the Incline With a Covered Patio
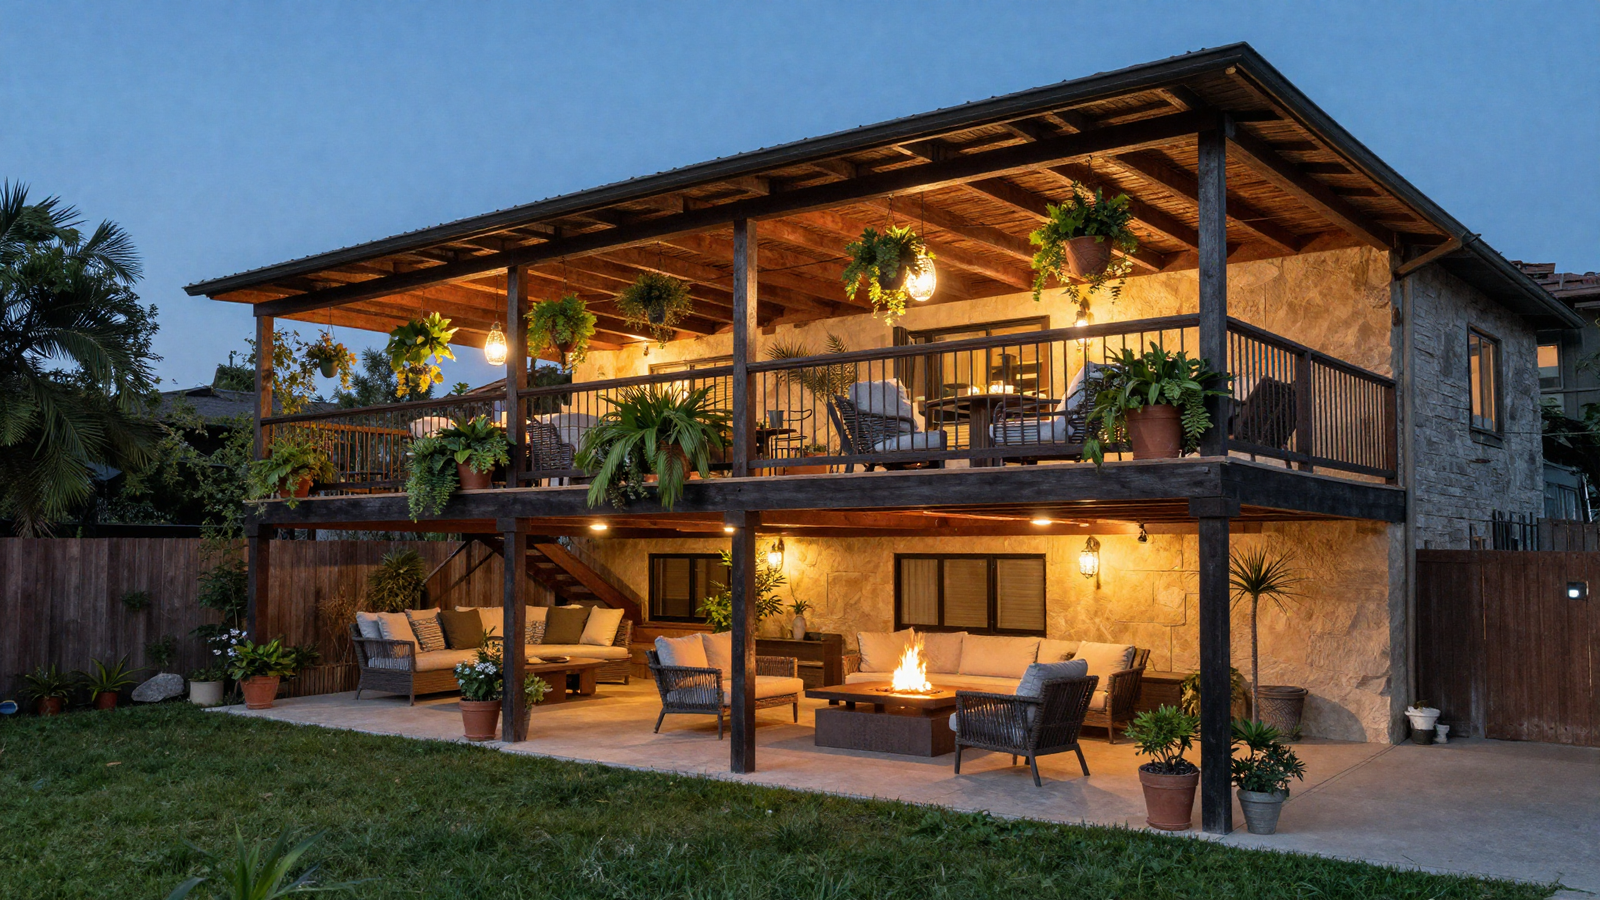
An extended covered patio built out over the slope gives you a full, level outdoor room without regrading the entire yard underneath it. Hanging plants and string lights soften the structural feel, and a fire pit tucked beneath it makes the space usable well into cooler evenings.
💡 Smart tip: Position the patio to frame the best view the slope offers — elevated sites often have sightlines a flat yard simply doesn’t.
⚠️ Mistake to avoid: Underestimating the footing and support requirements for a structure spanning uneven ground; this needs proper engineering, not standard deck footings.
5. Hold the Grade With Tight Concrete Bands
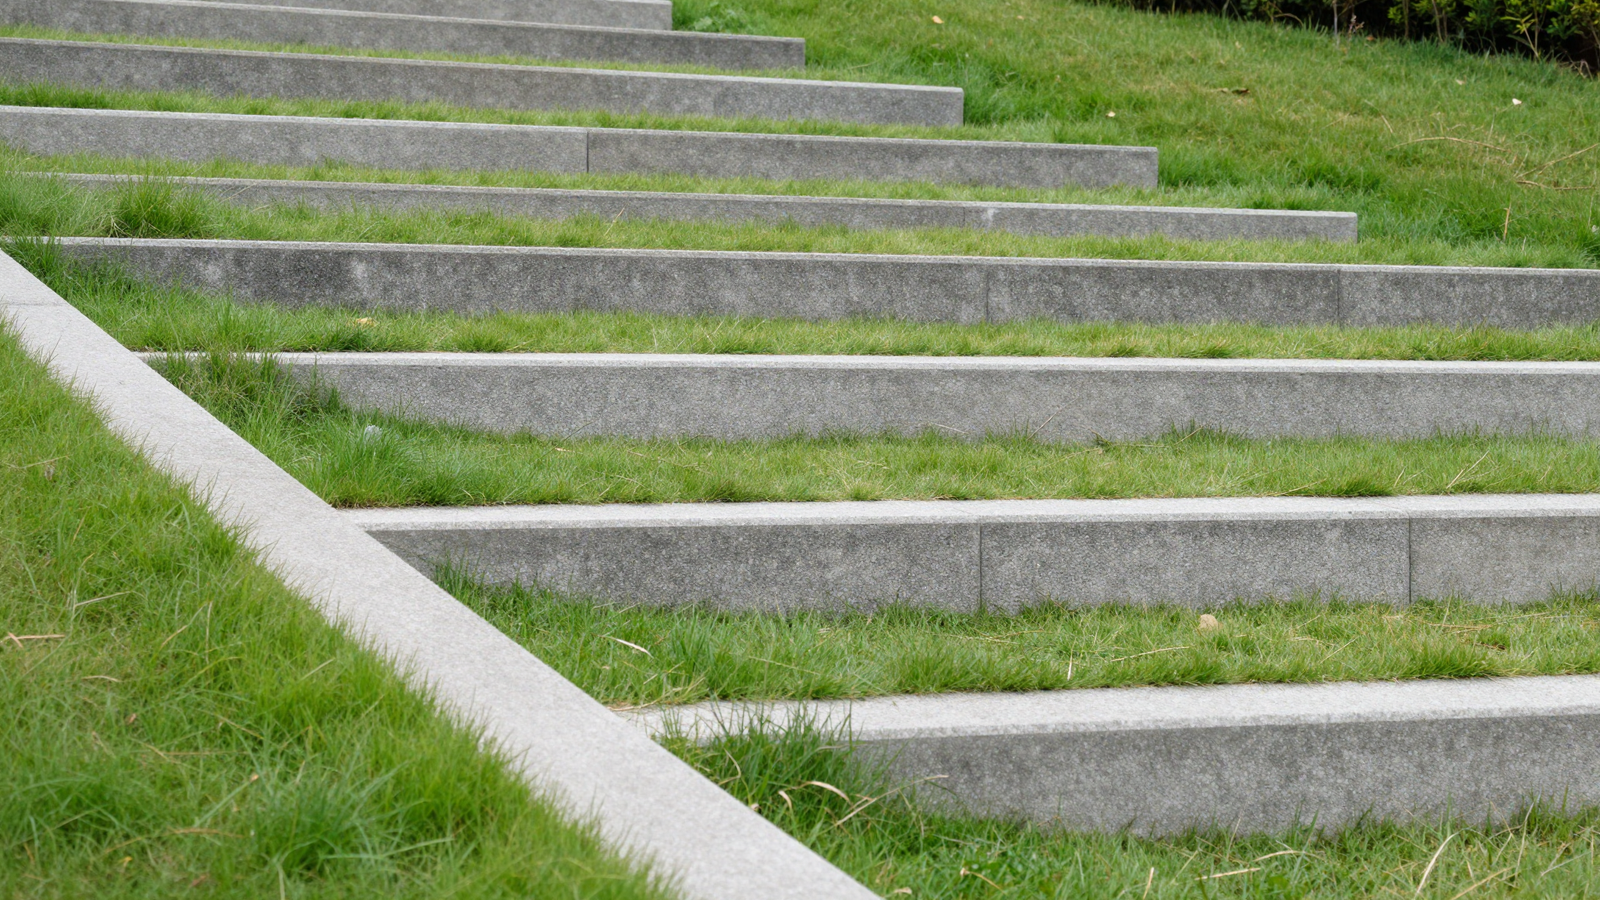
Instead of a few large terraces, running concrete bands across the slope at tight, regular intervals creates narrow planting strips that hold the grade stable while forming a clear upward path. The repeated horizontal lines contrast nicely against clean grass or gravel for a more contemporary, architectural read.
💡 Smart tip: Keep the interval spacing consistent throughout the slope; it’s the repetition itself that creates the strong visual rhythm this style relies on.
⚠️ Mistake to avoid: Spacing the bands too far apart on a steep grade; wider gaps between bands need deeper planting strips to actually hold soil in place.
6. Replace Stairs With a Gentle Ramp
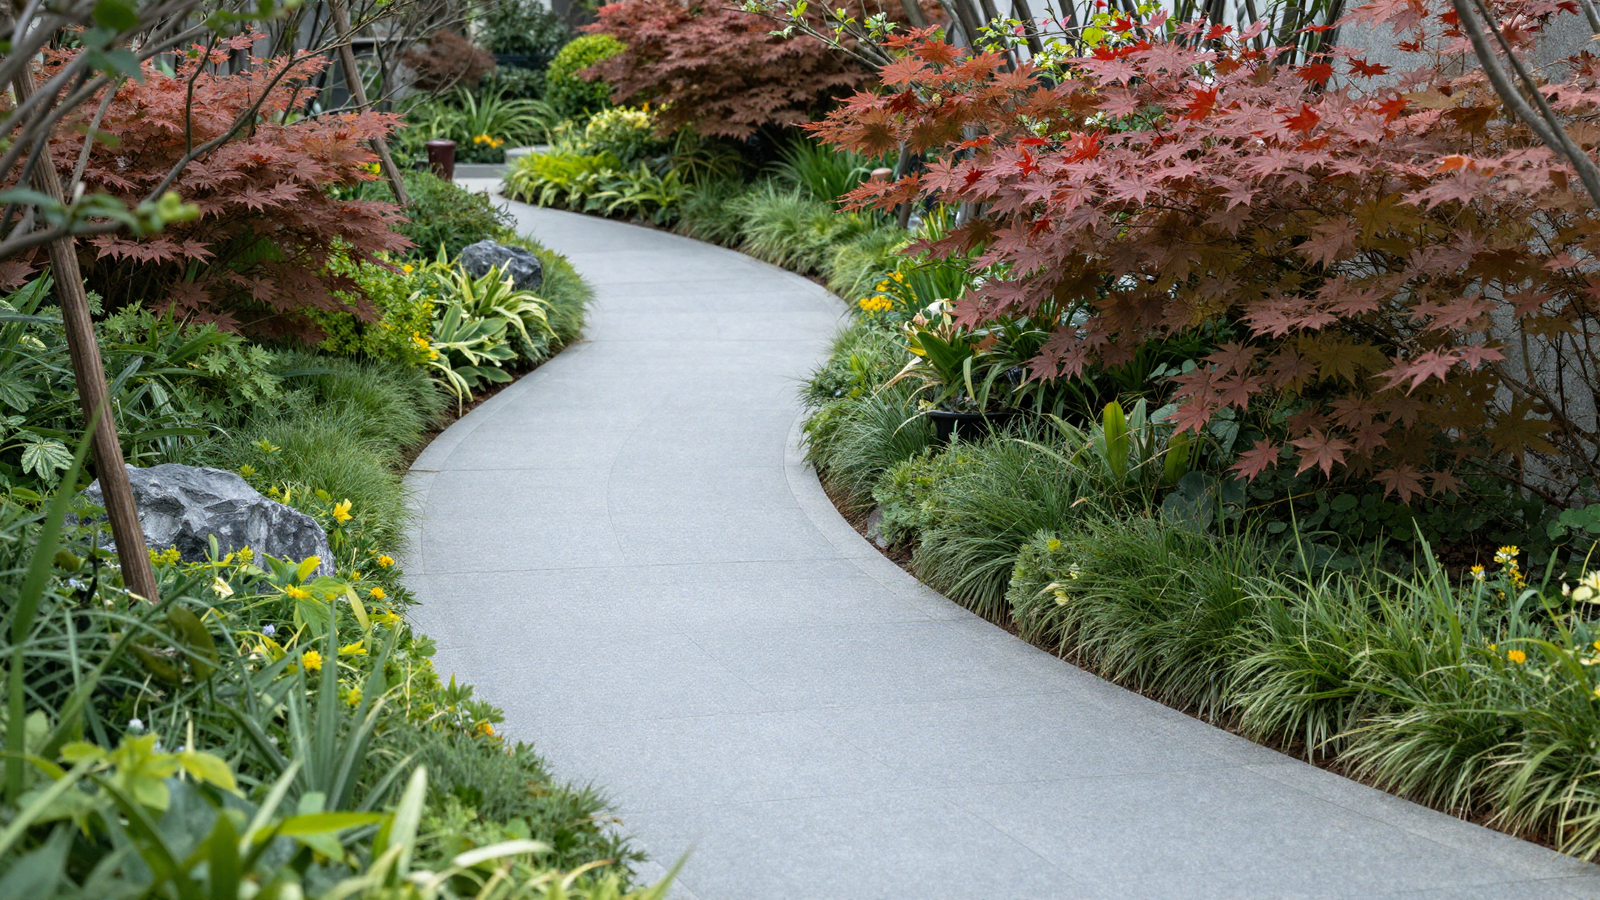
A gradual ramp instead of abrupt stairs makes a sloped yard genuinely more accessible — for strollers, wheelbarrows, aging knees, or just an easier walk with your hands full. Layering greenery and small trees along both sides keeps the ramp from feeling purely functional.
💡 Smart tip: Aim for a slope grade of roughly 1:12 or gentler if the ramp needs to be comfortably walkable without handrails.
⚠️ Mistake to avoid: Using a slick or overly smooth surface material; ramps need slip-resistant texture, especially in wet weather.
7. Build a Timber Retaining Wall Terrace
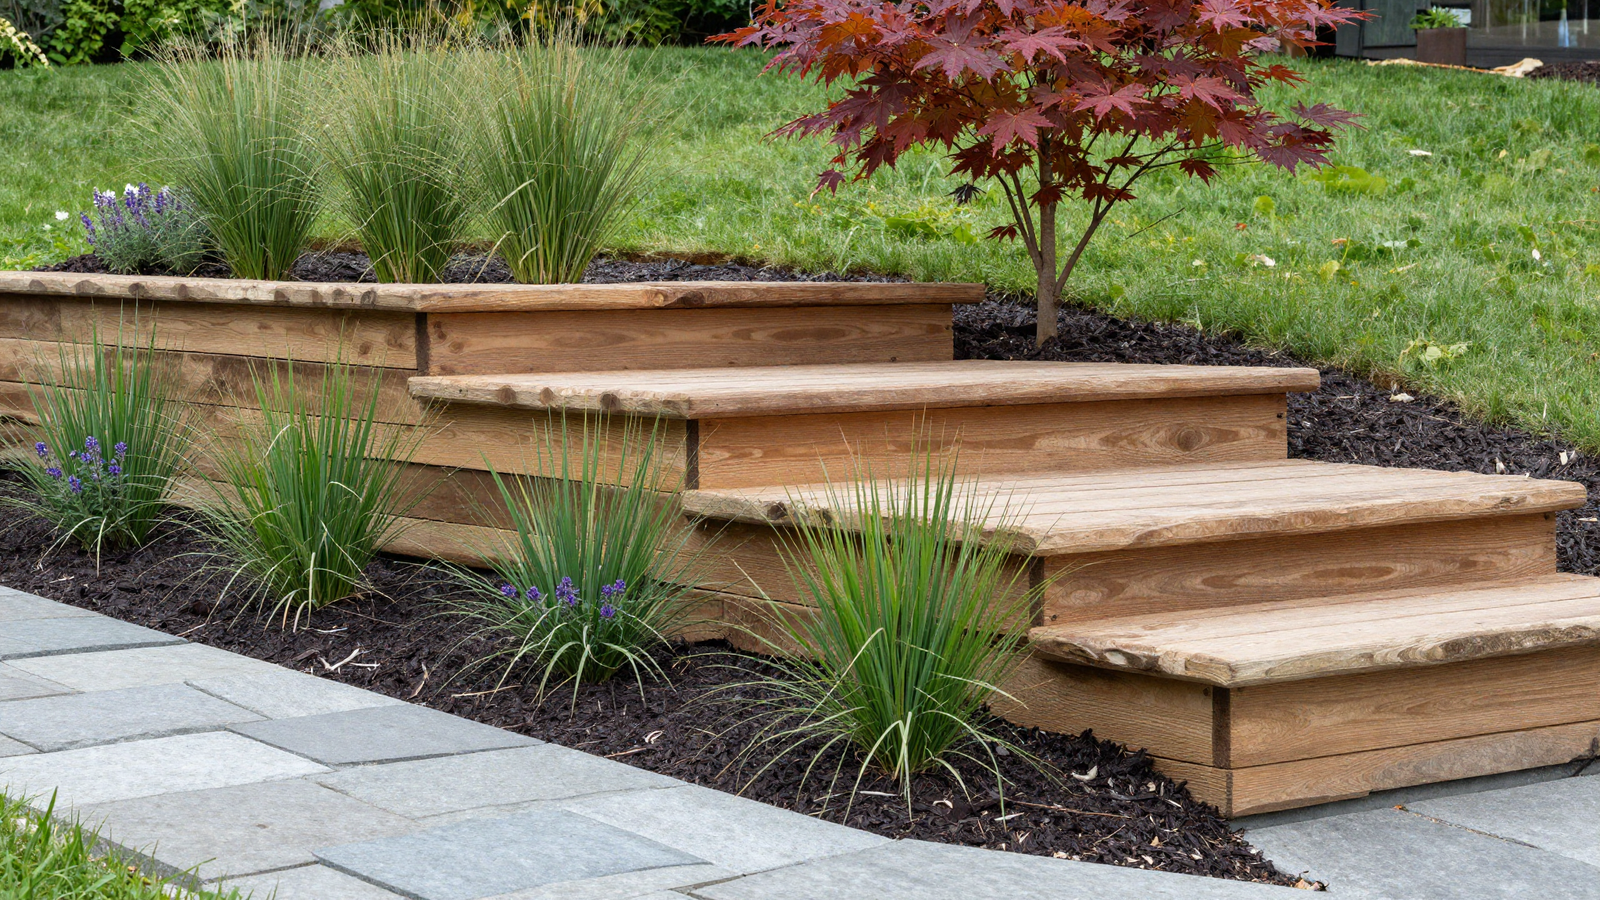
A timber retaining wall brings a warmer, more natural feel than stone or poured concrete, and it’s genuinely more DIY-friendly for a homeowner tackling a smaller terrace. Filling the bed behind it with ornamental grasses, catmint, and a single Japanese maple keeps the planting layered without becoming high-maintenance.
💡 Smart tip: Use tumbled stone or gravel outside the timber wall instead of grass — it keeps mowing off a steep, awkward edge entirely.
⚠️ Mistake to avoid: Using untreated lumber for a structural retaining wall; only pressure-treated or naturally rot-resistant wood belongs in ground contact like this.
8. Anchor Terraces With Large Boulders
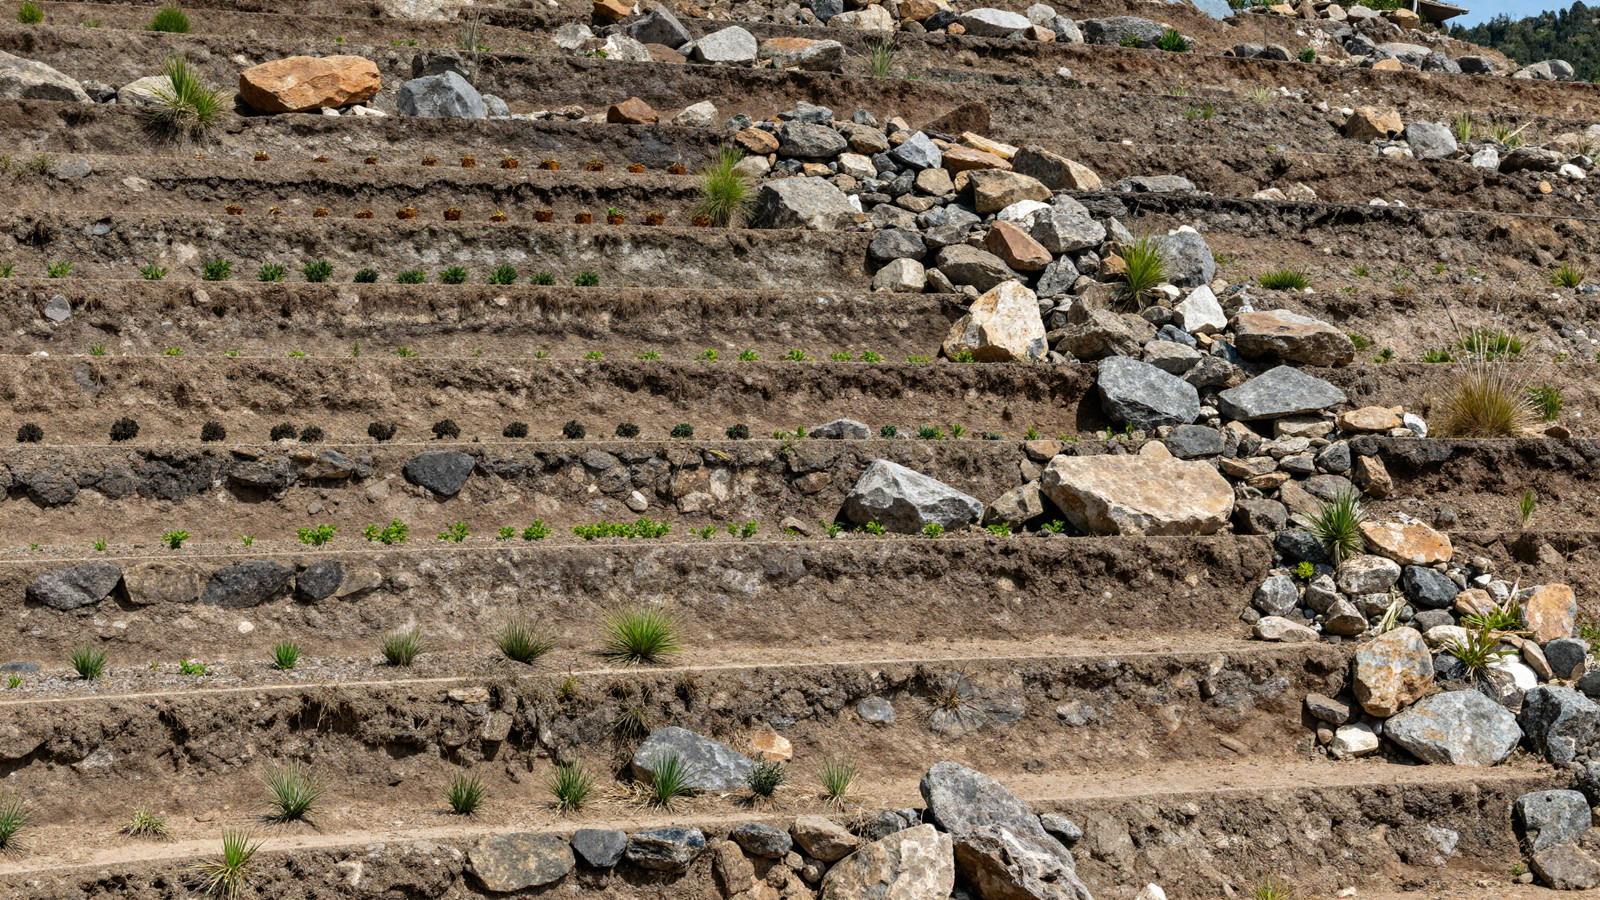
Placing a few substantial boulders within an otherwise uniform terraced layout keeps the structure from feeling too repetitive or mechanical. The stones add real visual weight, and the loose, informal planting tucked around them balances the more precise lines of the terracing itself.
💡 Smart tip: Vary boulder size and placement rather than spacing them evenly — irregular placement reads as more natural than a matched, symmetrical layout.
⚠️ Mistake to avoid: Underestimating the equipment needed to move large stones; anything over a couple hundred pounds typically needs machinery, not manual placement.
9. Turn a Sloped Side Yard Into a Connector Path
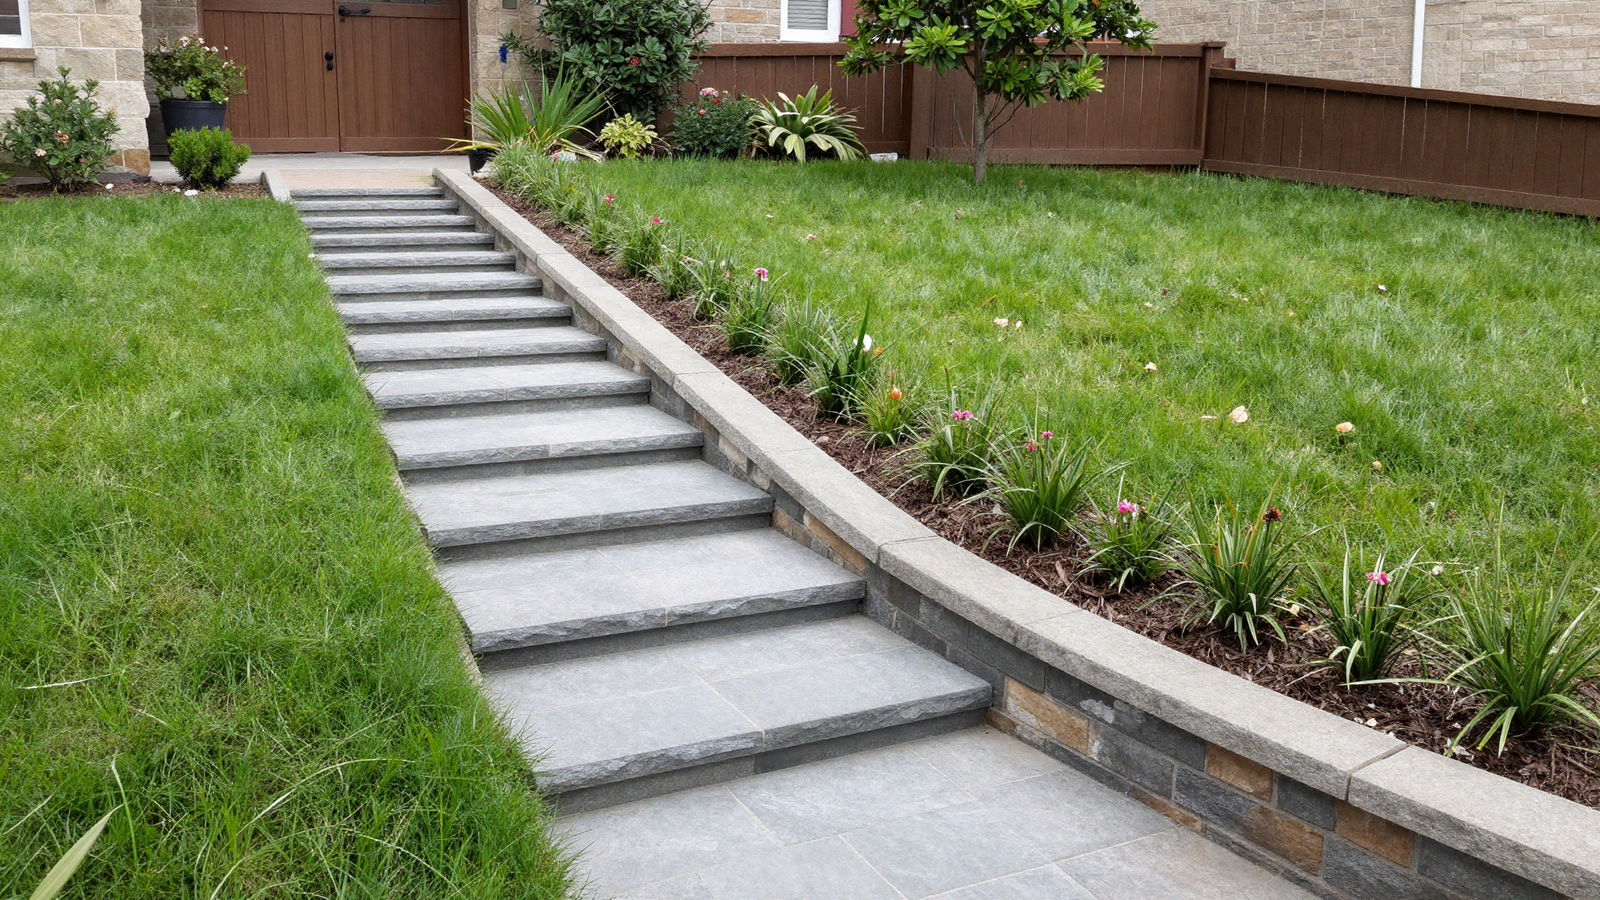
A narrow sloped side yard is often the most overlooked part of a property, but a stepped stone path with narrow terraced beds along the way turns wasted access space into a genuinely nice walk between the front and back of the house. It also solves the practical problem of moving equipment or trash bins on an uneven grade.
💡 Smart tip: Use low-maintenance groundcover along the narrow terrace strips here, since side yards typically get less attention than the main backyard.
⚠️ Mistake to avoid: Making individual steps too narrow or inconsistent in height; uneven step dimensions in a tight side yard become a genuine tripping hazard.
10. Match Plant Choices to Each Terrace’s Microclimate
Once a slope is terraced, each level actually drains and holds moisture differently — upper tiers dry out faster while lower ones stay damp longer. Choosing drought-tolerant plants for the top and moisture-loving species for the bottom means every level thrives instead of fighting the same one-size-fits-all planting plan.
💡 Smart tip: Observe how water moves through the slope after a heavy rain before finalizing your planting plan; it reveals exactly where moisture naturally collects.
⚠️ Mistake to avoid: Applying the same watering schedule across every terrace; what keeps the bottom tier healthy will overwater the top one, and vice versa.
Effort & Cost Snapshot
| Idea | Effort | Approx. Cost |
|---|---|---|
| 1. Stone-Terraced Planting Levels | High (DIY possible, pro recommended) | $2,500–$4,000 |
| 2. Steel-Edged Tiered Zones | High (pro recommended) | $3,000–$10,000+ |
| 3. Concrete Terraces With Water Channel | Very High (pro required) | $10,000–$50,000+ |
| 4. Covered Patio Spanning the Slope | High (pro required) | $5,000–$20,000+ |
| 5. Tight Concrete Banding | Medium–High (DIY or pro) | $1,500–$6,000 |
| 6. Accessible Ramp Path | Medium (DIY or pro) | $800–$3,500 |
| 7. Timber Retaining Wall Terrace | Medium (DIY possible) | $800–$3,000 |
| 8. Boulder-Anchored Terraces | High (machinery required) | $1,000–$4,000 |
| 9. Sloped Side Yard Path | Medium (DIY or pro) | $500–$2,500 |
| 10. Microclimate Plant Matching | Low (planning + planting) | $150–$700 |
A slope isn’t a flaw to correct — with the right terracing and planting choices, it can become the most interesting feature your yard has. Save this list to Pinterest so you can come back to it as you plan out your own multi-level backyard, one terrace at a time.
Continue Your Home Transformation
Explore the full collection of step-by-step eBooks and get the guide that fits the room you're working on.